With the ever-growing popularity of streaming, it has become more enticing than ever to get into streaming.
The days when streaming was all about gaming and competition/events are over. Today, you’d find live streams of any activity you can think of. Everyone with a solid internet connection can now stream music, art, ASMR, or anything else that they are good at to entertain us. You might be interested in diving into such a diverse world.
Well, I got your back. I will guide you through the initial steps of starting a Twitch stream. After reading this guide, you’d have a clear idea of how to start streaming to twitch and continue doing so.
So take your time and read the whole post carefully to start your first Twitch stream.
Why Should You Live Stream On Twitch?
You should stream on Twitch as it’s the most prominent online streaming platform with a diverse streaming community. It has the most extensive viewer base. Streaming on Twitch is free, and the setup process is relatively seamless, with lots of integrated tools available.
Amazon-owned Twitch has come a long way since its JustinTV days. It now boasts 140 million monthly active users, features the most famous content creators, and has partnerships with many big brands.
Starting on such a massive platform already has its advantages. You get instant access to a large audience, and new viewers will pour in.
On top of that, the Twitch community is large with content creators and gamers. If you ever need help, numerous guides and tutorials are available online on every little topic. You can also use the Twitch app on mobile devices, gaming consoles, or obviously, your gaming PC.
You are at complete liberty when it comes to using any device to stream.
But the most significant advantage of streaming on Twitch is the diversity. You’d see streamers of every category here, popular game streaming, competitive games, music, chess, cooking, or just chatting. It is quite the trend among PC, console and mobile phone users alike nowadays. You can even use a Nintendo Switch docked to a TV to start broadcasting the gameplay using a capture card. It is also very easily possible by using a mobile phone or even an Xbox or PlayStation.
Twitch is free, though you might want to buy a subscription to stretch your limits. If you have an Amazon Prime subscription, you can avail of the Prime Gaming subscription for free, with loads of perks.
Whether you want to subscribe to your favorite streamers is completely up to you.
Streaming on Twitch is a seamless experience compared to other platforms. Moreover, since Amazon owns it, Twitch has decent server collections worldwide, making streaming more smooth.
Now that you know the merits of choosing Twitch for streaming, find out everything you need to know about how to create an account on Twitch and start streaming in the next section.
Related content you should read about 4 ways to watch multiple Twitch Streams Some more guides on.
How To Live Stream To Twitch
If you intend to stream on Twitch, at first it might seem daunting but the good thing is that you need to go through the initial setup only once. After that, you can start future streams with a couple of clicks. Twitch offers its users the most easy-to-learn interface to start out.
Hence, most of the steps I’ll discuss today are applicable only for the first time you’re going to stream. If you do the initial setup right, you can focus on your content and regular streams later.
Of course, if you are confused about some of these steps, choose what you find correct now. Later, you can tweak them as you learn more from your experience.
Here are the steps to stream on Twitch:
1. Create a Twitch account
You can watch streams on Twitch without creating an account, but streaming requires a Twitch account. Creating a Twitch account is free and takes a minute to do so.
Here are the points you need to consider:
- Enable 2FA (two-factor authentication) to stream on Twitch. It is a requirement on Twitch’s behalf. You can use email, phone number, or an authentication app for the 2FA.
- Choose a username that sets you apart from the rest. It’s the essential part of this step. People will know you by the username, so it should have a great impression on them.
- Create a strong password. Streamers are more prone to password spoofing and hacking, so it’s best to generate and store passwords using a password manager.
It’s the most basic step to starting your streaming career, so don’t skip on the details.
Some more guides on how to find Twitch Stream key?
2. Read the Community Guidelines and ToS
Being aware of the TwitchCommunity Guidelines and Terms of Service will help you greatly in your streaming career.
It’ll ensure you don’t break any rules by mistake and then get warned (or even banned). Many streamers try to skip this step as it requires an extended reading. But trust me, it’s worth it.
At the very least, go through the Community Guidelines. 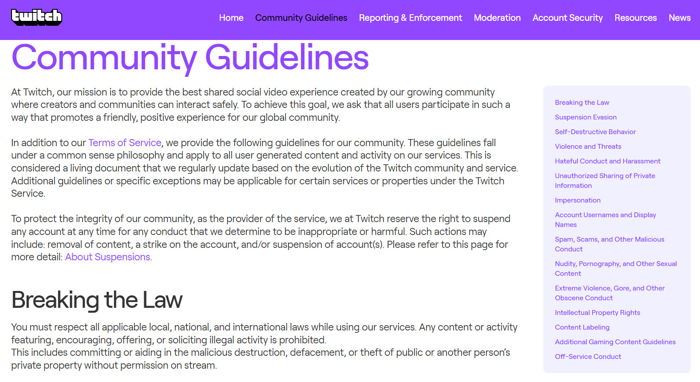
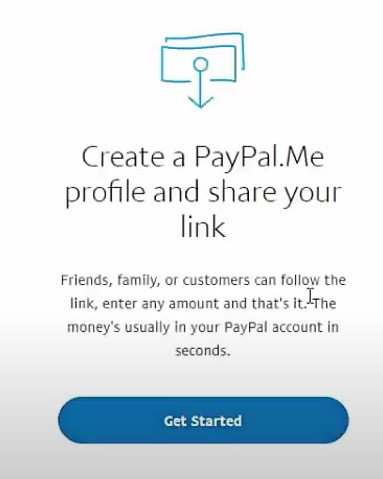
3. Set up donation options
You’d be investing a better part of your time into Twitch, so you should ensure to get something back.
During the initial days, you won’t have access to the Twitch Partner program, which gives access to the Twitch Bits or Subscriptions.
Hence, you need to rely on third-party services. Some are given below:
- Use PayPal to receive donations directly on your PayPal wallet. PayPal has a large user base, and you can generate a Paypal link for ease.
- Streamlabs donation page is a single-stop solution if you want to add multiple payment options. Open a Streamlabs account, set up the different payment options under donation settings, and finally collect the link to the donation page.
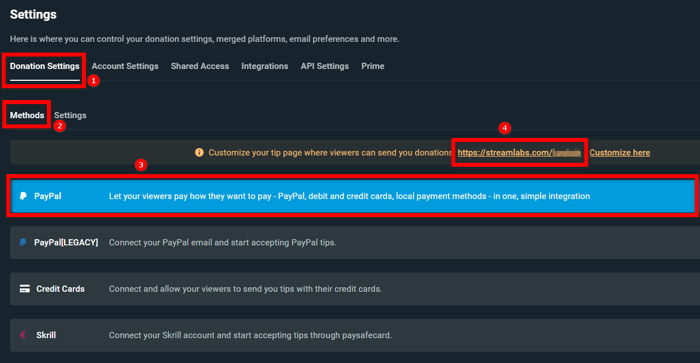
Once set up, you can put the links to your Channel Panels.
Check out the easiest way about how to save Twitch Streams?
4. Do some branding and set up your channel page
Your channel page is the one place where new viewers will get to know more about you. Twitch will feature all of your past streams, highlights, clips, and information about you here.
So ensure you have an attractive and well-designed channel page with proper branding.
Branding goes a long way to set you apart and give your channel a professional vibe.
The branding should be focused on a unique aspect around you. It should have strong relevance to the content and how you carry yourself through the stream.
The branding concepts and reach will expand over time, so don’t rush into it and try to do everything initially. Start small, focusing only on branding inside Twitch, then work your way outwards as needed.
Ensure you’re carrying the branding across all the components of your channel. The Twitch account and channel page have many places where you can showcase the branding.
Some are given below:
- Channel Avatar or your profile photo should reflect your username, and it should contain the colors of branding or compliment them nicely.
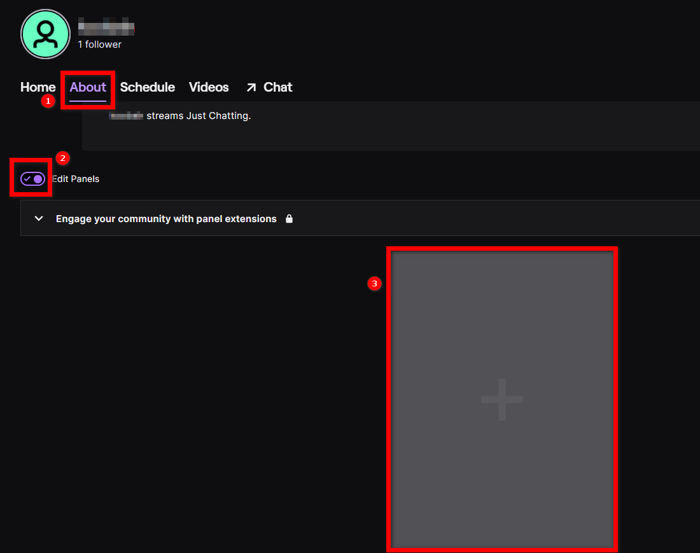
- Channel Panels are one of the most critical parts of the channel. Using the panels, you can link to your website, creatively introduce yourself, talk about your content, direct links to payment methods (PayPal or Streamlabs donation page), etc. Panels can contain text with markdowns or images with links embedded.
- Channel Banner is situated at the top of your channel page and acts as the background to channel trailer, hosting, etc. The primary branding colors should be prominent here. It’s an image with a resolution of 1200x480px. Video Player Banner is similar to the Channel Banner, the only difference being it’ll show up when you’re offline.
- Profile Bio is situated under the About section, and it contains a short description of your channel within 300 characters. Put something catchy here.
- Social Media links can be put beside the Profile Bio. You can place links to your YouTube, Instagram, Twitter, Discord server, etc. Increasing followers and reach on other social media will indirectly help to boost your streaming career.
- Profile Accent Color shows up when someone hovers your channel. It’s a quick way to display your branding using prominent colors.
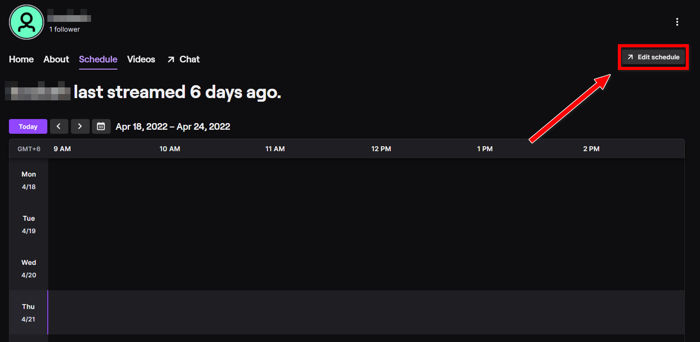
- Stream Schedule is essential as it lets your audience know when to come by. You can put start time, duration, day, title, and category for each stream.
If you can’t decide on any one of these areas, it’s fine to skip it for now.
5. Get the streaming hardware
You’ll need a decent computer for a Twitch streaming setup, as it’ll need to run the game, capture it, and send it to Twitch. You don’t need to break the bank to get such a setup, and all you need to stream most games is a mid-tier setup.
The quality of your stream is directly related to the hardware you use.
It also depends on whether you want to stream video games, go live to perform music, or whatever other purpose.
If you’re going to do a Just Chatting stream or other activities like cooking or painting, a basic computer or a laptop will do fine. You’ll also need a camera (webcam or DSLR) for showing your face, a mic to record your voice, and lights to make the surroundings visible and pleasing.
Follow our guide to fix Twitch Stream failed to connect.
6. Choose the streaming software
The streaming or broadcasting software will record the screen, camera, microphone output, and other audio and send them to Twitch servers.
So you should choose the streaming software wisely. Luckily there are some options that Twitch recommends,
They’re as follows:
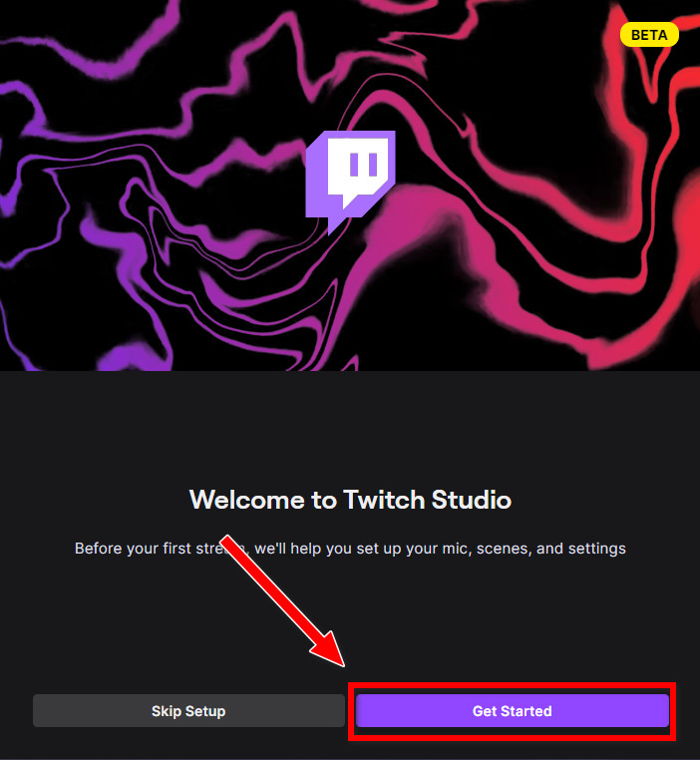
- Twitch Studio is the first-party streaming software as it’s from Twitch itself. Everything is streamlined and integrated to stream on Twitch, so there’s less setup. It’s the most accessible software to get started with.
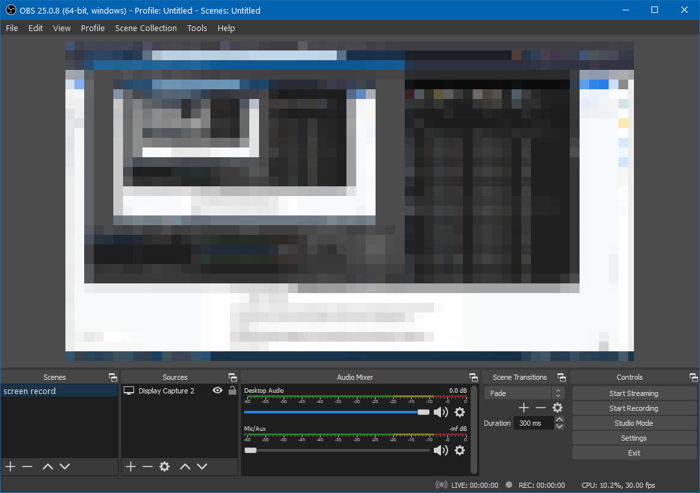
- OBS Studio is the most used streaming software. It’s open-source, highly configurable, and light on your computer in terms of resources. But it requires some setup before you can start streaming.
- Streamlabs OBS is built upon the OBS Studio and adds some nifty features which streamers appreciate. You can add or buy plugins, widgets, overlays and set up a donations page provided by Streamlabs.
The good thing is that every softwares above have has an auto-detection feature, which scans your computer hardware and finds the optimal streaming settings for you. So you don’t even need to go through the technical stuff.
Twitch Studio has built-in layouts and overlays. As for OBS Studio and Streamlabs OBS, you need to buy or make the overlays yourself and load them up in the software.
You also need to connect your Twitch account to the software. It’ll take less than a minute. Refer to the individual guides for the software on how to do it.
Even if you do not want to directly connect your account, you can use a stream key to broadcast your stream. To do this, you have to click on your profile picture from the Twitch dashboard > select Settings > and go to Stream. There you will find your stream key.
But before that, go through our epic guide on Twitch Stream lagging for viewers.
7. Add moderation
You must add a moderator or two to keep your chat clean. You’ll be busy with the streaming and content when you’re online, and it’ll be challenging to manage chat simultaneously.
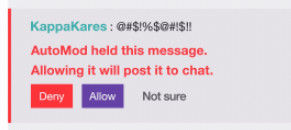
If you don’t have access to any moderator at the moment, go for software solutions like Automod.
Automod scans every message sent to your chat and uses machine learning to detect if it’s approvable or not. It’ll hold back any shady message from showing up and give you options stream alerts to Allow or Deny it.
8. Go live
After going through all the setup, you’re finally ready to go live.
Remember, you need to go through the above steps only once. Once everything is set up, you can directly jump into this step and start streaming.
The actual procedure to start the stream will vary depending on the software you’re using. Nevertheless, all softwares has a similar layout.
Here’s a basic rundown:
- Launch your streaming software.
- Turn on and adjust the camera, lights, and mic. Ensure everything shows up fine on the software.
- Adjust the sound levels and position the layout correctly if needed.
- Ensure screen capture is working correctly if you’re gaming.
- Load up the overlays.
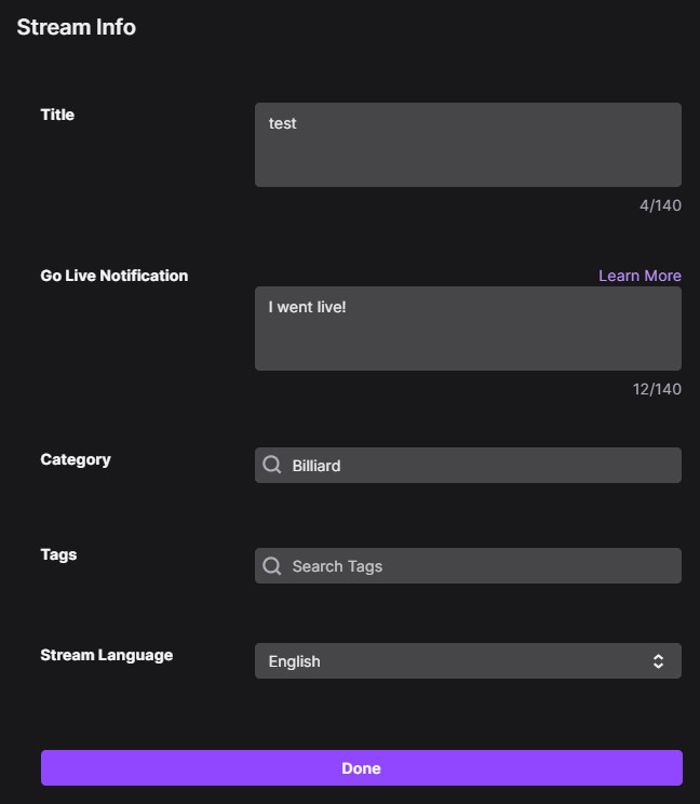
- Set the title, choose a category and add tags.
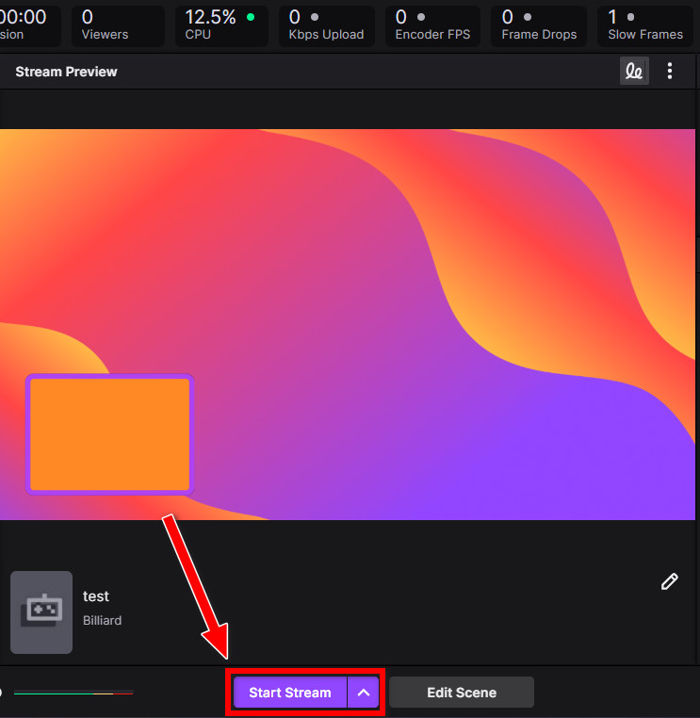
- Click the Start Streaming button.
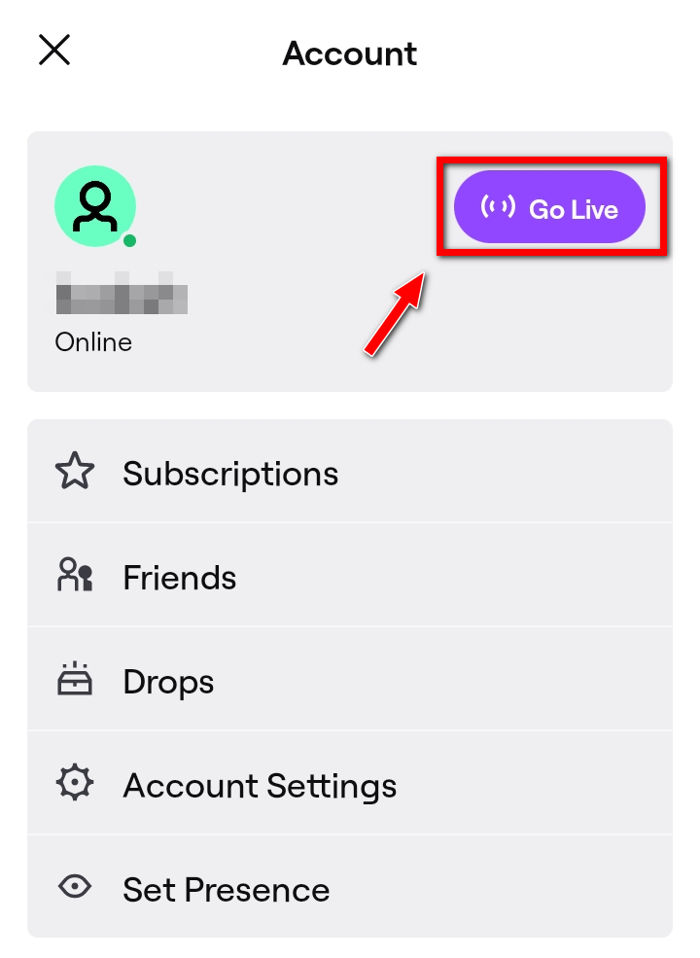
If you don’t have access to your computer, you can use the Twitch mobile app to go live. Streaming on Twitch from a smartphone is even simpler than having to get streaming software to use for live broadcasting on Twitch from a desktop PC.
Download the twitch app on your phone and log in to your Twitch account from the app, click on your avatar from the top-left corner, and select Go Live.
It’ll give you options to Stream Games or Stream IRL (for other activities). Select one and set the title and category, and you’ll be live in seconds.
As you can see, the process of going live is not tedious. Only the initial preparation takes some time and energy. After that, it’s a matter of loading up the streaming app and hitting the Start Streaming button.
Final Thoughts
Streaming on Twitch is the new trend everyone is getting into. You can start streaming on Twitch with minor preparations. Taking essential preparations will ensure you have a solid start with a quality streaming experience and are ready to get the boost and grow big into a great Twitch channel.
It’ll take some time to set everything up when you’re just learning how to stream. After that, starting a stream will take a couple of clicks.
If you want to stream yourself playing the games that you love or are good at, get started on Twitch right now by setting up a Twitch account and broadcasting your content to stream. If your Twitch content is trendy and the quality of your live stream is good enough, your channel will blow up in no time.