After watching Twitch for so many months, you realize that you want to start streaming. So you do some shopping and get the streaming gears needed.
To make your streams polished and professional, you need a decent overlay. If you have no idea how to design overlays yourself, you don’t need to worry. I will guide you through the process step by step so that you can make Twitch overlays like a pro.
What is a Twitch overlay?
Twitch overlay is a graphics layer that displays on your stream. It divides your stream output graphically into multiple sections like a game window, webcam, and chat section. You will use Twitch overlay to make your streams look professional and tidy and showcase your branding.
Keep reading the post to learn more.
What Are The Things To Remember While Creating A Twitch Overlay?
While creating a Twitch overlay, make sure to keep it simple and authentic, focus on the branding (colors, fonts, and logo), place the different windows in the correct place, do not cram too many elements, keep the file size small, and save the overlay as PNG.
Twitch is the most popular online streaming service. It boasts over 140 million monthly active users. If you start streaming on Twitch, you have to stand out against the millions of active streamers. One way of doing so is using the overlay like a pro.
Twitch overlays are nothing to skip on. It gives your stream authenticity and identity. If you choose the color fonts well, it will be valuable for branding. Have some time to spare? Check out some awesome solutions to fix the twitch error code 995f9a12 on Xbox.
Many streamers try to cram too many elements into the overlay, destroying the simplicity and beauty of the overlay.
While starting to make a Twitch overlay, ensure the resolution is 1920×1080 px or 16:9 aspect ratio. You can save the overlay as PNG and use it on OBS or other streaming software.
You can always reach out to professional overlay makers on freelance websites or organizations. But if you are new, you should stick to making one on your own. Changing Twitch name color is a great way to gain a lot of audiences. Quickly check out our epic guide to find out how.
This way, you will save money. If your channel grows big in the future, you can always hire a graphics designer to make a better Twitch overlay for you.
How To Make Twitch Overlay
In this post, I will show you two ways to make a Twitch overlay. I will use photo editing software and a graphic design tool and create two Twitch overlays.
Do not worry, as I will not be using any paid software to make the Twitch overlays. Both the methods in this post are free and online-based. So you do not need to download and install anything.
Before I start, here is a quick tip. If you are happy with a ready-made overlay, there are many websites where you can download free/paid Twitch overlays. So, your twitch following list is not working? Find out the cause and solutions to your problem real quick by checking our epic guide.
You can also use the Twitch Studio, a simple streaming software from Twitch, which comes with some overlays by default.
Having said that, let me show you the two methods now.
Here are the methods to make Twitch overlays free:
1. Use Photopea
Photopea is an online photo editing tool that is close in functionality to Photoshop. The best thing is, Photopea is free and web-based. So you can go to the website and start creating an overlay without the need to install anything.
As it is a photo editing software, you will need to use the different tools and apply effects to make the Twitch overlay. If you want a more straightforward approach, you should go for the second method using Canva. So, your twitch app full screen is not working? You can launch the theatre mode or you can quickly fix this issue by checking our epic content.
On the positive side, you have finer control over the design and unlimited creativity while using Photopea.
Here are the steps to use photopea for making online Twitch overlays:
- Go to the Photopea website.
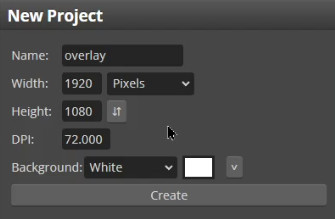
- Click on New Project.

- Give the project a name if you want.
- Set the width to 1920 px and height to 1080 px.
- Click on Create. You will see a new project with a white background.
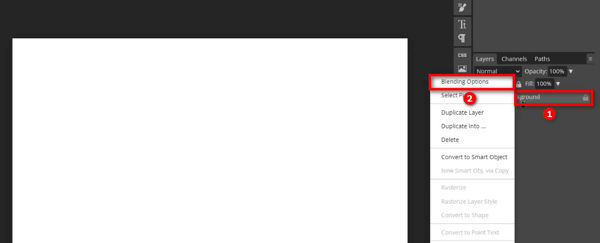
- Notice the Layer panel on the right. We will use it frequently to interact with the layers.
- Right-click on the background layer and select Blending Options.
- Click on Color Overlay from the left, then click on the color box beside opacity to open the color picker.
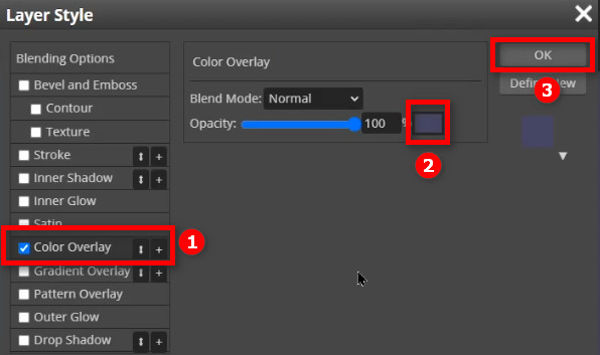
- Choose the color for your background layer. I chose a mixture of violet and purple.
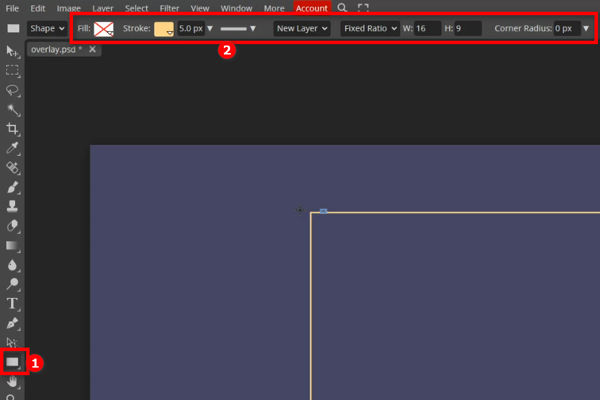
- Click on the Rectangle Tool. We will create the game window now. From the top, choose to Fill as transparent. Change Free to Fixed Ratio and give it a ratio of 16 by 9.
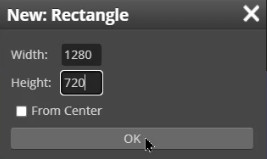
- Click on anywhere in the background, a popup box will appear. Use 1280 as width and 720 as height. Click on OK. You will see a 16:9 rectangle appear over the background.
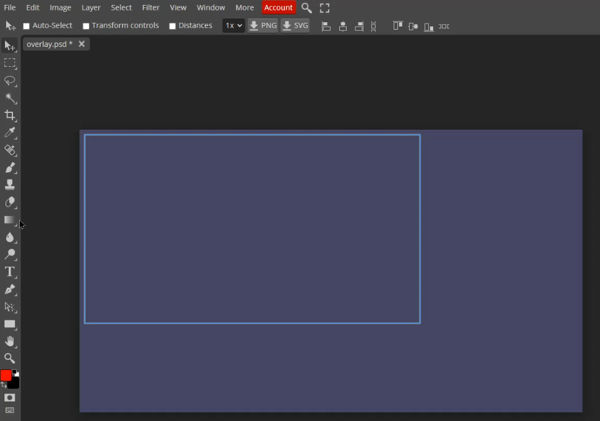
- Select the Move Tool and drag the rectangle to the upper left corner until the left side and the top side snaps to those of the background.
- Hold the SHIFT button and press the right arrow key twice to move it to the right by 10 px. Still holding the SHIFT key, press the down arrow key twice to lower the rectangle by 10 px.
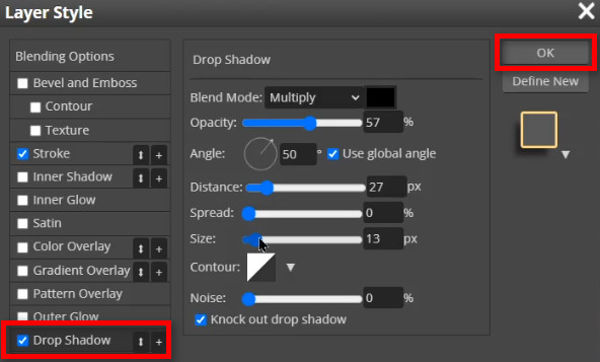
- Right-click on the rectangle layer, and go to Blending Options. Click on Stroke, and tweak the values until you are satisfied. I gave it a yellowish color. Click on OK now.
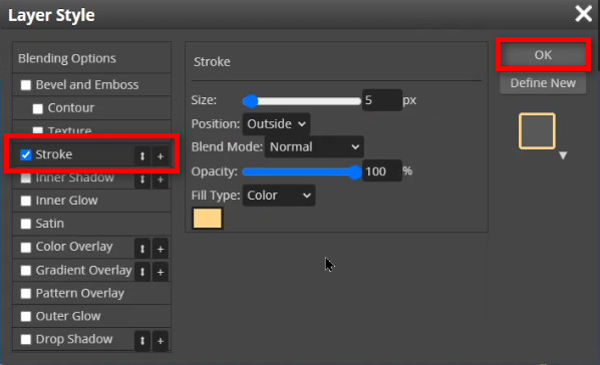
- Click on Drop Shadow to apply a drop shadow for a 3D effect. Change the Angle and Size/Spread to your liking. Click OK and exit the layer style window.
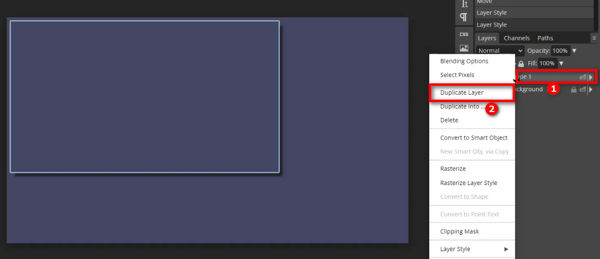
- Right-click on the rectangle layer and select Duplicate Layer. Use the Move Tool to snap the new rectangle to the bottom right.
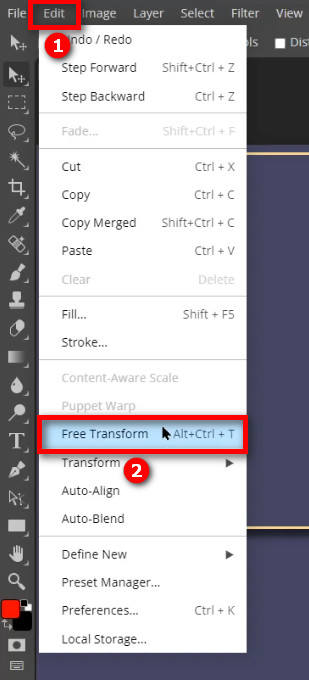
- Click on Edit from the top bar, then choose Free Transform. Then grab the top-left corner of the new rectangle and drag it while holding SHIFT. It will be the webcam or the face cam border.
- Position the rectangle precisely by using the same technique as in step 13.

- Use the Rectangle Tool again to create a chat window. This time you do not need a fixed ratio rectangle, so change it back to Free from the top bar. use the Free Transform tool to resize to your liking. The chat window will be at the top of the face cam window.
- Right-click on the chat rectangle layer and select the Blending Tool. Then give it a Stroke and Color Overlay. Choose a color for the Color Overlay to provide better readability for chats.
- Use the Rectangle Tool to create additional windows for new subscribers, new followers, new donations, top donations, etc. Use the Text Tool to label them. You have access to many fonts here, and you can configure the text styling and color.
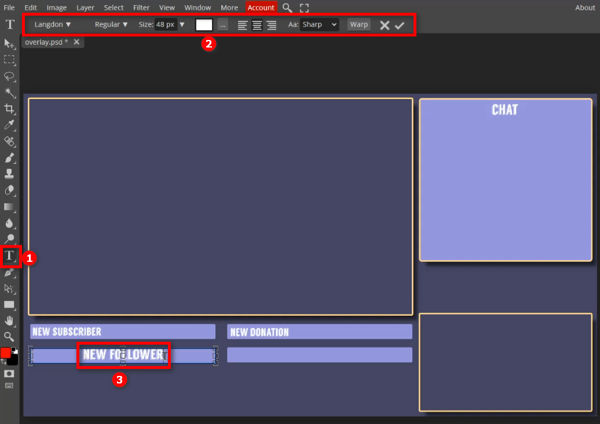
- Label the chat too using the Text Tool.
- Use the File > Open And Place option to insert any logo. For demonstration, I used the Text Tool to create my branding. If you don’t have proper branding at the moment, you can use the Text Tool like me. Just make sure to use a fancy font and big font size to make it look clear.
- Click on File from the top bar, then Export As PNG when you are done.
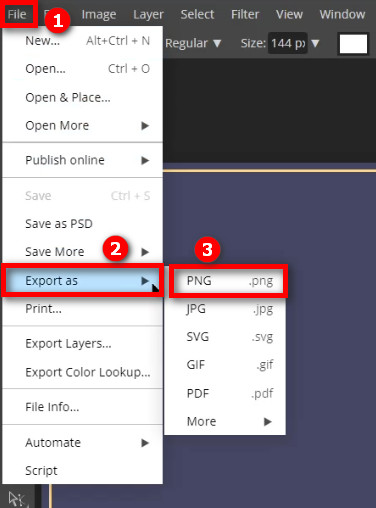
- Save it as PSD, too, to make further enhancements in the future.
Congratulations. You have successfully created a Twitch overlay using Photopea. 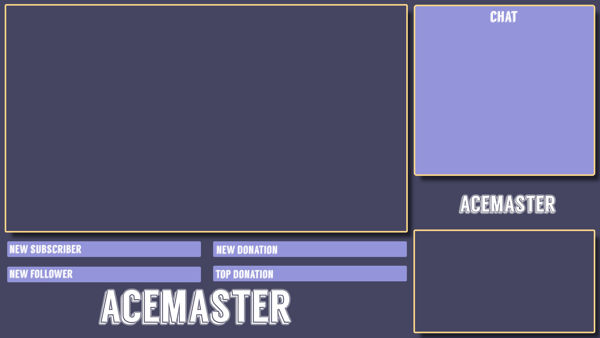
Just load the overlay on OBS, add the game capture, webcam sources, and chat, and you are good to go. If you are a new Twitch streamer, follow the step-by-step process to see followers on twitch.
2. Use Canva
Canva is a simple online graphic design tool. It has a vast collection of resources, and many of them are free.
If you find the first method too involved and complex, use this method. The downside of using Canva is that you have less control over the styling as the elements are ready-made. Don’t know how to change twitch username? Follow the step-by-step process from our ultimate guide.
The advantage of using Canva is its simpleness and the vast collection of elements and resources.
Follow the steps below:
- Go to the official Canva website.
- Create an account or log in.
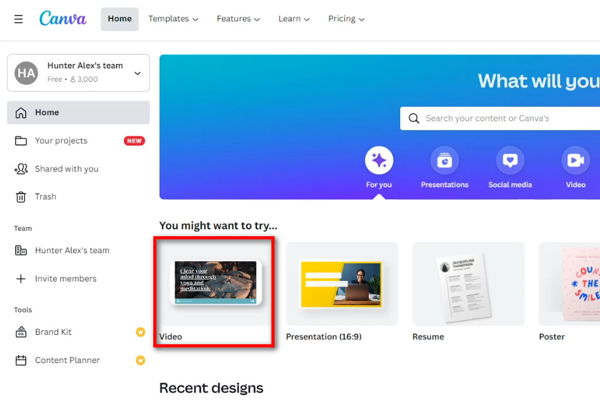
- Click on Video. A blank background will load.
- Go to Elements > Lines & Shapes from the left side.
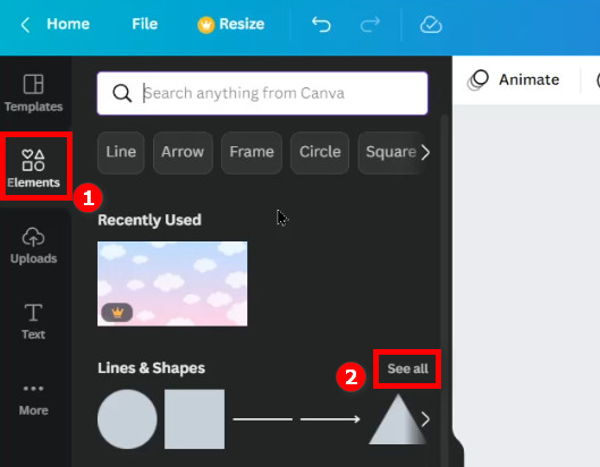
- Choose a rectangle and drag the handles to cover the entire background.
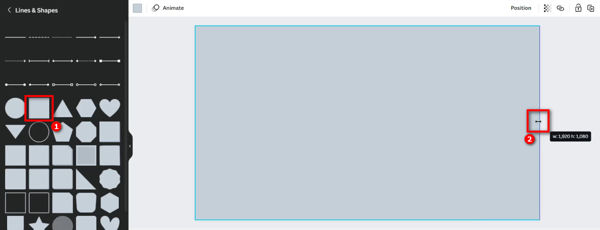
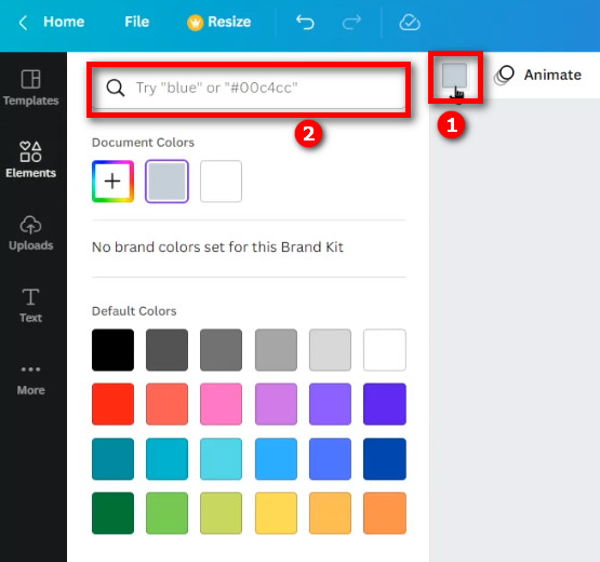
- Click on the colored square from the top-left side to open the color picker. Choose a background color.
- Go back to the left panel again, where the Lines & Shapes are listed. Choose any styled rectangle with borders, and drag it to cover the whole background. Hold SHIFT and remove it from the bottom-right corner to turn it into a game window. This technique ensures the rectangle has a 16:9 ratio.
- Use the colored squares from the top-left side to tweak the colors of the rectangle and its borders.
- Select the game window, then click on the Duplicate Icon (icon with a + sign) to make a copy of the game window. We will use this copy as a webcam window.
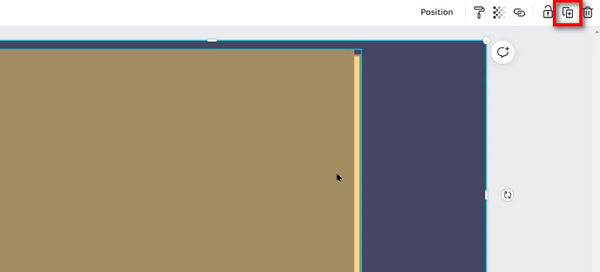
- Drag the webcam window to the lower right corner.
- Make another copy of the game window, and use it as the chat window. After placing the chat window above the webcam window, tweak the colors for better readability (as it will contain the chats).
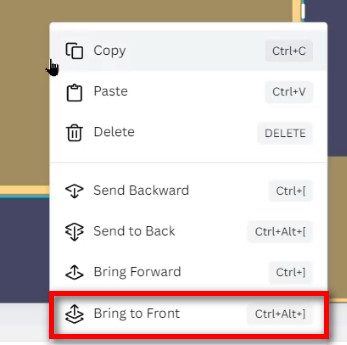
- Right-click on a window and select Bring To Front if the other window overlaps it.
- Use the Lines & Shapes panel again to make layouts for the other info (new subscriber, top donation). Use the duplicate functionality for easy operation. Label the boxes using the Text option from the left menu.

- Open your file browser, then drag and drop your logo to the Canva window to place the window in your overlay. You can resize and add background to your wish. Click on the Text option from the left menu if you don’t have a logo/branding.
- Click on the Download button, expand the dropdown.
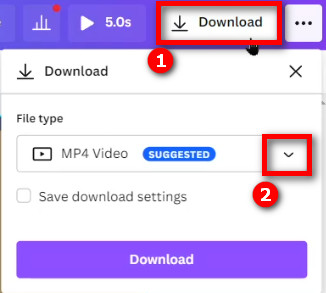
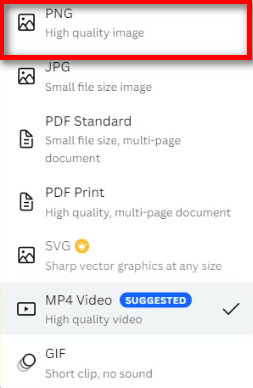
- Select PNG once you are done.
As you can see, making a Twitch overlay using Canva is quite simple, and it only takes a few minutes and your imagination to develop a beautiful overlay. 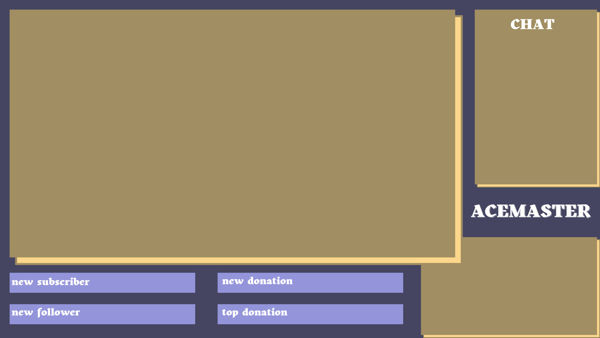
You can always go back and edit the overlay to make it even better.
FAQ
Question: Can I make my own stream overlays?
Answer: You can make your own stream overlays using online tools like Canva, Placeit, or photo editing tools like Photopea.
Question: How do you make a cute overlay on Twitch?
Answer: You can use the Canva graphics design tool to make a cute overlay for Twitch. Canva has many cute elements in its library, which you can easily use to create overlays.
Question: How do you make an overlay for Twitch without Photoshop?
Answer: You can make an overlay for Twitch without Photoshop by using online free photo editing tools like Photopea.
Final Thoughts
You can easily make overlays for Twitch using offline and online tools. If you have experience using photo editing software, Photoshop gives the best output.
If you don’t have access to paid softwares like Photoshop, there are free alternatives like the Photopea online editor, which is remarkably similar to Photoshop.
If you want something more simple, Canva is a great choice. You can select from their collection of elements and customize them to create an overlay.
Lastly, you can use the various dedicated services which make and sell Twitch overlays.