Even after you uninstall Microsoft Teams from your computer, it continues returning. This issue is quite irritating. You have a headache now about why this application is reappearing.
As an overseas software engineer, I have to work and collaborate with my teammates regularly through this application. As a long-time Microsoft team application user, I can provide you with how you can stop Microsoft Teams from installing itself.
So keep reading. Today you will explore some fantastic and winning techniques to fix Microsoft Teams glitches. Let’s get started.
You may also like to read about fix Teams error-we’re sorry—we’ve run into an issue.
Why Does Microsoft Teams Keep Reinstalling?
Microsoft Teams keeps reinstalling because Teams Machine-Wide Installer is activated on your computer. If you remove Microsoft Teams, Machine-Wide Installer will automatically reinstall itself each time you log into your PC. Sometimes the Appdata is the main culprit behind this issue.
Therefore, you should uninstall these two programs concurrently to prevent Microsoft Teams from beginning automatically or installing itself.
Many Windows customers complained that even after uninstalling Microsoft Teams from their machines, Teams continued reinstalling itself. It isn’t very pleasant.
Teams continue reinstalling themselves despite their attempts to remove it from their machine. They don’t require it and don’t need it on their device. The fact that it keeps appearing when they turn on their computer is bothersome.
It is because the uninstalling process isn’t successful or the AppData of Microsoft Team is creating some problems.
Related contents you should read about Microsoft Teams meeting not showing in Outlook.
How to Stop Microsoft Teams from Reinstalling
Eliminating the Microsoft Teams reinstalling issue is so simple. There are multiple ways to do that. I am giving you only the easy but winning solutions to you thus you can fix this issue properly and swiftly.
Some more guides on User Accounts in Outlook & Teams do not match
Here are the solutions to stop Microsoft Teams from reinstalling:
1. Uninstall Microsoft Teams Properly from the control panel
The Teams Machine-Wide Installer will automatically install Microsoft Teams whenever you connect to your computer. You must simultaneously remove Microsoft Teams and the Teams Machine-Wide Installer to repair MS Teams that continue reinstalling itself.
Follow the steps below to uninstall Microsoft Teams:
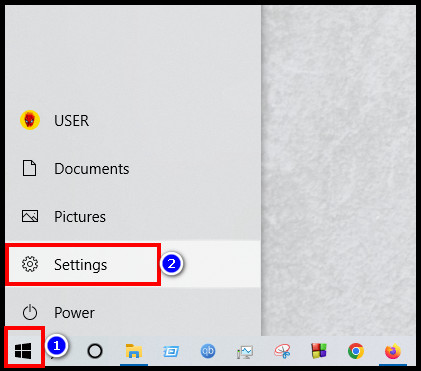
- Go to the Start menu.
- Select the Settings option from there.
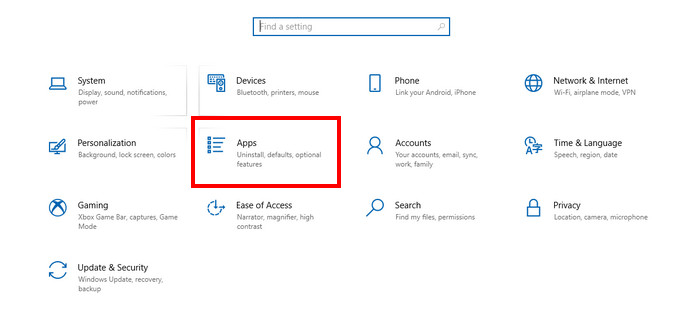
- Click on the Apps option.
- Type Teams in the search bar.
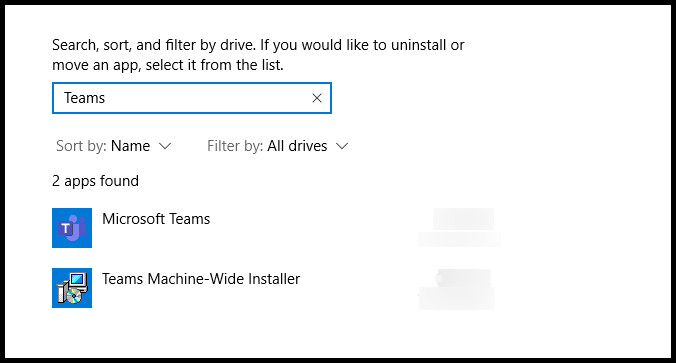
- Click on the Microsoft Team.
- Choose Uninstall option now.
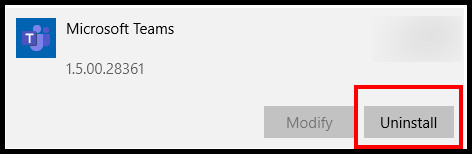
- Follow the same process to uninstall the Teams Machine-Wide Installer. It is the most crucial part you have to follow.
After doing all the procedures, you can remove the Microsoft Team from your device altogether.
But, before that, do check our latest post on Microsoft Teams can’t change status from offline.
2. Clear AppData
Many users have reported that after cleaning the AppData of the Microsoft Teams application, their situation has improved. You must remove the Teams cache files to resolve the Microsoft Teams continuous reinstalling issue.
Follow the steps below to clear AppData of Microsoft Teams:
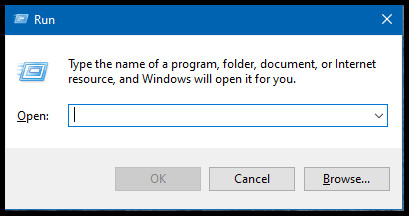
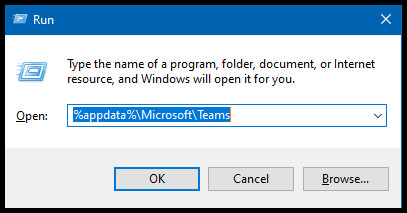
- Enter the Windows + R keys together to launch the Run dialog box.
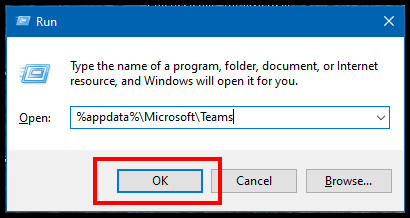
- Copy and paste %appdata%\Microsoft\Teams into the box.
- Click on the OK button now.
- Select all the files from the new window.
- Click on the Delete option now.
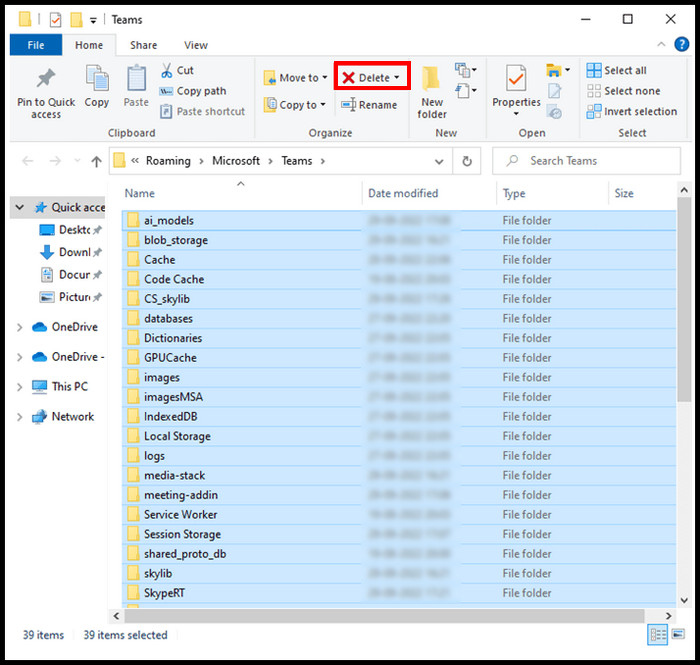
- Wait for the process completion.
Now restart your computer and check if the reinstalling issue has been resolved or not. Follow the next method if it isn’t working for you.
Check out the easiest way to fix Teams calendar not syncing with Outlook.
3. Uninstall Teams in Safe Mode
Sometimes defective errors and drivers prevent you from doing standard system operations. Therefore, I suggest that you start your PC in safe mode and uninstall the application as described below.
Follow the steps below to uninstall Microsoft Teams in safe mode:
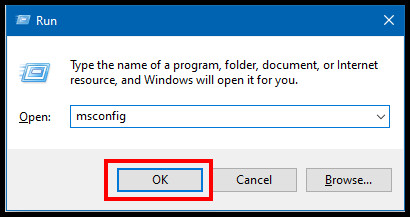
- Enter the Windows + R keys together to launch the Run dialog box.
- Copy and paste msconfig in the run box.
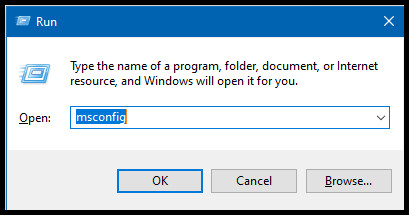
- Click on the OK button now.
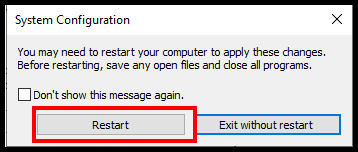
- Select the Boot tab from the window.
- Click on the Safe boot option now.
- Choose the Ok button.
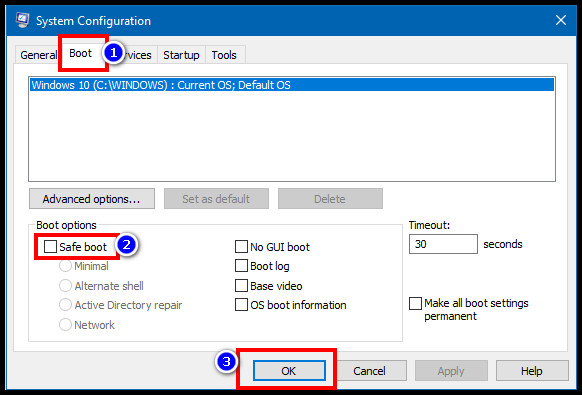
- Click on the Restart button.
- Wait for when your windows Home page again.
- Go to the Start menu.
- Select the Settings option from there.
- Click on the Apps option.
- Type Teams in the search bar.
- Click on the Microsoft Team.
- Choose Uninstall option now.
- Follow the same process to uninstall the Teams Machine-Wide Installer. It is the most crucial part you have to follow.
Check if the reinstalling issue has been resolved or not. Follow the next method if it isn’t working for you.
But before that, go through our epic guide on fix Microsoft teams can’t change status from offline.
4. Remove Teams via Registry Editor
You have now removed Teams from your computer. You may use Registry Editor to check that the Teams file is completely gone from your computer.
Maintaining a backup of your registry is essential since any changes might accidentally remove important details about the installed OS.
Follow the steps below to remove Teams via the registry editor:
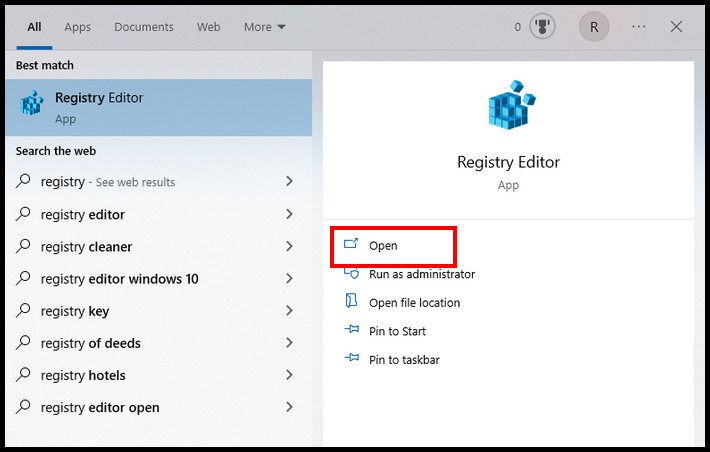
- Click on the Windows search option.
- Enter Registry Editor in the box and press Enter button.
- Click on the Open option.
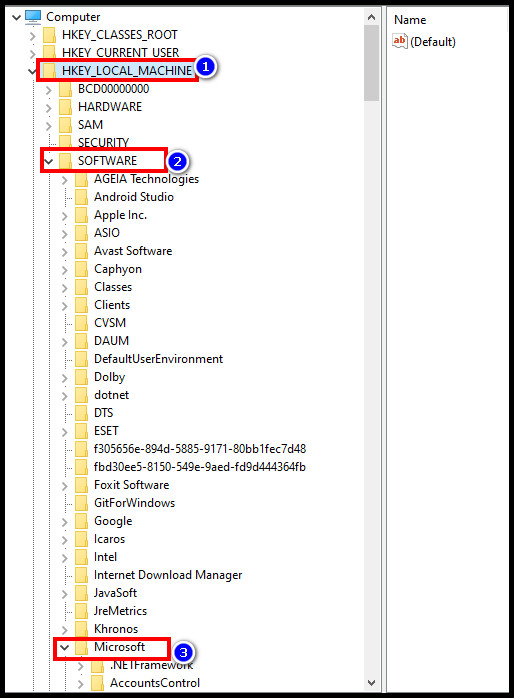
- Select the HKEY_LOCAL_MACHINE option.
- Choose the SOFTWARE Folder.
- Find the Microsoft option now.
- Follow Windows>CurrentVersion.
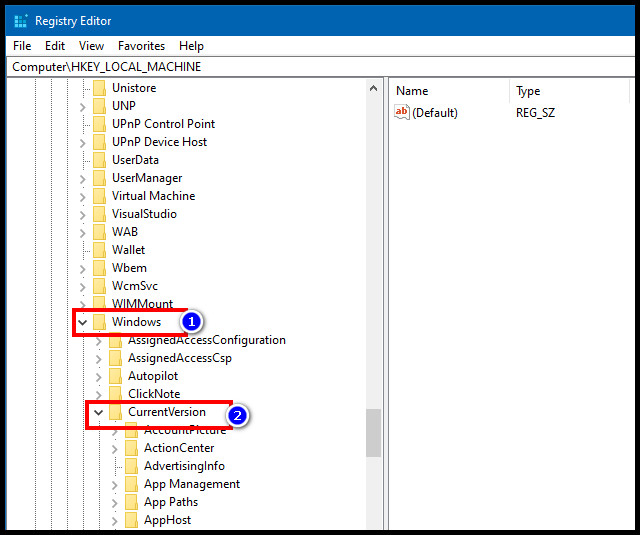
- Choose the Uninstall option.
- Find and select the Microsoft Teams folder.
- Right-click on it.
- Click on the Delete option now.
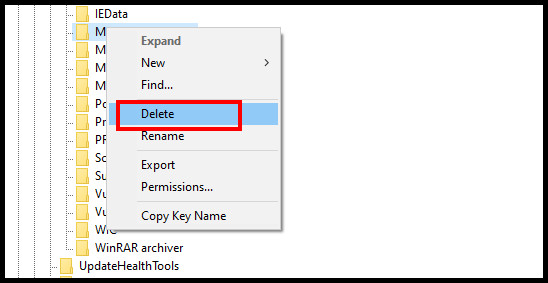
Please continue if asked to approve the delete function, and then restart your computer.
Check if the reinstalling issue has been resolved or not. Follow the next method if it isn’t working for you.
Follow our guide to fix Microsoft Teams Black Screen.
5. Disable the Auto Restart option
If Microsoft Teams starts up automatically every time you open the window, you may stop it from happening by following the procedures provided below. This assists you in resolving the Microsoft Teams keeps reinstalling problem.
Follow the steps below to disable the auto restart feature of Microsoft Teams:
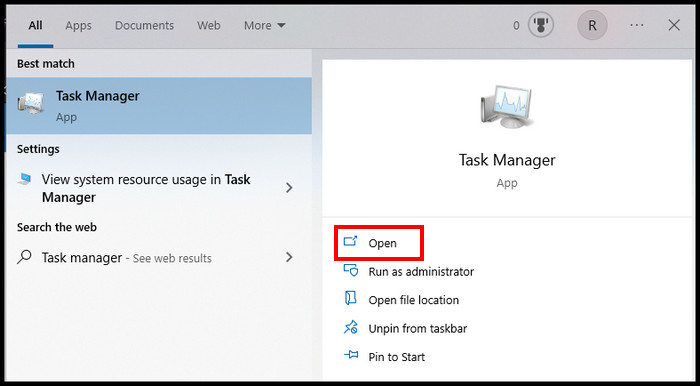
- Click on the Windows search option.
- Enter Task Manager in the box and press Enter button.
- Click on the Open option.
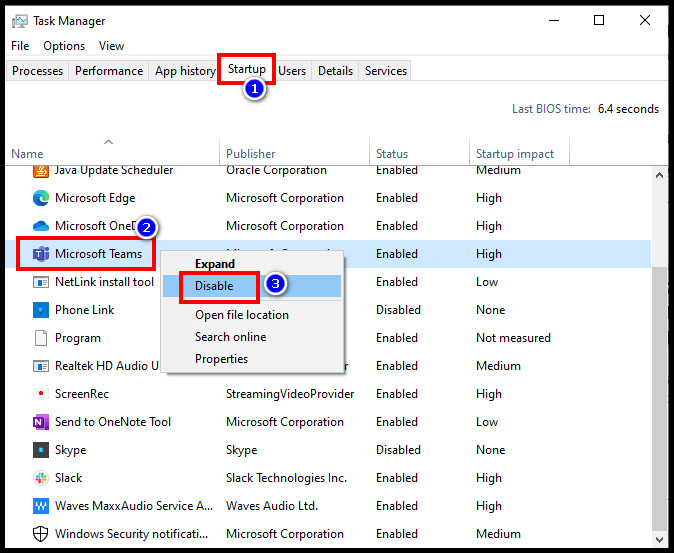
- Select the Startup tab from the screen.
- Look for the Microsoft Teams application.
- Right-click on it.
- Choose the Disable option.
You have disabled the Microsoft Team auto restart feature from the task manager option. You can also disable this setting from the Teams application.
Follow the steps below to disable the auto restart feature from Microsoft Teams:
- Launch the application.
- Click on the Settings option.
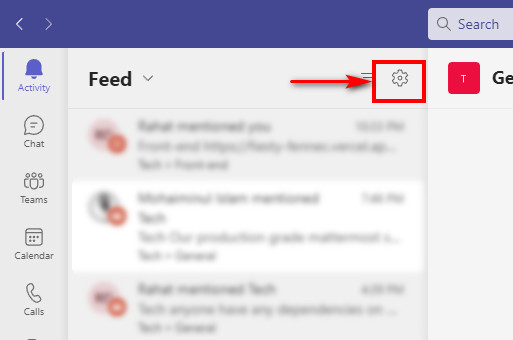
- Click on the General option.
- Uncheck the Auto-start application option.
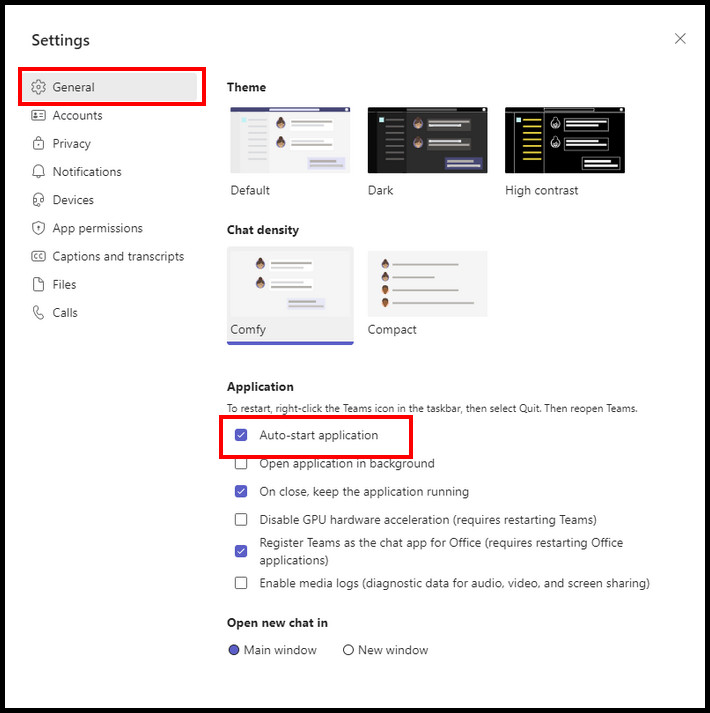
You have disabled the Microsoft Team auto restart feature from the Microsoft Teams application.
Also, check out our separate post on how to add Teams Meeting in Outlook?
Conclusion
After reading this post, I’m sure you are confident now about how you can stop Microsoft Teams from installing itself.
In your first attempt, try to uninstall the application completely. Also, try to clean the AppData of your Microsoft Teams application.
Try to uninstall the Teams in windows safe mode. Sometimes registry editor technique in windows helps a lot to eliminate the issue.
You should permanently disable the auto restart feature of the Microsoft Teams application. Don’t hesitate to try the following method if the previous one isn’t working for you.
Let me know which method helped you eliminate Microsoft teams’ reinstalling issue.