The number of remote workers is rapidly increasing worldwide. The remote control feature of Microsoft Teams is improving the impact of online meetings.
The process of giving and requesting control in Teams is straightforward. However, there are multiple options that you should focus on during the meeting.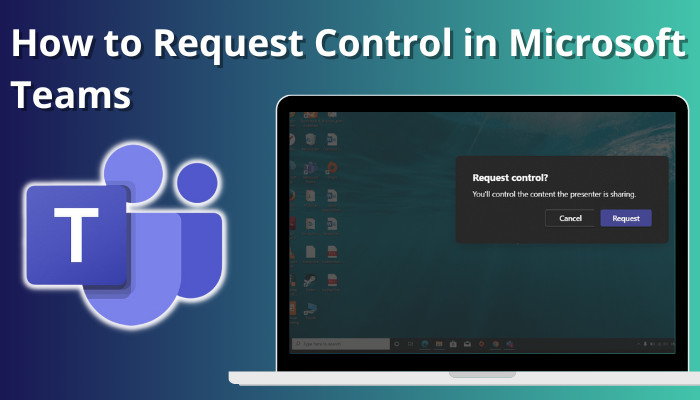
In this article, I will show you all the nuts and bolts of the share content feature of Teams.
So, let’s get started!
How to Request Control in Microsoft Teams
In order to get access to another person’s sharing, select Request control. The presenter can now allow or deny your request. If the person approves your request, you will get permission to edit or modify the display content. Simply select Stop control to revoke the access.
Before giving access or taking control of a meeting in Teams, you must consider some basic facts. Check the following list to know the essential things about request control.
Here’s a list of some basic facts to consider before using the request control feature:
- One cannot take control of another screen unless they grant permission.
- After giving permission, the user can revoke it at any time.
- No one can force the user to grant them permission.
- Any participant can request the screen control.
- The meeting controller can give anyone control of the shared screen, even when they don’t request access.
- Every participant will see the changes in the role of the screen controller.
The above list covers all the possible functionality of Teams share and requests control features. Consider the following instructions to request control in the Teams application.
Here are the steps to request control in Teams:
- Launch Microsoft Teams, sign in using your login credentials and join a meeting.
- Wait until someone shares their screen.
- Click Request Control to ask for control of the participant’s screen.
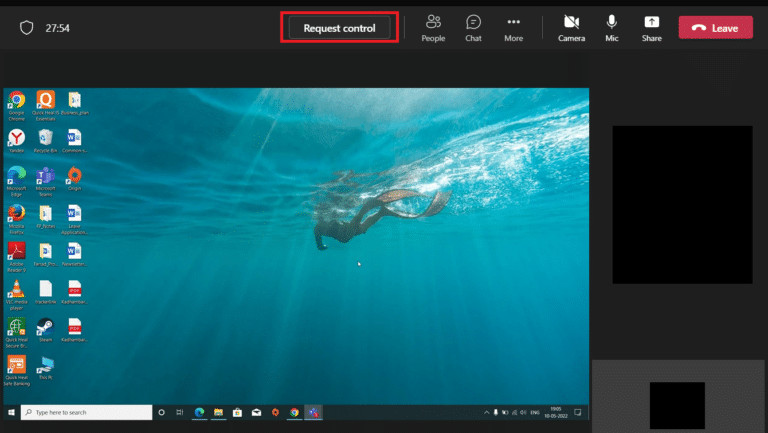
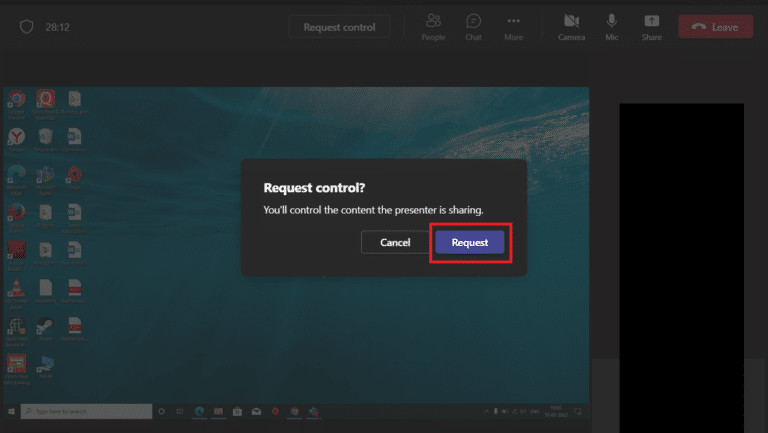
- Select Request from the Request control popup window.
- Click Stop control to revoke screen sharing.
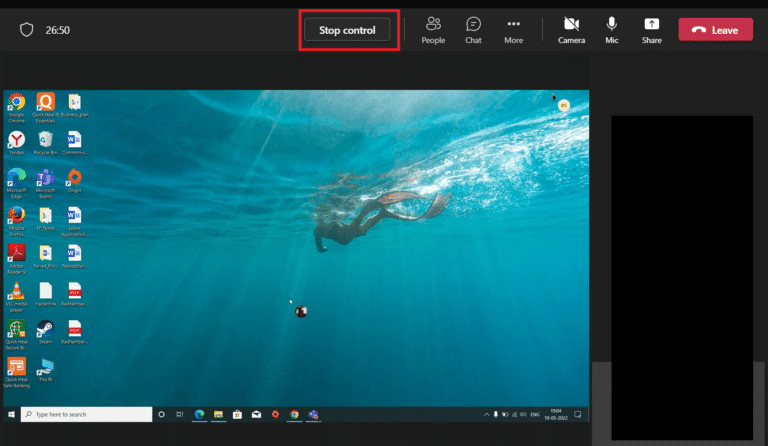
Use the Stop control option after finishing the screen sharing. During the screen sharing, all participants will be able to see that you are presenting your device screen. If you want, you can also take a screenshot in the MS Teams meeting.
How to Give Control in Microsoft Teams
If you want to give control of your screen in Teams during a meeting, click Give Control from the sharing toolbar. Select the name of the participant you wish to share the control with, and Teams will instantly notify the participants. Select Take back control to stop sharing.
By giving control to another participant, you allow him to control your PC virtually. The participant can type, edit and go through your shared screen.
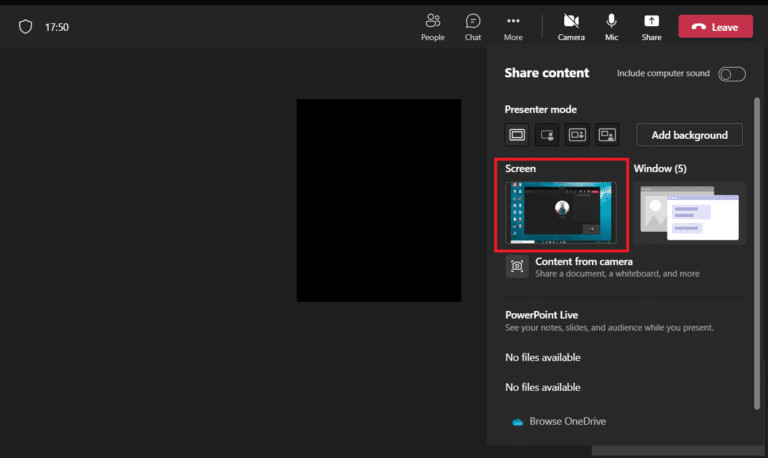
While sharing content, the user can choose between different options. For instance, if the user selects Screen, the participant will get full access to the full screen. Contrarily, if the user chooses any other window, the participant will only gain access to that particular window.
Check the following procedure to give control in Microsoft Teams:
- Open Microsoft Teams and join a meeting.
- Share your screen with meeting participants.
- Locate and click the Share content button on the Teams Meeting page.
- Choose the Screen, Window, or PowerPoint Live option from the Share content menu.
- Click on the Give control option from the top of the screen.
- Select the participant from the Give control dropdown.
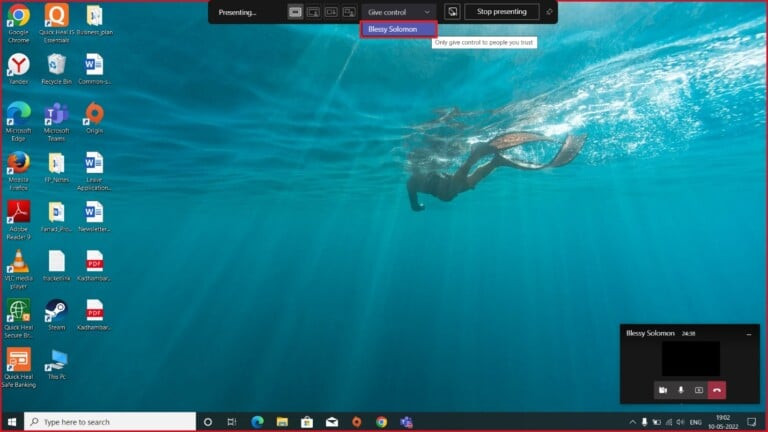
- Click Take Back Control when you need to take the control back.
The Share content menu has various options to make the sharing more meaningful. For example, toggle on the Include computer sound option to add PC sounds to the meeting. To share a specific window, choose the window from the Window list.
When you are done sharing the control with others, simply click the Take Back Control button to revoke the access from sharing. Check out another post if Teams can’t play embedded sound in PowerPoint over Teams.
How to Enable Teams “Request Control” Feature
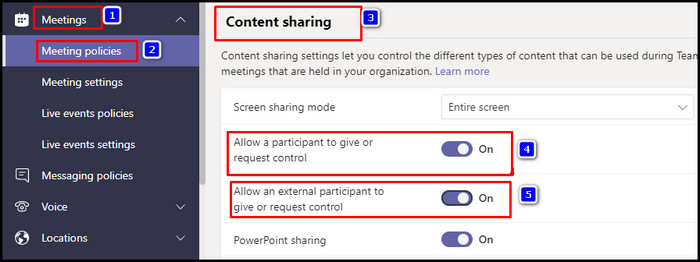
Teams admin or Global admin can enable the request control feature for individual or external users. Go to the Teams Admin Center and navigate to Meetings > Meeting policies > Content sharing. Turn on Allow an external participant and Allow a participant option.
Using this menu, the admin can also enable PowerPoint sharing in order to share PowerPoint presentations. Go through the subsequent instructions to authorize the Teams request control feature in MS Teams.
Here’s how to enable Teams “request control” feature:
- Open your browser and go to the Teams Admin Center.
- Sign in using your login credentials.
- Navigate to Meetings > Meeting policies > Content sharing.
- Turn on the Allow a participant to give or request control option.
- Turn on the Allow an external participant to give or request control option.
After performing the above steps, internal and external participants can quickly request or give access. During a meeting, users can also add video filters to Microsoft Teams.
Users can choose several options in the share content menu. Each option is focused on a specific task and can dramatically improve the sharing experience. The most used options are Screen, Window, Whiteboard, and PowerPoint Live chronologically.
Consider the following discussion to understand the difference and usage of the share content options.
Screen: This option is most suitable for sharing your computer screen with the participants. When you choose the Screen option from the share content menu, you can open any application or file to share with the participants.
Window: Using this option, you can quickly share any window from your computer. This option is handy when you need to share a particular document or application. The participants won’t be able to see the other window open on their PC.
Whiteboard: A whiteboard is the digital version of your old chalkboard. Use the whiteboard option to collaborate with all meeting participants.
PowerPoint Live: When you need to present a PowerPoint presentation in the Teams meeting, you should choose the PowerPoint Live option from the share content menu.
As I mentioned, turn on the Include sound option if you want to add your computer sound while sharing your screen.
Frequently Asked Questions
Why can’t I request control on Teams?
If your device doesn’t have a graphics processing unit (GPU) or the GPU hardware acceleration option is disabled, Teams cannot perform the request control feature. The Control drop-down menu won’t work without an installed GPU.
What is Teams remote control?
Teams remote control is a unique feature to control other participants’ screens remotely. By taking control of the computer screen, you can quickly navigate through the participants’ computers.
How to share content on a Mac?
To share content on Mac in Teams, you must enable Screen Recording. Navigate to Apple Menu > System Preferences > Security & Privacy, and ensure Microsoft Teams is selected.
Wrap Up
Before anything else, one must enable the Request Control feature in order to use the request or give control option in MS Teams.
There are different ways to share your computer screen. For instance, you can share the entire screen, a single window, or an application during the meeting.
Do you still have additional queries regarding this feature? Leave a comment below for further assistance.