As an Outlook user, you can schedule an appointment or call for a meeting in the calendar. Then you can add the meeting attendees and send invitations.
But the main problem arises when you don’t find any BCC option to add people.
This is a problem because you don’t want to share the invitees personal information with everyone for privacy reasons.
Luckily, a simple solution is available to add BCC while sending Outlook calendar invitations. In this article, we’ll look at how to hide the attendees list by sending out multiple calendar invites with just a single click.
So, take a cup of coffee and read till the end to add BCC while sending calendar meeting invites.
Also read how to add new Mailbox in Outlook easily.
Why Add Someone to the BCC?
You want to add someone to the BCC for security and privacy reasons. BCC stands for Blind Carbon Copy, a feature to send emails to many people without sharing others’ personal information, like their mail addresses. The mail address in the BCC field becomes invisible to others.
When you put a mail address in the BCC field of a message, those addresses become invisible to the other recipients. In contrast, the email addresses you put in the To and CC field are visible to everyone.
One recipient can see who gets the exact mail with an Outlook calendar meeting invitation from the CC section but not from the BCC. So, let’s take a look at the benefits of using BCC.
Benefits of Using BCC
- Keep the privacy of a person’s email address. Recipients can see the message only but can’t see the other listed recipients.
- No email address will forward if you add someone’s email in the BCC field.
- Protect the recipients against receiving unwanted replies from other recipients.
- Narrow down the risk of getting a virus attack or spam messages.
A virus can infect the recipient’s PC through attached files. When they reply, the replies can carry malware or viruses. So, BCC helps protect the meeting attendees against threats and intact personal information from outsiders.
Read more on why Outlook rules not running automatically on shared mailbox.
How to Add BCC in Outlook Calendar Invite
Before adding recipients to BCC, you must create the meeting or appointment first. As the BCC option is not present for sending calendar invitations, you can forward the mail as iCalendar. You can also save the iCalendar and send it to the recipients by adding specific people to BCC.
While sending meeting invites through the calendar, you can click on the Required button and add invitees in the Resources section. The Resources field works the same as BCC. So, these are the methods you can try to send a calendar invite for a meeting by adding specific people on BCC.
As I have mentioned earlier, you need to add invitees in the BCC field to keep their privacy intact. Follow the below methods to add people in BCC while sending Outlook calendar invitations.
Note: No matter which version of Outlook you use, the methods will work for every version.
Here are the methods to add BCC in calendar invites in Outlook:
1. Forward as iCalendar
You can easily add BCC by forwarding the iCalendar, which is the quickest way to add people to the BCC field while sending the invitation. So, follow the below steps.
Here are the steps to forward iCalendar to add BCC in Outlook:
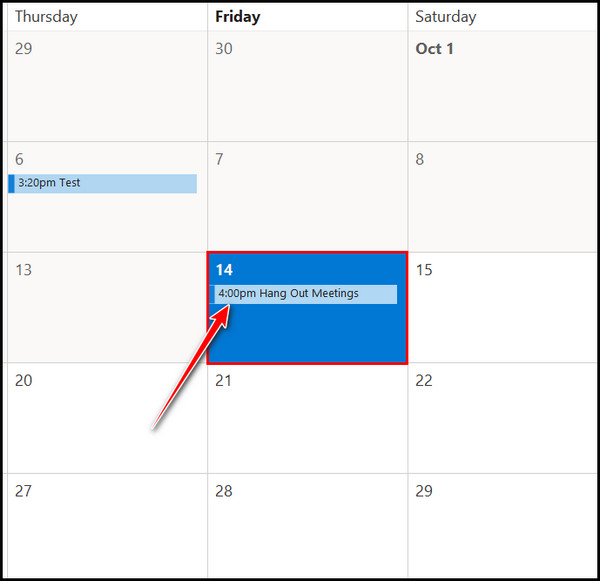
- Double-click on the Scheduled meeting in the calendar.
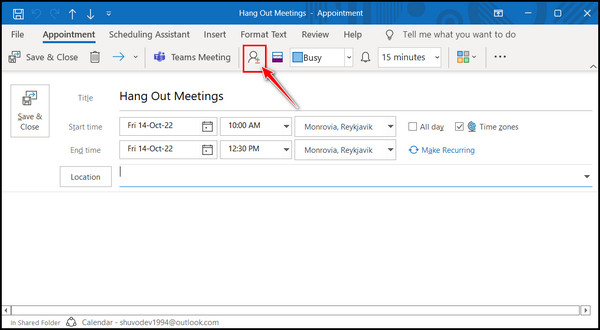
- Click on the Invite Attendees button.
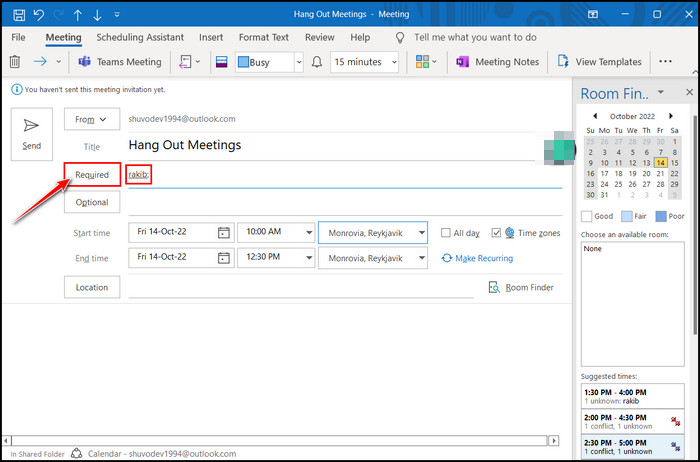
- Add at least one recipient in the Required field.
- Click on the Teams Meeting from the top ribbon.
- Select all the texts of Microsoft Teams Meeting from the mail body.
- Press Ctrl + C to copy all the selected text.
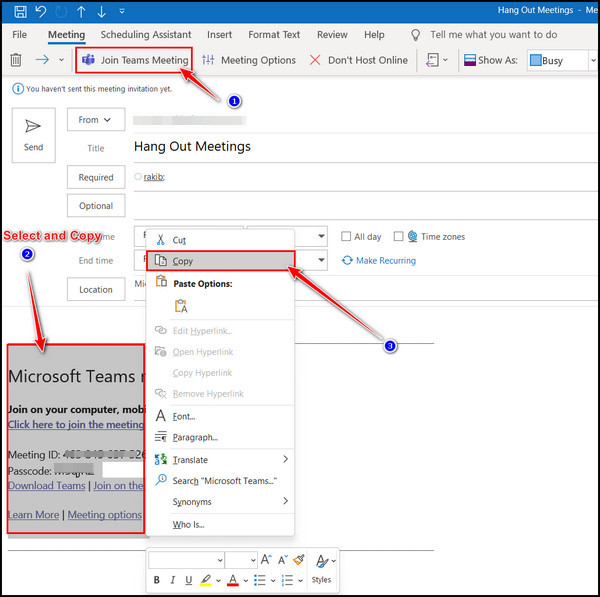
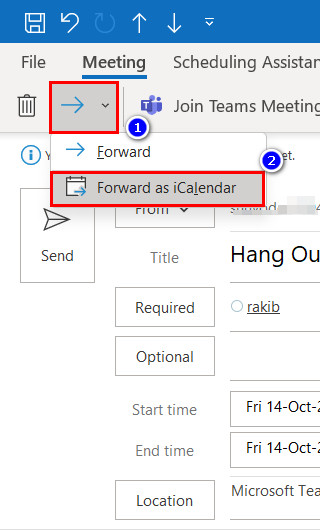
- Click on the Forward’s drop-down arrow and select Forward as iCalendar. It will take you to a new regular mail composing window.
- Click on the Options tab from the ribbon and select BCC if the BCC option is not available.
- Add all the specific mail addresses in the BCC Enter Other mail addresses in the TO and CC fields, respectively.
- Click the Send mail button after entering everything accurately.

Meeting attendees won’t see other email addresses in the BCC field.
Follow our guide to fix Outlook zoom add-in not working.
2. Save the iCalendar and Send
It is the same as the previous method, but you must do something extra here. You should create the meeting first and save the calendar with the meeting in the local drive. All you need to do is go for a new mail, attach the exported iCalendar and send people in BCC.
Here are steps to save the iCalendar and send it:
- Go to the Calendar and click on the meeting that you want to send the invitation to.
- Click on the File tab from the ribbon.
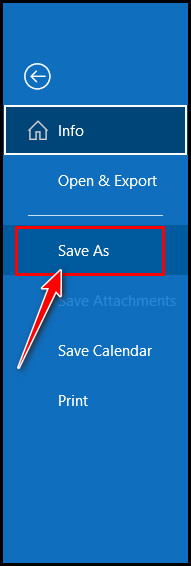
- Select Save as and save the calendar in iCalendar format in the local drive.
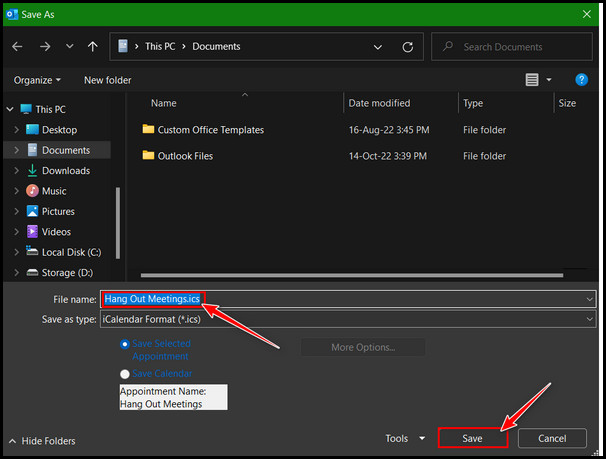
After that, go for a new email and attach the iCalendar. Next, enter all the email addresses you want to add to BCC. Add other email addresses to the TO and CC field and click the Send mail button after adding everything perfectly.
Follow our guide step-by-step to add signature to Outlook 365.
3. Add Recipients in Resources
You can also add recipients in the Resources field to send the mail to them as BCC. Adding the mail address to the Resources field will count as BCC. To add recipients in the Resources field, follow the steps below.
Here are the steps to add recipients in the Resources field:
- Go to the calendar and double-click on the exact meeting or appointment. A new window will pop up with appointment details.
- Click on the Invite Attendees button from the top.
- Click on the Required button.
- Click the email addresses from the list and hit the Resources button to add the mail address.
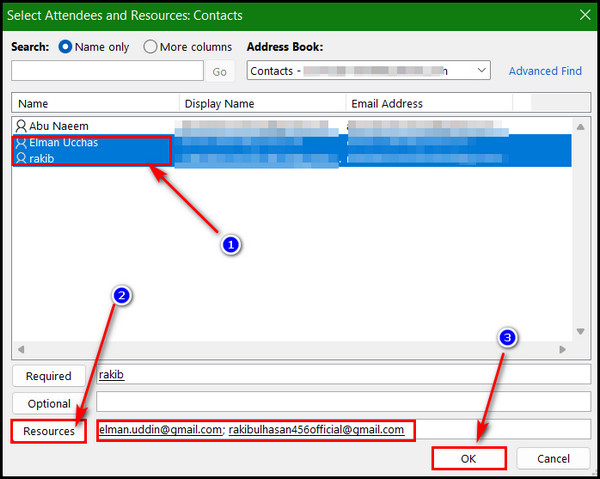
- Click the Ok button after adding all the specific email addresses in the Resources field.
- Delete the mail addresses that appear in the location field.
- Enter the meeting location in the location field.
Also, add all the usual email addresses in the required section. Send the mail after adding all invitees. After sending the mail, check whether the emails you send by adding on the Resources field maintain the BCC format or not.
Also read how to add someone to a distribution list in Outlook.
How to Enable BCC in Outlook
To enable BCC in Outlook, click on the Options tab and select BCC to add or enable it to add recipients in this field. Sometimes you won’t find the BCC field while composing new emails in Outlook, and it’s a problem when you must add email addresses in the BCC field.
You can always enable it if you don’t find the BCC field while composing mail. So, let’s find out how to allow BCC in Outlook if it’s missing.
Here are the steps to enable BCC in Outlook:
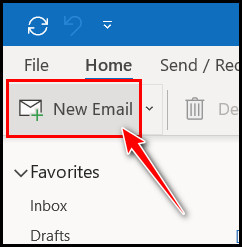
- Click on the New Email button or press Ctrl + N. You will see a new window for composing emails.
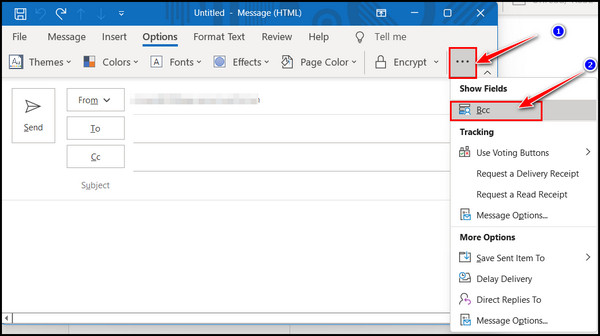
- Click on the Options tab from the ribbon and select BCC if you use Outlook 2016 or an older version.
- Click on the three dots from the top right corner and click BCC if you are using Outlook 2019 or 2021 version.
Adding recipients in BCC is a great way to secure recipients’ privacy. I hope now you have enabled the BCC in Outlook.
Find out how to add picture on Outlook email.
FAQs
Where is BCC in the Outlook Calendar invite?
Click on the Options tab from the ribbon and select the BCC option if you are composing new mail. Click BCC from the Show Fields section in the Message ribbon menu if you are replying or forwarding a message.
What does the Hide attendee list option do in Outlook?
You can hide the attendee list from the participants in the session. When the organizer enables the Hide attendee list option, the organizer’s name and the attendee’s name will show, but all other names will not display.
How can I invite mass calendar invitations in Outlook?
To send mass calendar invitations in Outlook, you must add all your invite email lists to BCC or simply select the Hide invite list. First, you must create a list of email addresses and enter them in the notepad, separating each email address by a semicolon (;). Now, Copy and paste the list into Outlook.
Bottom Line
Outlook is an excellent app for creating appointments and meetings in the calendar. You can also click on the meetings to add invitees to the session. Moreover, adding recipients to the TO and CC from the address book is a must.
To keep email private, you need to send emails by adding email addresses in BCC. I have given several methods to guide you in adding BCC to the Outlook calendar invitation.
I hope you read till the end and already add BCC to the calendar invitation. If you face any problem while applying the steps, knock me in the comment box. Peace out!