The presence status in Outlook is a concise tool to let your contact or organizations know your availability in events like appointments or meetings.
Struggling to find the right option? That’s where my decades of experience come in.
In this article, I will provide a thorough process to edit the presence status irrespective of Outlook app variants.
Also, check out our separate post on add meeting to Outlook calendar easily.
How to Change Presence Status in Outlook
With the simplest steps, you can alter the status in Outlook. Though different variants are present, the basic approach is somewhat similar, with slight variations depending on the platform and app rendition.
Here are the procedures to change the presence status in different versions of Outlook:
Outlook 2013/16/19/21
The approach to tweak the Presence status in Outlook 2013,16,19 and 21 shares the same DNA.
Here’s how you can change the presence status in Outlook 2013/16/19:
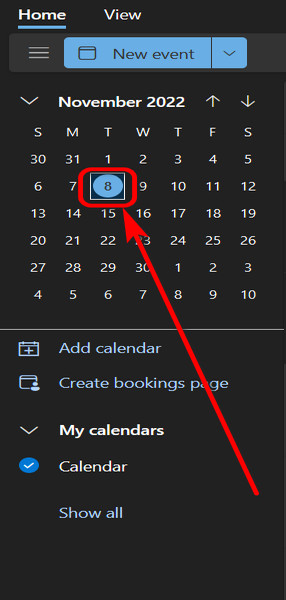
- Click on the Calendar icon at the bottom of the left pane.
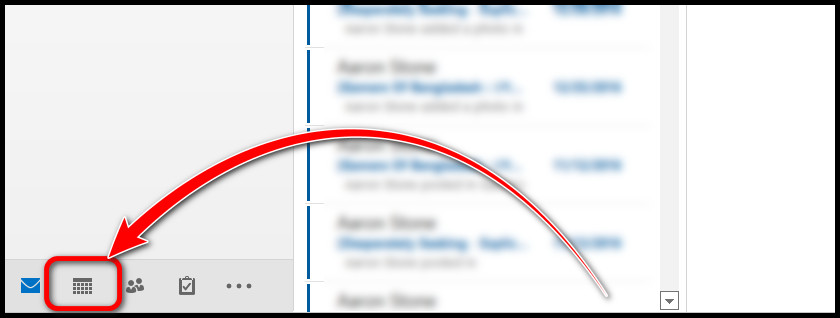
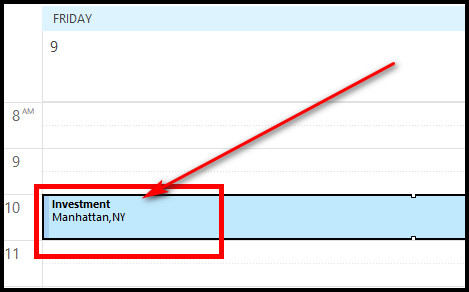
- Navigate and click on a highlighted date on which a meeting or an appointment is assigned.
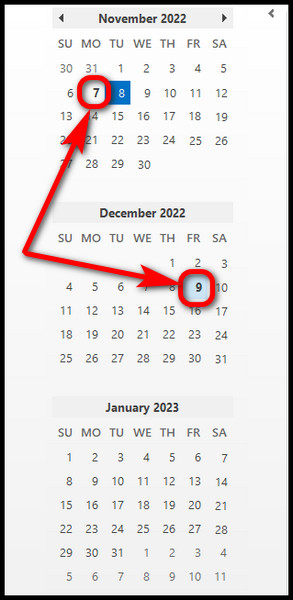
- Double-click on the date to open the schedule.
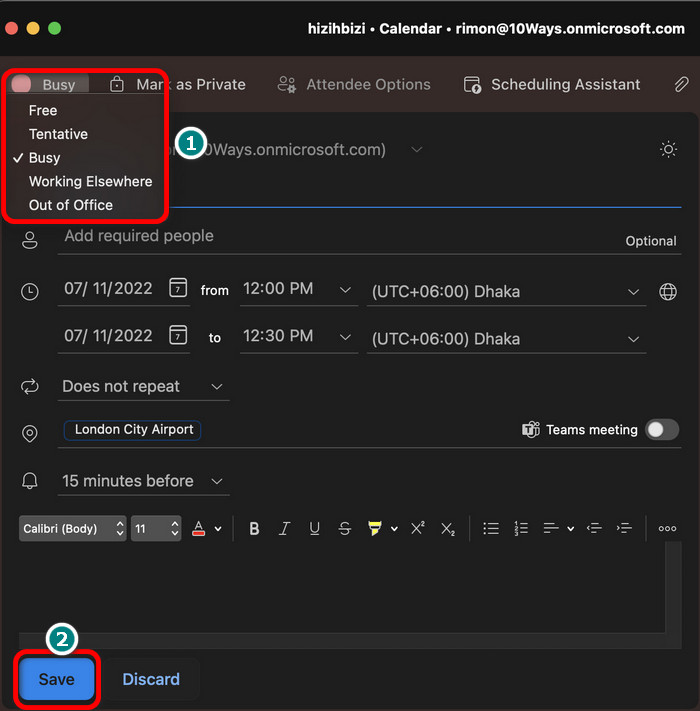
- Click on the Show As box from the newly appeared floating Window.
- Choose your preferred status from the drop-down menu.
- Click on the Save icon at the top of the Window.
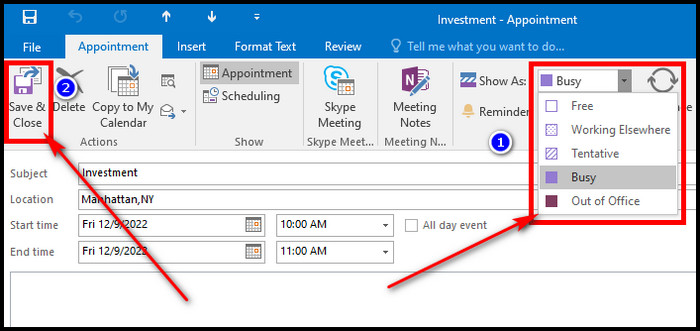
After saving the presence status, close the Window. Now, you have successfully edited the status.
Also read how to add new Mailbox in Outlook easily.
Outlook 365
Outlook offers an intuitive way to edit the status in the 365 version. It resonates with an elegant user experience.
Here are the steps to edit the presence status in Outlook 365:
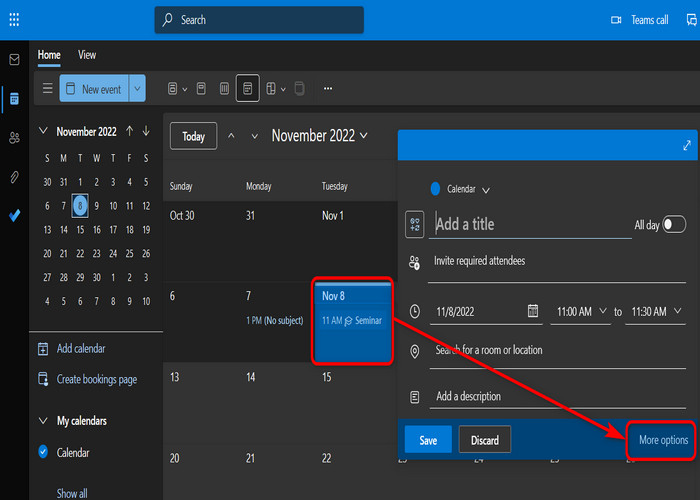
- Select the calendar icon from the left pane of Outlook 365.
- Choose any marked date with events of your liking and click on it. Typically dates with schedules are marked with a blue background.
- Click on the calendar date from the right half of the screen.
- Select More options, and it will expand the floating Window with event details.
- Click on the calendar icon to choose your suitable status.
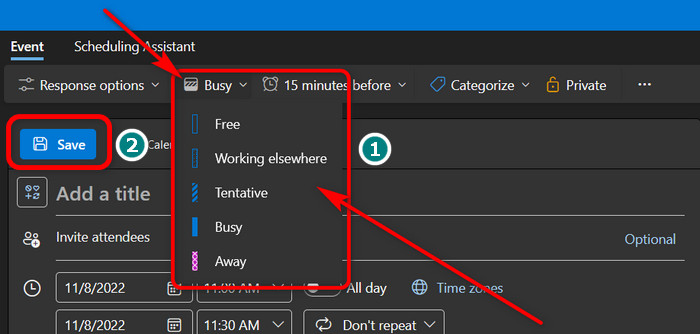
- Click on the Save button.
With this, your presence status will be updated. You can check it once again by firing up the event details.
Also, check out our separate post on add optional attendees in Outlook mac meetings.
Outlook for Mac
The Mac version of Outlook arguably offers the best technique to tweak the status.
Here is the process to tweak the status in Outlook for Mac:
- Click on the calendar icon at the bottom of the left pane.
- Click on a date that is populated with events. It is marked in blue.
- Choose and click the same date from the right pane again.
- Select the Edit Event option, and a new Window with event details will appear.
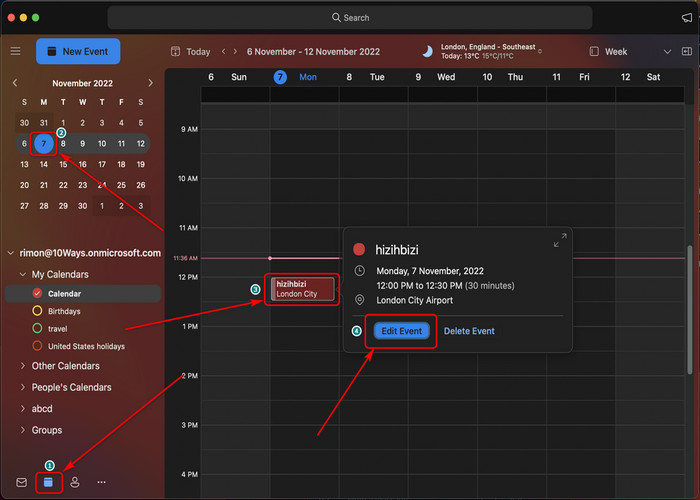
- Click on the colored circular icon to modify the status.
- Save and exit.
Once the saving is done, you will have a new presence status set for your upcoming events.
Follow our guide step-by-step to add Teams meeting in Outlook.
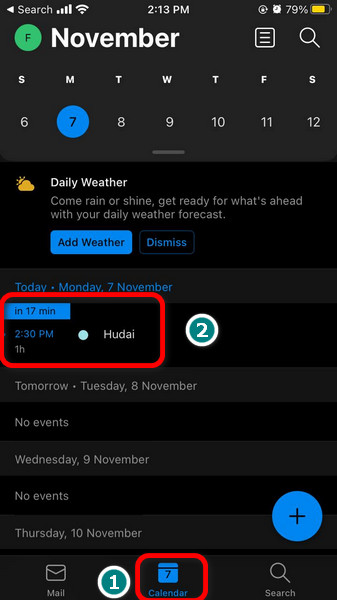
Outlook Android and iOS
The Mobile Outlook versions, including Android and iOS, offer the quickest way to change the presence status on the fly.
Here is the process to modify the status on Android:
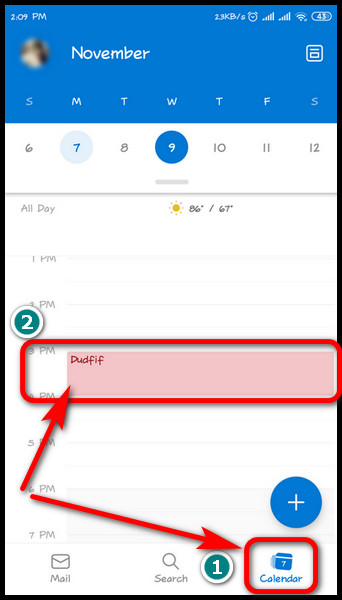
- Navigate to Calendar from the bottom of your app screen.
- Tap on the event assigned to the corresponding date.
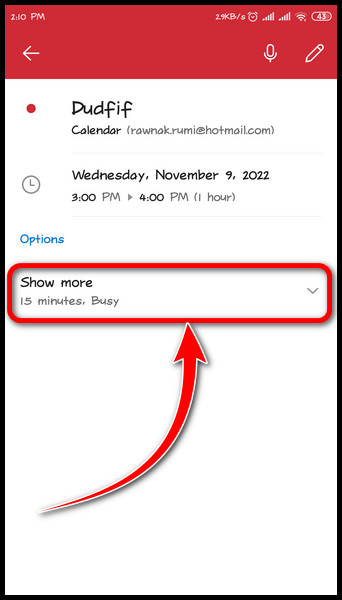
- Select Show more under the Options button.
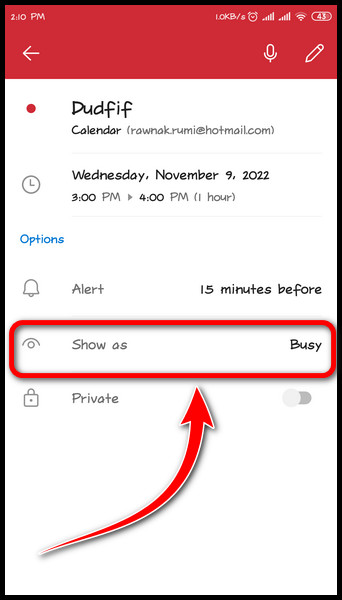
- Tap on the Show as menu and choose your status.
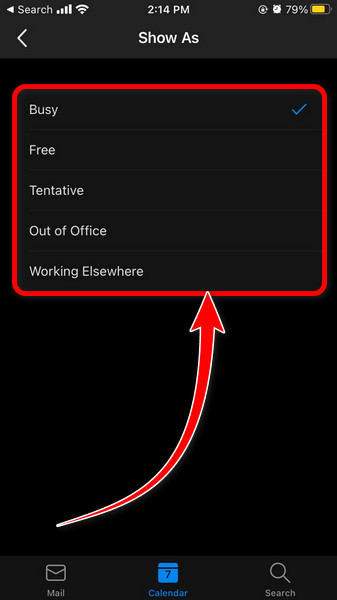
Here are the steps to follow to change the status on iOS:
- Tap the Calendar at the bottom.
- Choose your preferred event and tap on it.
- Select Show More.
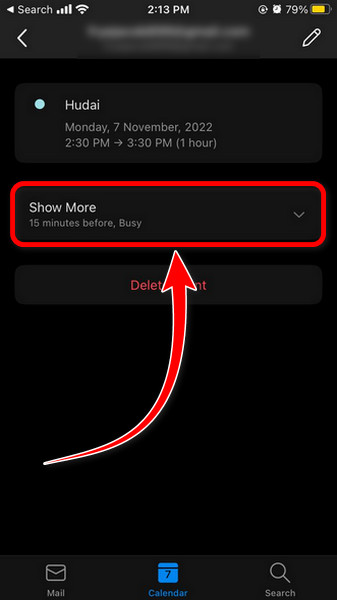
- Tap the eye icon and revise your status.
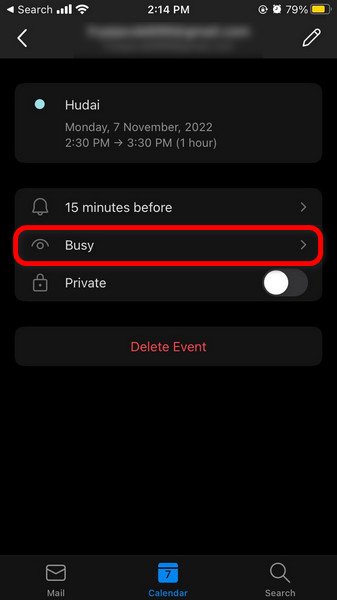
After setting up the new status, you can close your app.
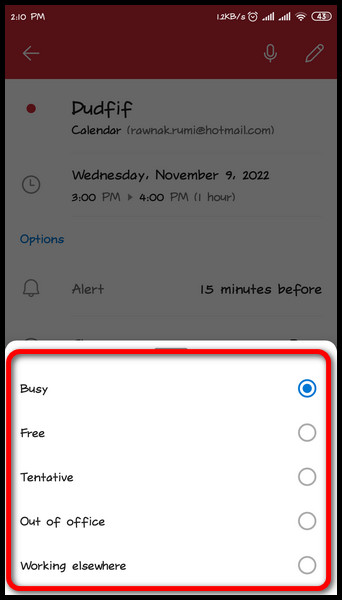
Different Presence Status in Outlook
Outlook has a variety of status preferences from which a user can choose a suitable one to notify the people on the other end about his availability.
But the improper selection of presence status can convey a confusing message to your business associates, colleagues or friends.
Let’s take a look at the Outlook status and their underlying interpretations:
| Status Name | Meaning |
|---|---|
| Free | Indicates that you are available for the event and have no issue joining. |
| Working Elsewhere | Refers to your current status as working on the scheduled day. |
| Tentative | Meaning you are hesitant about joining the event. You may or may not join. |
| Busy | Illustrates that you don’t want to be disturbed by anything and can’t join. |
| Away | Puts you up with a status that you will be out of the location on the event day. |
Ending Remarks
When you want to let people know about the possibility of attending an event, Outlook offers to change the presence status. It’s short and declarative at the same time.
I hope this article helped you to find the correct settings for tweaking the status.
Comment below if you have more questions.