Adding a signature to the bottom of the email has a significant positive impact.
It works like a digital business card and makes you more reachable.
But many find adding a signature or designing one a difficult job.

Well, I’m here to ease the job for you. I’ll remove all the learning curves and simplify the whole process in this post.
Following some simple steps, you would be able to add a signature in Outlook 365.
So keep reading the post till the end.
Why Should You Add A Signature To Outlook 365?
Outlook 365 is a web app for writing and managing Outlook emails. The web app is feature-rich and offers a great platform to manage your email efficiently.
Outlook has built-in support to add signatures to your Outlook email. Signatures can contain text, images, and links – and these elements support styling.
You can also find signature templates online to get a professional and beautiful design that matches your job and description.
If online presence matters in your profession, adding a signature to your Outlook email can significantly boost it. It will make your emails look more professional.
More people will think about reaching out to you or replying to your email because of the nice aesthetic and professionalism.
The readers will also find it relatively easy to figure out your profile. You will be using social media buttons, website links, and phone numbers – making it easy and flexible to contact you in multiple ways.
It will help you create business relationships and grow connections without much effort and cost. Outlook signature functions like a digital business card.
Jump to the next section to see the process of creating an Outlook signature.
Follow our guide step-by-step to add someone to a distribution list in Outlook.
How To Create and Add Signature To Outlook 365
Adding a signature in the Outlook 365 web app is not very complex. To create a new email signature, just sign in to your Outlook account > Navigate to View all Outlook settings > Compose and reply. Insert your signature under the Email signature option.
In this way, you can create a signature in Outlook or download a signature template online and add it to your mail.
Either way, you can choose to add the signature automatically to all emails or manually to a single email.
After going through the steps, you’ll clearly know how to create and edit a professional signature in minutes.
Follow the steps below to add your signature to Outlook 365:
1. Open the Email Signature option in Outlook
At first, you need to open the Email Signature option where you can create, edit and configure the signature.
Do as follows:
- Go to Outlook web: (https://outlook.live.com).
- Sign in to your Outlook account.
- Go to Settings by selecting the gear icon at the top-right corner.
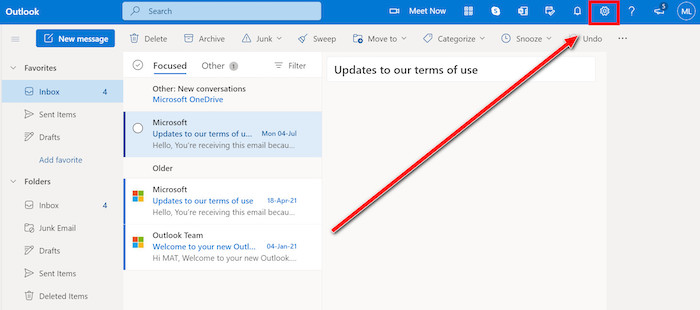
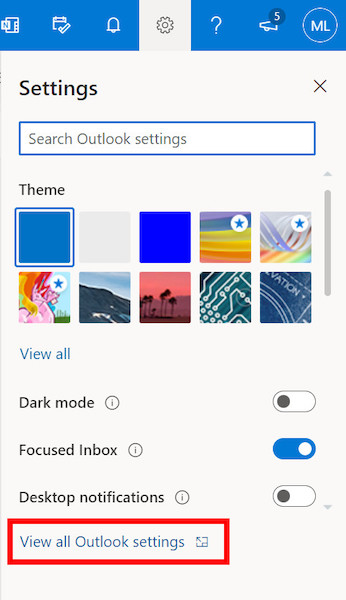
- Select “View all Outlook settings.”
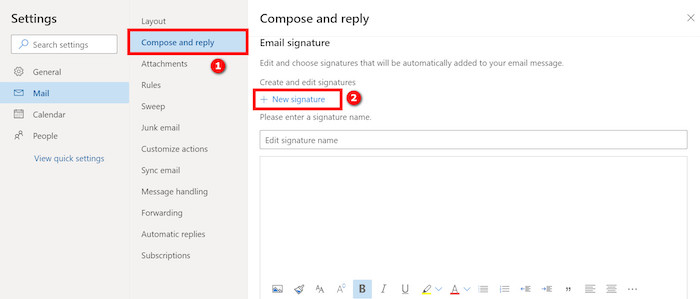
- Select Compose and reply from the left panel.
You’ll see the options to create and configure a signature on the right panel. If you’re having trouble with a can’t start Microsoft Outlook – invalid XML error? Don’t worry, We got you all covered. Just click on the hyperlink to view the full post.
2. Create a signature in Outlook 365
You can create one or more signatures and save them on Outlook 365.
Here is the process:
- Click + New Signature to start adding a new signature.
- Give the signature a name.
- Select the text box.
- Type your signature text in the appropriate format. If you’re unsure about the signature format, use signature templates (more on that later).
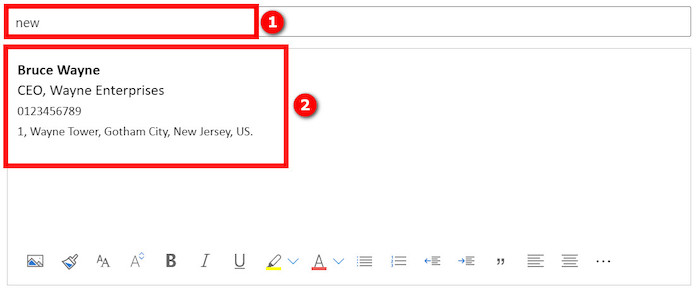
- Use the Toolbar below the text box to edit the formatting. Usually, the name and job title has a bigger font size and a different color than the rest. Don’t try to use multiple fonts or fancy ones; it reduces professionalism.
- Make the phone number clickable. Select the phone number, click on the Hyperlink button from the top-right of the popout, type “tel:” then the phone number (for example, tel:0123456789) in the URL box. Now, if anyone clicks on the phone number, the dialer will open with the number inserted.
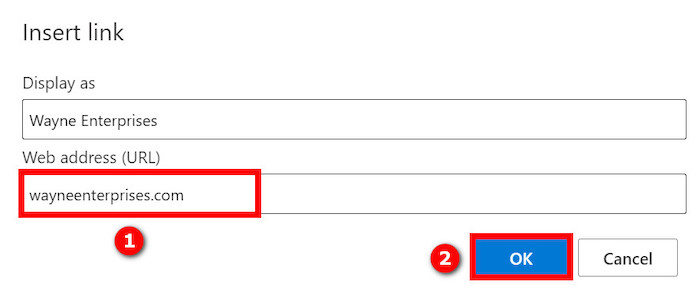
- Add hyperlinks to the company name or your website to make them clickable. Select the target text, click the Hyperlink button from the top-right of the popout, and add the URL.
- Add an image to your signature. You can only add local files as images; there is no option to add image links. You can adjust the image size and make it clickable using the Hyperlink button.
If you’re not feeling confident about how your signature looks, don’t worry. You can find templates online and use them as your Outlook signature. Simply paste the template into the above-mentioned Email Signature text box and replace the dummy text with your details. 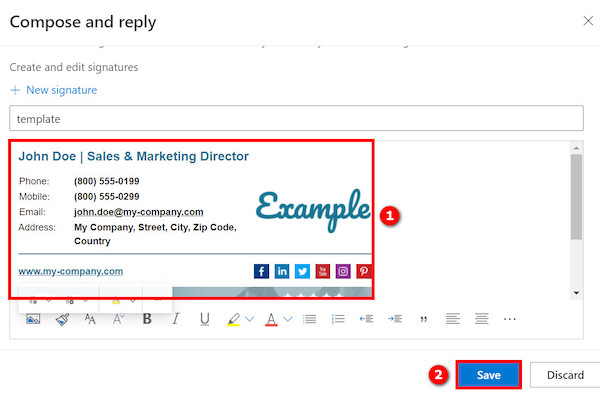
3. Configure Outlook signature settings and save
Now it’s time to choose if you’d add the signature automatically on all messages or replies. It speeds up the emailing process as you don’t have to add a signature manually on every email.
Do as follows:
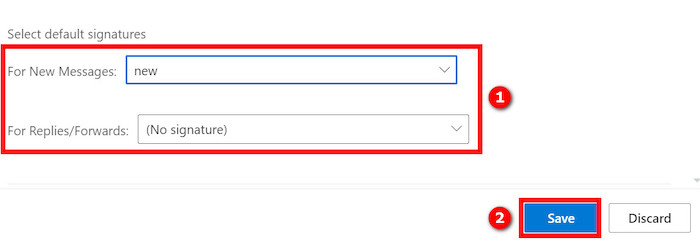
- Scroll below the Email Signature text box to see the “Select default signatures” section.
- Click on the drop-down beside “For New Messages” and select a signature name to add the signature automatically on all new emails.
- Click on the drop-down beside “For Replies/Forwards” and select a signature name to add the signature automatically on all forward or reply messages. It will result in a longer thread as your signature gets attached to every reply and might not be acceptable to some.
- Select Save to save the signature on your Outlook 365 account.
If you no longer want to add signatures automatically, you can return to the Email Signature option and untick the appropriate boxes.
Follow our easy step-by-step guide to fix Microsoft Outlook not connecting to server.
How To Manually Edit Signature In Outlook 365
There are two cases where you would add a signature manually to an email.
First, you don’t want to add a signature to all emails automatically and have turned the option off in the settings. You can add the saved signature manually.
Second, you want to add a different signature than the one saved (and probably configured to add automatically, in which case you’d be replacing the saved signature).
Here are the steps to manually add a signature to Outlook 365:
- Open Outlook 365 and go to your mailbox.
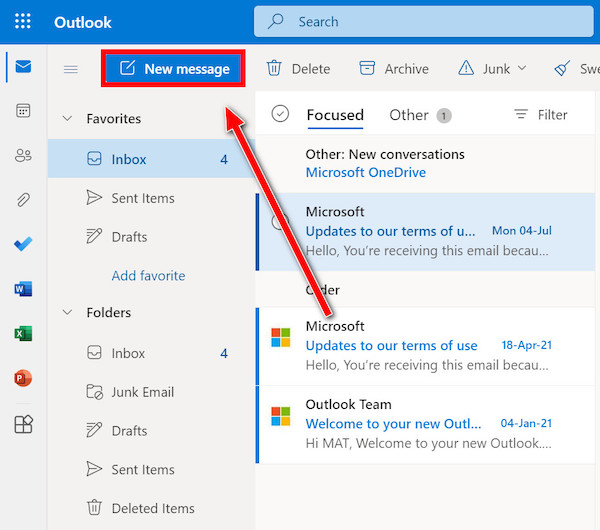
- Select New Message from the top-left corner.
- Type your message in the box.
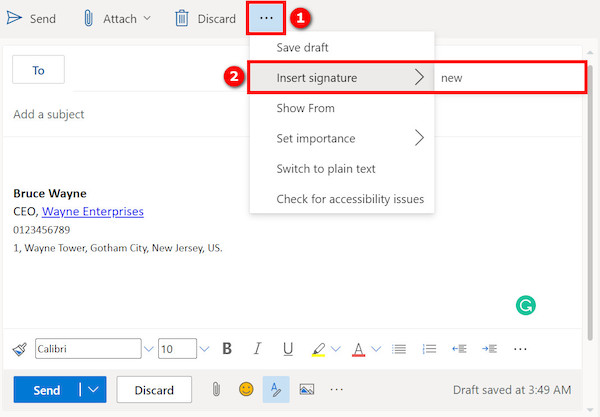
- Click on the three horizontal dots at the top-right corner > Insert Signature, then choose the signature name if you want to add from the saved signatures.
- Copy and paste the new signature directly in the message (and replace the saved one if it’s there) if you want to use a different signature than the one saved.
As you can see, manually inserting the saved signature or replacing it with a new one is not very complex.
But if you’re using the new signature frequently, copy-pasting the signature repeatedly is not very efficient. In such a case, it’s better to save the signature in Outlook 365.
How To Add An Email Signature To Outlook Desktop App
Outlook for Microsoft 365 desktop app is available as part of the Microsoft 365 subscription. If you have a subscription, you can install Outlook for Microsoft 365 as part of the Office 365 installation.
Once you have the Outlook for Microsoft 365 desktop app available (and activated), you can add the email addresses there and start adding multiple signatures.
Note: You must create signatures separately for the Outlook for Microsoft 365 desktop app and Outlook 365 web. The signatures are not cross-platform or don’t sync.
Follow the steps below to add a signature to Outlook for Microsoft 365 desktop app:
- Open a new email.
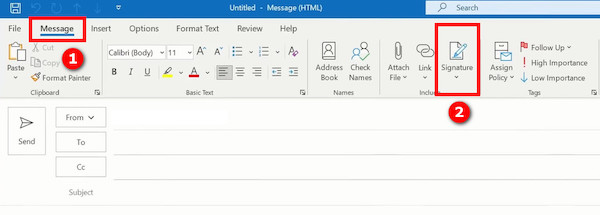
- Select the Message option from the ribbon menu above.
- Go to Signature > Signatures.
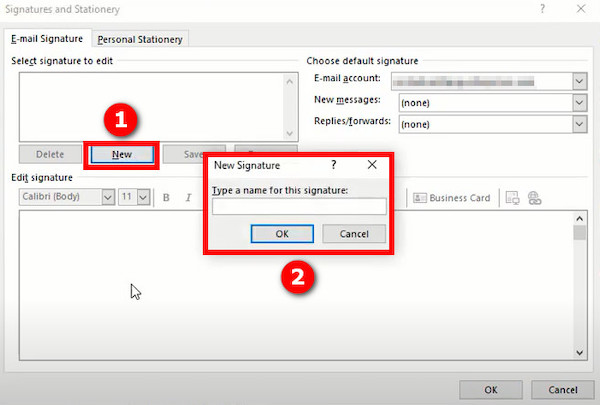
- Click on New under the “Select signature to edit” section.
- Give a name to the signature in the “New Signature” dialogue.
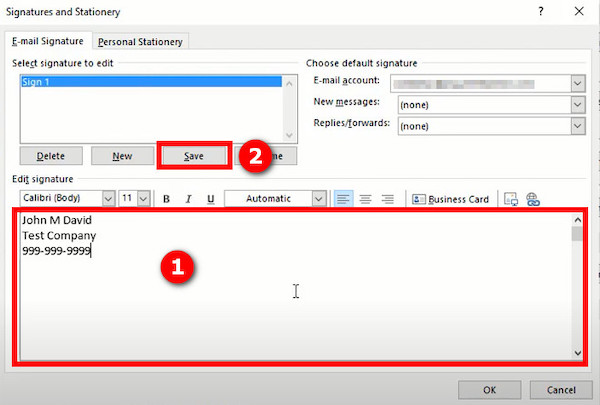
- Create your signature under the “Edit signature” section. Type in the signature and use the tools available on the top row to format text and add images/links. You can also paste a signature template in the box and edit the details.
- Expand the Email account drop-down box on the right, and select the email address to attach the signature.
- Expand the New messages drop-down box from the right, and select the signature to add automatically to every email.
- Expand the Replies/forwards drop-down box from the right, and select the signature to add automatically on every reply and forwards.
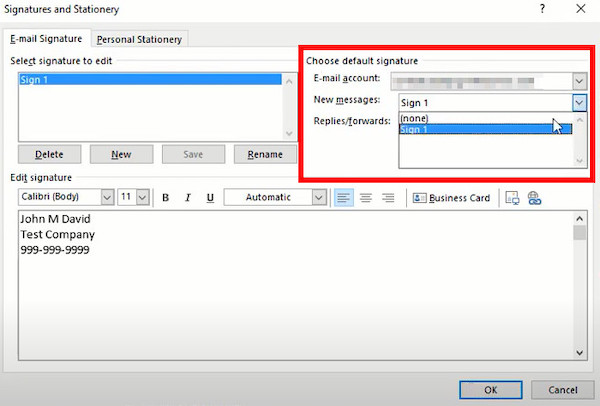
- Select OK to save the new signature and the options.
Your signature will be automatically added to every new email (if you have configured so), or you can manually add the saved signature to an email.
To manually add a saved signature on Outlook for Microsoft 365, select the Message option from the top, then click on Signature. A list of saved signatures will appear, and choose anyone from the list.
To change some information in the signature on the fly, right-click on your signature in the message box, select “Signatures…” and a popout window will appear.
Follow our guide step-by-step to add multiple emails to Outlook easily.
FAQ
Question: Where is the signature option in Outlook 365?
Answer: In Outlook 365 web, the signature option is accessible by clicking on the three horizontal dots > Insert Signature while composing a new email. In Outlook for Microsoft 365, signatures are accessible from Message > Signature.
Question: How do I edit my email signature in Outlook 365?
Answer: To edit your signature in Outlook 365 web, go to Settings > View all Outlook settings > Compose and reply > Email Signature.
Final Thoughts
Both Outlook 365 web and Outlook for Microsoft 365 are great options for managing and sending emails. Both of them have support for signatures.
Not only do they support signature, but you can also edit the signature using the given tools and add images or links. To make it visually more attractive, you can use templates from the web.
Both platforms also support adding the signature to automatically add to new emails and replies.