While Gmail is the most popular email platform nowadays, Microsoft’s Outlook is still used among top companies and business emails.

If you are new to Outlook, you might be confused about how to add a picture before sending an email to your boss.
While it’s not too complicated to follow the steps and add a picture to Outlook, I recommend being cautious because there’s no way to delete or undo an email if it’s sent with the incorrect picture.
If you send emails daily, don’t hesitate to move on to the next section immediately to learn something new.
How To Add Picture on Outlook Email
It’s important to note that Microsoft’s Outlook doesn’t allow you to attach or edit emails if your PC isn’t connected to the internet, so the first step is to check that. Since Outlook is available for both Android phones and Desktops, I will show the steps for both.
This article is going to focus only on Desktop, so check out our website for details regarding the mobile version.
Follow these steps to add a picture to Outlook email:
1. Insert Image as Attachment
As an email client, you can attach a limited number of documents or media in Outlook along with the message. This is not the quickest method available, but it has a 100% success rate.
If you have attached files in Outlook before, this should feel familiar.
Follow our guide step-by-step to add multiple emails to Outlook easily.
Here are the steps to insert an image as an attachment in Outlook Desktop:
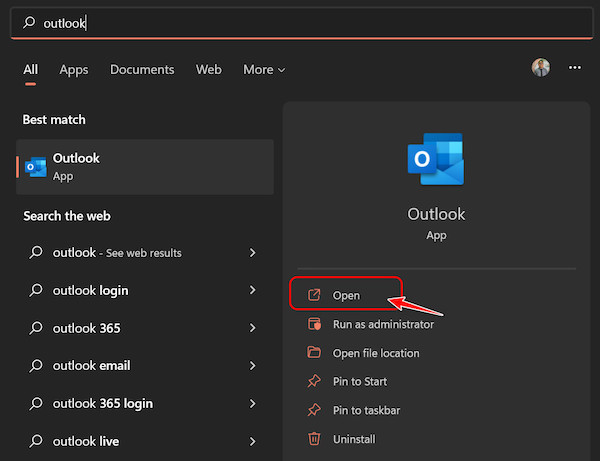
- Go to the Start menu, search for Outlook and launch it.
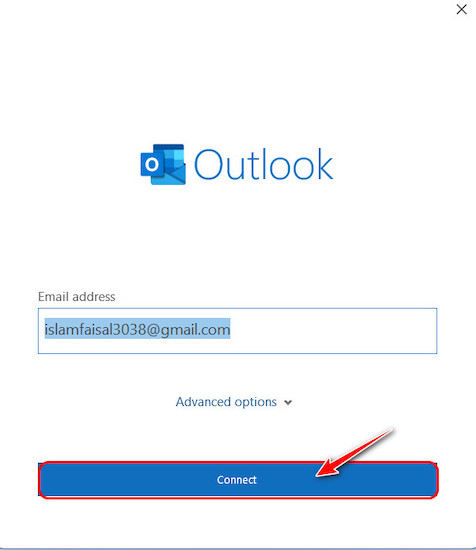
- Log in to your Microsoft account if you are not already signed in.
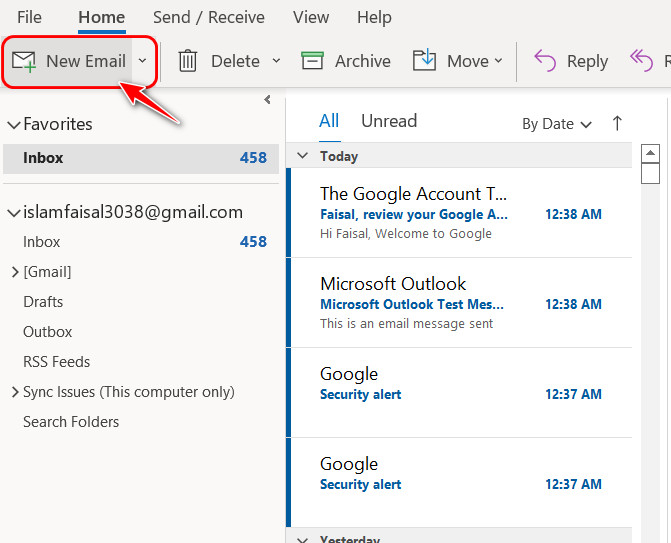
- Select the New Email button at the top left-hand corner to compose a new email.
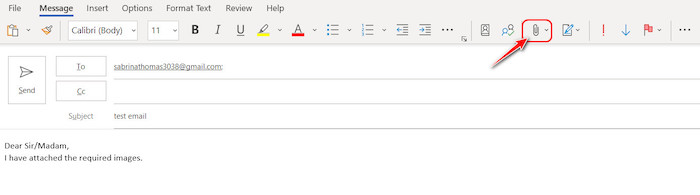
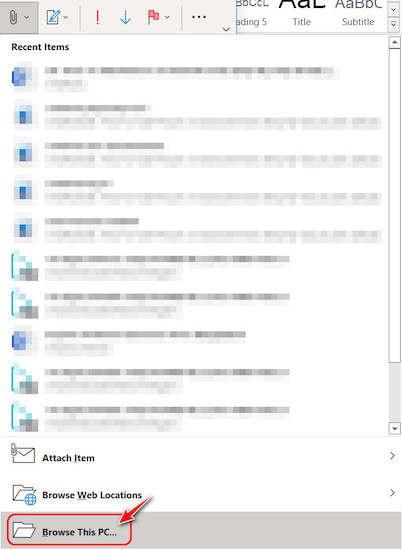
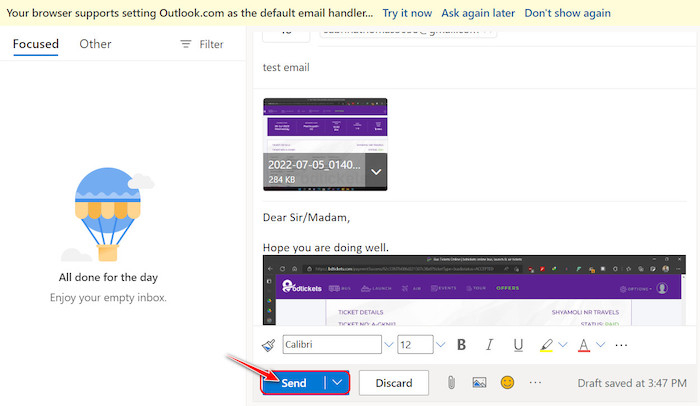
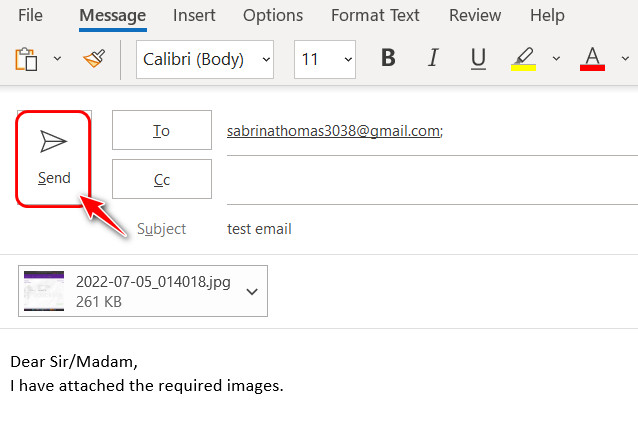
- Fill in the To, CC, and Subject fields, and type the message in the text area below. After that, click on the paperclip icon at the top right corner.
- Select Browse This PC from the list of options.
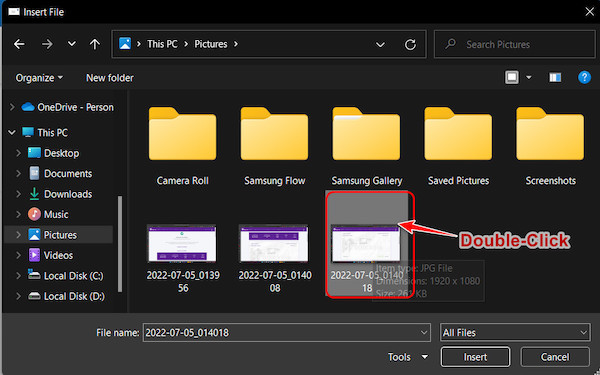
- Navigate to the location where you have stored the image and double-click on it.
- Click on the Send button at the top left corner once you have confirmed that the attached image and thumbnail are visible just above the email text.

After this, the recipient should be able to see the image along with the contents of your email.
If you prefer to use Outlook web instead, the steps are a little different since the design is very different.
Here are the steps:
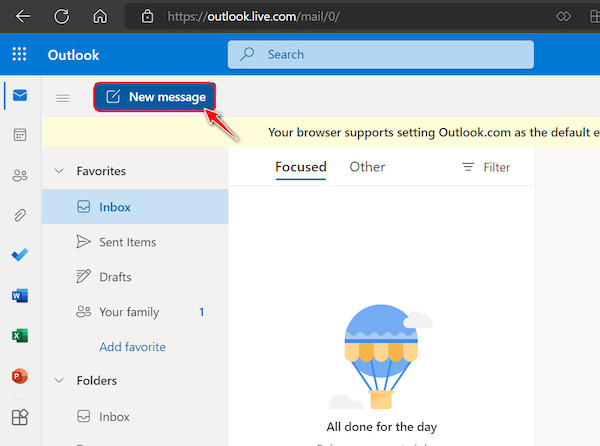
- Go to Outlook’s website and sign in to your account.
- Tap on the blue New Message button at the top left corner to start composing an email.
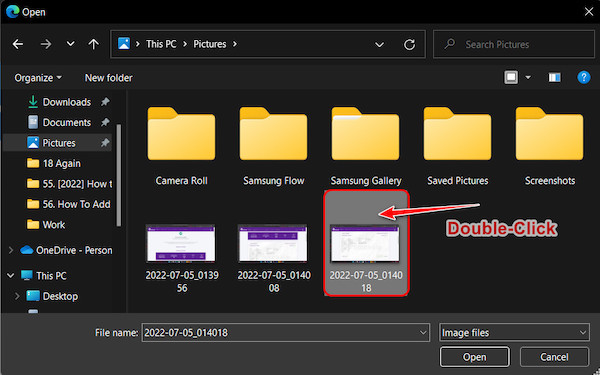
- Fill in the necessary fields and click on the tiny picture icon at the bottom, right next to the paperclip.

- Locate your picture on the File Explorer window and double-click on it.
- Wait for a while for the image to complete uploading. Note that this will insert the pictures in line with the text, unlike the Desktop
- Select the paperclip icon, and browse this computer button if you want to attach the images as attachments

- Double-click on the image as you did earlier by navigating to it.
- Check if the image appears above the email, just like the desktop Note that the thumbnail will be larger and more modern-designed in the web version. Click on the Send button once you are done composing the email.
Also, check out our separate post on add optional attendees in Outlook mac meetings.
2. Drag and Drop Picture
This method is faster, in my opinion, and I use it every day. However, one point to consider is that there might be some issues from time to time, meaning you might have to try it several times.
At other times, you might be unable to do drag and drop temporarily, so it’s not as stable as the previous method.
Follow these steps to drag and drop pictures in Outlook:
- Launch Outlook from the Start menu or Desktop.

- Click on the New Email button as you did earlier.

- Fill in all the required fields as you did earlier.
- Launch a File Explorer window and navigate to the folder where the picture is located.
- Select and drag the picture to the Outlook email window, similar to how you drag and drop files into folders.
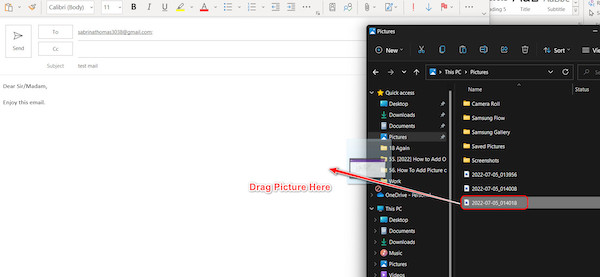
- Click on the Send button to finalize the email.
 As you have already seen, the web version of Outlook is more refined and modern, so if you want to use this method there, follow these steps:
 - Go to Outlook’s website from any browser.
- Select the New Message button as you did earlier.
- Launch a File Explorer window after you are done filling up all required fields.
- Locate the picture and drag it to the text area just below the subject Make sure you drop it in the area inside the rectangle as shown in the image.
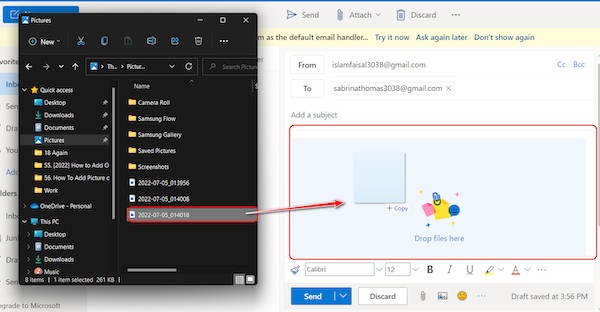
- Once you are done, click on the Send button to complete the process.
Follow our guide step-by-step to add Teams meeting in Outlook.
How to Put My Picture on My Outlook Emails
Most people nowadays receive more than a hundred emails daily, so how is someone supposed to know which one is from you? They could check the signature or the email address, but it’s time-consuming since you have to open the email.
The better choice is to include your profile picture with your email so that your recipient can immediately recognize your email and open it first.
Follow these steps to put your picture on your Outlook emails:
- Launch Outlook from your Desktop or Start Menu.
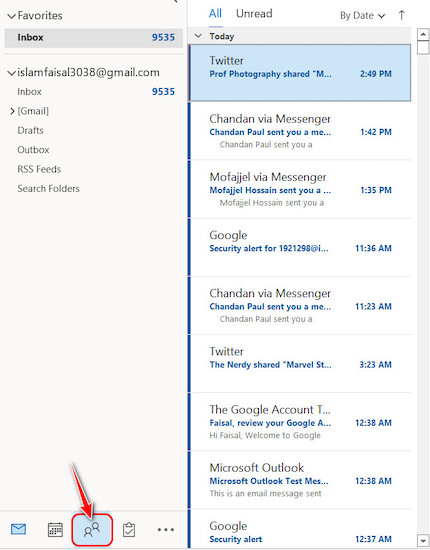
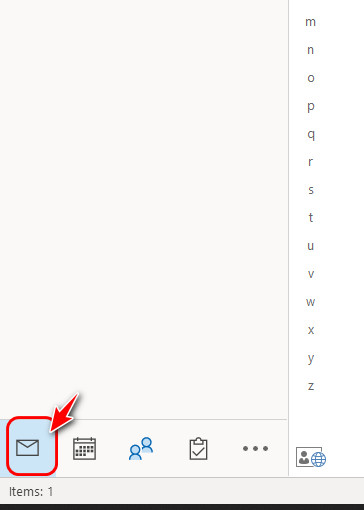
- Switch to the Contacts tab from the bottom left corner by clicking on the People
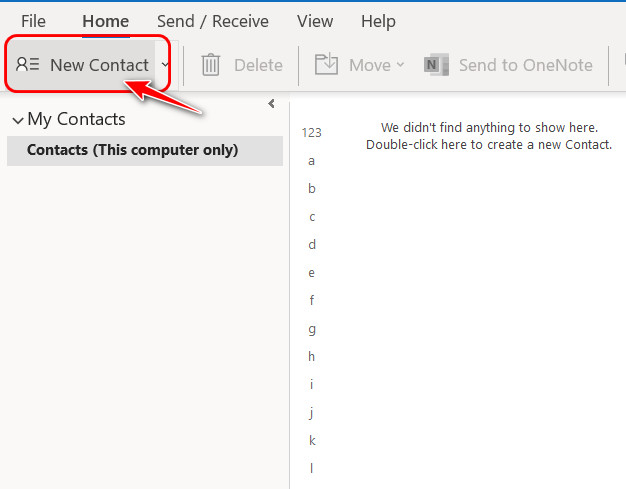
- Select the New Contact button at the top left corner to proceed.
- Type in as many details about yourself as you want and click on the picture
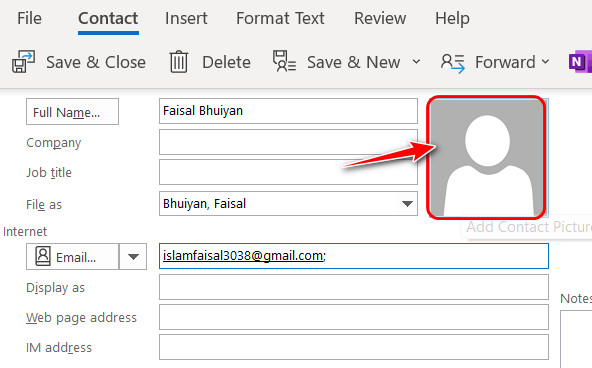
- Locate the picture you want to set as your profile picture and double-click on it from the File Explorer window.
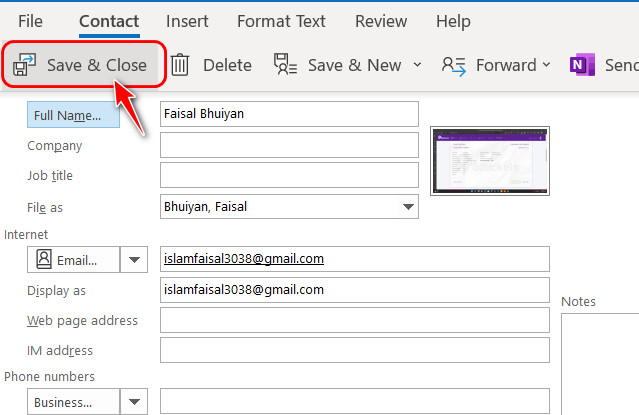
- Click on the Save and close button after that to save it as a contact in Outlook.
- Switch back to the Inbox by clicking on the Mail icon at the bottom left corner.
- Now, when you send an email, select this contact in the From text field.
Also read how to add someone to a distribution list in Outlook.
FAQ
Question: Why can’t I change my Outlook picture?
Answer: You can’t change your Outlook picture because you are having issues with your network connection. Apart from this, if your information, such as name, photo, and title, is managed by an organization, you won’t be able to change it yourself.
Question: How do I delete my profile picture in Outlook 2021?
Answer: You can delete your profile picture in Outlook 2021 by going to this link and logging in with your Microsoft account. Next, select the Change picture button below your profile. After you choose to Remove, the profile picture will disappear.
Question: Why is my Outlook picture not changing?
Answer: Your Outlook picture is not changing because there might be issues with your account syncing, most likely due to network issues. Other reasons could be because you have signed into Outlook with a Gmail or Yahoo email ID instead of Microsoft.
Question: How long does it take for Outlook’s picture to update?
Answer: It can take up to 24 hours for the Outlook picture to update. Since the Outlook profile is used in several different Microsoft applications, some apps may update quickly, whereas others will take their time.
Question: How do I remove photo from the email?
Answer: You can remove a photo from the email by clicking on the X button next to the attachment. Keep in mind that this is only possible if you are forwarding an email with attachments. You can’t remove the picture if the email has already been sent.
Final Thoughts
To conclude, I have shown you two reliable methods to attach pictures, including step-by-step guides for both the web and desktop versions of Outlook.
After that, I also showed how you could update your profile picture on Outlook so your recipients always know which emails are from you. I also created a separate article that focuses explicitly on the Outlook mobile app, so make sure to check that out.
Personally, I always use the second method to attach pictures or files to my emails, but I am curious to know how many people are like me.
So, Did you find the content useful? Make sure to comment down below.