Have you had one of your documents edited by someone else without mentioning where it has been edited? Do you want your edits and changes in check? It is all possible by the Track Changes option in Microsoft Word.
Track Changes is an excellent feature for collaborating with different editors on the same document.
If you want to keep track of the edits made to any document by yourself or by other people, Track Changes is the way to go. Using this feature is very simple and convenient once you grasp how it works, and this guide will tell you exactly that.
So, keep reading, as I will show you how to start using the Track Changes feature and the facilities it provides.
Read more on how to change language in Microsoft Word.
What Are Track Changes In Microsoft Word?
Track Changes is a feature in Microsoft Word that allows you to track the edits made to your document. You can also make comments and review changes made to the document using Track Changes. It makes working together on one document easy for several collaborators.
When you turn on track changes in Microsoft Word, you will see that any new edit made to the document is presented in a different format. This allows users to detect the changes easily.
The things that you can do using Track Changes are:
- See any newly inserted, replaced and previously deleted text or items.
- Check any changes in the format of the text.
- Review the changes made to your document and choose to accept or reject them.
- Make comments and reply to comments on changes made.
These facilities make Track Changes a powerful tool, especially if multiple editors exist for one document. You can perfectly sync with other people to edit your documents using Track Changes.
Track Changes needs to be turned on before it can start keeping track of your edits. The way of doing it is explained in the following section.
Look at how to turn on Track Changes to edit your documents with this great tool.
Find out how to use Microsoft Word read aloud.
How To Turn On Track Changes
You must first turn on Track changes to see all the new edits you or others make to your document. It is turned off by default, and you must set it on before you can use its features. You can use Track Changes from the Review tab in Microsoft Word.
Follow these steps for starting to use Track Changes in Microsoft Word:
- Open your Word document.
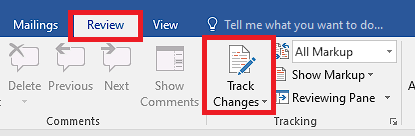
- Go to the Review tab and click on the Track Changes option.
After you turn on Track Changes, any edit made to the document will have a different format to denote that change.
The format of the new edits will depend on whether they are newly added text, replaced text or deleted text. Any changes to the original format of the text in the document will also be shown by turning on Track Changes.
The changes you will see after editing your document with Track Changes turned on are:
- Deleted text will be shown with a strikethrough line.

- Newly added text will have an underlined format.

- Replaced text will have a strikethrough, followed by the new edits with underlining.

- Format changes are shown in the comment section on the right side.

You can control the degree of presence of Track Changes to set what you will be seeing when you edit your documents with this tool. Find out all about showing and hiding Track Changes in the next section.
Here is the easiest guide to print in Microsoft Word.
How Can You Show Or Hide Track Changes?
After setting Track Changes in your document, you can manage if you will see the edits made to your document in detail within the lines of your document or if you just want a mark to denote the. You can also select which edits you want to see and choose to hide the Track Changes.
This is how you can show or hide Track Changes:
- Open your document in Microsoft Word.
- Go to the Review tab.
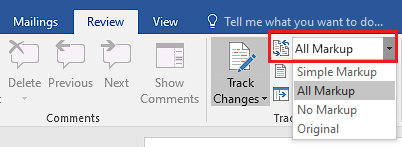
- Click on the Display for Review menu and select your preferred Markup style.
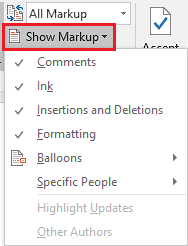
- Click on the Show Markup menu below and check on the changes you want to see.
When you change the Markup style, you will see a difference in the way Track Changes shows the edits made to your document.
Here are the types of Markup styles that you can choose:
- Simple Markup: This style doesn’t show the in-line edits made in your document. It only marks the changes by a line on the margin beside the text where changes have been made. Clicking on that line will let you see what has been changed.

- All Markup: It shows all the modifications on the lines of your document in detail at the places you made them.

- No Markup: This option will only show the edited document without denoting any changes made.
- Original: This will show you your document’s original version before edits were made after turning on Track Changes.
Quickly visit the links to find out how to double space in MS Word.
How To Accept Or Reject Changes
After turning on the Track Changes tool, you can review the modifications made to your document by others and choose to accept or reject those changes. Edits you accept will be added as a part of your original document, and rejected edits will be changed back to the original.
Here’s how you can accept or reject individual changes to your document:
- Open the document in Word.
- Place the cursor on the edited text.

- Go to the Review tab and click on Accept or Reject button to accept or reject the current edit respectively.
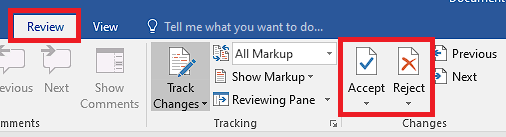
Other than accepting and rejecting the edits one by one, you can also click on the small arrow below the Accept or Reject buttons to accept/reject all the changes at once or to stop tracking after accepting/rejecting. 
Follow our ultimate guide if you want to fix Microsoft Word won’t open.
How To Add Or Delete Comments For Track Changes
When you are keeping track of the edits made to your document, you can also add a comment regarding the edits for you or anyone else to see. This can be quite helpful if you are trying to give some insight into the changes that have been made or should be made to your document.
Follow these processes to add comments to your Word document:
1. Add Comment From Review Tab
Here’s the way of adding comments to any Word document from the Review tab:
- Select the part of your document or place the cursor where you want to comment.
- Go to the Review tab and click on New Comment.
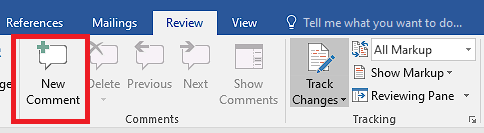
- Type your comment in the comment bubble that appears in the markup area.

2. Add Comment In The Text
This is how you can add your comment inside the text of your document:
- Select the part of your document or place the cursor where you want to comment.
- Use your mouse to right-click where you shall add your comment.
- Select the New Comment option.
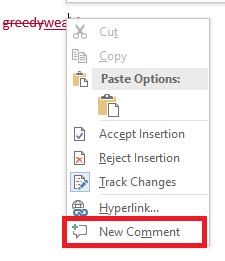
- Type your comment in the bubble.
The comments you insert into your document can be seen in bubbles appearing on the markup area (right side) of your currently opened document.
You can also delete the comments from your Word document.
To delete comments from your Word document, follow these methods:
1. Delete Comments Individually
Right-click on the comment bubble you want to delete from the right margin of your document and click on Delete Comment.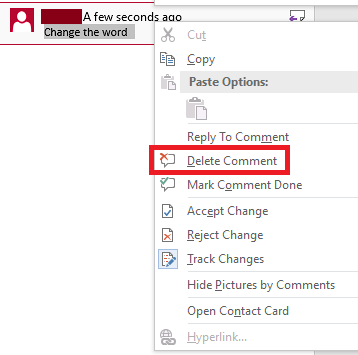
2. Remove Comments From Review Tab
Select the comment you want to delete with your mouse’s left click.
Click on the Delete button or Reject button from the Review tab to delete the comment that you have selected. 
3. Delete All Comments At Once
Click on the arrow below the Delete button in the Review tab. ![]()
Select Delete All Comments in Document. 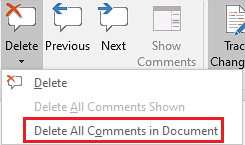
How To Resolve And Reply To Comments
If someone else has commented on your document, you can reply to that comment or mark it as resolved in the Microsoft Word app. Doing this is not very hard; you can do it from where your comments appear in your document and within the text where the comment has been made.
Follow this method to resolve or reply to comments in your Word document:
Right-click on the part of your text where the comment has been made or on the comment in the markup area. Then, click on Mark Comment Done or Reply To Comment to resolve or reply, respectively. 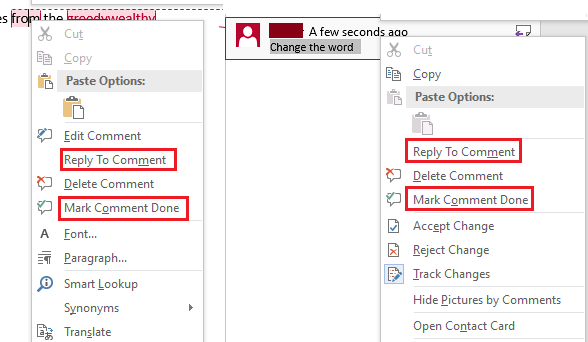
How Can You Open The Reviewing Pane To Track Changes?
The Reviewing Pane is a feature in Microsoft Word alongside Track Changes that presents all the edits made to your doc file in the form of a list on the left side. Accessing this list is a straightforward process. It has to be opened from the Review tab in the Word app.
To open the Reviewing Pane, click on the Review tab > the Reviewing Pane option. 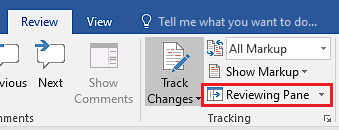
When you open the Reviewing Pane, you will see it appear on the left side of your Word document. You will see all the changes and comments on your document listed on it. 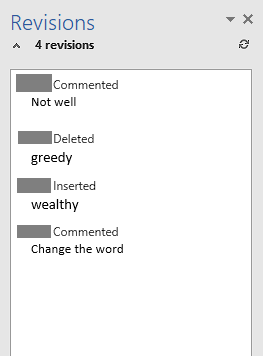
Opening the Reviewing Pane is not needed to use the Track Changes tools in Microsoft Word, but it sure helps to have all the edits and comments in your doc file shown at once, especially if the document is long.
Conclusion
Cooperating to edit a document has been made simple by the Track Changes function in Microsoft Word. Multiple people can work on the document in harmony with each by keeping track of each others’ changes using Track Changes.
After you go through this guide, you will learn everything about Track Changes and how to use the facilities it provides.