Wondering how to properly print a document in MS Word? Well, look no further. This article is going to help you master your printing skills by adjusting page size, grayscale, and number of copies.
There’s no doubt MS Word is one of the most used applications to date but people are so used to printing PDFs and other formats that they never used Word for the same thing.
Let’s let bygones be bygones, and go through the detailed steps to print in Windows 10 or Mac.
Without further delay, let’s begin!
Check our latest post on set different footer on each page in Microsoft word.
How to Print in Microsoft Word
There’s only one universal method you’ll need regardless of the document style. Sure, some options may vary depending on your version of Word but these are so small and insignificant that you don’t need to worry about them. The steps shown here should be enough.
Before trying anything out, make sure MS Word is installed on your rig and a printer setup is connected to your PC. Make sure to download the printer drivers too.
Here are the steps to print any document in MS Word:
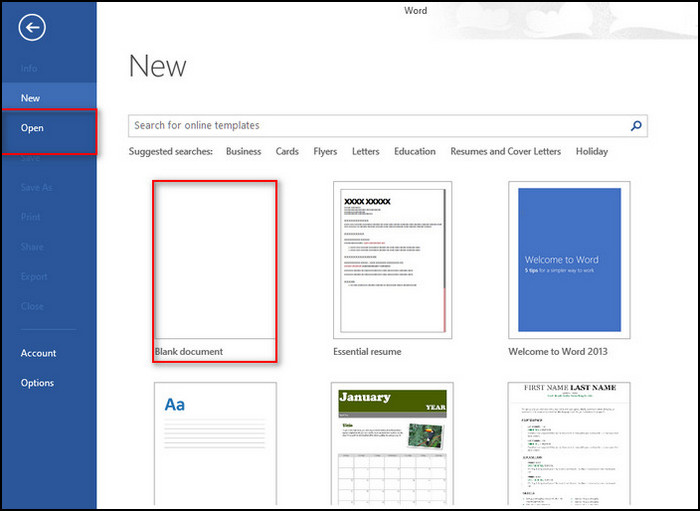
1. Open or Create an MS Word file
Open an existing Microsoft Word file or create a new one. Besides, You can easily search for your document in the search bar.
Read more on how to Microsoft Word Unlock Selection.
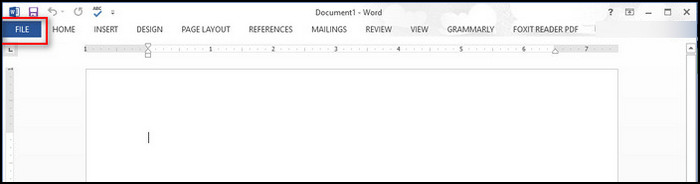
2. Move to the File section
After you open or create your file, click on the File tab. It’s in the upper-left corner of the menu bar.
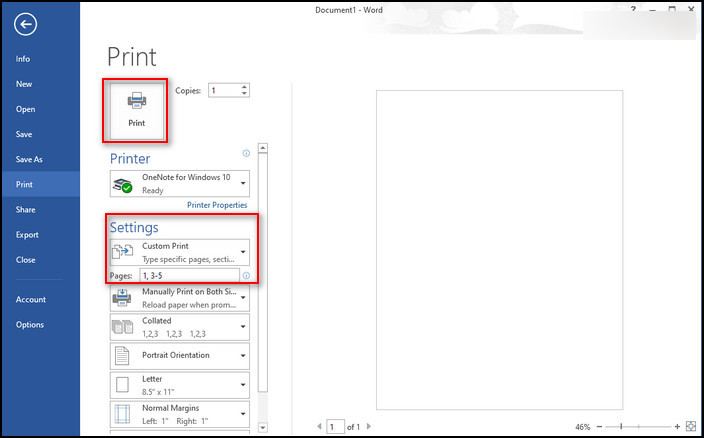
3. Open the Print box
Once you are in the option command window, click on the Print button, and the print dialog box will open.
Check out the easiest way to fix Microsoft Word find and replace is not working.
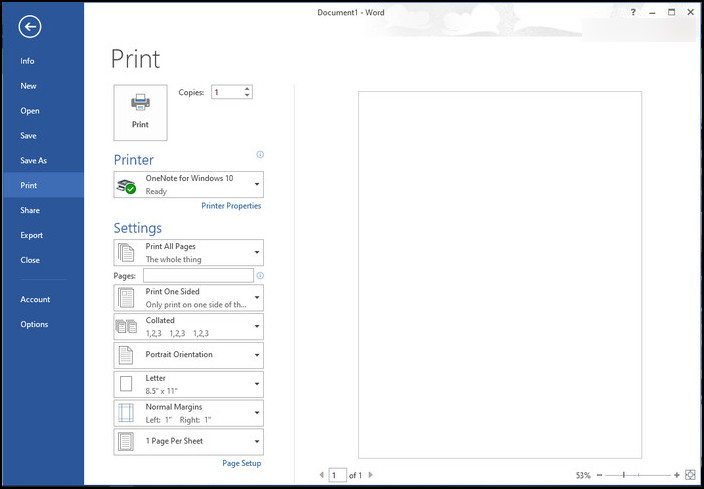
4. Select Printing Options
You will see some formats to make the layout cleaner and well arranged. You should tweak each of them to get the perfect output. If the text appears too small in the preview, you can use the bottom slider to zoom in.
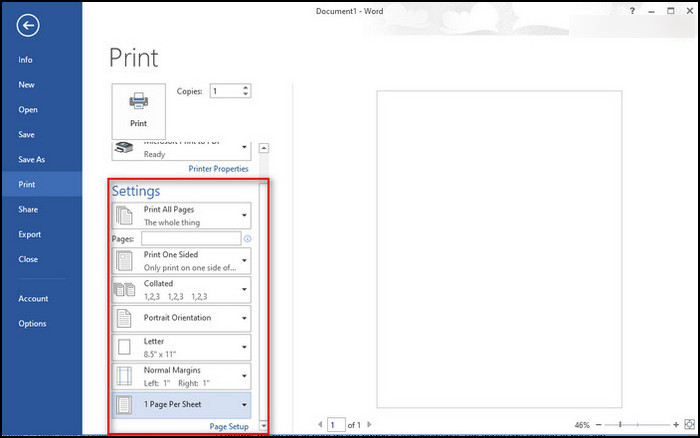
Here are the things to change in printer options:
When your default printer option displays any name, click on that name to choose your specific printer from the drop-down menu. Choose carefully to save as much toner as possible.
Set Number of Copies
You can choose how many copies you want. The default is typically 1; If you need more, you can increase the number of copies. Keep in mind that every copy will be identical.
Set Which Pages
A default will be set to print all the pages in the document. But users can choose to print the currently displayed page.
You can select any highlighted section, specific pages in the document and odd or even numbers of pages.
Set Size of Paper
Set your default paper size, like A4 or Poster, as per your requirement.
Set Number of Pages
Select the exact number of pages per sheet you need to print.
Set Orientation of the Paper
When you are about to print your desired document, make a proper orientation of the paper. Select either Portrait or Landscape.
Set Margins
You can adjust the top, bottom, left, and right margins with the labeled up and down arrow keys or by typing the numbers in the box.
You may also want to add headers and footers before printing. These can be your company logo or contact details as they will be replicated on every page. Read this separate post on headers and footers in Word to try out this feature.
Once you have configured the options available, simply click the printer icon to print it.
If you carefully follow the above steps, you’ll be able to change the printer option’s settings without hassle.
How to Print Double-Sided in Microsoft Word
MS Word also supports double-sided printing as opposed to the old fashioned printing on one side of the page. The simplest way to do this is by using a duplex printer. If that sounds expensive, you can print the documents manually on each page one by one.
If you have a duplex printer, you can print on both sides easily and quickly. Otherwise, you will have to be close enough to flip the paper when it’s time to flip to another side.
Here are the methods to print any document double-sided in MS Word:
Method 1: Print With a Duplex Printer
You can print any document on both sides using a duplex printer. It saves time and manages work easily.
Here are the steps to print with a duplex printer:
- Open the Word document.
- Select the File tab.
- Choose Print.
- Select the Printer at the top if necessary.
- Click on the second drop-down box.
- Choose one of the Prints on Both Sides.
- Make other changes if necessary.
- Click on the Print button, and you’re done.
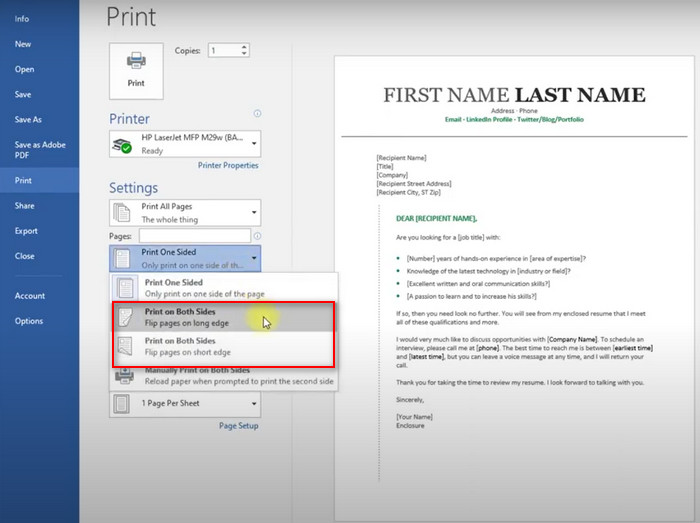
If you cannot see the Print on Both Sides option, your printer doesn’t assist with duplex printing.
Find out how to fix Microsoft Word Ctrl+Z not working.
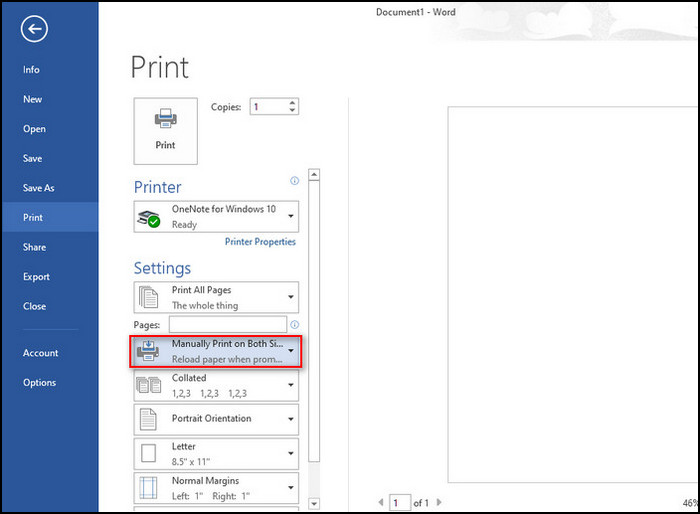
Method 2: Print Double-Sided Manually
If your printer only supports one side print, you’ll have to flip them over at that time and then print the rest of the pages.
Here are the steps to print document double-sided manually:
- Select the File tab.
- Choose Print.
- Pick Manually Print on Both Sides from the second drop-down box below settings. Word will prompt you a message when it’s time to flip the pages.
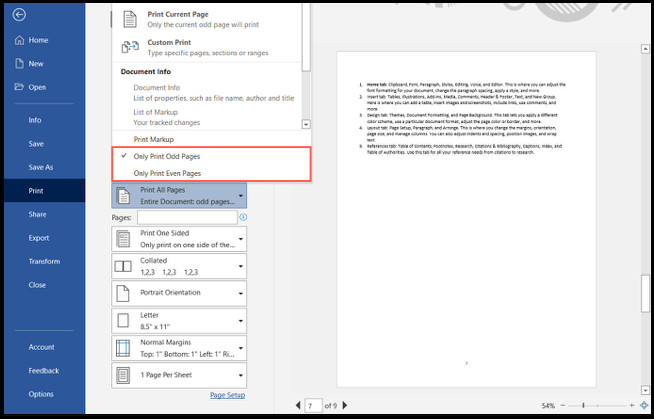
Alternative Way
- Use the first drop-down box under Settings.
- Choose either Only Print Odd pages or Only Print Even Pages.
- Perform other necessary adjustments.
- Click on the Print button.
When your set-up pages finish printing, just flip the pages and insert them again. Sometimes you may also need to rotate the pages depending on your printer.
How to Print a Custom Document in MS Word
Sometimes it is unnecessary to print out the whole document. In that case, custom printing can solve your issue within seconds. MS Word can ignore certain pages and send the rest to the printer for printing, as long as you have configured the right options.
If you are willing to print several pages or a range of pages, MS Word will always allow you to define which pages you would like to print. You just have to separate them with a comma.
Here are the steps to custom print any document in Microsoft Word:
- Navigate to the Print Pane.
- Enter the page number you want to print in the pages field.
- Click on Print.
In case you see the document is not printing as you want, you might need to adjust some of the page layout settings.
How to Turn Off Markup in the Print Settings
The simplest way to print any document without any comment is by heading toward your print settings.
Here are the steps to turn off markup in the print settings:
- Click on the File tab.
- Select Print.
- Click on the box just below the Settings drop-down menu, where you should see the pages you can print.
- Head towards the bottom of the list and select the Print Markup button to deselect it. Checkmark next to it will disappear.
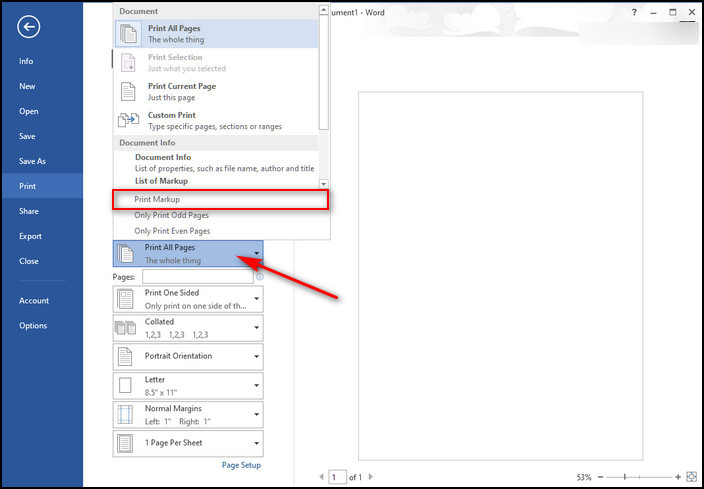
Markup and comment indicators should be gone when you look at your print preview on the right. It will not affect them displaying in your existing document, and they won’t appear in your printed document.
How to Turn Off Markup in MS Word Document?
If you remove or disable the markup and comments in your document, it will increase your productivity. This will not remove those items, but it will hide them for some time.
Here are the steps to turn off markup in MS Word document:
- Go to the Review tab and Tracking section of the ribbon.
- Click the drop-down box at the top of that area. This either shows All Markup or Simple Markup.
- Select the No Markup option.
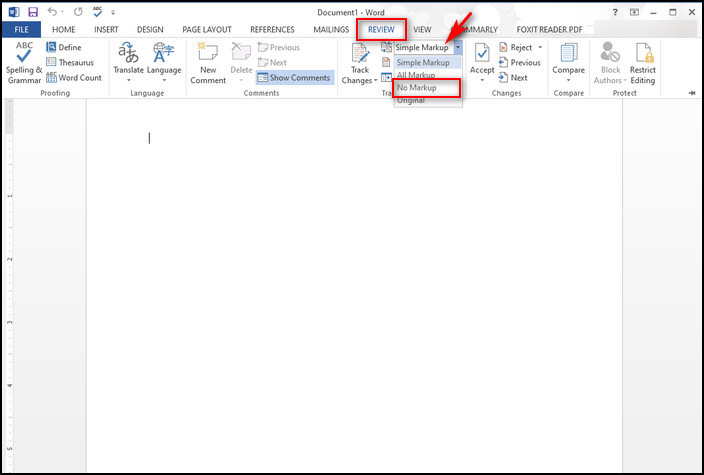
At that moment, all tracked changes and comments will be vanished from the document at that moment.
- Head towards the File Section.
- Select Print whether you’re ready to print your document.
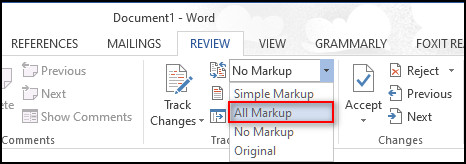
You can re-enable the markup and comments when you’re done with your print.
- Head towards the Tracking section.
- Click on the Review tab.
- Click on that drop-down box two times.
- Select All Markup or Simple Markup; it depends on your choice.
FAQs
Can I choose which pages not to print in MS Word?
Yes, you can choose the specific pages in your MS Word document you do not want to print.
Is there any shortcut to access MS Word’s Print Panel?
Yes, there is a shortcut to quickly enter the Print panel in MS Word by hitting Ctrl + P without having to open anything with your mouse or cursor.
Can I use any printer to print an MS Word document?
It is possible to print an MS Word document on any printer as long as it prints quickly, provides a quality result, and utilizes high-quality ink that creates legible ink.
How to print multiple pages on one sheet in Microsoft Word?
In MS Word, you can print up to 16 pages on a single sheet by specifying the number of pages per sheet in the settings of the print panel.
A Final Thoughts
After reading this article, now you know how to print any document in MS Word.
To sum up, you can modify settings simply by configuring the options: setting the number of copies to print, set which pages to print, the size of the paper, the orientation of the paper, and many more.
I am sure this article answered all your queries and helped you to print your essential document in Microsoft Word without any difficulties.
Good Luck!