Many MacBook Users have faced quite a dilemma recently. When connecting an external SSD to their Mac, it doesn’t show up. Somehow or other, the Mac was unable to detect the external SSD.
There might be various reasons why you are facing the problem of SSD detection. Some of them are credited to hardware and connection issues, while others might be due to software incompatibility.
If you have encountered the said problem on your Mac, there is no need to look further because here I am going to state some quick solutions that you can count on.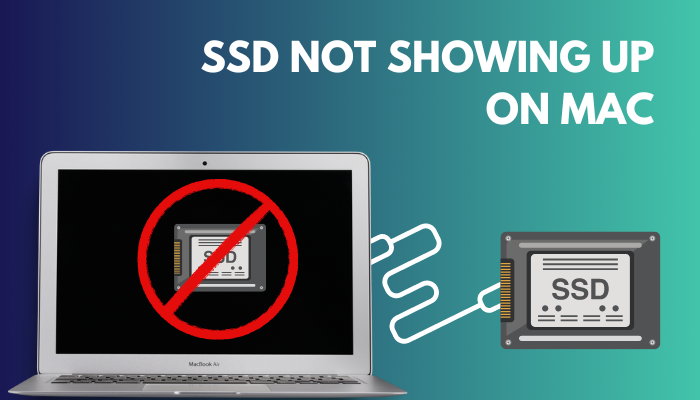
I recommend reading this article until the end to understand and apply the solutions to your Mac properly.
Without further ado, let’s get started.
You may also like to read about fix SSD keeps filling up.
Why is My SSD Not Detected on Mac?
Your SSD might not be detected on your Mac because of a damaged cable or port, incorrect insertion of SSD to your motherboard, uninitialized external SSD, etc. Additionally, an unrecognized file system might also be the reason. If your SSD storage gets infected, it won’t show up.
The most common reason is the damaged port or cable. If you are using a SATA SSD drive, your SATA cable might be damaged. For an M.2 SSD, your M.2 slot might be clogged due to dust or other materials or even get damaged. This hampers the SSD connection with your system.
One thing you need to do always before connecting a new SSD is to initialize it. Without going through this process, your external SSD might not work as intended.
What tops all of these reasons is a physically damaged SSD. If the SSD itself is damaged, there is nothing you can do in the software settings to fix it. In such cases, looking for an expert is the only solution.
Related contents you should read about how to install a second SSD?
How to Fix External SSD not Detecting on Mac
Fixing the SSD not being detected requires some easy steps as well as some hard-to-follow ones. The solution process depends on the severity and the reason why the problem occurred in the first place.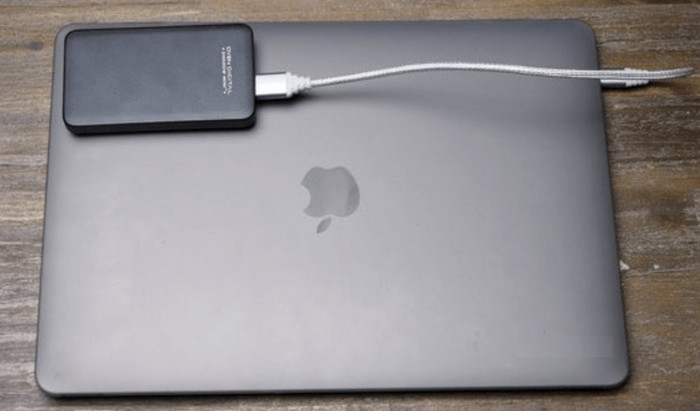
Here’s what you have to do to fix External SSD not Detecting on Mac:
1. Insert SSD Properly
When encountering a problem, you should first check if the connection is proper and stable. An incorrect or loose connection may cause other problems alongside the device not getting recognized.
In the case of a SATA SSD, you must check whether the cables are tightly connected to the SSD or not.
For M.2 SSDs, the part where you need to connect your SSD to your motherboard should have a lock system. Check if you locked the storage with the motherboard properly. It should not be able to move once the device is locked in place.
In case your connection has no fault, try applying the next method.
Related guide about how to move files from SSD to HDD?
2. Check the Cables and Port
Another important part is checking if your Mac does not recognize your SSD. It happens when the cables get damaged if twisted or because of high temperature. Leaving it unused for a long time might also ruin it.
So, before connecting the SSD to your system, check the wires and cables properly with a multimeter using the wire checker mode or simply measuring the wire’s resistance. The meter reading will be zero for any broken or disconnected wires.
The motherboard port where the cables connect also needs to be inspected. Specks of dust, bugs and other particles might clog it quite easily. So, you may need to clean it.
Some more guide on how to delete partitions on SSD?
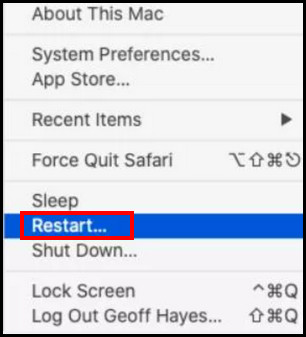
3. Do a Restart
Miraculously, restarting your system sometimes does the trick. So, before diving into making changes to the system, it is mandatory to do a restart.
Follow the steps below to do a restart:
- Click the Apple icon located at the top left corner of the screen.
- Find Restart among the options and then click on it. The Macbook will shut down momentarily.
- Wait for a few minutes, and it will start.
- Now, check if the SSD is detected or not.
This should solve most users’ problems. But if it does not work for you, you need to try the next fix.
Also related to this guide about use unallocated space on SSD.
4. Use the Disk Utility
Mac has a software named Disk Utility that resolves a wide range of issues pretty easily. You should try the disk utility to solve your SSD detection problem.
Follow the steps to use the disk utility:
- Open your Applications and find Utilities. Select Disk Utilities and then click on View.
- Select Show all devices. You should see all the SSD on the left panel.

- Click on Volume and then Unmount the SSD. Check if the problem is gone or not.
In case you cannot unmount the SSD, you need to proceed to the next solution.
Read more on how to use an Internal SSD for External Storage?
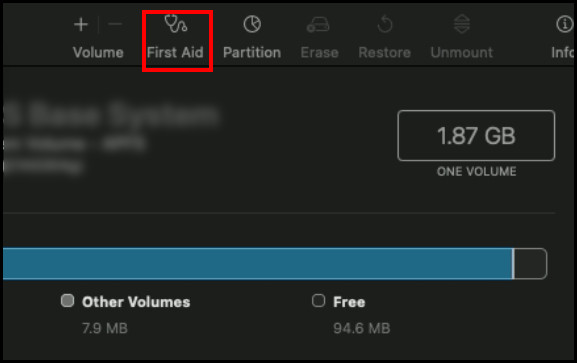
5. Use the First Aid Feature
The First Aid feature from Disk Utility has solved this issue for a large number of users. So, it is worth a try.
Follow the steps to use the First Aid feature:
- Open your Applications and find Utilities. Select Disk Utilities and then click on View.
- Click on the First Aid option at your screen’s top middle portion. This will open the First Aid feature.
- Look for any errors after the First Aid does its job. Any error here signifies corrupted files in the SSD itself.
- Delete the corrupted files, excluding the most important ones.
6. Format Unrecognized External SSD
Formatting your SSD and turning it into a compatible format might let your Mac detect the SSD. So, why not give it a shot?
Follow the steps to format unrecognized external SSD:
- Open your Applications and find Utilities. Select Disk Utilities and then click on View.
- Select Show all devices. You should see all the SSD on the left panel.
- Click on the device, and you will see some more options.
- Choose Erase from the top menu bar and select format. Remember that the format needs to be compatible with your Mac else your SSD will remain undetected.
This should help some users to solve the detection issue. But if it does not work, you must follow the next method.
Also read, fix Microsoft Teams error 2:211 on Mac.
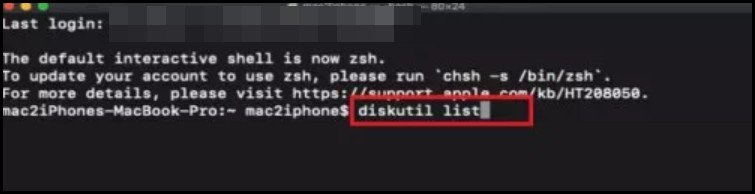
7. Use the Terminal
The terminal is like the command prompt of the Windows system. Here you can type the necessary commands and execute them in order to meet your needs.
Follow the steps to use the Terminal:
- Click the Launchpad icon in the Dock. Then type Terminal in the search field.
- Select Terminal from the results. This will open the terminal.
- Type diskutil list in the Terminal and press Return. Wait for the process to finish.
- Get the SSD identifier and type diskutil verifyVolume SSD_ID in the Terminal. Press Return when done.
- Fix the SSD if it is corrupted by using the command diskutil repairVolume SSD_ID. Wait a few minutes till it is finished.
- Close the terminal and check if the problem persists or not.
These steps might sound technical, but if you can execute them properly, your SSD will show up in no time.
Check out the easiest way about how to recall email in Outlook for Mac?
8. Contact Hardware Experts
This would be your last resort if none of the fixes above worked for you. It would also imply that your SSD has no software issues, nor does your Mac. Rather the culprit is your SSD’s hardware.
This is not possible for normal users to physically fix the SSD. I recommend you check your SSD warranty and send it to the warranty if the time period is not over.
In case the warranty is over, you will need to send your SSD to an expert for repair. Often the repairs do not work. Buying a new SSD is your salvation in that situation.
Follow our guide to fix can you play Steam games on Mac?
FAQs
Why is my SSD not detected on Mac?
The reason your SSD is not detected might be a simple connection issue due to a damaged port and cables to a damaged SSD device.
How do I get my Mac to recognize my external SSD?
Apple has integrated a useful utility named Disk Utility. You can use it to repair your SSD. It can easily be accessed from your Terminal or from the Application list. This is how you can get your Mac to recognize your SSD.
How do I initialize a new SSD Mac?
To initialize a new SSD, you need to open Disk Utility first. Then click on the device, select the partition option and complete the process following the on-screen instructions.
Final Thoughts
For any user, being unable to detect an External SSD is a serious issue. It might indicate the damage to your SSD and its precious data. I described the 8 quick fixes above for your convenience. If you follow them correctly, you will be able to quickly solve the problem.
In case you have any questions regarding any part of the solutions, feel free to contact me. You can do so by using the comment section located below.