The Poll feature allows users to create polls, gather feedback, and make decisions collaboratively right from their email client. Whether you’re trying to set a meeting time or gather feedback on a project, this feature simplifies the process.
However, If you’ve ever found yourself unable to create polls or faced with unresponsive poll features in Outlook, don’t worry.
Because in this article, I’ll provide the steps to troubleshoot the polls not working issue and help you regain control of this feature.
Why Can’t You Insert a Poll in Outlook Email?
You cannot insert a poll in Outlook email because an administrator in your organization has turned off the send polls and collect responses option. You need to open the Microsoft 365 admin center, and enable Send a link to the form and collect responses from External Sharing.
After turning on the send polls and get answers option, if you still cannot add polls to Outlook emails or the poll option not showing, there might be a problem with your MS Office or Outlook files.
Here’s why you cannot insert a poll in Outlook:
- Outlook data files are corrupted.
- Microsoft Office files are damaged.
- Outdated Outlook cache data.
- Misconfigured or damaged Outlook profile.
- Old Outlook version.
Now you know why you cannot embed a survey in an Outlook email, let’s see how you can fix the poll not working issue and add polls to your emails. Not just surveys; you can also embed videos in Outlook email.
How to Fix Polls Not Working in Outlook
Your polls will not work in MS Outlook if you or an admin in your organization has disabled the option to send polls and collect answers. To resolve this issue, check the Send a link to the form and collect responses option from External sharing in the Microsoft 365 Admin Center.
Also, Scan with Microsoft Support and Recovery Assistant helps detect and fix issues with the Polls feature. Additionally, creating a new Outlook profile and repairing data files resolves problems with corrupted email storage, which causes the polls to stop working.
Here are the methods to fix Polls not working in Outlook:
1. Enable Polls in Outlook
You need to check the Send a link to the form and collect responses option from the Microsoft admin center to use polls in Outlook.
Here’s how to enable polls in Outlook:
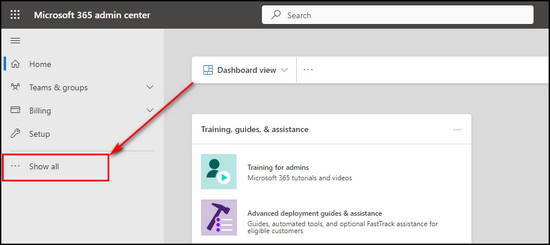
- Visit the Microsoft 365 admin center and sign in with your admin account.
- Click on Show all from the left menu.
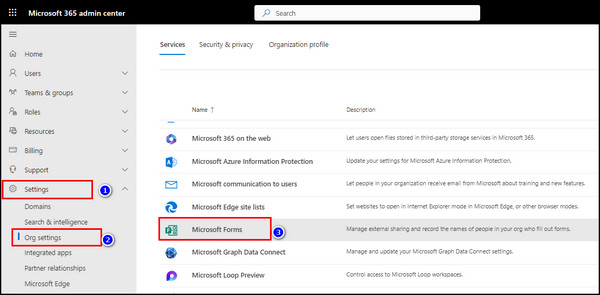
- Select Settings > Org settings.
- Choose Microsoft Forms.
- Put a checkmark on the Send a link to the form and collect responses option from the External Sharing section.
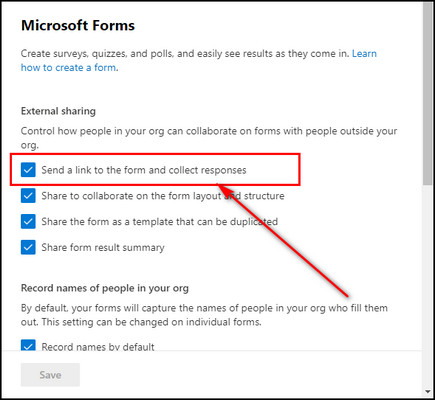
- Click Save to apply the changes.
Now, the poll feature will work in Outlook, and you can also add polls in Microsoft Forms & Teams.
2. Repair Outlook Data Files
Outlook uses data files (PST for POP accounts or OST for Exchange/IMAP accounts) to store emails, contacts, and other data. If these files are corrupted, it can make the Polls option disappear.
Use the built-in Microsoft Outlook Inbox Repair Tool (ScanPST.exe) to scan and repair corrupted Outlook data files. You can find this tool in your Office installation directory.
Here are the steps to repair Outlook data files:
- Close Outlook in case it’s running.
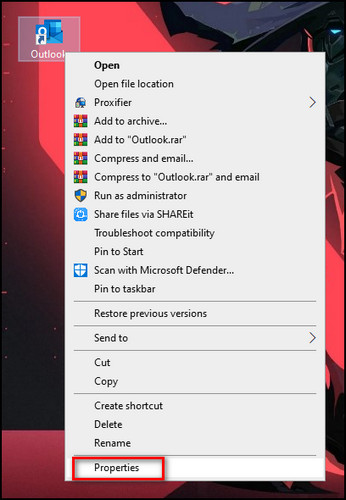
- Right-click on the Outlook shortcut and choose Properties.
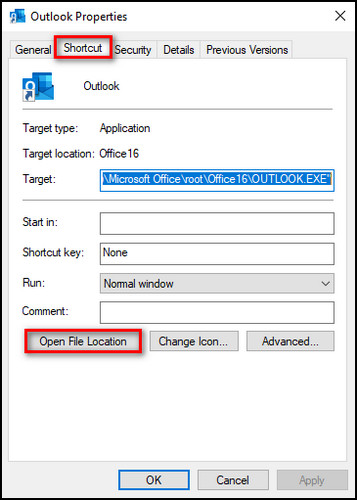
- Open the Shortcut tab and choose the Open File Location option.
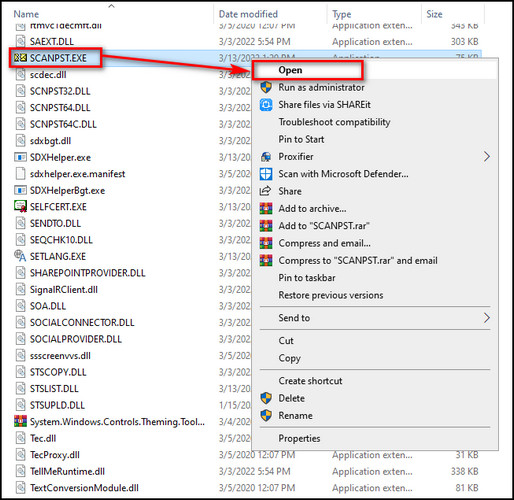
- Run SCANPST.EXE, and the Microsoft Outlook Inbox Repair Tool will open.
- Click on Browse and proceed to the following directory:
C:\Users\[your username]\AppData\Local\Microsoft\Outlook.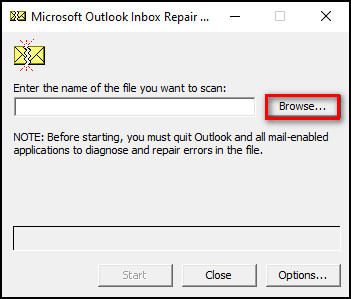
- Select the profile you want to repair and click Start.
- Wait for the scanning process to complete and click OK.
3. Repair Office 365
Sometimes, the poll option not showing in Outlook 365 can be attributed to problems with the entire Office suite. Repairing the Office application can help resolve any shared components that may affect Outlook’s functionality, including missing voting buttons.
Here’s the process to repair Office 365 files:
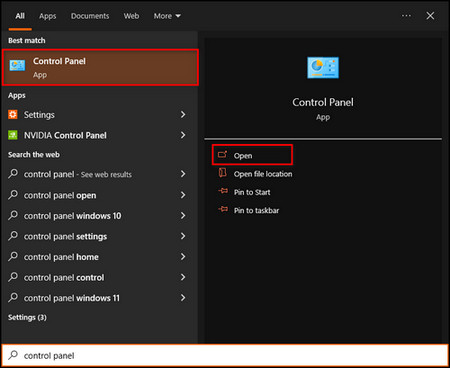
- Search for Control Panel and start it.
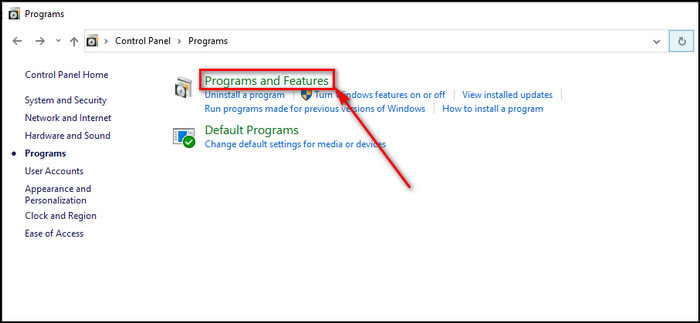
- Click on Program > Programs and Features.
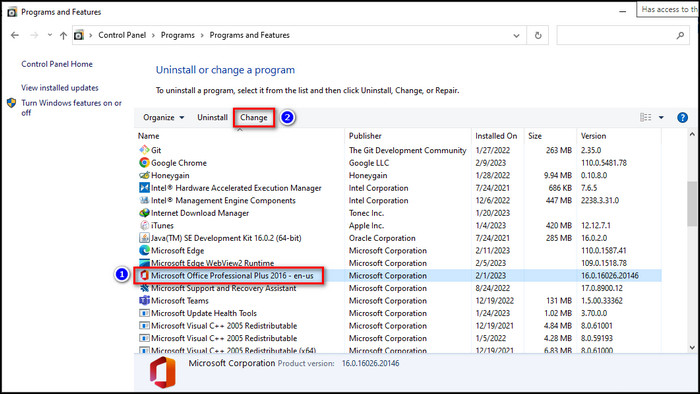
- Right-click on Microsoft Office or Microsoft 365 Apps for enterprise and click the Change button.
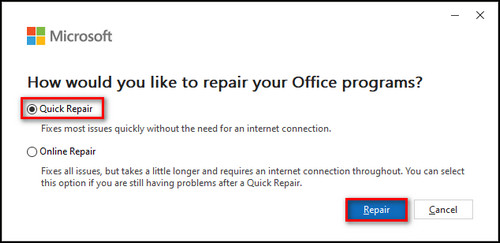
- Choose the Quick Repair option and click on Repair.
4. Clear Outlook Cache
Cached data in Outlook can sometimes become outdated or corrupted, which stops the poll option from working correctly. Clearing the cache in Outlook can help refresh its data and resolve polls-related problems.
Follow the steps below to clear the Outlook cache:
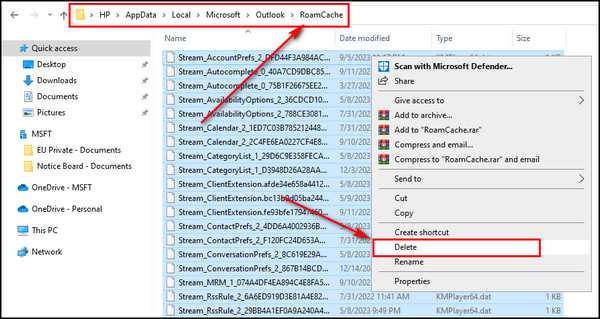
- Press the Windows + R keys to start the Run program.
- Enter %localappdata%\Microsoft\Outlook in the text box and click OK.

- Open RoamCache, select all the files, and remove them.
5. Create a New Outlook Profile
Your Outlook profile stores settings, email accounts, and other configuration information. If it becomes corrupted or misconfigured, it can lead to the Polls feature not showing.
Create a new Outlook profile and configure your email accounts within it. This will start with a fresh profile, which can often resolve issues related to profile corruption and restore the poll functionality.
To create a new Outlook profile:
- Stop Outlook from running in the background.
- Open the Control Panel.
- Input Mail in the search box on the top right and select it.

- Choose Show Profiles and click on Add.
- Choose your new Outlook profile and click OK.
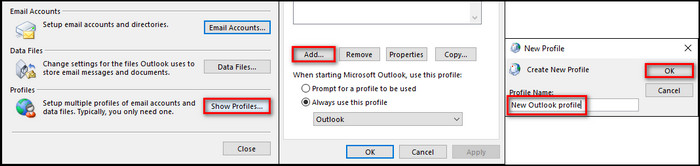
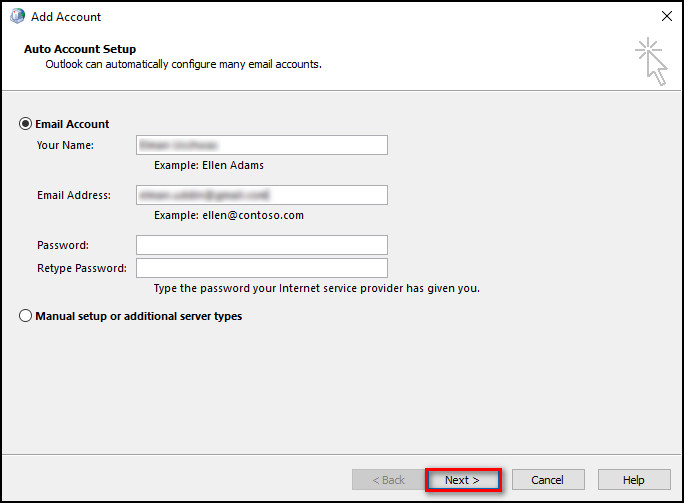
- Enter the profile name, email address & password, and click Next.
- Select Outlook, put a checkmark on Always use this profile, and click OK.
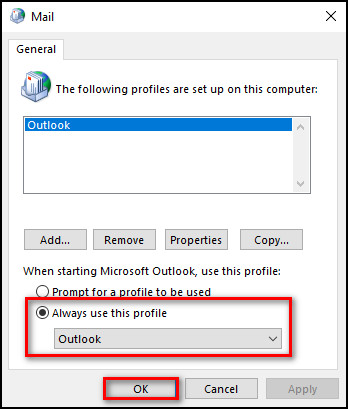
- Launch Outlook and it’ll start with the profile you’ve just created.
This process will establish a new profile and resolve the poll option not showing in Outlook 2016 & other versions. To prevent confusion, remove your old profile.
6. Disable Browser Add-ons or Extensions
Sometimes, 3rd party add-ins conflict with the poll feature in Outlook and cause it to not work as it is supposed to. These extensions can even make the poll option go completely missing.
When that happens, you have to open Outlook in Safe Mode so no add-ons start to run. Then, disable the extensions that are causing problems with the poll functionality.
Here’s how to disable browser add-ons or extensions:
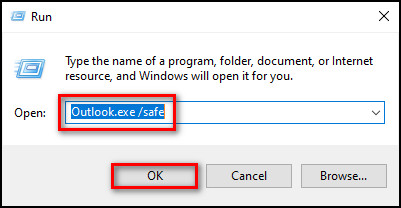
- Right-click the Windows icon and choose Run, or press Windows + R on the keyboard.
- Input Outlook.exe /safe, press Enter, and Outlook will open in safe mode.

- Select File and go to the Options tab.
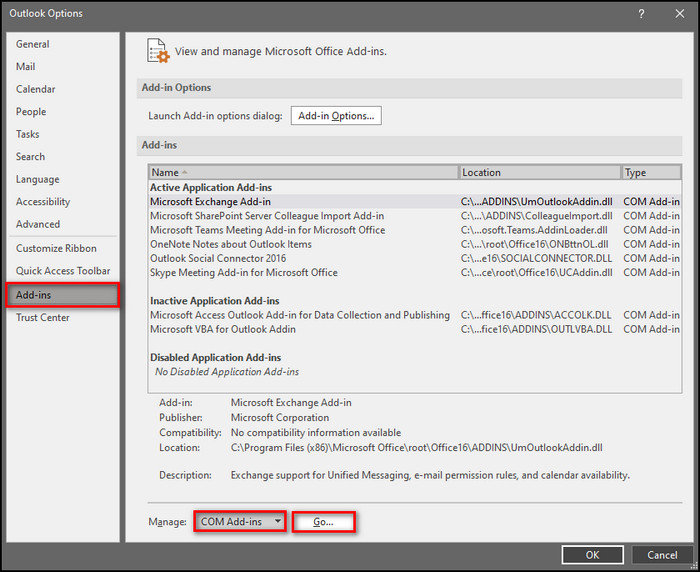
- Go to the Add-ins tab, choose Com add-ins beside Manage, and click on Go.
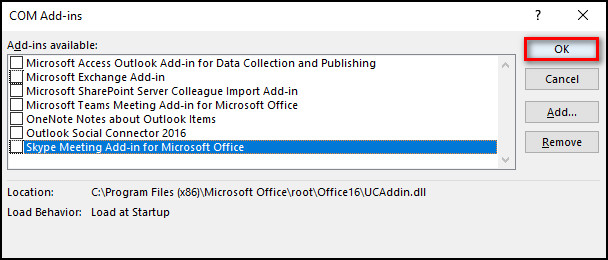
- Remove checkmarks from all the add-ins and click OK to save the changes.
Now, start Outlook normally, and you’ll be able to add polls to your emails without issues.
7. Update the Outlook App
Outdated software can have compatibility issues and may not support newer features or functions like polls. Especially, You cannot use Scheduling Poll in Outlook, as it is a relatively new feature.
Updating Outlook ensures that you have the latest bug fixes and features.
Here are the steps to update the Outlook app:
- Open Outlook on your device.
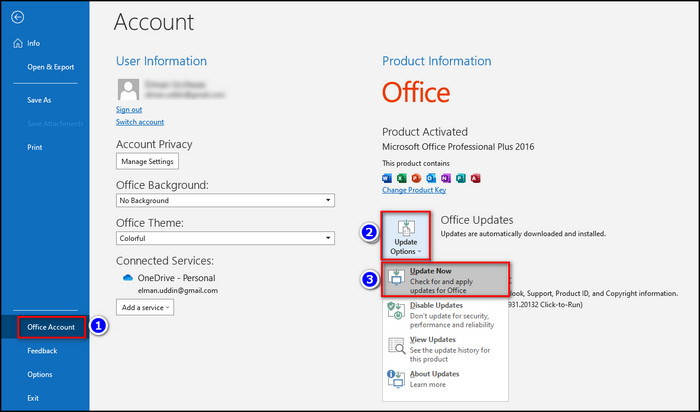
- Click on File from the top left.
- Select Office Account, click on Update Options, and select Update Now.
If a new app version is found, let it download and install. Then, launch Outlook and check whether you are able to insert a poll into your email.
8. Check Your Internet Connection
A stable internet connection is crucial for the Poll feature to work correctly in Outlook. If your internet connection is slow, it may result in issues with sending or receiving poll requests.
So, make sure you have a fast and stable network connection before creating a new poll in Microsoft Outlook.
9. Use a Different Network
Sometimes, the network you are connected to may have restrictions or firewall settings that block certain features or services.
Switching to a different network, such as a mobile data connection or a different Wi-Fi network, can help determine if you are unable to insert polls in Outlook emails due to your current network configuration.
10. Create a Poll in Outlook on the Web (OWA)
After trying all the above methods, if you are unable to add a Poll to emails in Outlook Desktop, just use the Outlook online version to create polls, add them to emails, and forward them to colleagues.
Here’s how to create polls in Outlook on the Web:
- Visit the Microsoft 365 website and log into your Office account.
- Click the App launcher from the upper left and select Outlook.
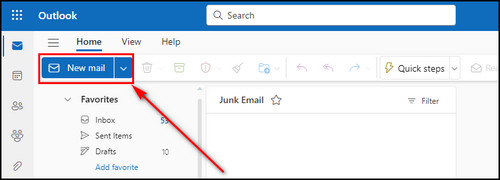
- Select New mail.
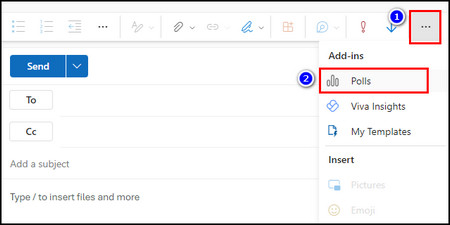
- Click More options from the top right corner and choose Polls.
- Insert your questions & answers for your poll. Select Add option to create a poll in Outlook with multiple questions and click Next.
- Select Add to email if you are happy with the poll preview; otherwise, click Edit to modify the poll.
After you’ve added the poll to your email, you’ll notice a link in the email to your poll. Now send your message, and let the voting begin!
Outlook will put you in the CC field so you can see the poll and view the results.
If your recipients can’t see voting buttons in Outlook, it’s likely because their Outlook version doesn’t support it. They can click the poll link embedded in the received email to participate in the poll from their web browser.
Now, the polls will work correctly in Outlook, but still you need to know how to create a poll the right way, which I’ve explained in the following section.
How to Create a Poll in Microsoft Outlook
To create a vote in your e-mail in Outlook with Microsoft Forms, select New Email, go to the Insert tab, and click on Poll from the ribbon.
You can also add the Polls by Microsoft Forms add-in to create a poll and view voting results in Outlook.
How Recipients Interact with Outlook Voting Buttons
The recipient’s experience interacting with Outlook Voting Buttons varies depending on how they access their email within the Outlook platform. So, provide clear instructions when sending emails containing polls/voting options to individuals who may not be familiar with them.
When users view their email through the Reading Pane in Outlook, they should look for the prompt, ‘This message includes voting buttons. Click here to vote’, located near the top of the email. Clicking it will expand a dropdown list to allow participants to cast their votes.
In cases where the recipient opens the email in a separate window, the casting vote process may be less noticeable. They will see a message saying, ‘Vote by clicking Vote in the Respond group above,’ near the header.
To cast votes, participants should select Message and Vote from the options provided. Then, you can view the Outlook poll results with names.
FAQs
Where is the voting button in Outlook?
The voting button is located in the Options tab of the new email window. To add the voting buttons, open Outlook and select New Email. Then go to the Options tab and select Use Voting Buttons from the Tracking section of the Quick Access toolbar. Choose the Custom option to add custom voting options in Outlook.
How to enable polling in Outlook 365?
Within both the desktop and browser versions of Outlook, you can incorporate a Poll feature that integrates a one-question through Microsoft Forms. To do this, click the three dots menu icon in Outlook on the Web and select the Poll option.
How to create a Poll on a team?
To create a poll in Microsoft Teams, navigate to the community, meeting chat, or group chat where you’d like to set up the poll. Then, click the plus icon and select Polls from the options. On the Polls screen, input your question and list the available options. Finally, click Save to preview your poll and finalize it.
Final thoughts
By following the troubleshooting steps outlined in this article, users can regain access to polls in Outlook and enhance their productivity.
Be sure to keep your application up-to-date, check for add-in conflicts, and repair the data files to restore the polling functionality in Microsoft Outlook and simplify your communication processes.
Comment below if you have further questions, and we’ll get back to you.