The Outlook Voting option allows you to simply collect your colleagues’ or friends’ choices or opinions via email messages.
If you are unfamiliar with how to use the voting button and create a poll in Microsoft Outlook, you have come to the right place.
In this post, I’ll show how to create a poll and email it to a co-worker or friend.
Let’s get started.
Follow our guide on how to add BCC in Outlook Calendar invite.
How to Send a Vote Email in Microsoft Outlook
Sending a vote email is quite simple, but you must create a poll using the voting button in Outlook before sending it. Polls let you receive an exact tally of respondents’ responses in your mailbox.
Here are the methods to create and send vote emails in MS Outlook:
Outlook 2010/13/16/19
The process of creating a poll and sending a vote email is the same in Microsoft Outlook 2010/13/16/19.
Here is the process to create and send vote emails in Outlook 2010/13/16/19:
- Open and log into your Outlook.
- Select the Email option and press Ctrl+N to open a new email.
- Go to Option and click on the Use Voting Buttons.
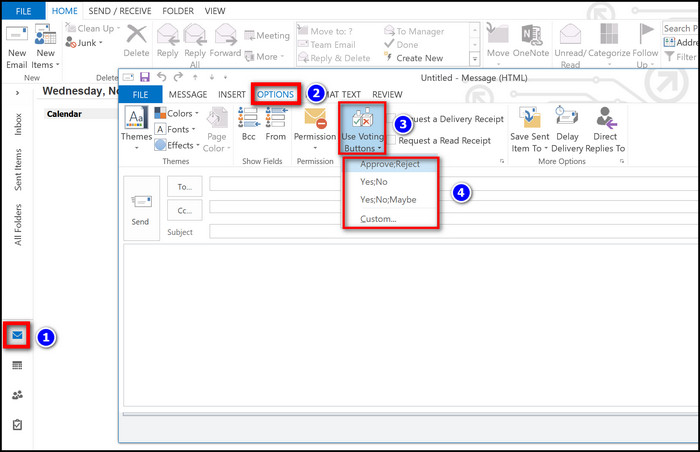
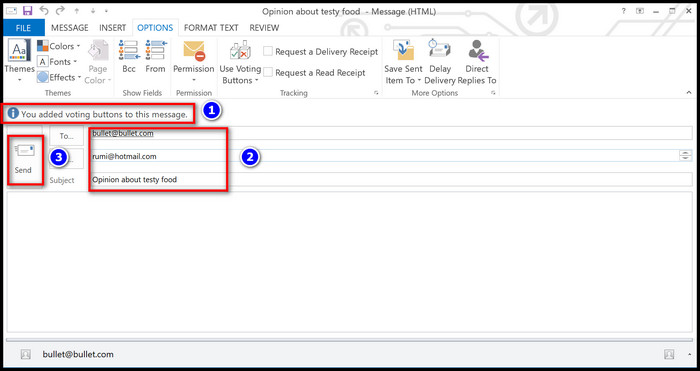
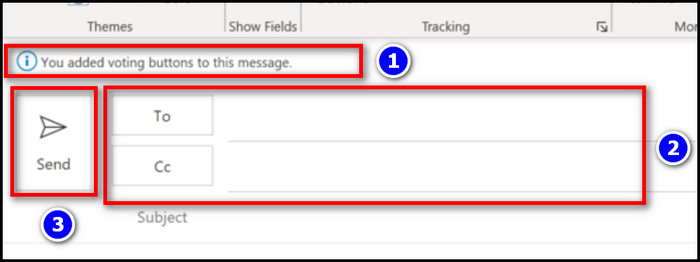
- Choose any option from the drop-down menu. You will see the You added voting buttons to this message in the email box.
- Enter your recipient’s email addresses.
- Hit Send button to deliver a vote email.
Find out how to add picture on Outlook email.
Outlook 365
Creating a poll in Microsoft Outlook 365 is straightforward.
Here are the steps to create polls and send vote emails on Outlook 365:
- Open Outlook 365.
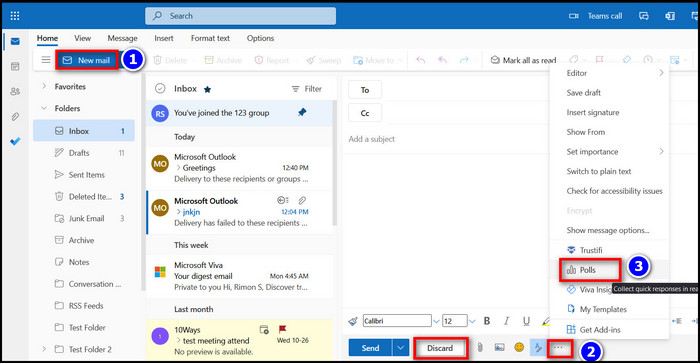
- Click on the New Mail tab. It will open a blank mail page.
- Select Three dots beside the Discard button.
- Choose Polls from the list.
- Create a poll depending on your needs. Once you’ve finished creating the poll, the poll card added massage would appear in your email.
- Enter the email addresses of your recipients.
- Click on the Send button to deliver the vote email.

Also read how to add new Mailbox in Outlook easily.
Outlook For Mac
In terms of creating polls and sending voting emails, the Mac version of Outlook is equivalent to Outlook for Windows.
Here is the process to create polls and send vote emails in Outlook on Mac:
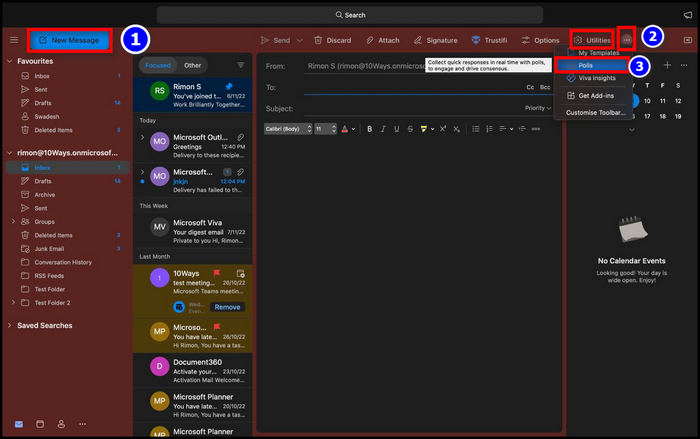
- Open your Outlook app, and click on the New Massage.
- Select Three dots beside the Utilities button.
- Choose Polls.
- Create polls, and a You added voting buttons to this message massage would appear in your email.
- Enter your recipient’s email addresses.
- Press the Send button to deliver the vote email.
Also read how to add someone to a distribution list in Outlook.
How to Respond and See poll Results to a Vote in Outlook
It’s quite easy to respond to the poll in Outlook. The poll creator can monitor the status of the vote in the Outlook message settings after receiving all the responses.
Here are the steps to respond to a vote in Outlook:
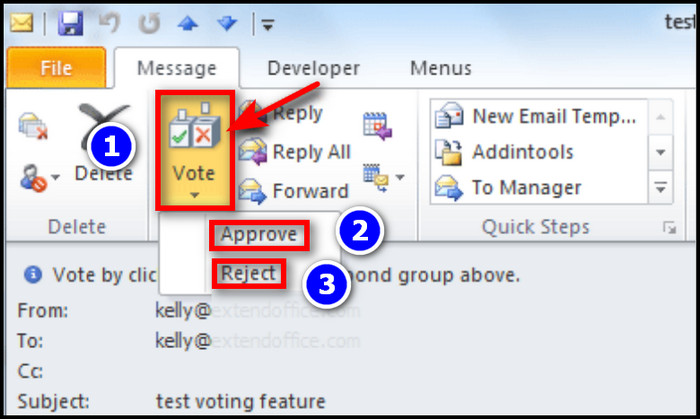
- Double-click the email Message to open it in the message window.
- Click the Vote button.
- Click one of the responses in the drop-down list. In our case, select Approve or Reject.
- Click OK when the pop-up dialog box appears.
Here is the process to see poll results in MS Outlook:
- Open the sent email containing the voting buttons.
- Choose the Message tab.
- Select Tracking.
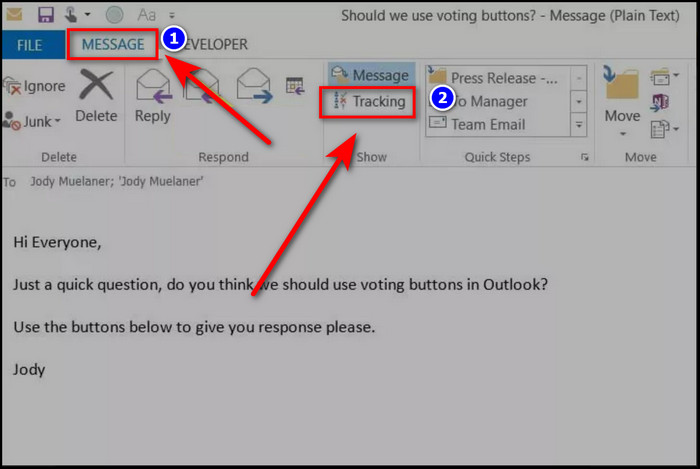
You’ll see a summary of all responses to the poll in your message box.
Conclusion
The poll creator in Outlook is a useful tool for people who need to conduct a short survey and gather the opinions of their friends and coworkers.
To get the most out of this tool, I’ve provided all the information about the poll maker and how you can submit this poll to your teammate.
If you have any feedback or question, feel free to comment below.