If you are a PC user, you might know that it does not matter how powerful components your PC has if you do not have a mouse and a keyboard. Most of you have come here to know about the methods to fix your mouse and keyboard problems in Windows.
I will say that you have come to the right place. As an IT expert, I have faced similar situations with my clients and fixed them quite easily.
In this guide, I am listing some of my solutions in a way that even a beginner can understand. Follow them carefully and make your keyboard and mouse work as fast as you can.
Why Keyboard And Mouse Work in BIOS But Not in Windows?
Your keyboard and mouse might normally work in BIOS but not in Windows because of faulty or corrupted device drivers, faulty keyboard and mouse, outdated drivers, PC infected with malware, a problem during Windows update, etc.
Most of the time, it is the drivers that are at fault. As you all know, your PC needs drivers for specific devices, and if they get corrupted, the device misbehaves or, in some cases, does not work at all.
Malware might be another potential reason why your mouse and keyboard behave like this. Malware and viruses cannot work properly during BIOS bootup, so your devices seem fine. But when Windows boots up, they seem not to work at all.
Follow our guide step-by-step to What is SVM Mode in The BIOS
Fix Keyboard And Mouse Not Working in Windows
There are various solutions to this problem, but it cannot be said specifically which one will work for you. But do not worry. You have to try these solutions one by one until you get results.
Here’s what you have to do to fix the keyboard and mouse not working in Windows:
1. Use an external keyboard and mouse
You first need to check that your keyboard and mouse are not damaged. To this end, you must use an external keyboard and a mouse to see if they work in Windows.
If your device has a PS/2 port, then use a mouse or keyboard with a similar PS/2 port. In case you do not have a Mouse or keyboard with such a port, you can use any kind of adaptor.
If your problem still persists even after changing devices, you should try the next solution.
2. Update drivers
One of the reasons why your devices are not working might be outdated drivers or corrupt drivers. In this case, you have to update your existing drivers to the latest versions and see if it solves the problem or not.
Follow the steps below to update drivers:
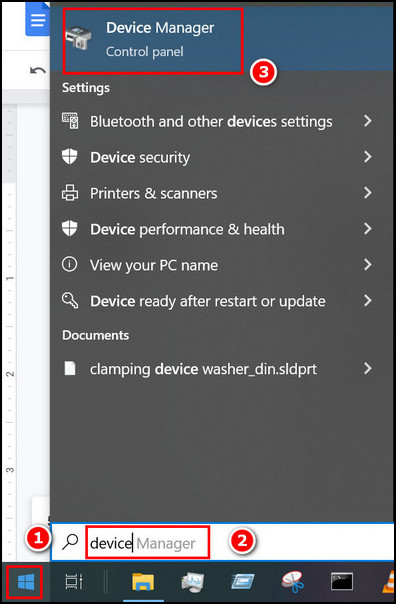
- Click on the windows icon located at the lower–left corner of your screen. Type Device Manager.
- Select the best match, and the Device manager will open up.
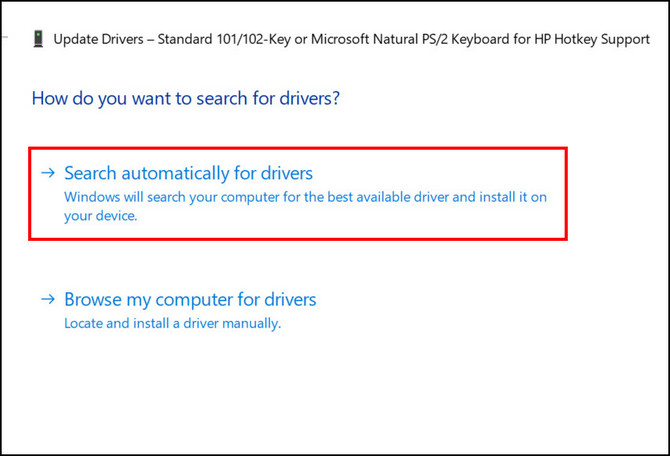
- Click on keyboards, and some options will appear under them. Click on it and select the update option at the top of your screen.
- Select Search automatically for drivers, and your PC will download the necessary updates.
- Do the same for the mouse also.
Most users reported that their problem was solved by updating the drivers. If still your keyboard and mouse are no good, then head over to the next solution.
Also read on how Can You Flash BIOS With CPU Installed
3. Roll back to previous Windows update
If your problem started after you updated your windows, then your PC might not be compatible with the updates. In this case, you are to roll back to your previous updates.
Follow the steps to roll back to the previous Windows update:
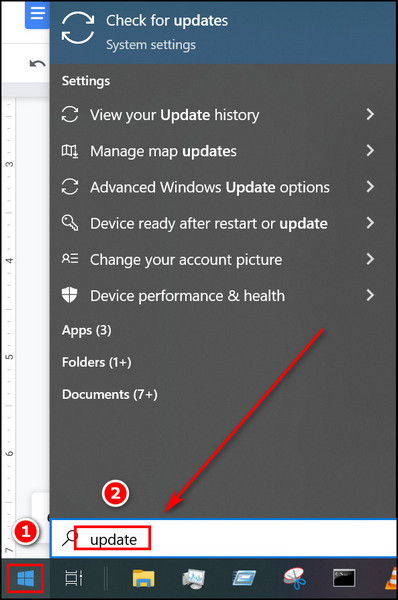
- Click on the windows icon located at the lower-left corner of your screen.
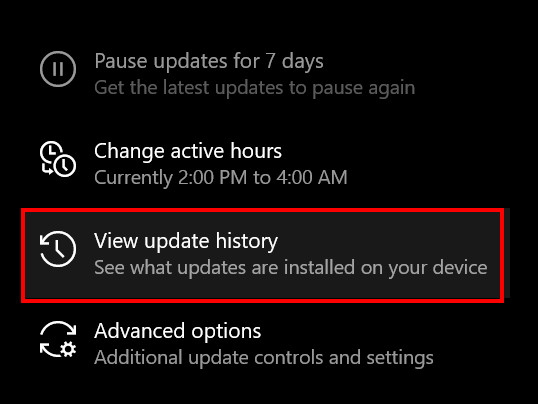
- Type Update and press enter. You will be redirected to the windows update window.
- Find and click on View update history. You will see all the updated versions installed.
- Click on Uninstall updates, and you will see the Installed updates window in the Control panel.
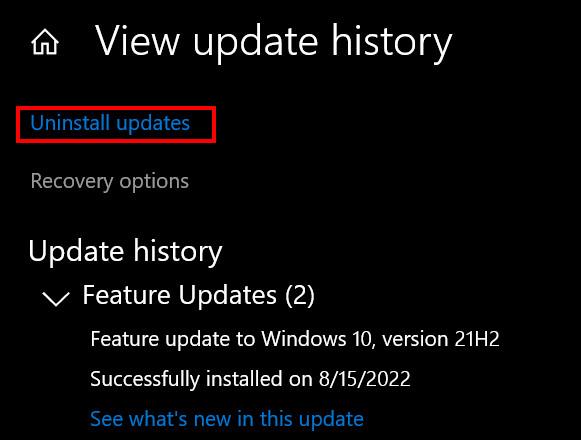
- Select the latest update and click on Uninstall.
Your PC will restart several times. When all is done, check if your devices work or not.
4. Disable Intel Integrated Sensor Solutions driver
There are some cases where users have reported that disabling the intel integrated sensor solutions driver has solved the problem. So, it is worth trying. This might be the solution you have been looking for the entire time.
Follow the steps below to Disable the Intel Integrated Sensor Solutions driver:
- Click on the windows icon located at the lower–left corner of your screen. Type Device Manager.
- Select the best match, and the Device manager will open up.
- Find system devices and click the arrow next to them. Some options will appear under it.
- Right–click on the Intel Integrated Sensor Solutions driver and click on disable. It will be disabled.
Suppose you do not find that driver; no need to worry. Skip this step in that case.
Read more on Why Your BIOS Settings Won’t Save
5. Disable power management for the device
If the device power management is on for the specific device, it might be turned off to save power. In that case, you need to turn it off.
Follow the steps to Disable power management for the device:
- Click on the windows icon located at the lower-left corner of your screen. Type Device Manager.
- Select the best match, and the Device manager will open up.
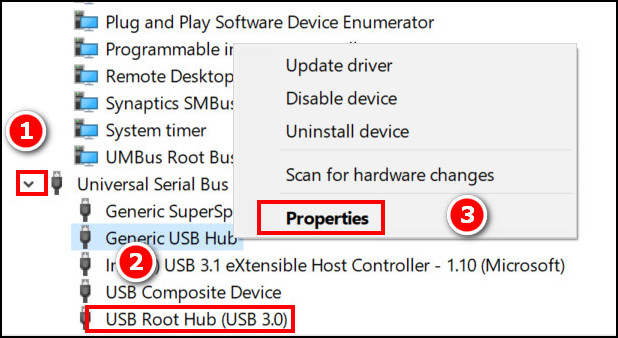
- Find USB Serial Bus controllers and click the arrow next to them. Some options will appear under it.
- Click on the USB root hub and right-click on it. Select Properties.
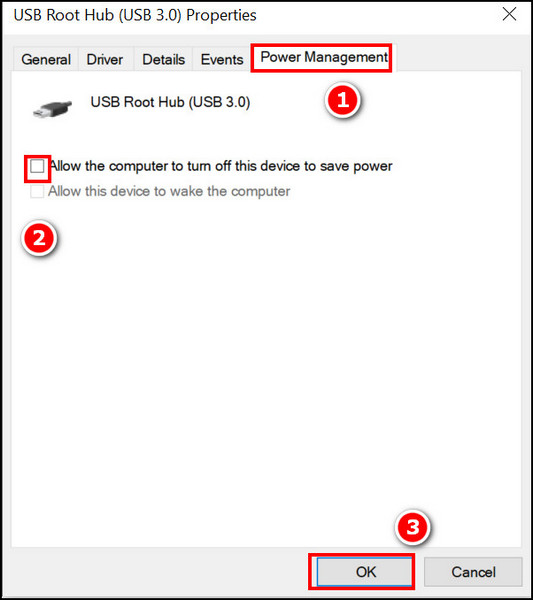
- Select the power management tab and make sure the box is unchecked. Click on OK.
If disabling power management does not fix your issue, then go to the next method.
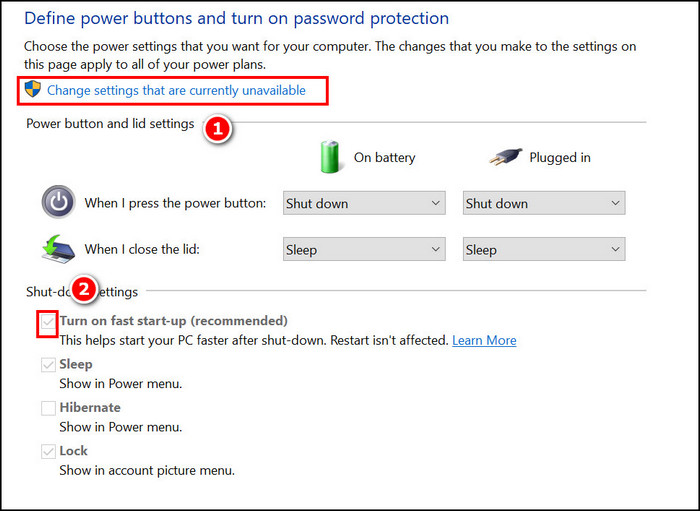
6. Turn off Fast start-up
There are some issues with some PCs if they use a Fast start-up. So, it might be a way to solve your problem.
Follow the steps to turn off fast start-up:
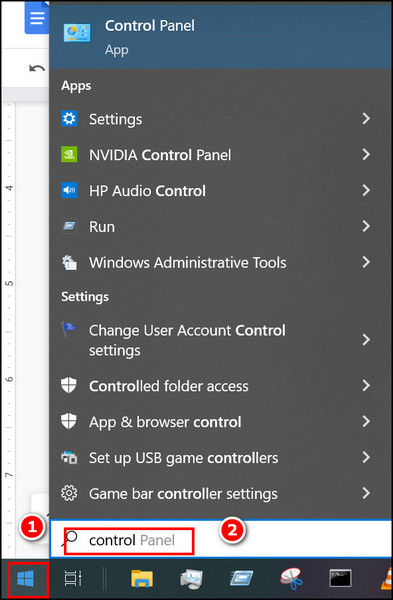
- Click on the windows icon and type Control panel. Press Enter.
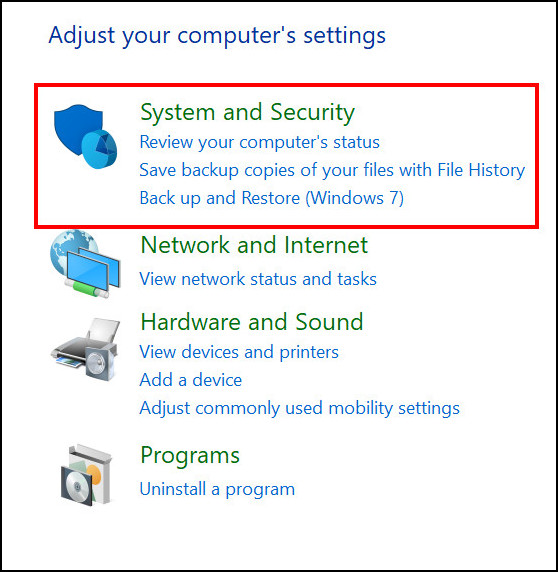
- Select System and security. On the next page, you will see some options listed in one place.
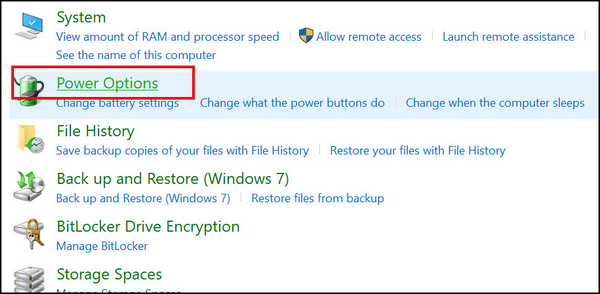
- Click on Power options.
- Click on Choose what the power button does.
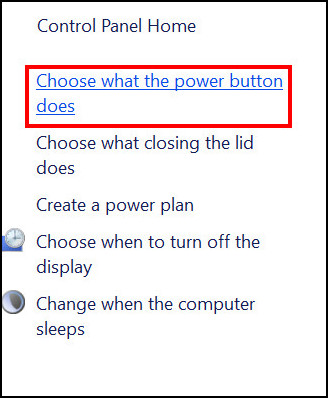
- Select change what the power button does and then untick the Fast startup option below. Finally, click on OK.
Congrats if your problem is solved. Otherwise, you can find your solution in the next one!
Also, check out our separate post on how to fix PC won’t go to sleep in Windows 11.
7. Use a different port
If you have any other USB ports available, try unplugging your device from the previous port and plugging in another one. It might help if the problem lies with your ports.
If you see the results, it can be safely concluded that your previous port was at fault. You should repair the port from an expert or keep using the other one.
8. Reinstall device driver
Sometimes, reinstalling the device driver helps. Especially for those who do not have drivers installed correctly due to various reasons, reinstalling will help.
Follow the steps below to reinstall the device driver:
- Click on the windows icon located at the lower–left corner of your screen. Type Device Manager.
- Select the best match, and the Device manager will open up.
- Click on keyboards, and some options will appear under them. Click on it and select the Uninstall option at the top of your screen, right beside the update icon.
- Make sure you understand that installing both at the same time will result in disaster.
- Install that driver, then do the same for the mouse.
Laptop Keyboard Works in BIOS, Not in Windows
Those who use laptops are quite in a bind if their keyboards or integrated keypads do not work. It is more difficult because you cannot unplug your integrated keyboard or the keypad.
Most of the fixes above work not only for desktop PCs but also for laptops. Ensure your laptop has enough USB ports to use external keyboards and mouse.
Laptop settings to make your keyboard and mouse work in Windows are similar to those of PCs. Try following them one by one until your problem is solved. If you are lucky, you might not need to try them all.
Check out the easiest way to install active directory users & computers on Windows 11.
Conclusion
If you have understood my instructions and followed them clearly and carefully, then it is guaranteed that your problem will be fixed in no time. But there might be specific problems that might not be resolved during this process.
Write in the comment section specifically which steps helped you solve your problem. If you have any better solutions, please write them down in the comment section. It might help other users.