Do you want to know how you can install Active Directory Users and Computers on your Windows 11 system?
Well, I have great news then.
I have conducted a lot of research and have written the best and latest procedures to install the Active Directory Users and Computers on Windows 11.
It might look confusing at first, but I am here for you.
If you do not have much experience in using Windows 11, there is no reason to worry. The procedures given in this post can be followed by anyone, so keep calm and read this entire post.
What is Active Directory Users and Computers?
Hopefully knowing what the Active Directory Users and Computers is have increased your confidence in going through the procedures given in this post.
There is still no need to worry if you are a bit confused.
Keep reading this post and you will be installing the Active Directory Users and Computers in no time.
Here is the easiest guide to fix drag and drop not working on Windows 11.
How to Install Active Directory Users and Computers on Windows 11
You can follow three very simple procedures to install the Active Directory Users and Computers (ADUC) on Windows 11
Each of the procedures given below has been tested, so do not worry.
Please remain calm and follow the straightforward methods to Install ADUC on your Windows 11 device.
Here are the methods to install Active Directory Users and Computers on Windows 11:
Just like any other platform, Windows 11 also has a Settings menu. This Settings menu can be used to install ADUC on your Windows 11 system.
The whole process is very simple, so do not be tense. Please follow the steps given below.
Here are the steps to use the System settings menu to install the ADUC on Windows 11:
- Press the Windows+I keys together on your keyboard. You will be taken to the Settings menu.
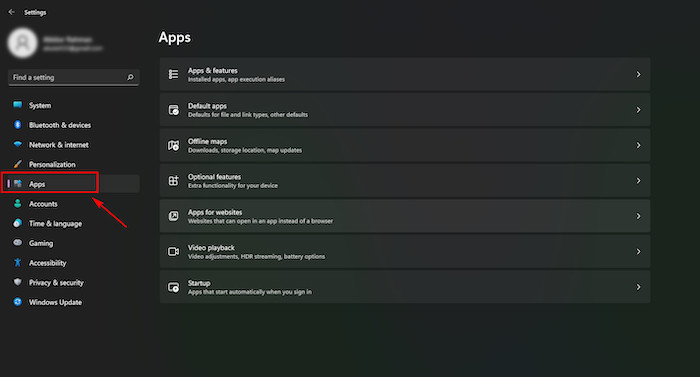
- Click on Apps on the left menu side pane.
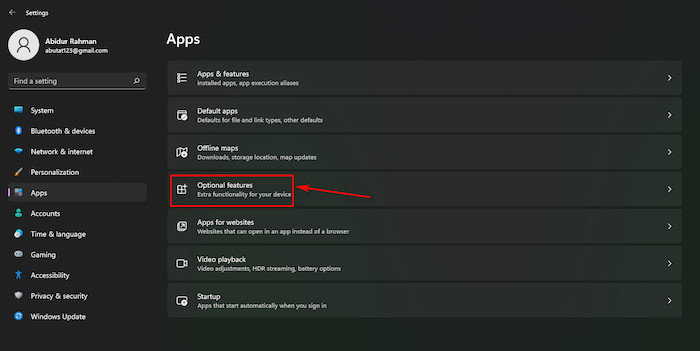
- Select the Optional features option by clicking on it.
- Click on the View features button beside the Add an optional feature.

- Go to the search bar and search for active directory domain services.
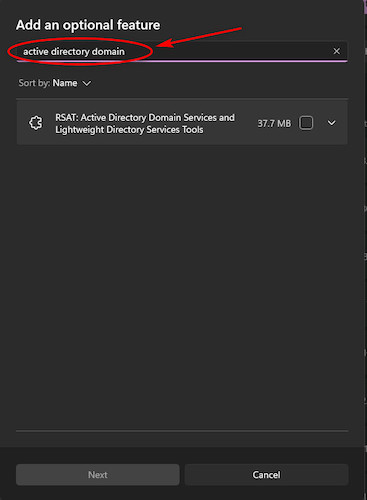
- Scroll down and click on RSAT: Active Directory Domain Services.
- Select the RSAT: Active Directory Domain Services feature and click on Next.

- Click on the Install button.
- Wait for the installation process to finish.
If you were not able to install the Active Directory Users and Computers on Windows 11 by following this method
2. Run a Command-line in PowerShell
The Command Prompt is a tool that can be used to run command lines on Windows 11.
You are going to open the PowerShell by searching for it from the Search button on the Taskbar and then running the Windows PowerShell tool as an administrator.
Follow the straightforward steps given below and you will be using PowerShell easily.
Here are the steps to use PowerShell to install Active Directory Users and Computers on Windows 11:
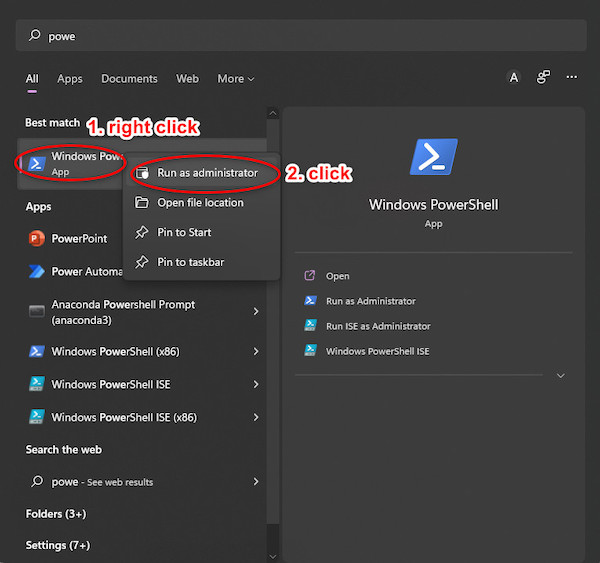
- Click on the Search button and search for PowerShell.
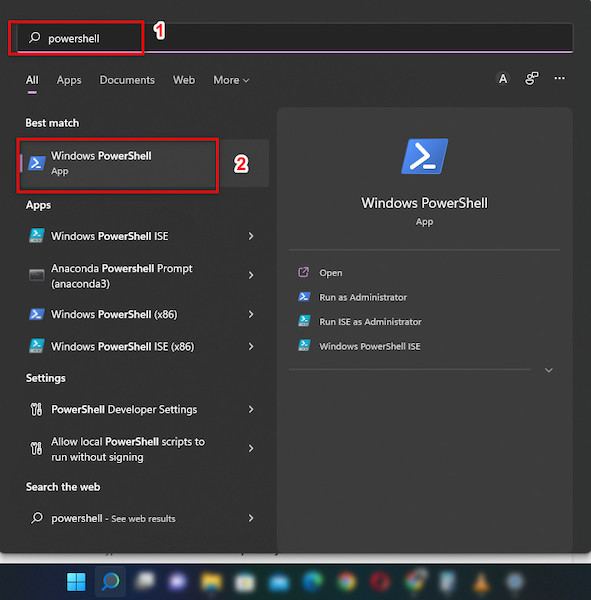
- Right-click on PowerShell and click on Run as administrator.
- Paste or type in Add-WindowsCapability -Online -Name “Rsat.ActiveDirectory.DS-LDS.Tools” in the terminal and press the Enter key on your keyboard.
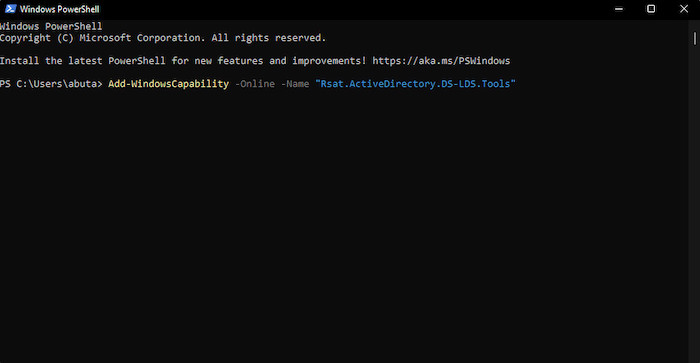
- Wait for the installation process to finish.
Please follow the other fantastic procedures given in this post if this one did not work correctly.
Also, check out our separate post on how to fix PC won’t go to sleep in Windows 11.
3. Use Command line in Command Prompt
Similar to the previous method, you can use the Command Prompt in Windows 11 to run a command line to install the Active Users and Computers on Windows 11.
The simple steps to this straightforward process are given below.
Even a person with minor experience can follow the steps given below, so there is no reason or you to doubt yourself. Just keep calm and go through the steps given below.
Here are the steps to use the Command Prompt to install Active Directory Users and Computers on Windows 11:
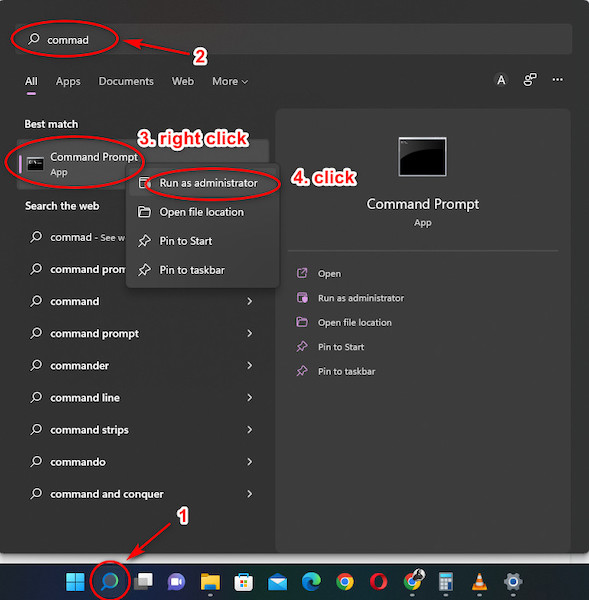
- Enter the Search button, and search for Command Prompt.
- Right-click on Command Prompt and click on Run as administrator.
- Paste or type in exe /Online /Get-CapabilityInfo /CapabilityName:Rsat.ActiveDirectory.DS-LDS.Tools~~~~0.0.1.0.
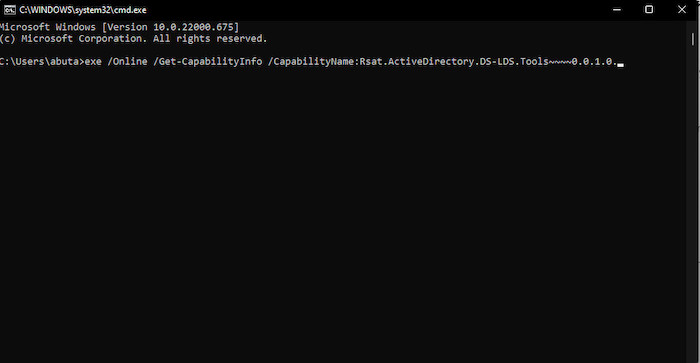
- Wait for the installation process to finish.
If you need to know how you can install RSAT in Windows 11, continue reading this post.
Follow our guide to fix Windows can’t access network drive on Windows 11.
How to Install RSAT in Windows 11
The Remote Server Administrator Tools is a package that can be used to manage roles and features in a Windows Server.
You can control the servers using RSAT from a Windows client machine.
Many users all around the world are facing an issue where they are not able to install RSAT on their Windows 11 systems.
Please follow the steps given below to install RSAT in Windows 11.
Here are the steps to install RSAT in Windows 11:
- Go to Settings>Apps>Optional features.
- Click on the View features button.
- Select the features related to RSAT.
- Search for rsat.
- Click on Next and then Install.
- Wait for the installation process to finish.
If you need to know how you can fix the RSAT could not install issue, please continue reading this post.
How to fix RSAT could not install issue
Sometimes, when you attempt to install RSAT on your Windows 11 system, you can face some problems and RSAT does not get installed.
I know that this situation is very frustrating, so I have tried my best in writing the best and easiest fixes to the RSAT could not install issue.
The straightforward procedures are given below, so keep calm and please go through them.
Here are the procedures to fix the RSAT could not install issue on Windows 11:
1. Use Windows PowerShell
Using Windows PowerShell to run a command line to fix the RSAT could not install issue is a very simple and easy task to do.
All you need to do is follow the simple steps given below and you will be all set.
Here are the steps to use Windows PowerShell to fix the RSAT could not install issue:
- Click on the Search button and search for PowerShell.
- Right-click on PowerShell and select Run as administrator.
- Click on Yes.
- Paste Get-WindowsCapability -Name RSAT* -Online | Add-Windows Capability -Online into the terminal and press the Enter key on your keyboard.
- Wait for the process to finish.
There can be some other reason for which your system is unable to install RSAT, so please follow the other methods if this one did not fix the RSAT installation problem.
But before that, go through our epic guide on adjust page file in Windows 10.
2. Edit the Registry
Editing some Registry files on your Windows 11 device is another excellent procedure to fix the RSAT installation issue on Windows 11.
It might seem daunting at first, but trust me, this whole process is very straightforward.
Just follow the steps given below and you will be editing registry files easily.
Here are the steps to edit Registry files to fix RSAT installation issue on Windows 11:
- Press the Windows and S keys together on your keyboard.
- Search for Services and enter it.
- Right-click on Windows Update and select Stop.
- Press the Windows and R keys together.
- Type in regedit and click on OK.
- Click on Yes.
- Paste in HKEY_LOCAL_MACHINE\SOFTWARE\Policies\Microsoft\Windows\WindowsUpdate\AU.
- Double click on UseWUserver.
- Type in 0 under Value Data and click on OK.
- Go back to the Services tool and right-click on Windows Update.
- Select Start.
- Wait for the process to finish and restart your system.
- Check whether you can install RASAT on your system or not.
Please follow the other fantastic procedures if this one did not fix theRSAT installation issue on Windows 11.
How to uninstall RSAT in Windows 11
There are many features available in RSAT on Windows 11. You can uninstall them by going into the Settings app and uninstalling the RSAT features from the Installed Features Section.
There is no reason to lose hope if you are confused. Just follow the simple steps given below and you will be able to uninstall RSAT in Windows 11 easily.
Here are the steps to uninstall RSAT in Windows 11:
- Enter the Settings menu by searching for it in the Search button.
- Click on Apps from the left menu pane.
- Go to the optional features button and click on it.
- Scroll down to the Installed features section.
- Select the feature or features you want to uninstall.
- Click on the Uninstall button.
- Wait for the uninstallation process to finish.
- Restart your system.
I sincerely hope you were able to uninstall RSAT in your Windows 11 system by following the steps given above.
Also, check out our separate post on what are the disadvantages of not activating Windows 10.
Conclusion
I know it must have been very annoying when you were not able to Install the Active Directory and Computers on your Windows 11 system.
As I could relate to your frustration, I have tried extra hard to provide you with the best and most relevant procedures to install the ADUC.
Hopefully, you were able to install ADUC on your system by going through this post.