Looking for an installation guide for one of the best IDEs? Look no further! This article will provide step-by-step instructions to download and set up Eclipse IDE for programming, whether it’s in Java or any other language.
As a senior developer, I know perfectly well how important an Integrated Development Environment or IDE can be to a project. You should spend a good amount of time finding the IDE that clicks with you.
Eclipse is the perfect IDE if you want to learn Java programming, so grab a cup of coffee and scroll below to find its installation instructions.
Also read how to update drivers on Windows 11.
How To Install Eclipse IDE in Windows 11?
To install Eclipse IDE, you need to go to the Eclipse Downloads page and choose the installer for your operating system and architecture. Once it finishes downloading, you can simply open it and follow the instructions to install Eclipse IDE in Windows 11.
Whether you want to install the Eclipse IDE for Java or any other programming language, you need to know what your CPU architecture is to be able to get the proper installer for your PC.
Follow these steps to determine your CPU architecture:
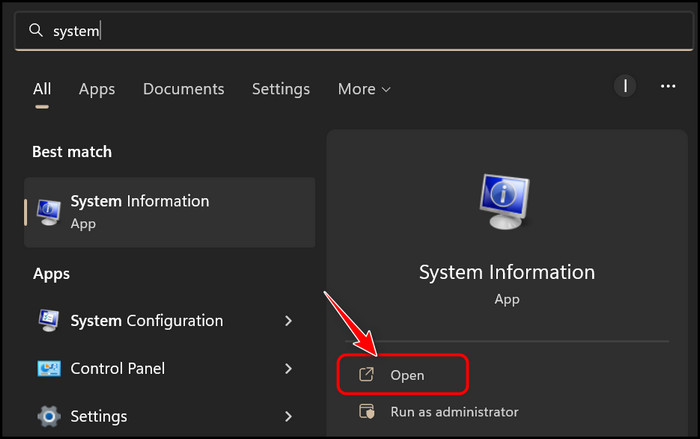
- Open the Start menu, search for System Information, and launch the first result.
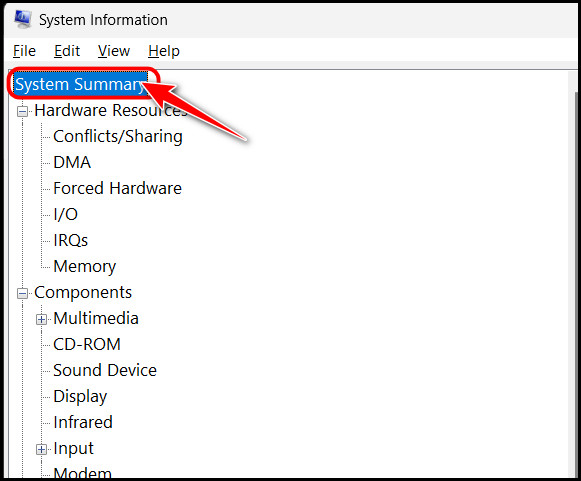
- Click on System Summary on the left panel.
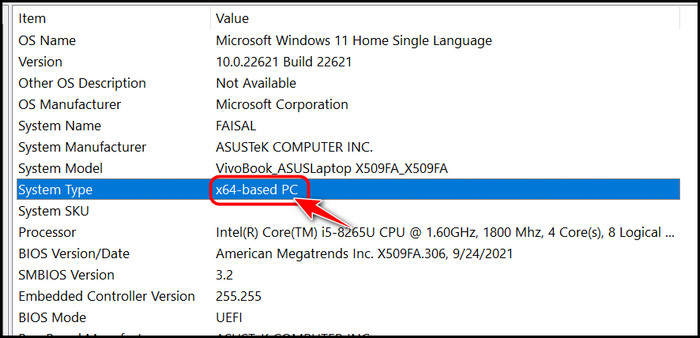
- Note the value next to System Type on the right panel, as that is your CPU architecture.
Now that you know all the necessary hardware information, you can proceed to the installation process below.
Follow our guide to fix blue screen on Windows 11.
Follow these steps to install Eclipse IDE in Windows 11:
- Launch Chrome or another alternative browser and browse to the Eclipse Downloads webpage.
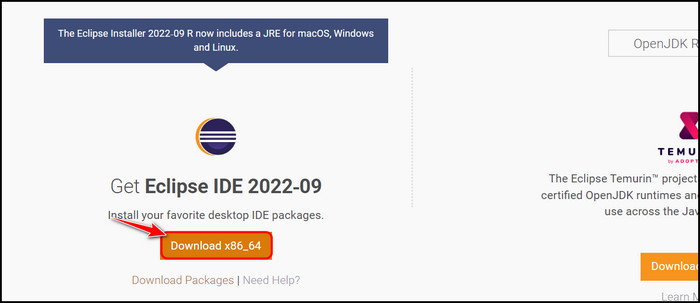
- Locate the Orange Download button below the Get Eclipse IDE section and check if the architecture matches the one you noted earlier. Click on it after making sure it matches the architecture you noted earlier.
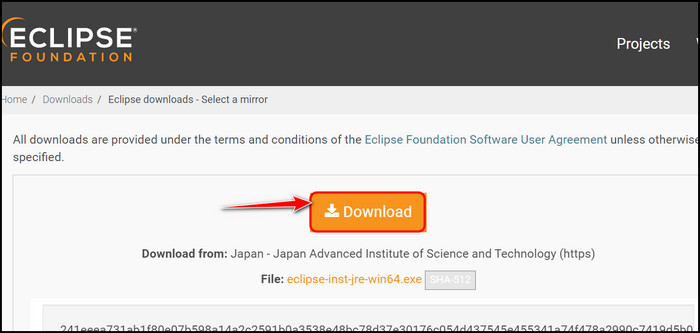
- Click on the Download button on the next page to initiate the download process.
- Go to the Downloads folder and double-click on the file you just downloaded to run the Eclipse installer.
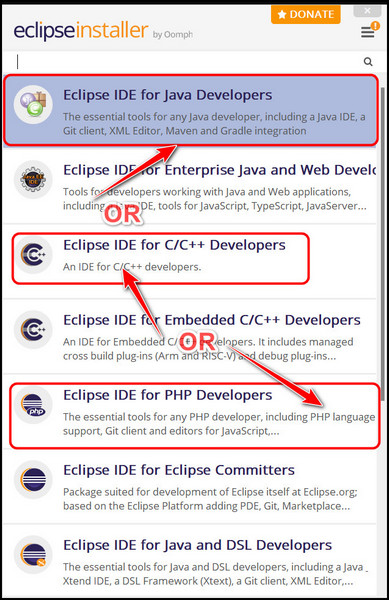
- Look for the Programming language you want to use Eclipse for in the options list and select it. You can choose from Java, C/C++ or PHP. Read the short descriptions below and click on the one that suits your needs.
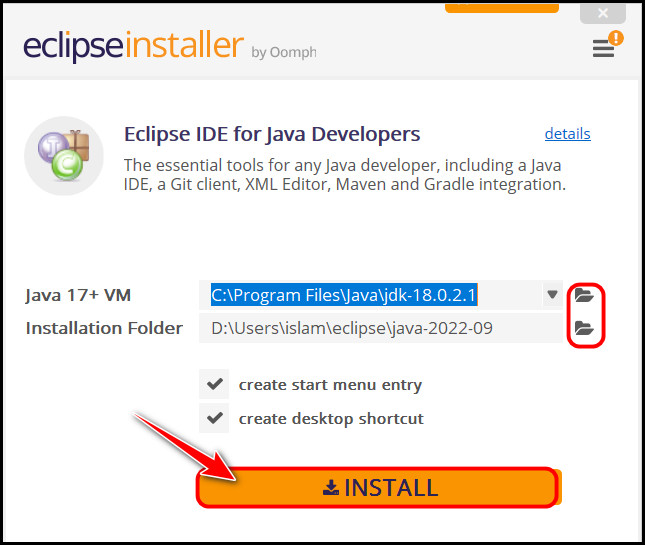
- Choose your installation location on the next page. If you want to change the default directory, you can do so by clicking on the Folder icon at the right. Once you are done, click on the Install button below.
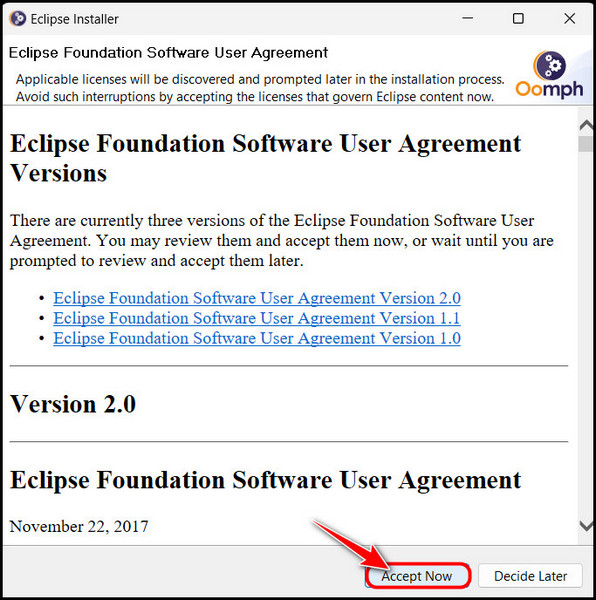
- Select the Accept Now button once a Terms and Conditions agreement appears.
- Wait for the installation process to finish. Once it completes, you will be able to launch Eclipse and use it to create Java projects.
As you can see, it is pretty straightforward to start using Eclipse for your projects.
If you are a beginner, the endless customization and features of Eclipse may overwhelm you, so go through the next section to find more details on how to start a new project in Eclipse.
Also, check out our separate post on how to fix PC won’t go to sleep in Windows 11.
How To Create Java Project in Eclipse?
You can create a Java project in Eclipse by opening the Eclipse application and selecting the Java Project option in the New section options of the File menu at the top left corner. After you configure all the settings in the next window, simply click on the Finish button to create the project.
Follow these steps to create a Java project in Eclipse:
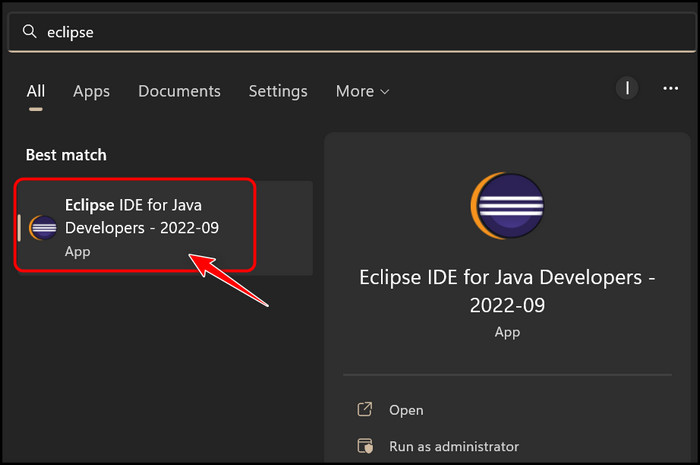
- Click on the Windows icon at the bottom left corner of your taskbar to launch the Start menu, search for Eclipse, and launch the best-matched result.
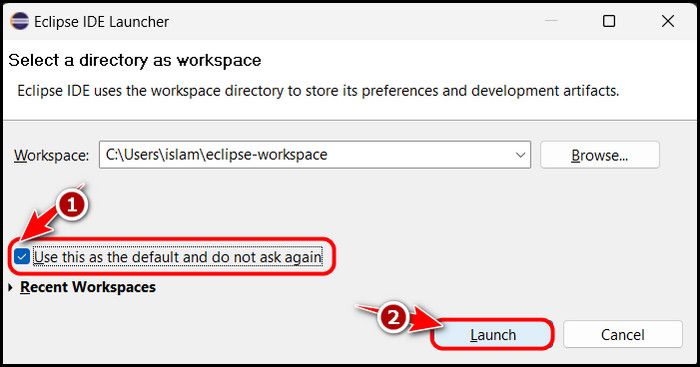
- Check the option to set the workplace as default on the pop-up window and click on OK to proceed.
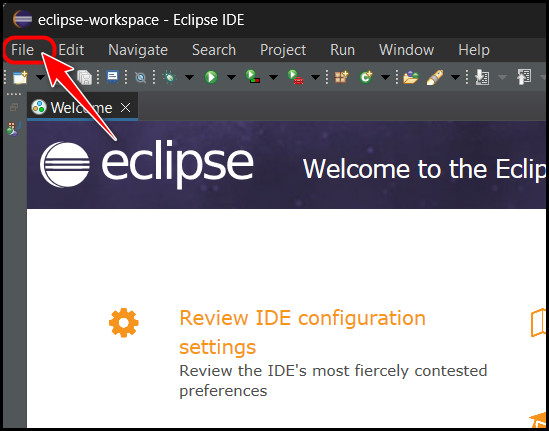
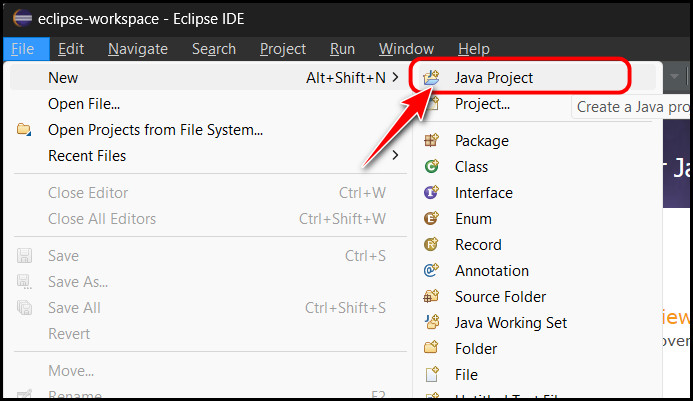
- Look for the File menu button at the top left corner and click on it.
- Move your mouse cursor over to the New option so that a new menu expands. Select the Java project option from the expanded panel.
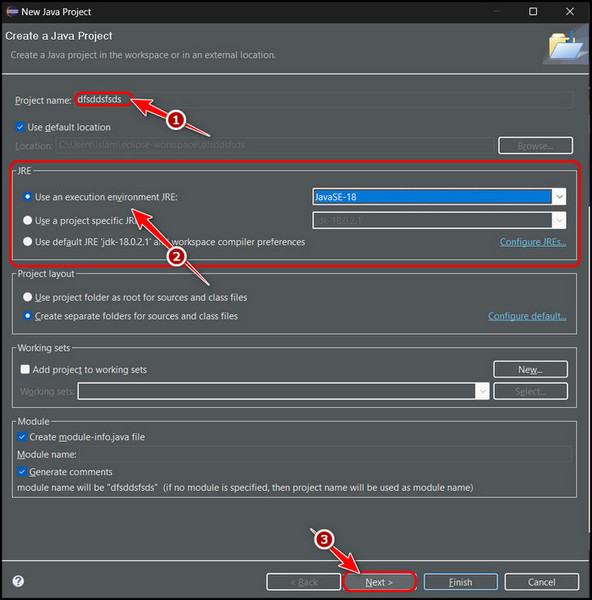
- Type your project name at the top and select a JRE according to your project needs. Leave the other settings untouched if you can’t understand them yet. Click on the Next button once you are done.
- Change your project’s output folder on the next page if you want, but I recommend leaving it to default settings if you are confused. Click on Finish once you have made your decision.
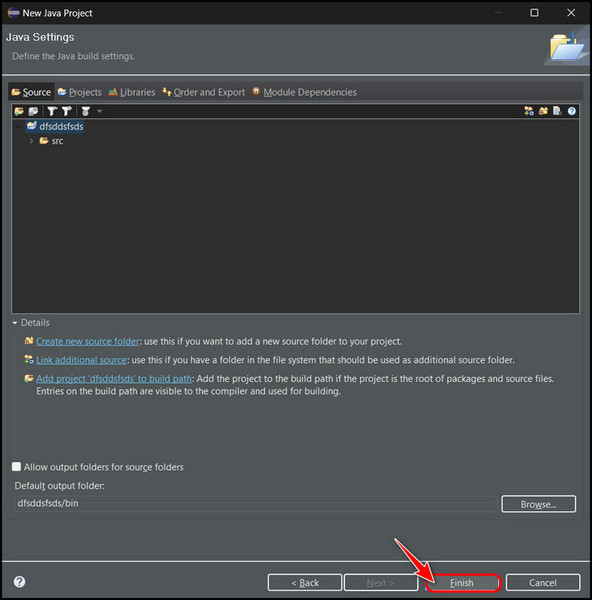
If you have configured all the settings correctly, your new Java project should automatically load in Eclipse.
As a long-time user of Eclipse, I know that beginners can often wonder about many things, especially in their first week of getting started with Eclipse. So, check out the comprehensive FAQ section below to clear all your major doubts.
Check out the easiest way to install active directory users & computers on Windows 11, Windows can’t access network drive on Windows 11.
FAQ
Question: Does Windows 11 come with Java?
Answer: Yes, Java comes included with Windows 11, but it’s worth noting that you need to install Java Development Kit and Java Runtime Environment separately if you plan to develop programs or create projects.
Question: Does Eclipse support Java 11?
Answer: Yes, Eclipse supports Java 11. However, it requires you to install JDK/JRE 11 manually. Moreover, the LTS installation is recommended for better stability in all Eclipse 2022-03 packages.
Question: How do I install apps on Windows 11?
Answer: You can install apps on Windows 11 by searching for them on the Microsoft Store after you log into your Microsoft account. Alternatively, you can also install apps on Windows 11 the old-fashioned way by searching for executable installers on Google.
Question: Is the Eclipse IDE free?
Answer: Yes, the Eclipse IDE is completely free to use as it’s developed open source. Since it’s open source, users are also free to modify the program and create custom versions of the software if needed.
Question: Is Java 8 or Java 11 better?
Answer: Java 11 is better than Java 8 in many circumstances. The applications are written in Java 9. 10, and 11, run significantly faster than Java 8, and they are also more secure. The ZGC and Epsilon garbage collectors have improved Garbage collection.
Question: Does Java 11 use more memory than Java 8?
Answer: Yes, Java 11 uses more memory than Java 8. This is because Java 11 switched to a new default garbage collection algorithm called G1. However, the memory can be sacrificed as the new algorithm is better for preventing big pauses in garbage collection.
Question: Which is better, Eclipse or IntelliJ?
Answer: IntelliJ is better than Eclipse if you prefer doing standard Java development. On the other hand, if you are looking for more features and a professional development environment, Eclipse is a popular choice among developers.
Final Thoughts
To sum up, Eclipse is a perfect choice for developing programs in C, C++, PHP or Java. As you keep using Eclipse, you will discover small details here and there that speeds up the coding process when compared to other IDEs.
The first section of this guide explored the step-by-step instructions to set up Eclipse IDE for your preferred programming language. After that, I showed you how to create a Java project in Eclipse, but you can create C, C++ and PHP projects in a similar way.
Which language are you planning to use in Eclipse IDE? I look forward to reading your comments.