The dreaded blue screen of death is something many long-time users of Windows may know. Just as the name suggests, it is a blue screen that pops up when there is a major problem.
The Blue Screen of Death(BSOD) can pop up for many reasons.
This post will go through the different reasons that cause the BSOD and the fantastic procedures to fix the Blue Screen of Death issue on Windows 11.
I know that it is very annoying to keep seeing the Blue Screen of Death, especially when you are in the middle of something.
That is why I have written all the fixes to the BSOD issue, so read the entire post for full details.
Why do you see the Blue screen on Windows 11?
The Blue Screen of Death mainly occurs due to a critical error in the Windows operating system that results in the operating system to stop running properly. Critical errors can occur due to reasons like faulty hardware, low-level apps, faulty drivers, or the presence of excessive malware.
If you are using very old hardware, chances are your PC or laptop is nearing its lifecycle. You can try reinstalling Windows to see whether it is a hardware or software issue.
If you are still seeing the BSOD after reinstalling Windows 11 on your system, you might have to upgrade your system or buy a new one.
Still, seeing the Blue screen of Death is not the end of the world.
Please continue reading this post and go through the procedures given below to fix the Blue Screen of Death issue on Windows 11.
Here is the easiest guide to fix drag and drop not working on Windows 11.
How to enter Safe Mode on Windows 11
Some of the procedures given below require you to enter Safe Mode in Windows 11. It is a very simple process to enter the Safe mode menu.
The steps for entering Safe Mode are given below, so please go through them.
Here are the steps to enter Safe Mode in Windows 11:
- Click on the Start button and then the Power button.
- Hold the Shift key on your keyboard and click on Restart.
- Select Advanced options and go to Troubleshoot>Advanced options>Startup Settings.
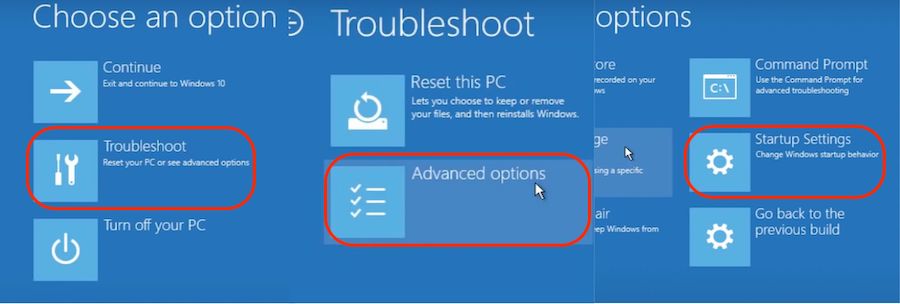
- Select the Safe Mode option by pressing the F4 button or the respective button.
- Wait for your system to restart into Safe Mode.
Continue reading this post to know how to fix the Blue Screen of Death on Windows 11.
Fix the Blue screen on Windows 11 easily
There are many fixes to get rid of the blues screen on Windows. You do not need to be an experienced Windows 11 user to go through the instructions given below so keep calm.
Here are the methods to fix the blue screen on Windows 11:
1. Run the Windows Memory Diagnostic Tool
Just as the name suggests, you are going to use the Windows Diagnostic Tool to check for problems on your Windows 11 OS.
It is a very easy-to-use tool and can be used to identify the causes resulting in the Blue Screen in Windows 11.
The steps to this procedure are given below, so please go through them.
Here are the steps to use the Windows Diagnostic Tool to fix the Blue Screen in Windows 11:
- Search for Windows Memory Diagnostic after clicking on the Search button.
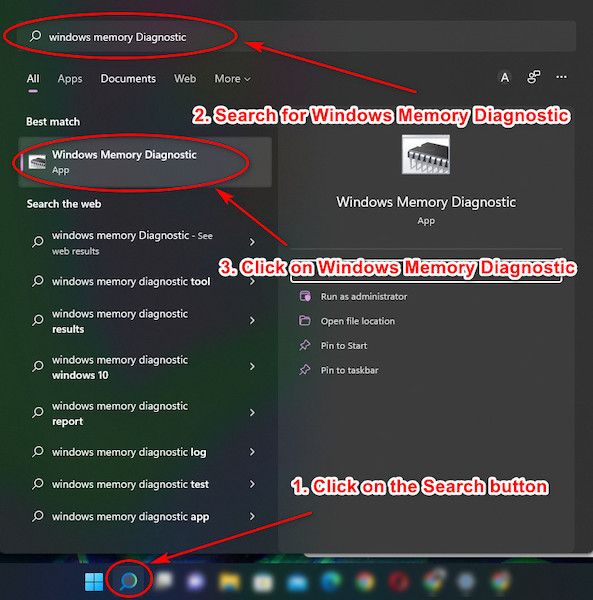
- Click on Restart now and check for problems.
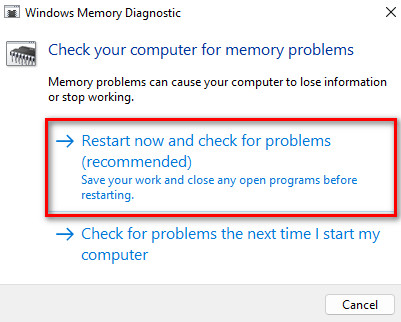
- Wait for your system to reboot.
- Restart your pc after the tool finishes the process.
- Check whether the blue screen persists or not.
If this process did not fix the blue screen issue on Windows 11, please follow the other fantastic methods given in this post.
Check out the easiest way to install active directory users & computers on Windows 11.
2. Update drivers
Sometimes an update to a driver or drivers can fix the blue screen on Windows 11.
This happens as Windows 11 is still relatively new compared to other versions of Windows, but it is a fact that Windows 11 will improve with time.
So update your components like your GPU or graphics card.
Just like the other procedures given in this post, the simple steps for this procedure are given below.
Here are the steps to roll back an update to fix the blue screen issue on Windows 11:
- Press the Windows and X keys together on your keyboard.
- Click on Device Manager.

- Select a Device category option by clicking on the arrow beside it.
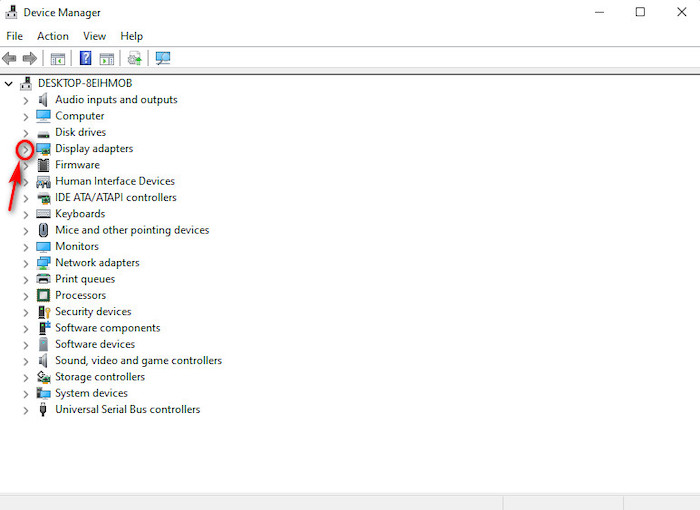
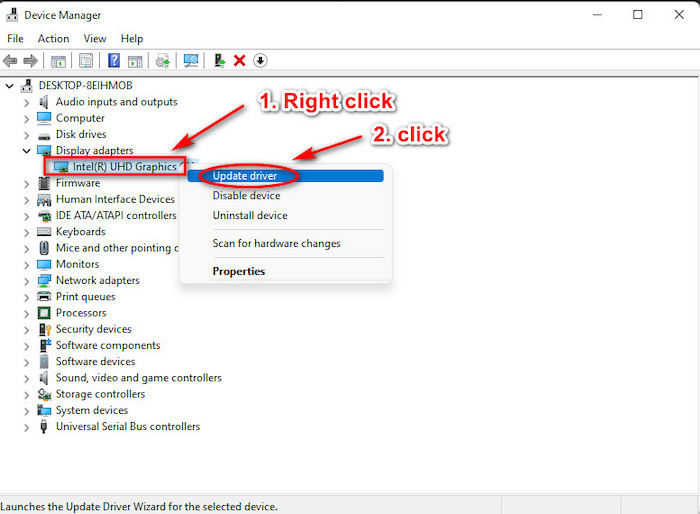
- Right-click on the driver you would like to update and click on Update driver.
- Restart your pc after the rollback process gets finished.
There is no reason to give up if this fix did not work. There are other fantastic and tested procedures to fix the blue screen on Windows 11.
Follow our guide to fix Windows can’t access network drive on Windows 11.
3. Update Windows 11
I always recommend everyone to update their Windows 11 operating system when the latest update gets released.
Having the latest version of Windows 11 will save you a lot of hassle.
It is also a great and easy way to fix the blue screen on Windows 11, so please follow the straightforward steps given below.
You got this!
Here are the steps to update Windows 11 to fix the blue screen on Windows 11:
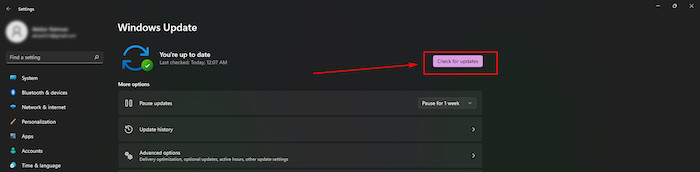
- Go to the search button, click on it and search for check for updates and click on it. You will be taken to the Windows Update menu.

- Click on the Check for updates button.
- Download and install any available updates.
- Restart your PC.
- See whether the blue screen still pops up or not.
It might seem daunting when a fix does not work. That is why I have given other fantastic procedures as well. Please go through the other fixers to fix the blue screen on Windows 11.
4. Run an SFC scan
You can use the SFC scan command line in the Command Prompt to check for any corrupted system files present on your system.
Corrupted system files are very harmful to your pc and can cause the blue screen to pop up.
Just like the other procedures, all you need to do is follow the simple steps given below and it will not take more than a couple of seconds.
Here are the steps to run an SFC scan to fix the blue screen on Windows 11:
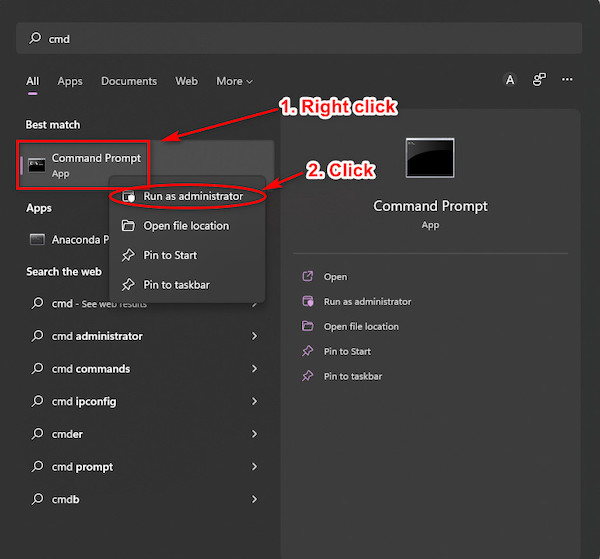
- Search for cmd in the Search button.
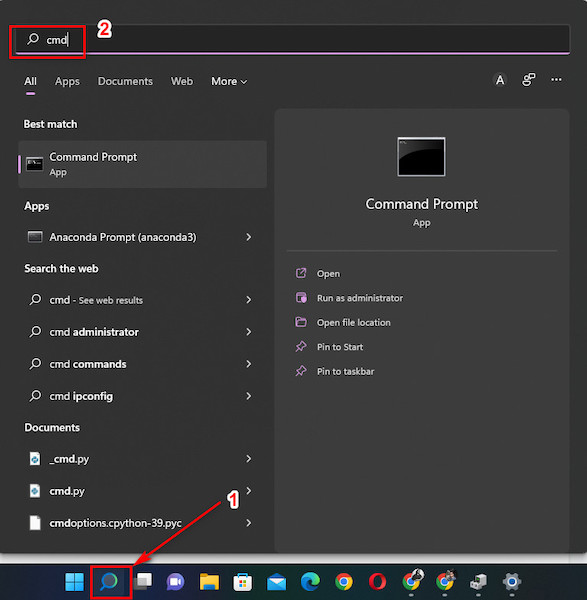
- Right-click on Command Prompt and select Run as administrator.
- Paste or type in sfc/scannow and press the Enter key on your keyboard.
- Wait for the SFC scan process to finish.
- Close all the apps and restart your pc.
- Check whether the blue screen pops up or not.
Sometimes you need to follow multiple fixes to resolve an issue, so do not lose hope if this procedure di not fix the blue screen on Windows 11. Please go through the other fantastic fixes.
5. Check for malware and viruses
In simple terms, viruses and malware make your system corrupted and not work properly.
Excess amounts of viruses and malware can destroy many crucial files resulting in the blue screen popping up on Windows 11.
Thankfully Windows 11 has a default anti-virus tool called the Windows Defender Firewall that can be used to scan for viruses.
Please follow the steps given below to scan for viruses present on your pc.
Here are the steps to use the Windows Defender Firewall tool:
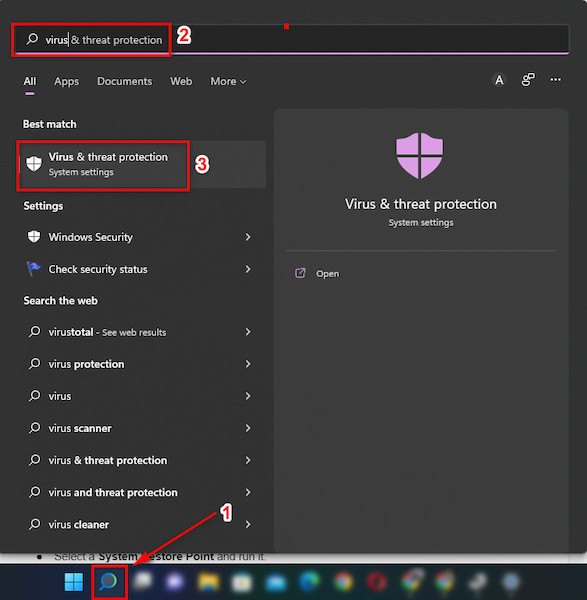
- Click on the Search button.
- Search for Virus & threat protection and click on it.
- Click on the Quick scan button.
- Wait for the process to finish.
- Remove the viruses and malware by following the on-screen prompts.
- Restart your system.
- Check whether the blue screen issue got resolved or not.
If you are still seeing the blue screen on Windows 11, please follow the other magnificent fixes given below.
Also read how to enable & disable CD burning.
6. Run a System Restore
A System Restore is a feature where you can go back to a point in time when your Windows 11 operating system was in a much better condition.
In order to use a System Restore, you need to have a backup beforehand.
Even if you are not sure if you have a backup or not, it is worth a shot to check whether you have a System Restore point present on your system.
The straightforward steps to this simple process are given below, so please go through them.
Here are the steps to use a System Restore point to fix the blue screen on Windows 11:
- Go to the Search button and search for Recovery.
- Click on Recovery and then click on Open System Restore.
- Select a System Restore Point and run it.
- Follow the on-screen prompts and complete the process.
- Click on Finish.
The other options you now have are resetting Windows 11 or reinstalling Windows 11. I would suggest you reset Windows 11 first and if that does not work, you can reinstall Windows 11.
So please go through the remaining fixes given in this post.
7. Reset Windows 11
Resetting Windows 11 is an easy process to remove all the apps present on your system and that is great as this will get rid of any corrupted files present on your pc.
So please keep calm and go through the simple steps given below.
Here are the steps to reset Windows 11:
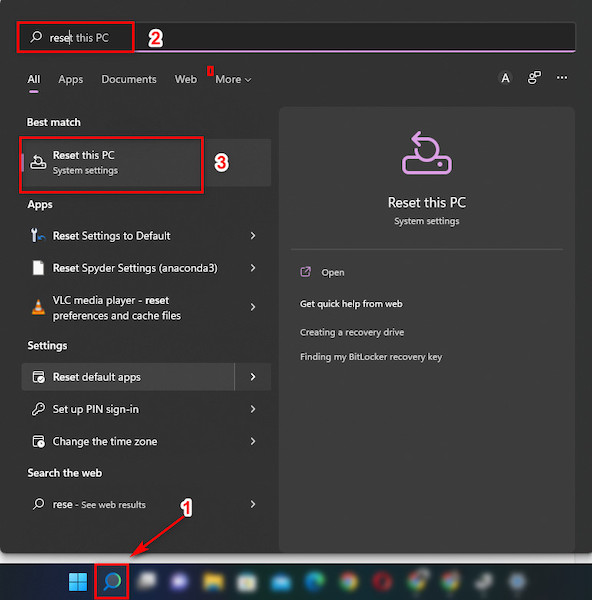
- Search for Reset this pc from the Search button.
- Click on Reset this pc.
- Click on the Reset PC button.
- Select your desired option and follow the on-screen prompts.
- Wait for the process to finish.
- Check whether the blue screen still pops up or not.
If resetting Windows 11 did not work, please follow the next procedure to reinstall Windows 11.
8. Reinstall Windows 11
Reinstalling Windows 11 is the only other option you have left other than changing your hardware.
You do not need to be nervous if you do not know how to reinstall Windows 11.
All you need to do is go to the official Microsoft website and download the Windows 11 installation files.
After downloading the ISO file, run it to install Windows 11.
Select your preferred options during the installation process and you will be good to go. After you are done reinstalling Windows 11, check whether the blue screen still pops up.
Follow our guide how to reduce RAM usage in Windows 10.
9. Upgrade your hardware
This procedure is a bonus tip for me. You can try replacing the HDD(Hard Disk Drive) or SSD(Solid State Drive) that is present on your system.
Usually, an HDD will last about three to five years and an SSD will last from five to seven years.
An HDD has moving mechanical parts that deteriorate with use over time.
SSDs last longer as they do not have any moving mechanical parts, but they have memory cells that perform worse over time, especially during heavy usage.
So try changing your HDD or SSD to see whether that fixes the blue screen on Windows 11.
Conclusion
I sincerely hope you were able to fix the blue screen on Windows 11. We all can agree that this is an annoying problem and I have tried my best to provide you with the best fixes.
Hopefully, you could follow the instructions in this post without much difficulty.
Please go through our other posts if you have further queries regarding troubleshooting problems on Windows 11.