Windows 11 works completely fine most of the time and users, including me are content when that is the case.
Sadly, Windows 11 is not perfect as sometimes some problems arise.
The Network file sharing error On Windows 11 is one of the prevalent issues that is making Windows 11 users annoyed worldwide.
I know you might be worried or confused as to what steps to take in order to fix this frustrating issue, but I would advise you to keep your cool.
Thankfully I have conducted thorough research and have written the best fixes to this problem.
The fixes in this post have also been tested, so there is no doubt they work, so keep calm and go through the entire post for complete details.
Why does the Can’t Access Network Drive issue occur on Windows 11?
The Windows cannot access network drive issue occurs on Windows 11 for reasons like Misconfigured network settings between your Windows 11 system and the Drive sharing settings on your operating system. Not having the proper sharing settings is also another reason for the error to occur.
As there are different reasons causing the network file sharing error on Windows 11, I have written multiple methods targeting the different causes to resolve the error.
All these methods are given below and I have tried my best to write them in an easy manner.
So keep calm and continue reading this post to fix the network file sharing error or Windows cannot access network drive issues on Windows 11.
Here is the easiest guide to fix drag and drop not working on Windows 11.
How To Fix Windows Can’t Access Network Drive On Windows 11
The simple procedures to fix the windows cannot access network drive issues, or network file sharing errors are given below.
The steps are simple and images are provided to aid you, so there is no reason to be nervous.
Please go through the simple procedures given below and you will be fixing the issue in no time without much difficulty.
Here are the steps to fix the windows cannot access drive issue on Windows 11:
1. Change Network Sharing Permissions
Reconfiguring your network sharing permissions is a quick and easy fix to the network sharing error on Windows 11.
This is a very simple procedure consisting of straightforward steps.
So please go through the simple steps given below and you will be good to go. Also, remember to follow the images carefully.
Here are the steps to reconfigure network sharing permissions on Windows 11:
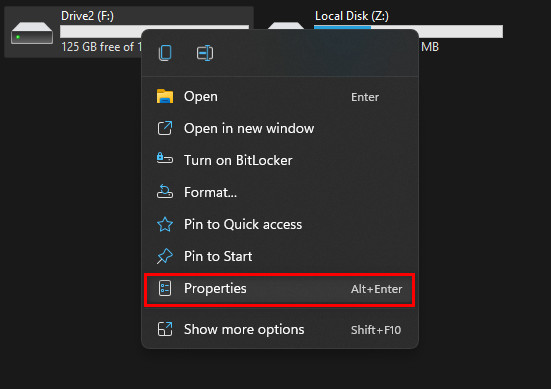
- Right-click on the drive of your choice.
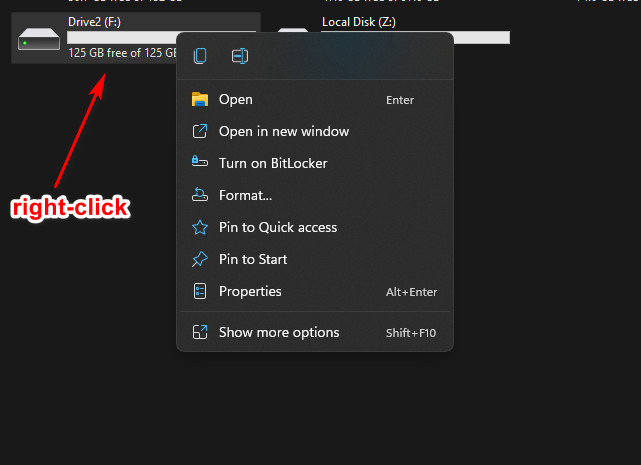
- Click on Properties.
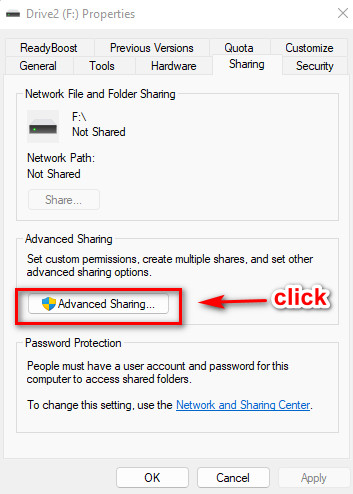
- Go to the Sharing Tab.

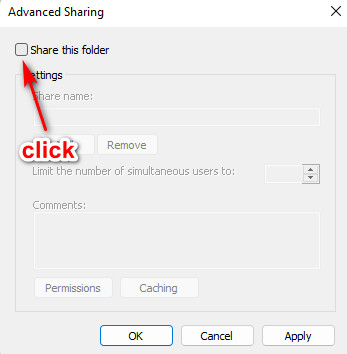
- Click on the Advanced Sharing Options.
- Turn on the Share this folder option by clicking on the checkbox.
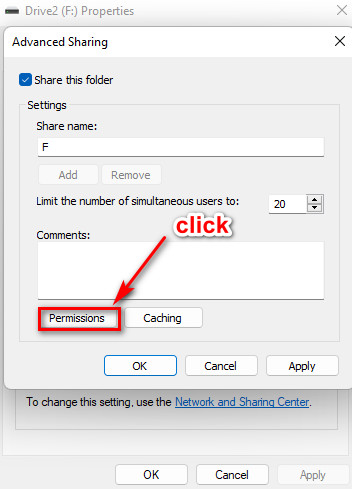
- Enter a name in the Share name box.
- Click on the Permissions You will be taken to another window.
- Select the Everyone option from the list.
- Turn on all the options in the Permission for Everyone section.
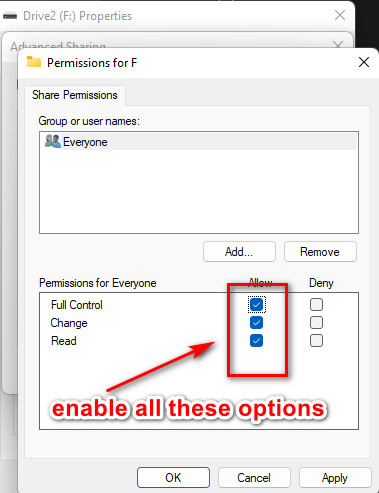
- Click on the OK button, then click on the Apply button, and then finish by clicking on the OK Button.
- Restart your system.
If you are still not able to share the files or your Windows 11 still cannot access a network drive, please go through the other magnificent procedures given in this post.
Follow our guide to fix blue screen on Windows 11.
2. Accept Security Permissions
Sometimes the security settings can interfere with sharing network files or drives.
So you need to change these settings to fix the Windows network sharing not working issue on Windows 11.
You might be confused and I do not blame you.
That is why I have written the straightforward steps to change the security settings in order to fix the issue.
Here are the steps to accept Security permissions on Windows 11:
- Right-click on your desired drive and then click on Properties.
- Go to the Security tab by clicking on it.
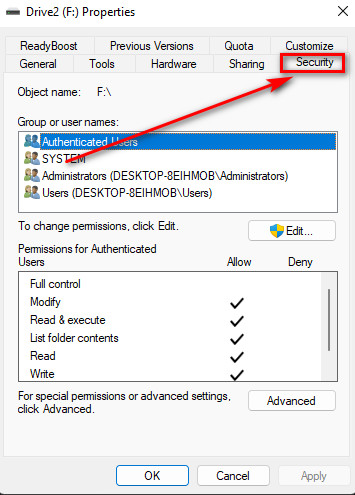
- Click on the Edit.
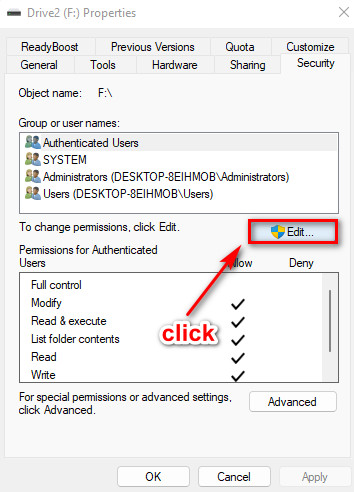
- Click on the Advanced button and then click on the Find Now Button.
- Scroll down through the list and click on Everyone.
- Click on OK.
- Select everyone and turn on the Enable Permissions option for Everyone by clicking on all the checkboxes under Allow.
- Click on OK.
- Navigate to and click on OK on the Security Window.
- Restart your PC.
You have now been granted security permissions for sharing your desired drive if you followed the instructions properly.
Follow the other fantastic procedures given in this post to fix the Windows network drive sharing not working issue on Windows 11.
Also, check out our separate post on how to fix PC won’t go to sleep in Windows 11.
3. Disable Password Protected Sharing
Password-protected sharing is a great way to share files in a more safe manner. Your files will be protected by an encrypted password if they are password protected.
Although that is amazing, it can cause problems during the process of sharing network drives.
Hence, I have written the simple steps on how to turn off password-protected sharing so that you can fix the Can’t access network drive error on Windows 11.
Here are the steps to turn off password-protected sharing on Windows 11:
- Click on the Search button and search for advanced sharing settings and press the Enter key on your keyboard.
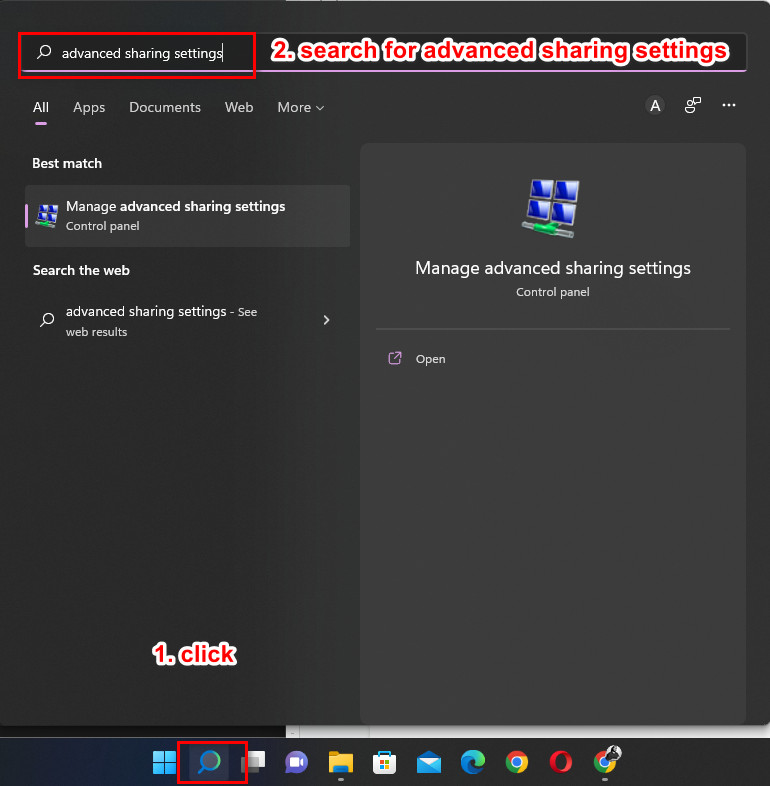
- Turn on the Turn on sharing so anyone with network access can read and write files in the Public folders option.
- Select the Turn off password-protected sharing option.
- Click on the Save changes button.
- Restart your system.
You should be able to share your preferred network drive now. If you still cannot do that, please go through the other excellent fixes given in this post.
Check out the easiest way to install active directory users & computers on Windows 11.
4. Turn On File and Printer Settings
Similar to the previous method, all you need to do is turn on the Turn on file and printing sharing option.
All you have to do is go through the straightforward steps given below and you will be all set.
Here are the steps to turn on file and printer settings on Windows 11:
- Search for advanced sharing options from the search button and press the Enter key on your keyboard.
- Turn on the File and printer sharing option below the Public Sharing
- Close all windows and restart your pc.
Sometimes you need to go through multiple fixes to resolve an issue. If this fix did not work, kindly go through the other ones given in this post.
Read more on does Oculus Air link work with Windows 11.
5. Use Command Prompt
You can use one simple command line in the Command Prompt to fix the Windows network drive sharing issue.
You have to open the Command Prompt with administrator privileges and run a command line.
You can follow the simple steps given below to pull off this simple process.
Here are the simple steps to use the Command Prompt on Windows 11:
- Search for Command Prompt.
- Right-click on Command Prompt and select Run as administrator.
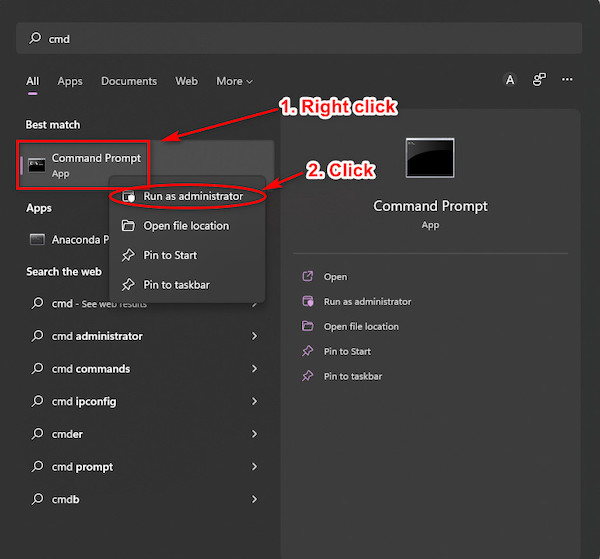
- Click on Yes.
- Paste or type in net use <DeviceName>: \\<ServerName>\<ShareName>. Enter your server name and share name in place of <ServerName> and <ShareName>.
If this method did not fix the Windows network sharing error on Windows 11, please follow the other fantastic procedures given in this post.
6. Run the Troubleshooter
Windows has multiple troubleshooters for the different components present on your system and you can use the troubleshooter for network drive sharing to check if there are any problems.
Even if you have no idea what I am talking about, there is no need to panic.
Just like the other procedures given in this post, all you have to do is follow the steps given below and you will be using the troubleshooter with ease.
Here are the steps to use the Network sharing troubleshooter on Windows 11:
- Search for Troubleshoot settings from the Search
- Click on Troubleshoot settings and then click on Other troubleshooters.
- Scroll down and click on the Run button beside the Shared Folders
- Follow the on-screen prompts.
- Check whether there are any problems.
Please follow the other magnificent procedures if this one did not fix the network sharing drive issue on Windows 11.
7. Turn On Network Discovery
Many users have reported that enabling the network discovery feature can fix the network drive error on Windows 11.
You are going to access the Network and Ethernet menu from the search button and change the settings, it is that simple.
Please follow the simple steps given below to turn on Network discovery.
Here are the steps to turn on network discovery in Windows 11:
- Search for Network and internet and enter it from the Search Button.
- Click on Ethernet.
- Select the Private
- Restart your system.
If you were able to follow the instructions given in this post correctly, you must have been able to fix the Windows 11 network sharing not working issue.
Conclusion
I have given my best effort to provide you with the best information on fixing the network sharing issue on Windows 11.
I know it is a very frustrating problem, but that is life.
All the different causes have been targeted and the procedures given in this post fix the problem by eliminating the reasons.