The drag and drop feature is one of the most convenient features available on multiple versions of Windows.
So, you are trying to use the drag and drop feature, but it is not working.
Previously, you could drag files onto an app present on the Taskbar. This was great as it saved a lot of time.
Sadly on Windows 11, many users are not able to use the drag and drop feature and I know this can be very annoying.
I have written the best ways you can use drag and drop on Windows 11 in this post. I am a Windows power user and the fixes given in this post have been tested.
You can easily go through the very simple instructions given in this post, so please continue reading.
Why is drag and drop not working on Windows 11?
The drag and drop feature does not work on Windows 11 because it has been removed. You need to now open the app window to drag and drop a file into it. There are some rumors that Microsoft is thinking of bringing back the drag and drop feature back to Windows 11.
So, what can you do if you can drag files onto an app icon on the desktop or Taskbar?
You can also use the Split-screen feature to keep the app’s windows open on one side.
After that, you can just drag your desired file onto the app window. You can also edit some registry files, although that is not recommended.
If you want, you can use third-party apps or files to force Windows 11 to have the drag and drop feature.
All of the procedures are given below in this post, so keep your cool and go through them.
Follow our guide to fix blue screen on Windows 11.
How to drag and drop files on Windows 11
It is unfortunate that we cannot just drag and drop like before, but there is no reason to lose hope as you can still drag and drop files in other different ways.
The different procedures on how to drag and drop on Windows 11 are given below, so keep calm and please go through them.
Here are the steps to drag and drop files to the taskbar on Windows 11:
1. Use the Windows Split Screen Feature
IF you need to transfer files from one folder to another, there is a very easy way to do that. You can use the split-screen feature and you will be transferring files between folders in no time.
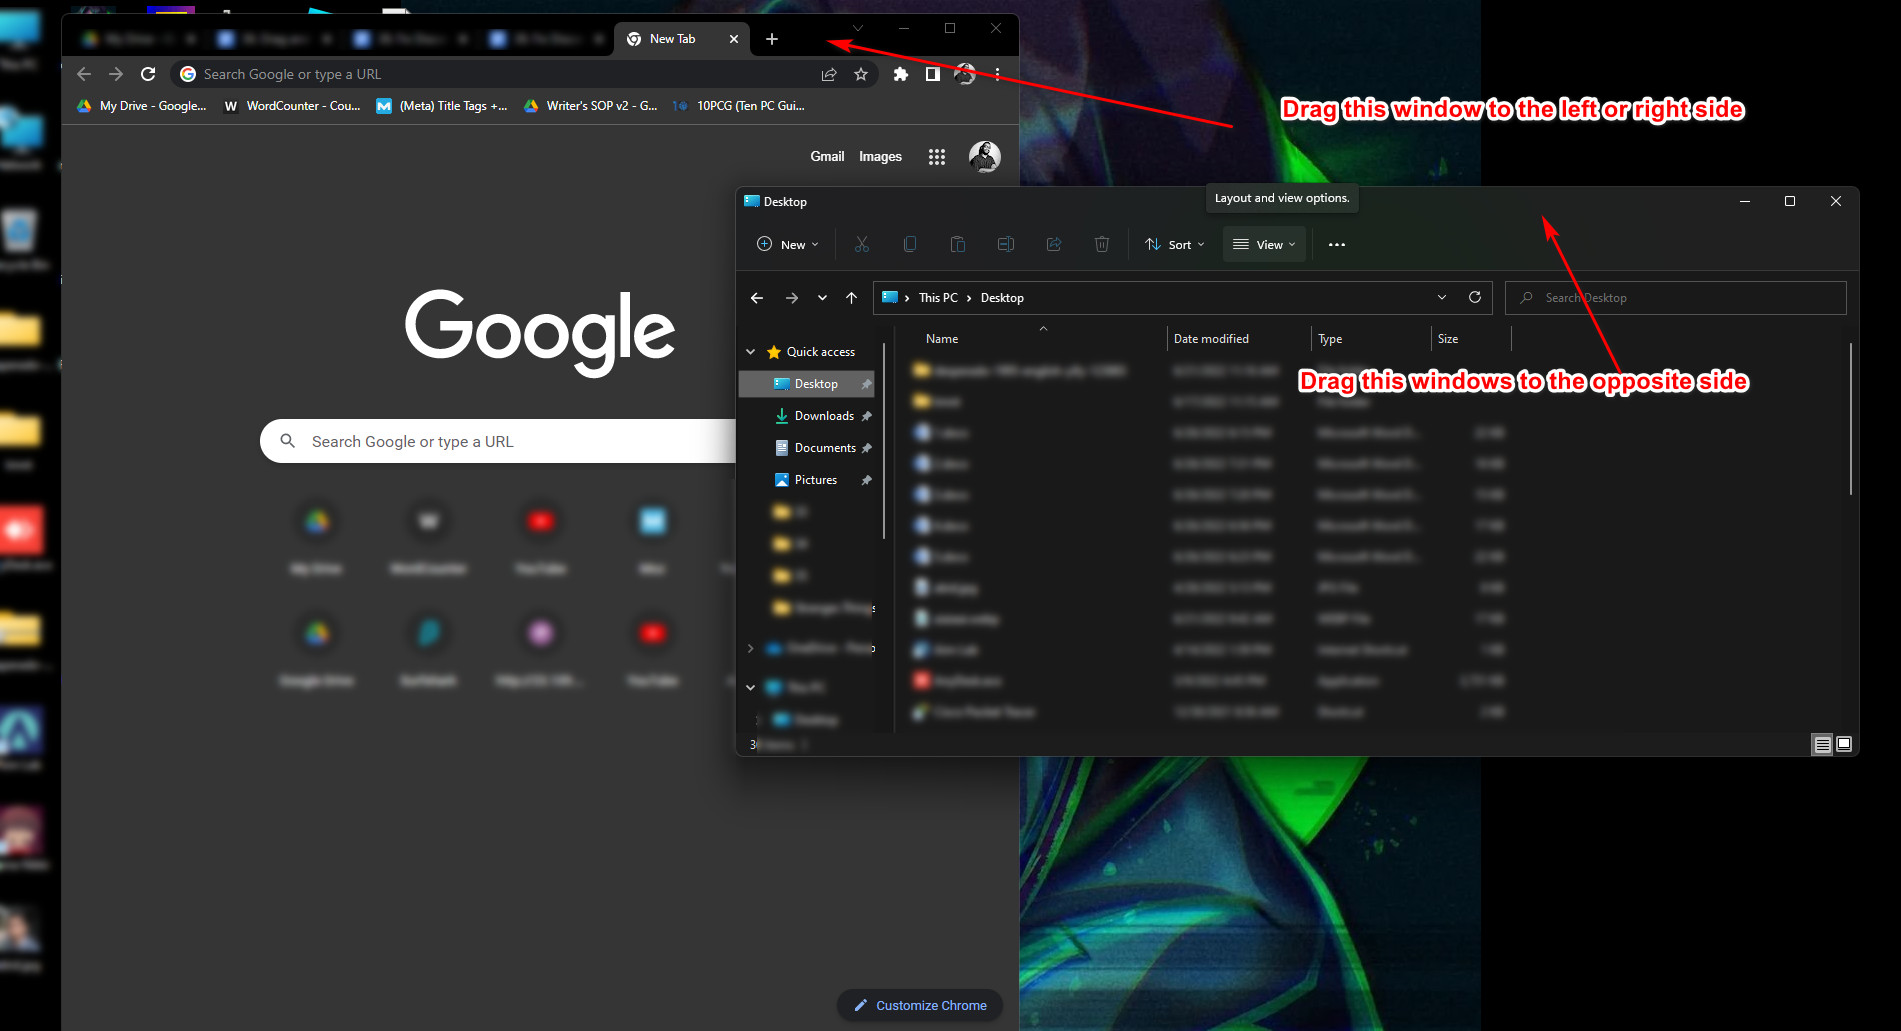
All you need to do is drag one of the windows to the extreme left or right side of your display and that window will take half of the screen.
You will do the same for the other window as well, just using the other side of the screen.
So, the end result is that you will have two windows, each taking half of the screen. From there, you just need to drag and drop the files from one window to another.
If you are still confused as to how you can do this, please follow the straightforward steps given below.
Here are the steps to open windows side by side on Windows to use drag and drop:
- Open the app or folders you want to drag the files to.
- Drag one of the windows to the right or left side of the screen.
- Select what you want on the other side of the screen.
- Drag and drop the files.
If you were not able to follow the instructions given in this procedure, please remain calm and go through the other fantastic ways to use drag and drop on Windows 11.
2. Use Alt+Tab shortcut
The Alt-Tab keyboard shortcut is a quick and easy way to switch between apps or folders on the fly.
It is relatively easier compared to the other procedures given in this post.
All you have to do is hold the Alt button and press the Tab button to switch between apps or windows.
It might sound confusing, so please follow the straightforward steps given below.
Here are the steps to use the Alt+Tab shortcut to use drag and drop on Windows 11:
- Open the files or apps you want to transfer files to. If you want to drag and drop files between two folders, open those two folders.
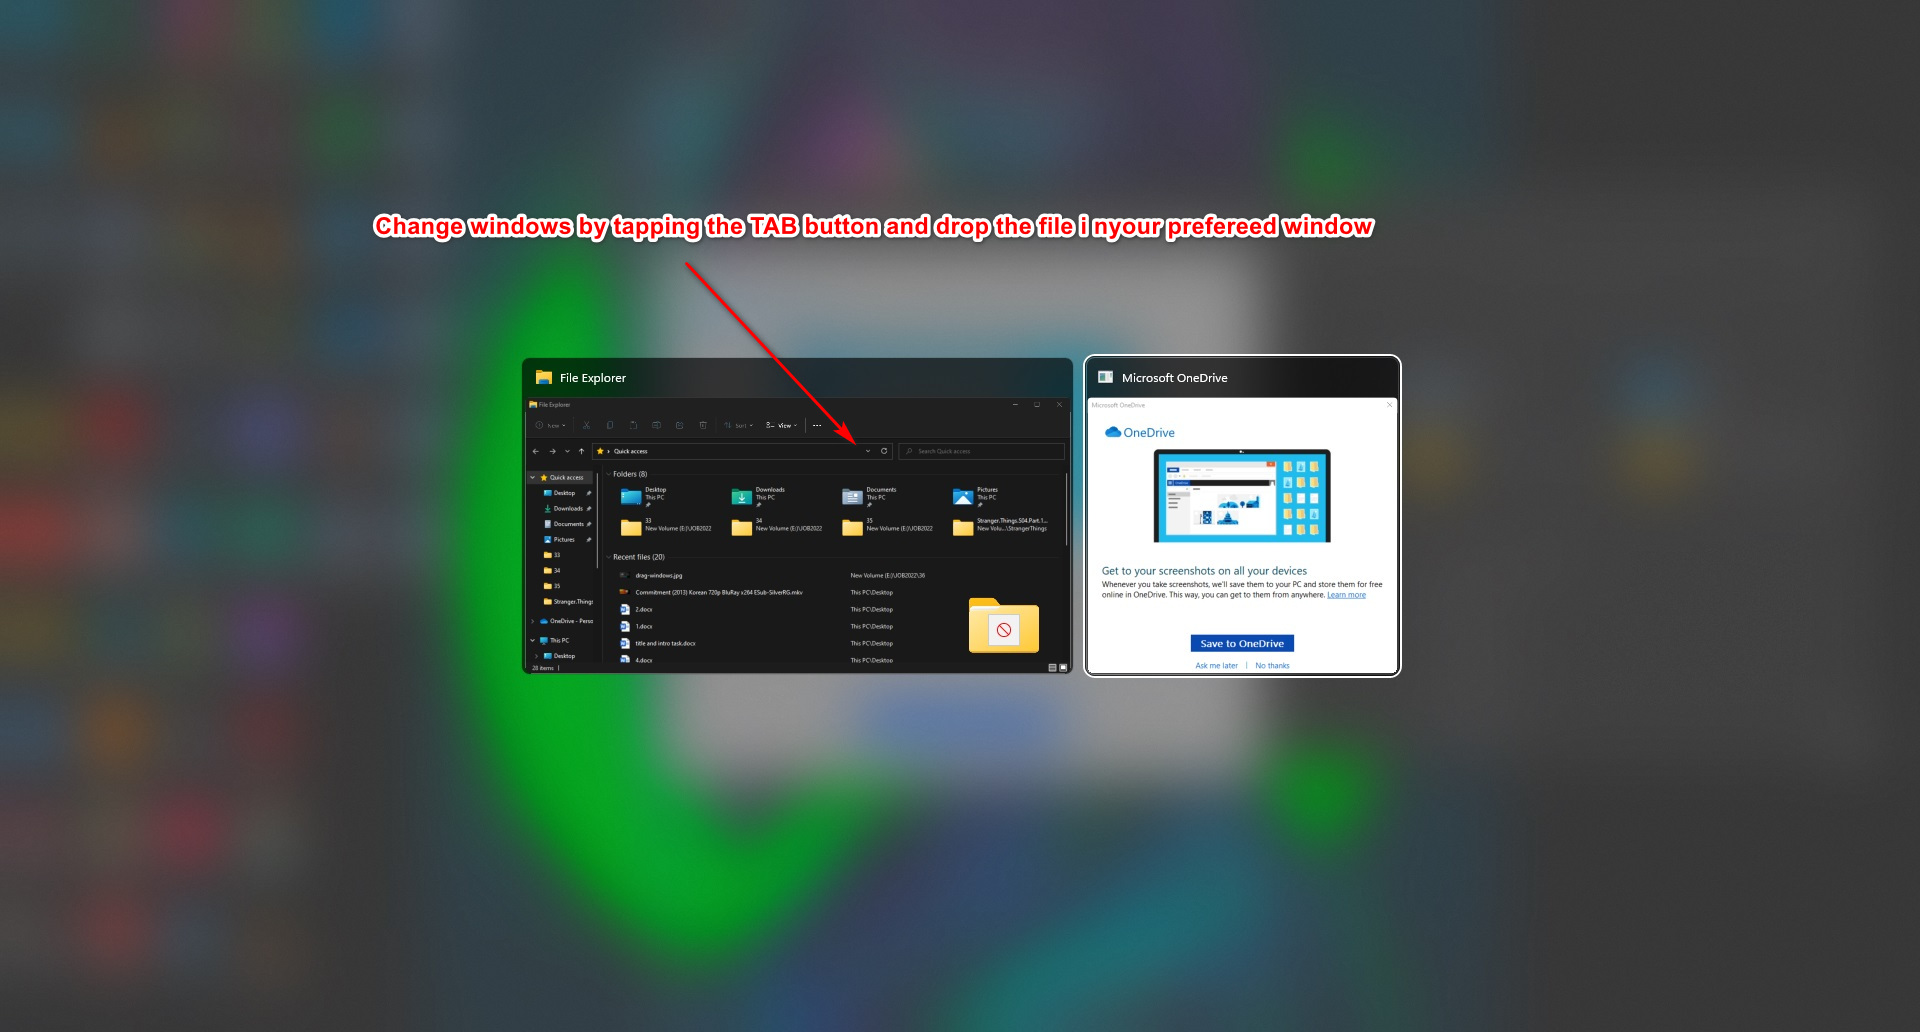
- Drag the file and hold the Alt button and tap the Tab button to switch between windows.
- Select your window and release the Tab button and drop the file or files in the window of your choice.
If you are still confused as to how you can drag and drop on Windows 11, please do not be down and go through the other amazing methods given in this post.
Follow our guide to fix Windows can’t access network drive on Windows 11.
3. Copy and paste files
Yes, just as the name suggests, you will simply copy and paste files in this procedure. If you are using Windows for a long time, you most probably know how you can copay and paste files.
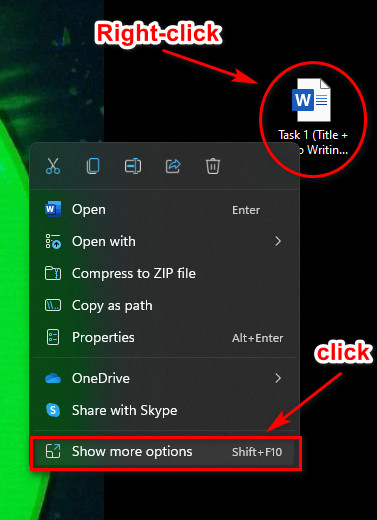
The basic way is to right-click on the file or files you want to copy, click on Show more options and then click on Copy.
After that, you need to go to the folder where you want to transfer the file to.
Right-click on the empty space in the folder, select Show more options, and then click on Paste. The file will be copied and you have transferred the file successfully.
If you did not understand the instructions given above, please go through the simple steps given below.
Here are the steps to copy and paste files on Windows 11:
- Right-click on the file you want to transfer and then click on Show more options.
- Click on Copy.
- Go to the folder or Window you want to paste the file to and right-click on the empty space.
- Click on Show more options and then click on Paste. The file will be copied or transferred.
Please do not lose hope if this procedure did not help you. Kindly go through the other amazing procedures given in this post.
Read more on does Oculus Air link work with Windows 11.
4. Change Registry files
I do not recommend using this procedure. Why? Editing registry files means you are hampering vital files of your Windows 11 operating system.
Note that after using this procedure your taskbar will not work properly.
If you are very desperate, you can use this procedure or else go through the previously mentioned procedures given in this post.
Please follow the steps given below and you will be editing registry files easily.
Here are the steps to edit registry files using drag and drop on Windows 11:
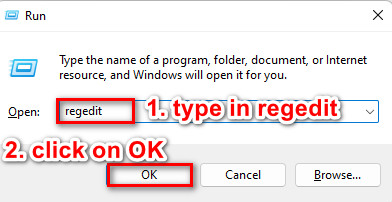
- Press the Window and R keys together on your keyboard.
- Type in regedit and click on OK.
- Enter HKEY_LOCAL_MACHINE\SOFTWARE\Microsoft\Windows\CurrentVersion\Shell\Update\Packages in the address bar.
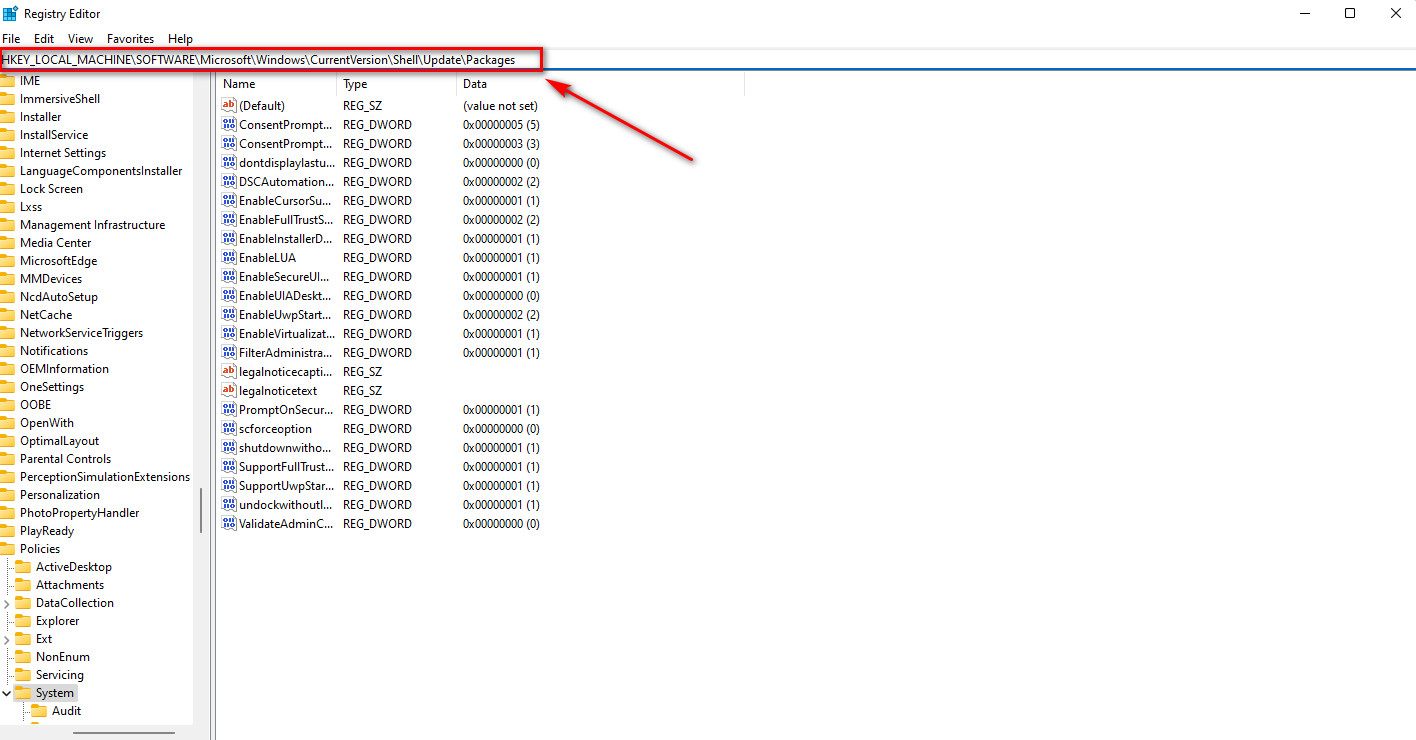
- Right-click on the right side of the screen.
- Select New and then DWORD (32-bit) Value.

- Change the name to UndockingDisabled.
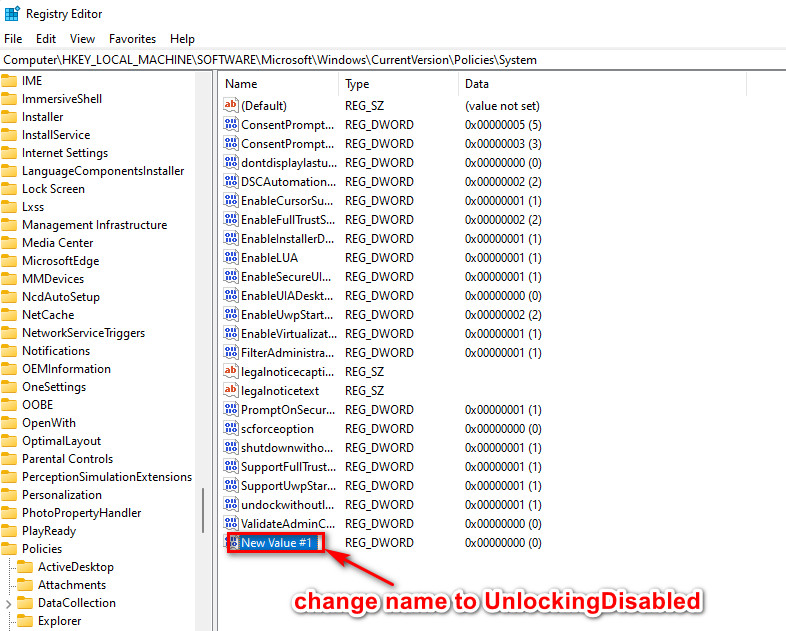
- Right-click on UndockingDisabled and select Modify.
- Input 1 for Value data.
- Click on OK.
- Restart your system.
If this procedure did not help you to use drag and drop on Windows 11, please follow the last method given in this post.
5. Use third-party tools
In this process, you are going to use a script made by a man from Github. It is safe to use this procedure as it does not change registry files like the last method.
Nothing vital is being hampered within this process and you can also deactivate the tool whenever you want to.
Please follow the straightforward steps given below and you will be all set. Remember that this is a third-party app.
Here are the steps to use a third-party tool to use drag ad drop on Windows 11:
- Lunch browser and go to github website then Windows11DragAndDropToTaskbarFix.
- Scroll down and click on the Download Binary (Windows11DragAndDroptoTaskbarFix.exe)
- Click on Windows11DragAndDropToTaskbarFix.exe and the file will be downloaded.
- Navigate to and click on the three-dot icon and select Keep.
- Click on Show more and then click on Keep anyway.
- Run the downloaded file.
- Check whether drag and drop is working or not.
If you want to turn this tool off, please continue reading this post.
How to turn off the third-party tool for drag and drop
If you want to turn off the tool that you used in the last procedure given in this post, please go through the very simple steps given below and you will be turning off the tool in no time.
Here are the steps to turn off the third-party tool for drag and drop on Windows 11:
- Go to the search button and click on it.
- Search for Command Prompt.
- Right-click on Command Prompt and select Run as administrator.
- Type in or Paste taskkill /f /im Windows11DragAndDroptoTaskbarFix.exe in the terminal.
- Press the Enter key on your keyboard.
- Close the Command Prompt. You have turned off the tool.
If you were able to follow the steps given above properly, I am sure you were able to turn off the third-party tool.
Also, check out our separate post on what are the disadvantages of not activating Windows 10.
Conclusion
I am also sad that we cannot drag and drop as we used to in the previous version of Windows. I guess it is a sacrifice for the sake of evolution.
There are rumors that Microsoft is planning to bring back the drag and drop feature to Windows 11.
I sincerely hope you were able to use the drag and drop feature on Windows 11 and that you have gained some knowledge reading this post.