It’s irritating while trying to delete the temp files from your C drive to free up space, but access to the temp folder is denied. You are trying again and again, but the result is the same. Well, you aren’t the only person, as recently, I also have faced the same issue while deleting the temp files on my Windows 10 PC.
 In this article, I will explain these temp files, their uses, why you need to access the folder, why access is denied, and the best possible methods to access the temp folder without hassle. I will explain them individually, like What, Why, and How.
Many of us don’t know why the space in the C drive reduces daily, resulting in a performance drop. At regular intervals, unnecessary files need cleaning from the drive to run the PC smoothly. So without further ado, let’s start by explaining the temp folder and files.
What Are Temp Folders and Files?
Temp files are the temporary files created by your RAM in the Temp folder when you run an application on your PC. These files are no longer needed once you complete the task. After closing the application, Windows deletes the files, but sometimes Windows keep them longer than usual.
Various types of files are created as temp files. For example, unsaved text files, extracted installation and compressed files, video or web files from streaming websites, and downloaded executable files that you “run” instead of “save”.
Related content you should read how to use password instead of a pin to log into windows 10?
Why Do You Need to Access the Temp Folder?
Generally, Windows removes temporary files from the folder after closing the program. But many of these temp files remain untouched on the temp folder because Windows doesn’t delete them instantly for future uses.
In the long run, the temp files occupy a lot of space on your hard drive, and Windows falls short on the C drive. As a result, you start getting a slow response from your PC. It is one of the main reasons why you need to access the temp folder. You can also do some magic with the temp files. Stick around, and I’ll show you how!
Why is the Temp Folder so Crucial?
Though these temp files don’t have any significance in the outcome of the apps, they can be used to restore lost data.
For example, while using Microsoft Word, your texts, fonts, and styles are stored in a temp folder until you save them. Similarly, while using Adobe Premiere Pro or After Effect, all these edited files are stored in the temp folder before rendering the final video.
So finally, we can say that while we are running software and doing our necessary things, the software creates a temp file and keeps data as long as you save the output file wherever you want. Sometimes Windows also use the temporary folder to run the necessary Windows service apps.
Read more on windows 10 education vs pro.
Why is Access to the Temp Folder Denied?
Access to the temp folder may be denied because of a Lack of administrative permission, and User Account Control may also prevent you from accessing the folder. It is widely seen for Windows 7 to 11 users, as the newly created administrative accounts don’t have full permission.
Sometimes your current Windows account doesn’t have the inheritable permission to access the temporary folder. As a result, you may notice that you can access all the other folders rather than the temporary folder.
How to Eliminate the Access Denied Message?
Shifting to a proper account or taking ownership of the folder will fix the problem, for instance. The issue is present on all versions of Windows, so you may see an Access denied message from Windows 7 to Windows 11.
The problem doesn’t have too many solutions over the internet. After hovering over the internet for quite some time, I found several ways to eliminate the Access Denied message, which actually helped to access my temporary file without any further trouble.
But, before that, do check our latest post on what are the disadvantages of not activating windows 10?
Here are the methods that can help you get access to the temp folder:
1. Turn Off UAC [User Account Control]
User Account Control(UAC) is a Windows feature that doesn’t allow malware and harmful files to run on your computer and cause fatal damage. Applications run without administrative permission when your UAC is on for that user account.
To run the application with administrator privilege, you need to right-click on the .exe file and choose the option Run As Administrator.
The temporary folder doesn’t care about the UAC. So, you must turn off the UAC to open the temp folder for further tasks.
Here are the steps of how you can disable User Account Control(UAC):
- Click on the Windows Icon and type Control Panel.
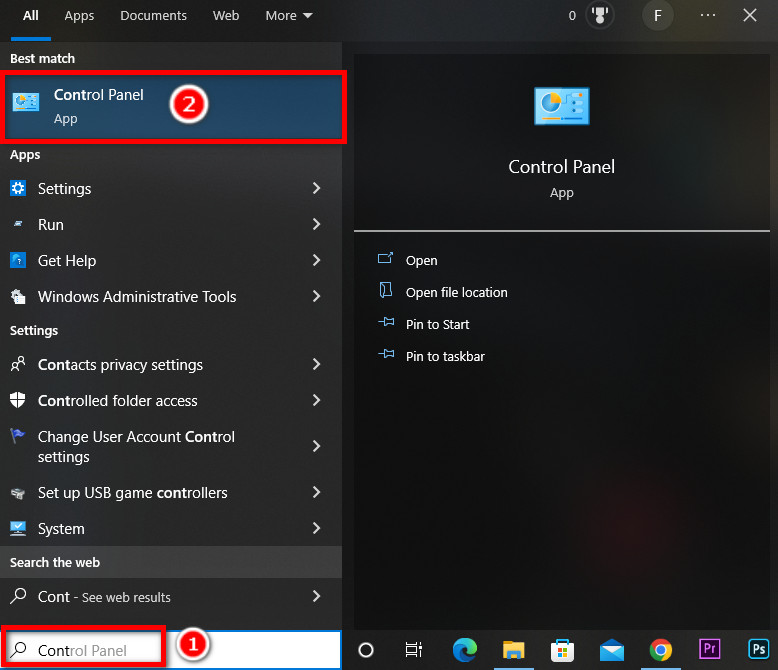
- Open Control Panel.
- Click on User Accounts.
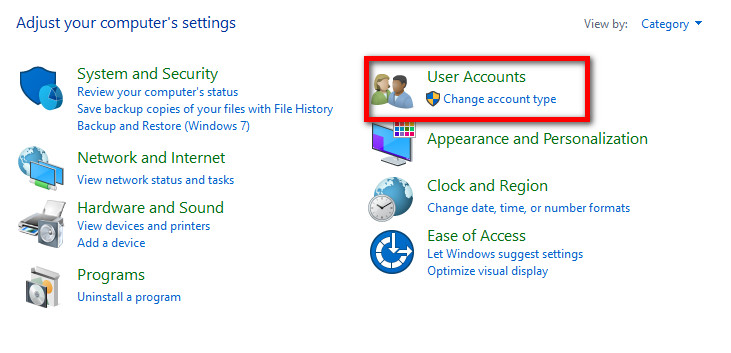
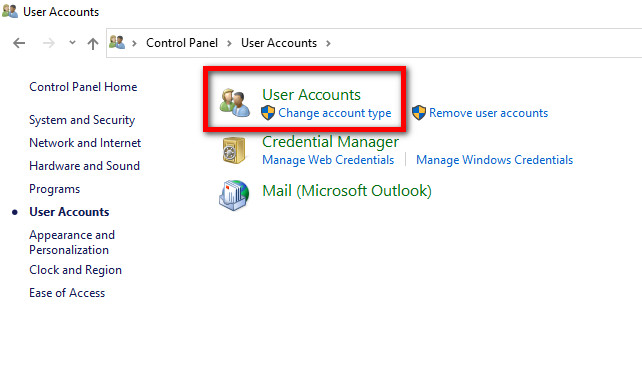
- Hit on the Change User Account Control settings.

- Place the slider at the bottom to Never Notify and hit OK.
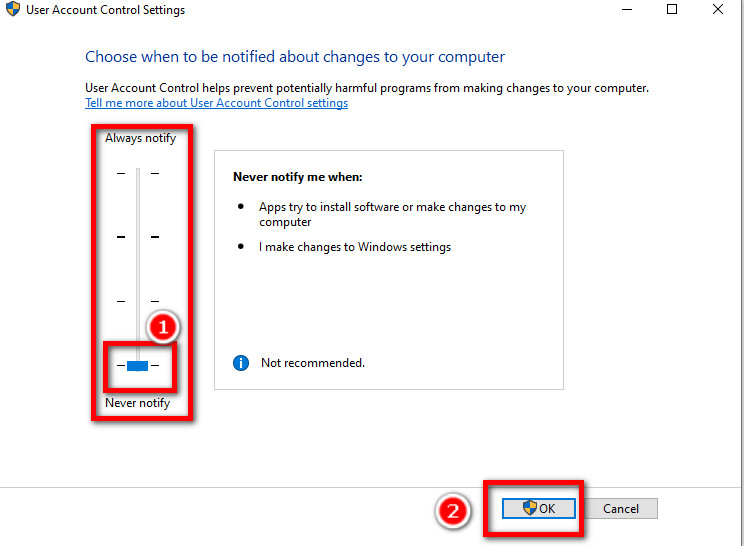
Open the temporary folder again to check whether the problem is solved or not. You can access it by pressing Window+R from your Keyboard, typing %temp%, and hitting Enter.
Important: After completing your task in the temp folder, don’t forget to take the UAC settings to the default level; Notify me when apps try to make changes to my computer. If you don’t make the change, the malware will get a free pass to damage your files.
If this method doesn’t solve the problem, then move to the next one and check again.
Also related to this guide about adjust page file in windows 10.
2. Access Permission Modification for the Temp Folder
Another trick you can do that is more interesting. You can access the temp folder by simply making the temp folder require low-level permission. To do that, you need to navigate to the folder’s parent folder.
Copy and paste the following path in your Windows search bar and navigate to the folder:
C:\Users\%UserName%\AppData\Local ( %UserName% denotes your user account name). 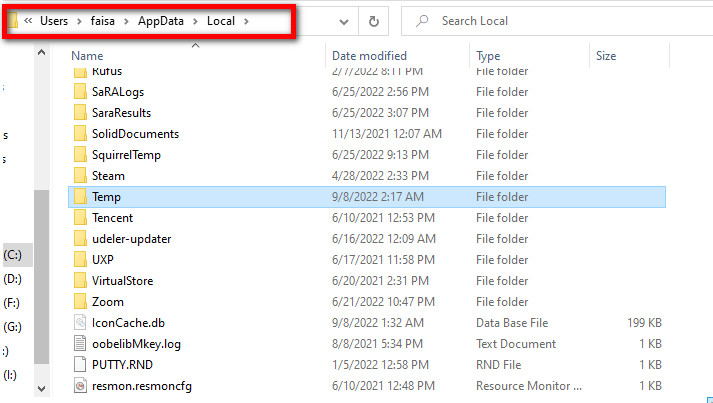
Follow the steps below to modify the access permission on the temp folder:
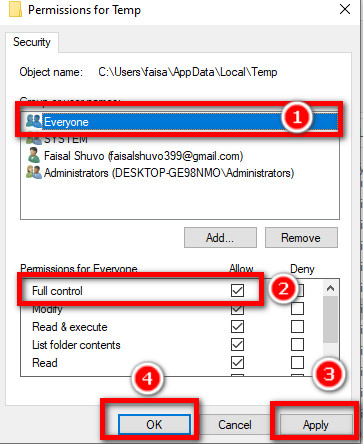
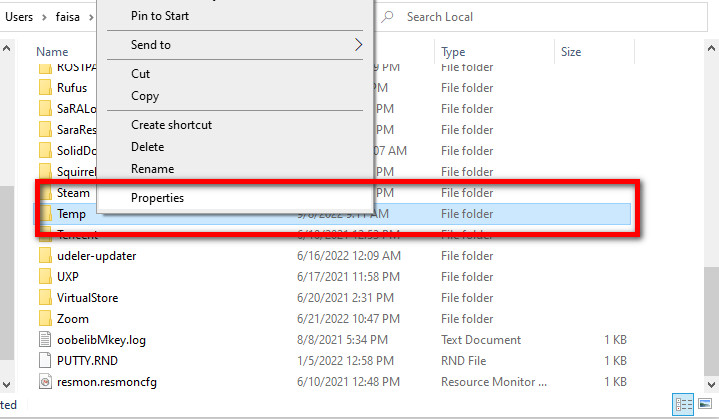
- Right-click on the Temp folder and go to Properties.
- Hit on Security.

- Now, Click on Everyone from Groups or user names.
- Check the Full Permissions checkbox under the Allow column in the permissions section.
- Lastly, Click Apply and the OK.
If you don’t find the Everyone group under the Groups or user names section, you need to add it.
Follow the steps below to add Everyone to the list:
- Hit on the Edit button in the Security tab.
- Now, Select Add.
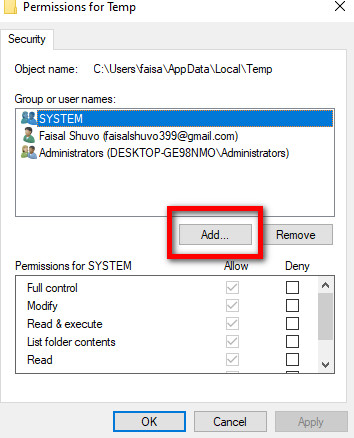
- Type everyone under object names.
- Click on Check Names.
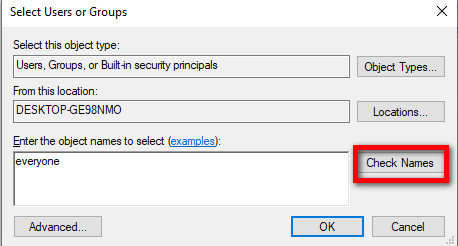
- Hit OK to complete the process.
Now everything should be good. Try to go to the temp folder again to check whether you can access it now, unlike your ex’s inbox. If the answer is no, march to the next method.
3. Built-in Administrator Account Activation
Windows 7 and later versions have a hidden account with full admin privileges.
You may have given the administrator role to yourself while setting up fresh Windows. Still, you may have less administrative power in that account than in the hidden account.
Follow these steps for activation of the built-in admin account:
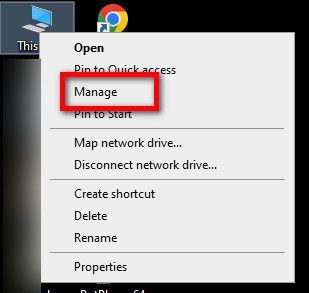
- Find This PC on the Computer screen.
- Right-click on it and choose Manage.
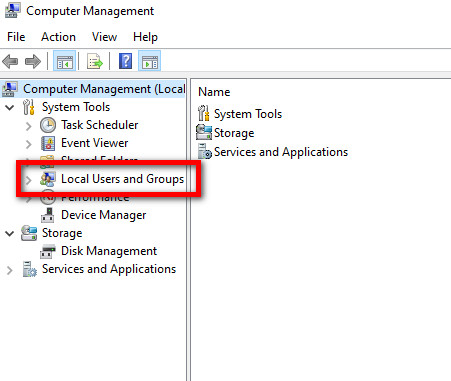
- Look for Local Users and Groups at the left sidebar and single click on it.
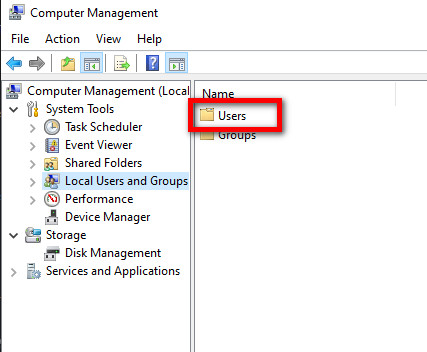
- Double-click on Users.
- Find out the Administrator from the list, which has the description- Built-in account for administering the computer/domain.
- Double-click on Administrator.
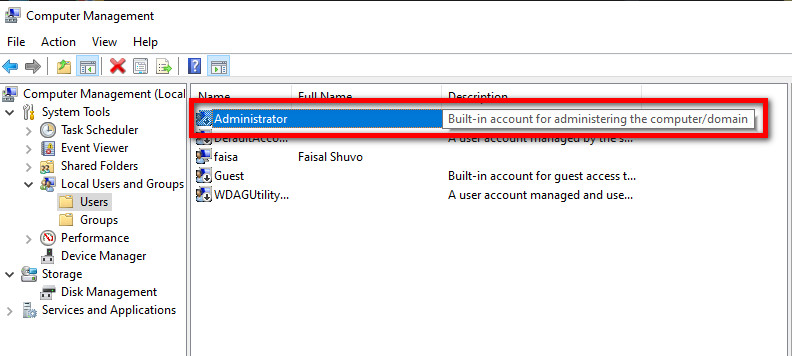
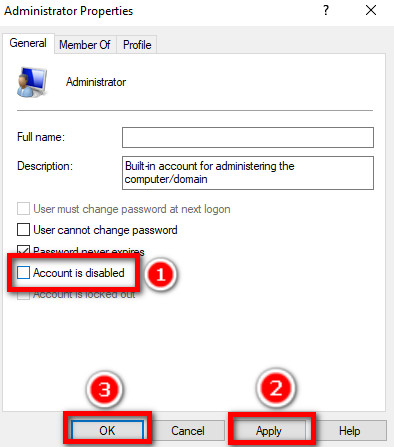
- On the dialog box, uncheck Account is disabled.
- Click OK and Restart your computer.
Another method of enabling the hidden admin account is using the Windows Command Prompt(CMD).
Here are the steps you need to follow:
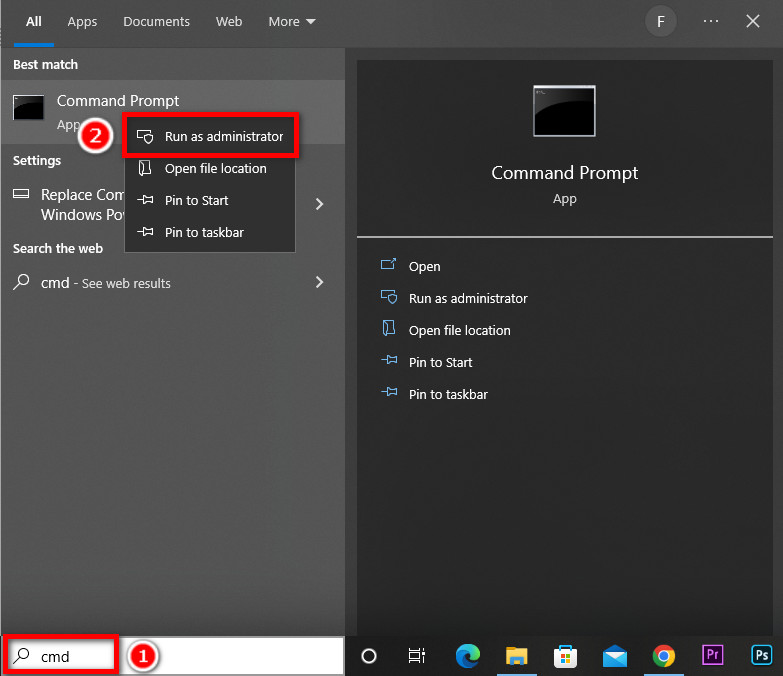
- Click on Window Icon and type CMD.
- Right-Click on the CMD app and select Run as Administrator.
- Copy and paste this command:
net user administrator /active:yes 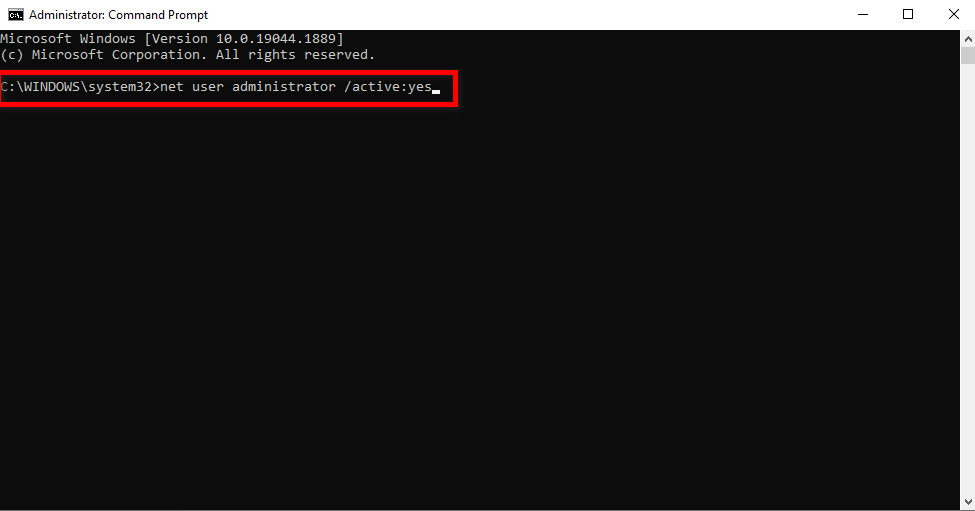
- A confirmation message will appear after some time.
- Now, restart the computer.
Once your PC is booted, you should see the new admin account. After logging in, you can try to reaccess the temp folder.
NB: Once you have deleted the temp files, you need to turn off the admin account by navigating to the same path. Otherwise, Windows will not load the startup application, which is something you don’t wanna see.
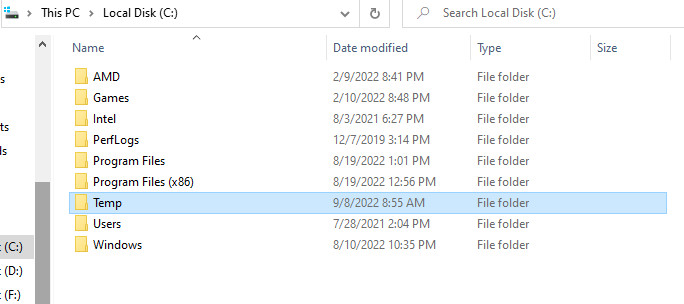
4. Create a New Temp Folder
You can make a new temp folder anywhere in the C drive and command Windows to recognize the new temp folder as the default temp folder. The method seems easy to implement, but you must be extra careful to avoid making any mistakes.
Note: Changing the temp folder might result in data deletion. Please backup your important data before you take the following steps.
Follow the steps below to replace the temp folders:
- Create a New Folder in your Windows Drive C and name it Temp.
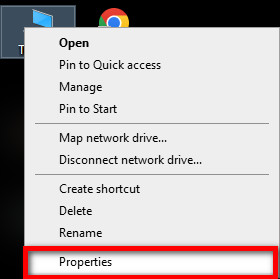
- Right-click on This PC, then select Properties.
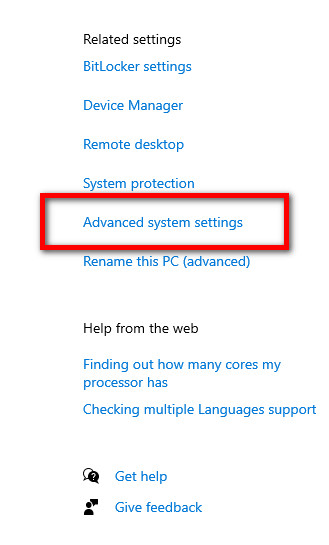
- Find Advanced system settings from the right-hand sidebar.
- Navigate to Advanced.
- Click on Environment variables.

- Now click on Temp under User Variables for %UserName%.
- Click on Edit.
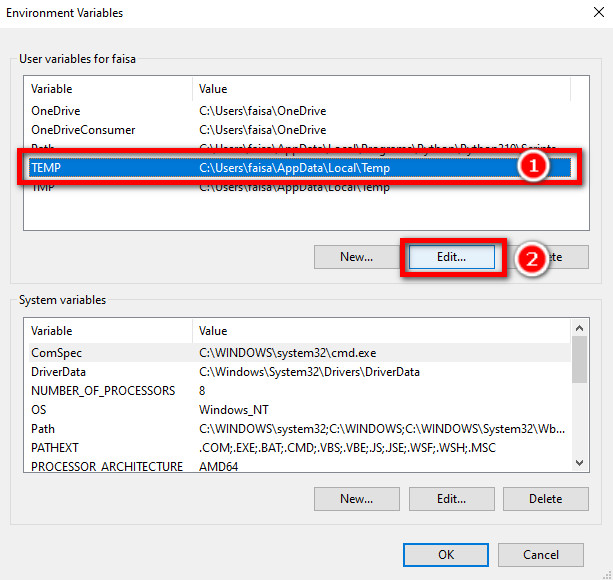
- Type the current path address of the temp folder you created. (e.g., C:\Temp).
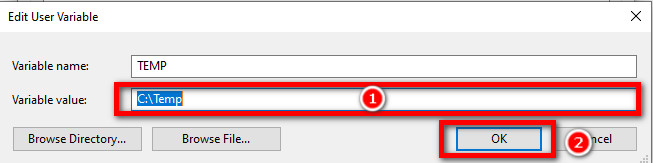
- Hit OK twice and close the window.
Now time to check once again if the method is working or not. To make the change work, you need to restart the computer. Don’t be disheartened if it doesn’t; just try the next method.
But before that, go through our epic guide on how to reduce ram usage in windows 10?
5. Give Inheritable Permission to Child Folders
The last thing you can do is allow the inheritance of the child folders inside the Local folder.
Follow the steps below to enable inheritable permission:
- Go to the Windows Search bar and paste the following address:
%userprofile%\AppData\Local\Temp 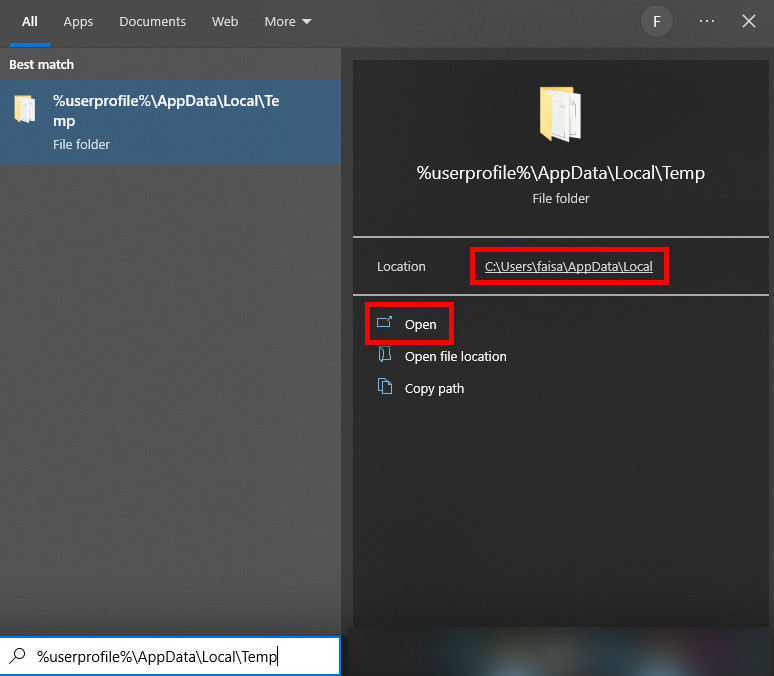
- Look for the Temp folder and go to Properties.
- Head to the Security tab.
- Now click on Advanced.
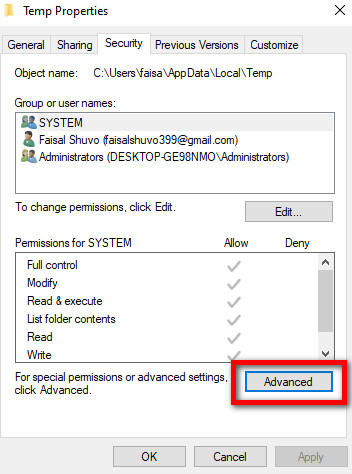
- Now, Click on Enable inheritance.
- Hit on Apply and then OK.
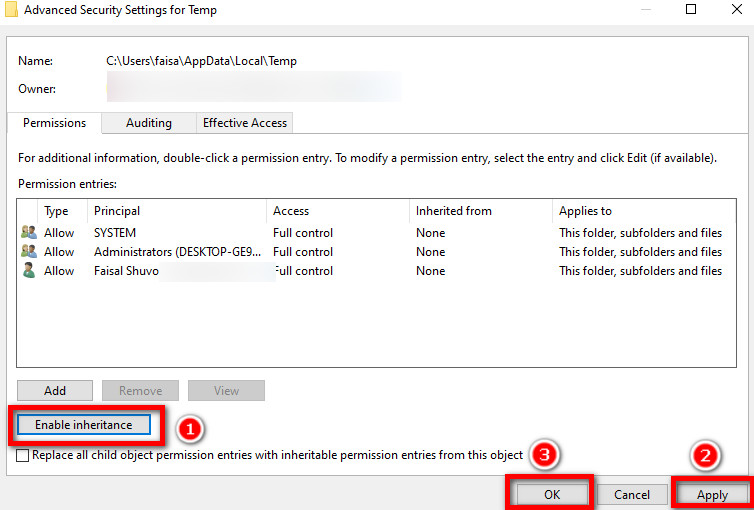
Now, check the accessibility of the temp folder. I hope you already have access to your temp folder.
Maybe now you have some questions on your mind. I will answer the most commonly asked question below. Perhaps this will be helpful for you.
FAQs
Is it okay to delete the temp folder?
Yes, you can delete the files. Windows usually delete them after the successful execution of any program. If it doesn’t delete automatically, you can do it manually too.
Can I restore Temporary Files in Windows 10?
In the latest version of Windows updates, it has become much easier to get to your temporary files and restore them in case you accidentally deleted them.
Step 1: Open the Settings app and go to Update & Security > Backup. Select Restore files from a current backup.
Step 2: You can now browse to your temp file folders, and you will be able to select the files that you want and then choose to restore them.
Do Windows Have Only One Temporary Folder?
No, It depends on how many users accounts you have. Basically, each user account has one temp file. So, if you use only one user account, you have only one temp folder.
But you may notice that some Application installation directories also have a temp folder. e.g., Adobe Premiere Pro or GameLoop have their own temp folder in the installation directories to reserve their data.
Conclusion
Hopefully, this article has helped you to access the temp file. In my case, I solved the issue by enabling inheritable permission. Maybe it’s the easiest way to follow. Let us know in the comments which method saved you.
Comment below if you have any new ideas or quarry on this issue. Please let us know if these solutions don’t resolve your problem. We will reach you ASAP.
If you got any problems with other software, feel free to knock us. We will try our best to help you to resolve your problem. In the world of tech, nothing is impossible. Where there is a problem, there is a solution.