Quick access is a Windows File Explorer feature that stores and shows recently visited folders and files along with pinned items by the user. Though it is a convenient feature, some of you may find it annoying because whenever you open File explorer, these files pop up in front.
Disabling Quick Access is not a big deal. You can re-enable it any time you want, and you don’t even need any expert’s help. The methods include using the Registry Editor, File explorer settings and the Local Group Policy Editor.
Here I am going to explain the methods to turn off Quick Access in Windows 11. Follow my instructions very carefully to disable this feature from your File Explorer.
Without further ado, let’s get right into it.
Check out our separate post on how to fix windows can’t access network drive on Windows 11.
Why Does Quick Access Need to be Disabled?
Quick Access needs to be disabled as it causes various problems, such as you cannot rename any files in Quick Access, pops up before opening the File Explorer. This is also a personal preference and feels meaningless and annoying to keep for some users.
Most users tend to deactivate quick access for its appearance during the opening of File Explorer. You open File explorer to see the drive partitions and then navigate to the place you desire. But having turned on Quick Access, you are to click on My PC located at the left panel every time and navigating the left panel is annoying.
Again, some users do not want others to show which files or folders they recently used. This calls for the disabling of Quick access.
How to Disable Quick Access in Windows 11
There are quite some methods to deactivate Quick Access, such as using file explorer settings, registry editor etc. You can try any of them to get the same result. So, I suggest reading them all first. Then try your preferred method.
Here’s what you have to do to turn Quick Access off:
1. Use File Explorer Settings
Windows 11 File Explorer comes up with the choice to enable or turn off Quick Access. It is easy to enable or disable according to user preference.
Follow the steps below to use File Explorer Settings:
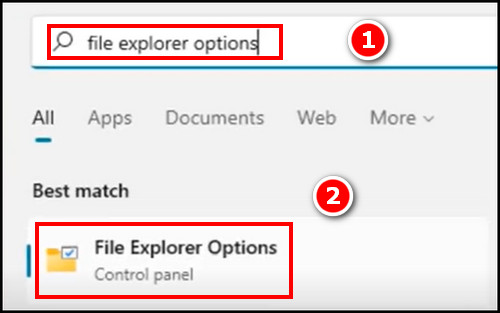
- Click on the search icon in your Windows 11 taskbar.
- Type File Explorer Options in the search box and click on the best match. It will open a small window containing the options we need to turn off Quick Access.
- Make sure that the General tab is selected in the small window.
- Click on the Open File Explorer to option and select This PC.
- Uncheck the two options under the Privacy options. It will make your Quick Access hide.
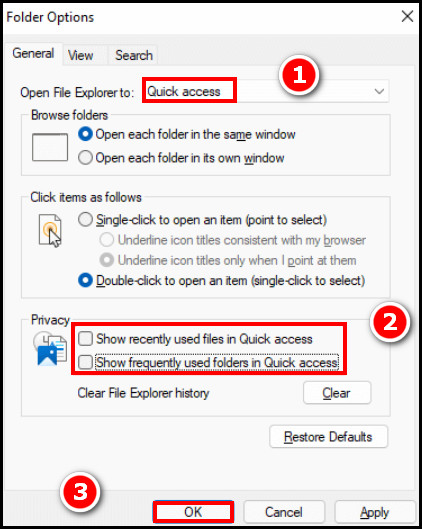
- Click on OK, and you are done.
If you see previous Quick access files, even after doing the right settings. Then click on Clear in the small window. It will clear all recent files.
Also read on how to update drivers on Windows 11.
2. Run the Registry Editor
Using the Registry Editor is another way of turning off Quick Access in your Windows 11. But be careful not to make any wrong steps here as the registry is a sensitive place. Any mishaps here might ruin your PC, and you will need to do a Fresh Install in that case.
Follow the steps to run the Registry Editor:
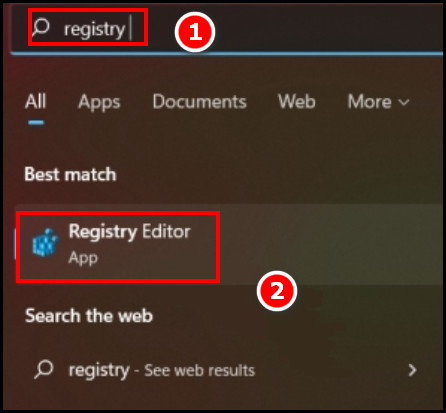
- Click on the Search icon located in the middle of your taskbar. Type Registry, and you will see Registry Editor.
- Select the Registry Editor. This will open the Registry Editor window.
- Navigate to the following location HKEY_CURRENT_USER\SOFTWARE\Microsoft\Windows\CurrentVersion\Explorer\Advanced.
- Look for the string named LaunchTo and double-click on it. The string value will be displayed.
- Change its value to 0 and click on OK.
You might need to restart your PC if you do not see any changes to the File Explorer. But if it does not help, you may follow the next method.
Here is the easiest guide to fix drag and drop not working on Windows 11.
3. Use Local Group Policy Editor
This is a workaround for the previous methods and might be unfamiliar to some of you. But it will do the job just fine. So try it out.
Follow the steps to use Local Group Policy Editor:
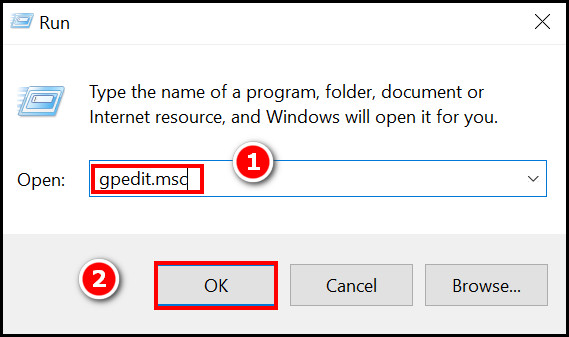
- Press the Windows key + R on your keyboard. It will open the Run box.
- Type gpedit.msc in the Run box and click on OK. The Local Group Policy Editor will be opened.
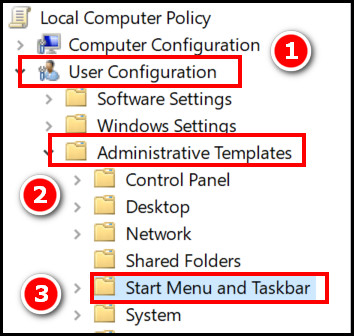
- Click on User Configuration, located at the left panel. Some options will appear under the option.
- Search for Administrative Templates and again click on it. Then select Start Menu and Taskbar.
- Find Remove Quick Settings Policy and then double-click on it. A new window will pop up.
- Select the Enabled option in the new window.
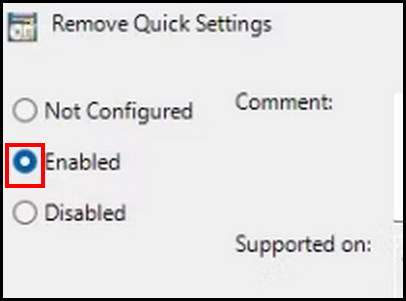
- Click on OK, and you are done.
Follow our guide to fix blue screen on Windows 11.
How to Enable Quick Access
Suppose you have disabled Quick Access successfully. But if you ever need the feature again, you can also enable it quite easily. You will need to follow the steps above in the reverse direction to enable them.
If you have used the File Explorer method to turn Quick Access off, you need to open File Explorer options and then make the small window options as it was before. Finally, clicking OK will do the trick.
For Registry Editor, you will have to change the value of LaunchTo to 1. After a restart, it will be as it was before.
But if none of these works, you can use the Fresh Start option in Windows to reset your Windows completely.
NOTE: I would not recommend a Reset, as it uninstalls all your softwares.
Also, check out our separate post on how to fix PC won’t go to sleep in Windows 11.
FAQs
How do I turn on quick access in Windows 11?
You need to open File Explorer options and then make the small window options as it was before. Finally, clicking OK will do the trick.
How do I show my computer instead of quick access?
You need to click on the search icon on your desktop, type File Explorer Options, and press enter. In the new window, click beside Open File Explorer To option and select This PC. After this, click on OK and close all windows. Try opening File Explorer. You will see this PC opened.
How do I exclude files from quick access?
If you have a particular file or folder in your Quick Access that you don’t want to appear, excluding it is a straightforward process. You have to right-click on the file or folder and select Remove from Quick Access or Unpin from Quick Access.
Conclusion
Most users have found their solution through the File Explorer method. It is easy for all users to follow along. Again, it is quick and easier to undo than the other methods.
If you find any portion of my article too difficult to understand, feel free to use the comment box below. I will try to explain that part in more detail. Also, if you have any alternative methods, do share them. Don’t forget to share the article with your friends if they are also looking to disable quick access.