Getting tired of wasting your valuable time launching the same programs every day? They say time is money, so why not just set up a keyboard shortcut and save yourself some minutes?
Once you integrate Windows into your daily life, there will definitely be a small list of programs that you get used to opening frequently.
While it may seem like opening each of these programs manually may not take up too much time, you can actually save a lot of trouble by using keyboard shortcuts. It’s only been a few months since I started using this feature, and in my experience, it takes Windows to another level.
I’m sure you can’t wait to try this out yourself, so grab a cup of coffee and skip ahead to the next section to get step-by-step instructions.
How To Set Up Keyboard Shortcuts in Windows 11?
There’s no limit to how many keyboard shortcuts you can set up; it can be for any number of programs, services, or custom actions.
Although many people don’t know about it, keyboard shortcuts have been around since Windows XP (yes, it’s been that long), and this feature is now more customizable and easier to set up.
Before moving forward, you should note that Microsoft already integrates some pre-built keyboard shortcuts during Windows installation.
You can find the complete list of keyboard shortcuts later in the guide but read this section first.
Related content you should read about fix Sound Cutting-out on Windows 11?
Follow these steps to set up keyboard shortcuts in Windows 11:
1. For Launching Programs
You can select a keyboard shortcut with any number of keys for any program by specifying it in the Properties section of any program file.
Follow these steps to create a keyboard shortcut for launching programs:
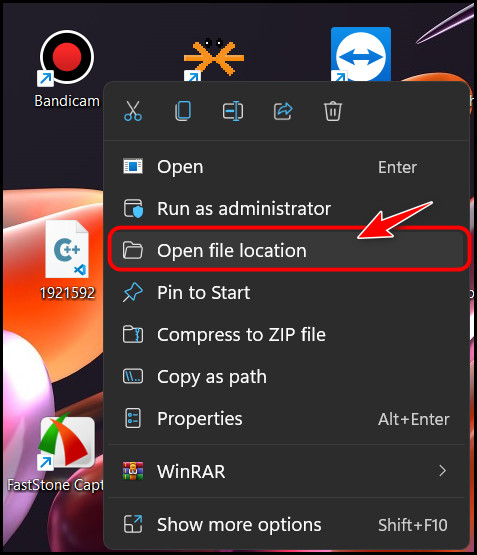
- Locate the program shortcut on your Start menu and right-click on it.
- Select Open File Location from the context menu.
- Right-click on the program’s desktop shortcut if you don’t have the shortcut in the Start menu and select Properties.

- Right-click on the program’s shortcut in the File Explorer window if you opened it from the Start menu and select Properties.
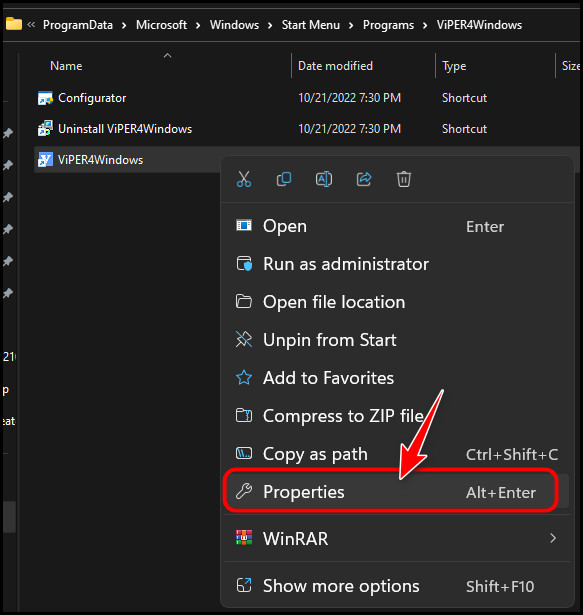
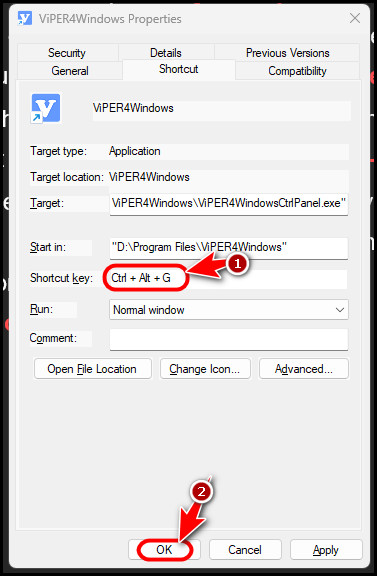
- Switch to the General tab of the Properties window if you are not already on it, and look for the text box next to Shortcut key.
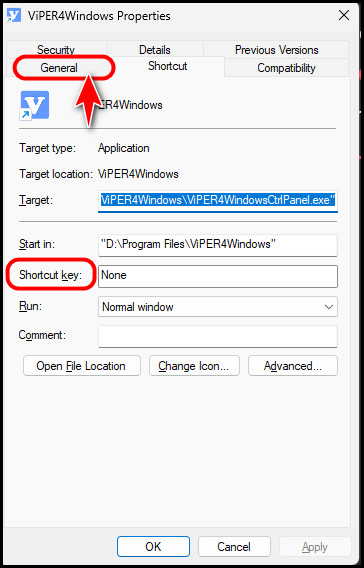
- Click on the text box next to it and press a key combination that you want to use to launch the program. Once Windows detects the keystrokes, you should see the combination appear in the Properties Select OK to save the changes.
That’s all! You will be able to launch the program from anywhere by simply using that key combination.
One point to keep in mind is that Windows may assign an additional key to the combination if that key combination is already configured to launch something else. In that case, use the key combination that appears in the text box.
While this is an excellent way to create shortcuts, you are only limited to launching programs with keyboard shortcuts. If you want a quicker way to create these shortcuts and also use keyboard combinations to launch any folder or file, follow the next method.
Some more guides on how to turn Game Mode ON or OFF on Windows 11?
2. For Launching Files, Folders and Programs
I know you may want to avoid third-party programs due to integrity risks, but WinHotKey has been tested and is confirmed to be safe.
If you want to use keyboard shortcuts to launch applications, open documents or folders, type some text or perform various actions like minimizing or resizing the current window, then this app is made for you.
Follow these steps to set up WinHotKey in Windows 11:
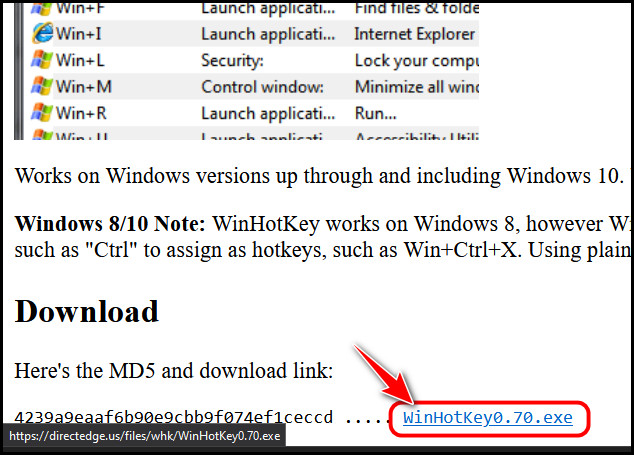
- Visit the WinHotKey homepage and scroll to the Download. Click on the highlighted hyperlink to download the installer.
- Launch the downloaded file and follow the instructions to set it up.
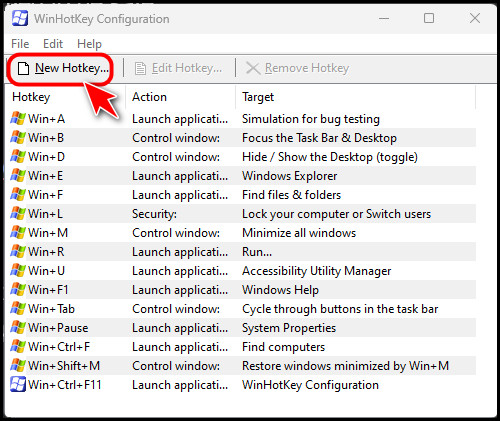
- Open the application once it’s installed.
- Click on New Hotkey at the top left corner.
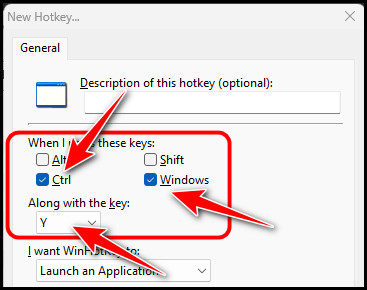
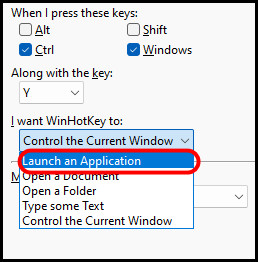
- Select the key combination by checking the keys and selecting it from the drop-down menu. For example, if you check Windows, Ctrl and select Y from the drop-down menu, then the hotkey will be activated when you press Windows + Ctrl + Y.
- Select the action you want the shortcut to perform by expanding the drop-down menu under the I want WinHotKey to section.
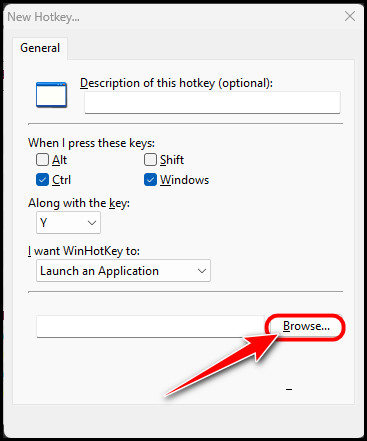
- Select the Browse option if you chose to Launch an application, open a Document or Open a folder.
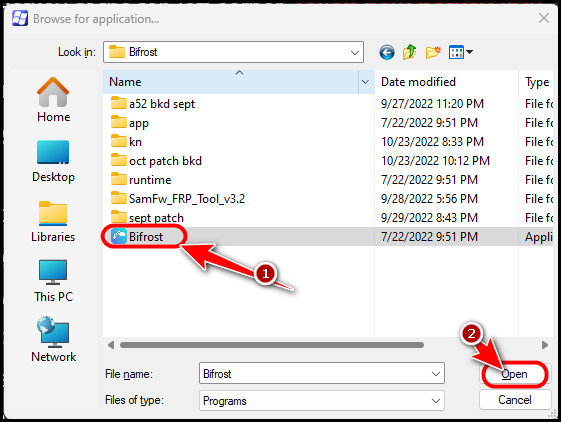
- Navigate to the folder where the program’s exe file, document or folder is located. If you select a program or document, click on Open. Otherwise, click on the select folder instead.
- Select OK to save the changes.
As you can notice, this alternative makes managing all the keyboard shortcuts easier and more efficient in Windows. In addition, you can also find a list of other keyboard shortcuts that you can change according to your preferences.
While setting up your own customized keyboard shortcuts is exciting, I recommend using the built-in shortcut if one already exists. If you are wondering how to know if it exists, you can refer to the comprehensive list of keyboard shortcuts in the next section.
Check out the easiest way how to fix Spotify overlay not working on Windows 11?
What Are the Existing Windows Keyboard Shortcuts?
You can find a comprehensive list of all the existing keyboard shortcuts below. The data is verified and updated to some new shortcuts from the latest build of Windows 11.
Here is the complete list of built-in keyboard shortcuts on Windows 11:
1. Windows 11 Exclusive Shortcuts
The following table lists all shortcuts that only work on Windows 11:
| Task | Shortcut |
|---|---|
| Launch Quick Settings (only for Windows 11) | Windows key + A |
| Launch voice typing (only for Windows 11) | Windows key + H |
| Mute microphone in supported apps (only on Windows 11 22H2) | Windows key + Alt + K |
| Launch notification center/calendar (only on Windows 11) | Windows key + N |
But before that, go through our epic guide on fix function keys stopped working on Windows 11.
3. Alt Shortcuts
The following table lists all shortcuts that use the Alt key:
| Task | Shortcut |
|---|---|
| Scroll through running applications | Alt + Tab |
| Show the password on the Login screen | Alt + F8 |
| Close current application | Alt + F4 |
| Switch between running windows in order | Alt + Esc |
| Show selected File/Folder properties | Alt + Enter |
| Go to the previous page | Alt + Left Arrow |
| Go to the next page | Alt + Right Arrow |
But, before that, do check our latest post on VPN not working on Windows 11.
4. Windows Key Shortcuts
The following table lists all shortcuts that use the Windows key:
| Task | Shortcut |
|---|---|
| Maximize current Window | F11 / Windows key + Up arrow |
| Switch to Task View | Windows key + Tab |
| Show / Hide desktop | Windows key + D |
| Open Quick Link Menu | Windows key + X |
| Lock Current User Account | Windows key + L |
| Launch File Explorer | Windows key + E |
| Launch Settings app | Windows key + I |
| Minimize all running windows | Windows key + M |
| Restore all minimized windows | Windows key + Shift + M |
| Launch Run | Windows key + R |
Have some time to spare? Check out our latest fix for how to show Battery Percentage on Windows 11?
5. Fn Key Shortcuts
The following table lists all shortcuts that use the Fn (Function) keys:
| Task | Shortcut |
|---|---|
| Rename the selected File/Folder | F2 |
| Search something in File Explorer | F3 |
| Refresh Current Window | F5 |
| Open the menu bar of the running application | F10 |
You may also like to read about fix Brightness Slider Missing On Windows 11.
6. Shift Key Shortcuts
The following table lists all shortcuts that use the Shift key:
| Task | Shortcut |
|---|---|
| Permanently delete the selected file | Shift + Delete |
Also, check out our separate post on how to show battery Percentage on Windows 11?
Final Thoughts
To summarize, more people need to be aware of how much time setting up keyboard shortcuts can save. You should know how to configure a shortcut key yourself after reading the first section, whereas the second section should be enough to learn existing ones.
Share this article with your friends if you enjoyed it so that they can also use this Windows trick and save time.