Cores are like smaller CPU units that can perform individual tasks independently. Having more CPU cores is always better, making your PC run tasks more efficiently. But every core might not always be activated.
Windows manages the activation of cores according to the user’s needs. But you can also enable them manually.
Here I will explain the methods to enable all of the cores available to your computer. So, read the article without skipping to learn about core activation.
Without further ado, let’s dive right in.
You may also like to read about how to fix PC won’t go to sleep in Windows 11?
When Do You Need to Enable All CPU Cores?
You should enable more cores to perform significantly better than a single-core CPU of the same clock speed, run multiple processes simultaneously, and increase performance when multitasking. Also, it enables your PC to work efficiently while running powerful apps and programs.
Having multiple cores enabled means your PC has multiple mini-processors for individual tasks. They can even divide the workload among themselves to make the process faster. So, obviously, you are getting advantages over a single-core PC with the same clock speed.
Another thing to note is that the more cores your PC has, the more simultaneous work can be done in a single go. So, more cores are always good for multitasking. But if the cores remain dormant, they will be useless to you. This is why you will need to activate your CPU cores.
Again, some heavy apps and games cannot be played unless your PC supports multiple cores. So, if your cores are activated according to the window’s management, they might not activate during your game. This brings us to the manual activation of all cores.
Related contents you should read about how to uninstall Drivers in Windows 11?
How to Activate All CPU Cores in Windows 11
The easiest and fastest way of enabling all CPU cores is the default Windows 11 system configuration window. But there are other ways if this fails to do the job.
You will not require prior knowledge to activate the cores of your computer. If you follow the instruction carefully, you can complete the activation yourself.
Related guide about how to easily move a Window that is off-screen on Windows 11?
Here’s what you have to do to enable all cores in Windows 11:
1. Use the System Configuration Tool
Windows has a powerful built-in system configuration tool. This tool can be used to change active core numbers, and you can decide the number of cores you want to use from here.
Follow the steps to use the system configuration tool:
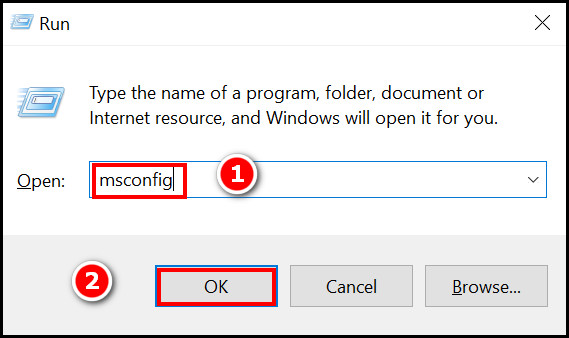
- Press the Windows key + R on your keyboard. The program Run will start.

- Type msconfig in the Run box and click on OK. The System configuration window will pop up.
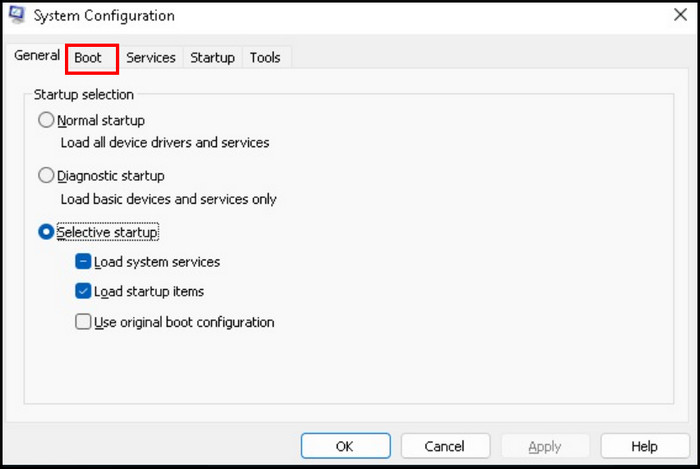
- Select the Boot tab in the system configuration window. This will change the options in the window.
- Find the Advanced Options within the window and click on it. Another small window will pop up above the previous window.
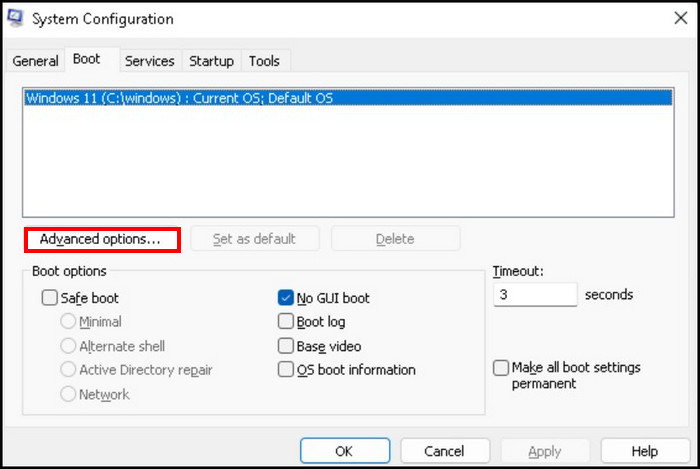
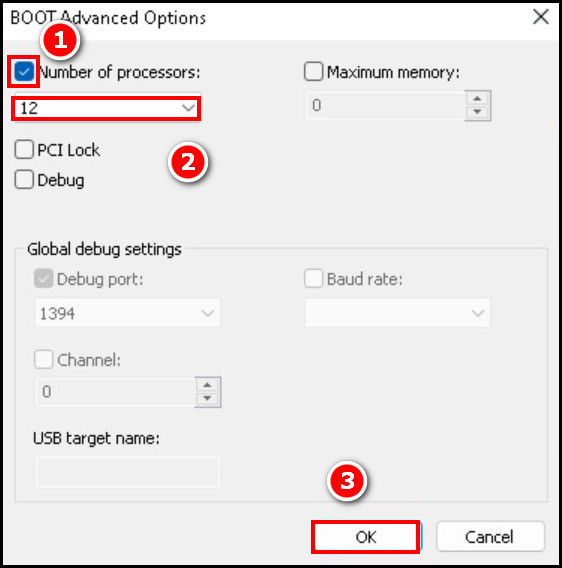
- Check the box saying Number of processors and then select the number of processors from the drop-down box below. It is recommended to use the maximum number of processors for maximum performance.
- Click on OK.
- Restart your computer as instructed. The changes will only take effect after the restart.
Most users will find their cores enabled by following this method. However, there might be a few exceptions. No need to worry, as I will also provide an alternative method.
Some more guide on fix Drag and Drop not working on Windows 11.
2. Change the BIOS Setting
Some manufacturers provide the option to change CPU cores in the advanced option located within the BIOS. If the Multi-core support is disabled from the BIOS, you cannot use the previous method to enable them.
Follow the steps below to change BIOS Settings:
- Press the Power Button and shut down your PC. After the computer turns off completely, turn it on.
- Start pressing the delete key repeatedly until you see your BIOS opening. Note that this key differs from manufacturer to manufacturer. Some need to press the F2, F10, or F12 key to start the BIOS.
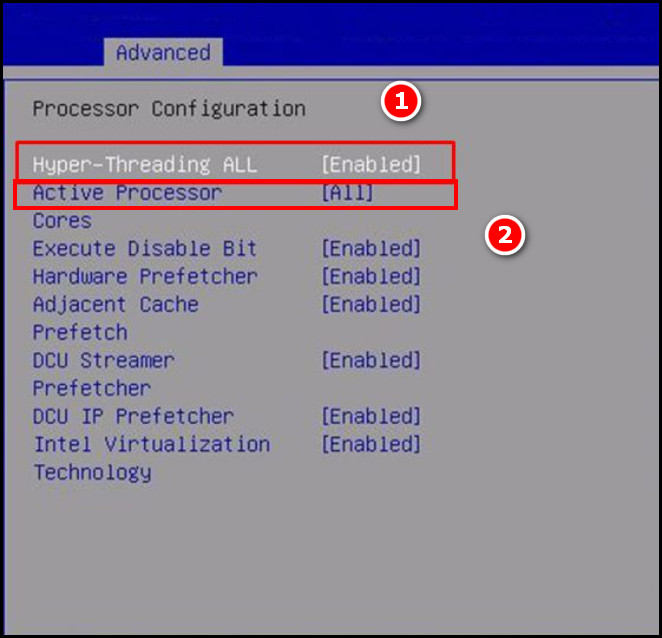
- Find the advanced option and enable Hyperthreading.
- Click on the Active Processors and select All. Now save changes and reboot.
You might need to look for quite a bit before you find the right options, as the layouts vary from manufacturer to manufacturer. But once you do, it will be smooth sailing onward.
Read more on fix Remote Desktop not working on Windows 11.
Should I enable all CPU cores?
Yes, it is OK to enable all CPU cores. It is noted that Windows manages the cores needed to provide the best performance. So, they are being enabled if needed by any heavy software of process. But what enabling these does is give any of the processes the extra computational power needed. This reduces the time needed to perform any task and makes the computer faster and more efficient.
However, as windows manage the cores as needed, there is no need to fix the number of cores manually. For any average user going beyond 4 cores is extravagant. But there are exceptions as well.
Suppose you are running any specialized softwares with a lot of computational powers required. In that case, activating all cores will greatly affect the software’s output, making the improvements visible to any user. It is worth trying to enable them and see if your PC improves.
FAQs
How do I activate all cores on my PC?
You can activate all cores on your CPU by using the System Configuration window. Use the msconfig command in the Run program and select the Boot tab. Select the advanced option and set the number of cores. After a restart, your cores will be activated as set before.
Is enabling all CPU cores good?
Due to the management of Windows, it is really not necessary to go out of your way to enable all CPU cores. But it might help if your program is heavily dependent on computational power.
Conclusion
CPU clock speed and the number of cores determine a computer’s performance speed. But even if two computers have the same clock speed, the number of cores ensures greater performance. So, enabling more cores is good in certain circumstances.
I tried to keep the article easy to understand and follow so you can use it easily on your Windows 11. But if you find any parts difficult to understand, feel free to contact me using the comment section below. Don’t forget to share this with your friends if they need to run all their CPU cores.