Are you the only one who uses your computer? If it is barely used by anyone other than you, you do not need to enter the password every time you turn on your computer and sign in to your user account.
Entering the password when you boot your computer is a tedious task.
You can configure your Windows 10 computer to log in automatically without having to enter your password each time. This can save a lot of your time in the long run.
The method of configuring your PC to log in automatically without entering your password and removing your password has been shown elaborately in this guide. Take a look at its content to know how you can log in to your Windows 10 PC without a password.
Follow our guide how to turn on auto login in Windows 10.
What Happens When You Configure Windows To Auto Login?
Microsoft Windows allows you to skip your sign-in process by starting your computer and booting up your desktop immediately by configuring it with auto-login. As a result, you won’t have to spend time typing in your password to log in to your user account.
The auto-login option is a very handy feature offered by Microsoft in Windows 10 to let you start using your computer instantly without any impediments when you turn it on.
Auto-login is set by default when you install Windows 10 on your computer for the first time.
The auto-login feature is applied to your startup account. You can then choose if you want to add a password in Windows 10. If you do, you must type in that password every time you start your computer. It can be quite a time-consuming process, especially if your password is long and has letters in different cases, numbers and symbols.
Having to enter the password each time you want to boot up your computer can waste some of your precious time, which can be a huge amount.
So, you can use auto-login to avoid entering the password and directly sign in to your user account in Windows 10 when you power on your computer. This way, you can save valuable time and get into your work in the blink of an eye.
The ways of configuring Windows 10 to log onto your account automatically without having to type in your password are shown in the following section.
Keep reading to learn how to configure auto-login on your Windows 10 computer.
Find out how to enable BitLocker in Windows 10 Home.
How To Configure Auto Login Without Password In Windows 10?
There are two ways to set the auto-login feature to sign you into your account in Windows 10. One way to do it is from the advanced tool for user accounts management on your computer. You have to edit the registry to configure auto-login if this option is unavailable.
Remember that you cannot turn on auto-login if you use your Microsoft account to sign into your Windows PC.
Configuring auto-login from the user account management tool is very easy, but the option to do it might not be available in your version of Windows 10. In that case, you would have to open the Registry Editor tool and use it to configure your computer to sign you in automatically without a password.
The process of setting auto-login by editing the registry is a bit complicated but do not worry about that, as both methods are explained here in simple words. You can easily apply them after having gone through the steps shown here.
Follow these steps to configure Windows 10 auto-login without a password:
1. Configure Auto-Login From User Accounts Tool
The simpler way of using auto-login to sign in without a password is using the User Accounts tool.
This is how you can set auto-login from User Accounts:
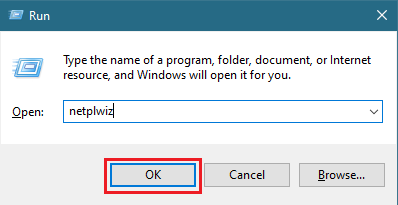
- Press Win + R.
- Type in netplwiz and click on OK.
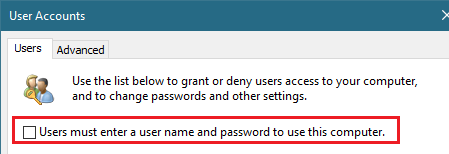
- Uncheck the Users must enter a username and password to use this computer option.
- Click on Apply.
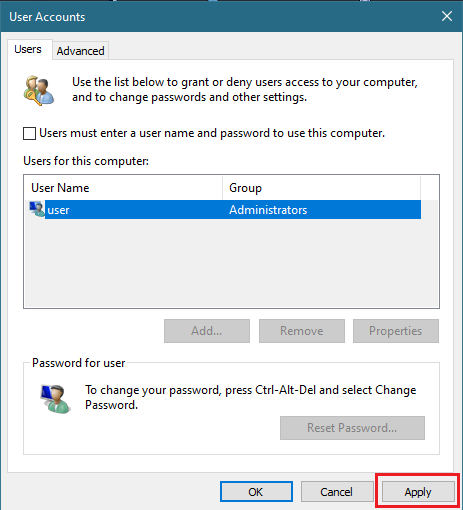
- Enter your password to confirm and click on OK.
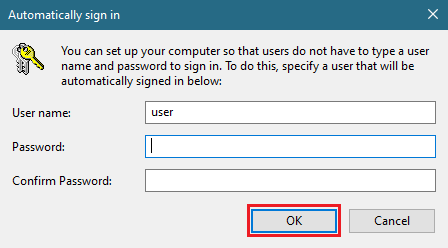
- Click on the OK button in User Accounts.
After doing this, you have to restart your computer for the changes to take effect, and then you will be able to sign in to your computer effortlessly.
Here’s a complete guide on how to sign out of Windows 10.
2. Use Registry Editor To Turn On Auto-Login
You may see that the option to enable auto-login is unavailable on your Windows 10 User Accounts tool. In that case, you will have to do it by editing the registry. Care should be taken so that you do not edit any other files on the registry.
Take these steps to edit the registry to enable auto-login:
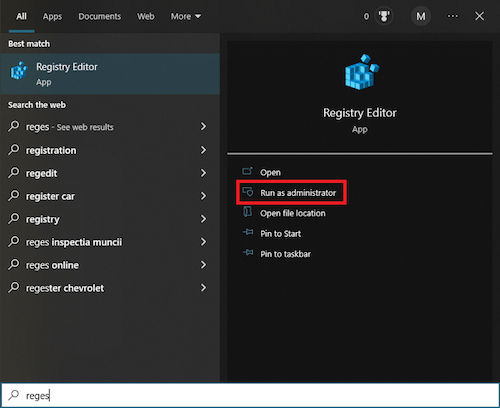
- Search for Registry Editor and run it as administrator.
- Paste this path to go to the Winlogon folder: Computer\HKEY_LOCAL_MACHINE\SOFTWARE\Microsoft\Windows NT\CurrentVersion\Winlogon

- Use right-click on the Winlogon folder and select New > String Value.
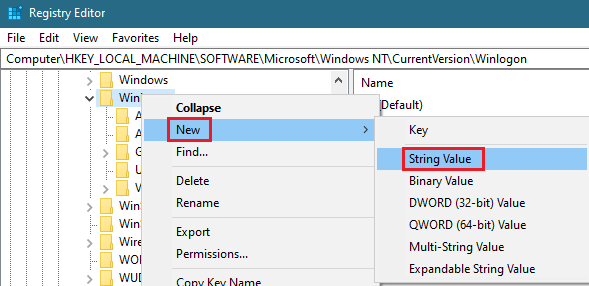
- Set the name as DefaultUserName by selecting Rename from right-click menu.
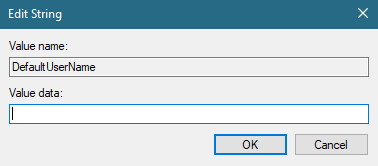
- Set the Value data as your name, then click on OK.
- Select New > String Value again by right-clicking on Winlogon.
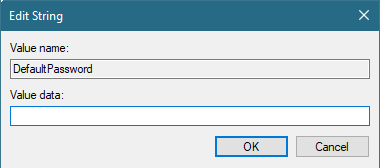
- Set the name as DefaultPassword by renaming it and set the Value data as your password like before, then click on OK.
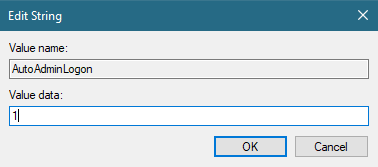
- Create another new string, name it AdminAutoLogon and set it’s Value data to 1.
- Close the Registry Editor and restart your computer.
After your PC restarts, you will no longer need to enter your password to use it.
Follow our guide step-by-step to fix Windows 10 searching index problem.
How To Remove Password From User Account In Windows 10?
Your user account does not require a password the first time you log on to your computer; unless you set one, you never have to sign in with a password. Although, if you had set a password afterward, you could always remove it from your account to sign in without a password again.
Here’s how you can remove the password from your user account in Windows 10:
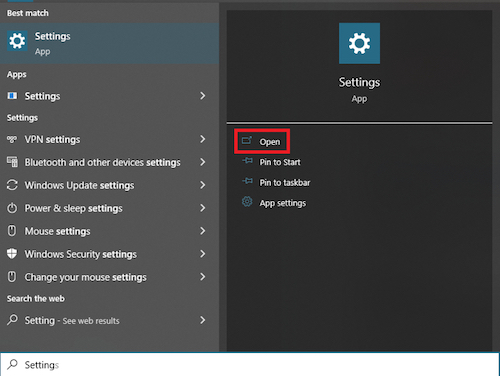
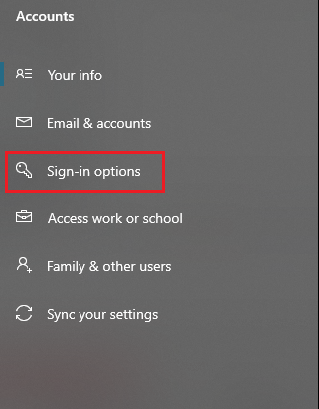
- Open Settings.
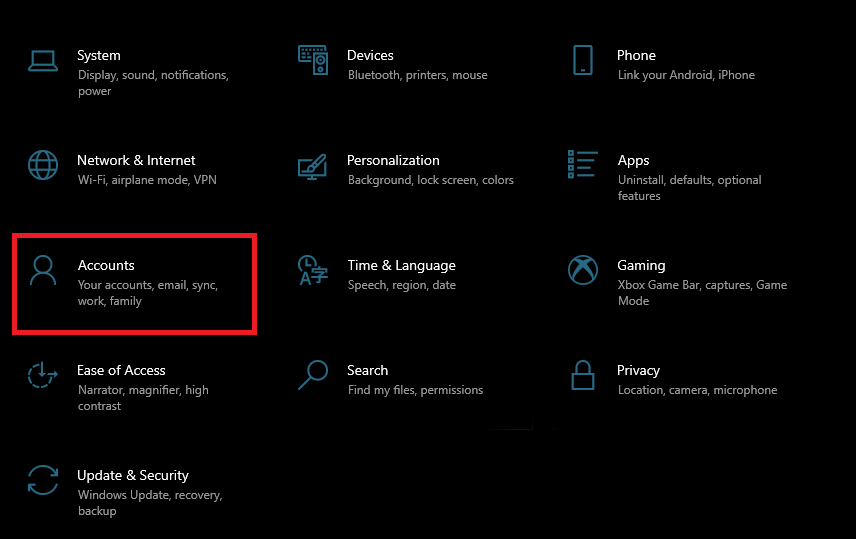
- Go to System.
- Select Sign-in options.
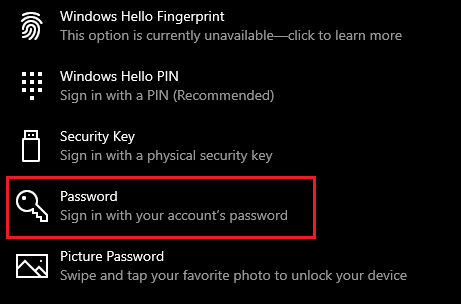
- Click on Password.
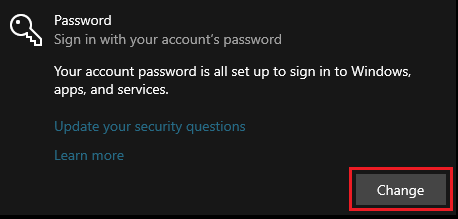
- Select the Change button.
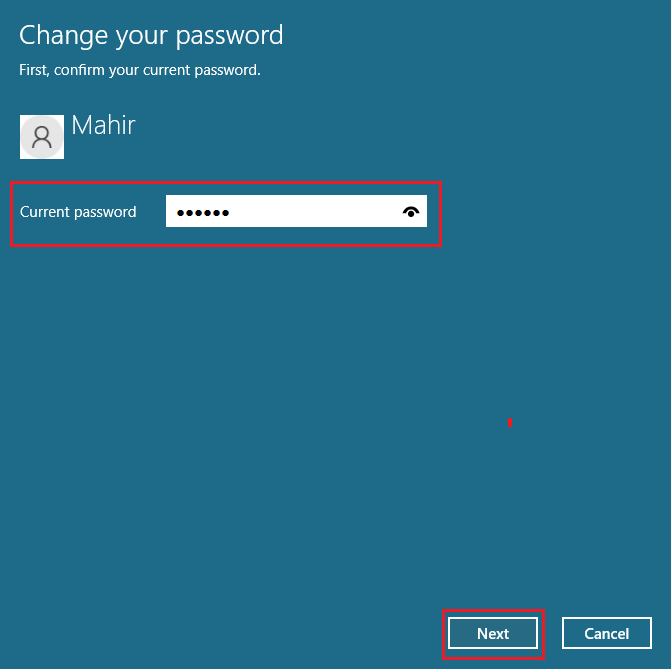
- Type in your current password and click on Next.
- Leave the new password fields blank and click on Next.
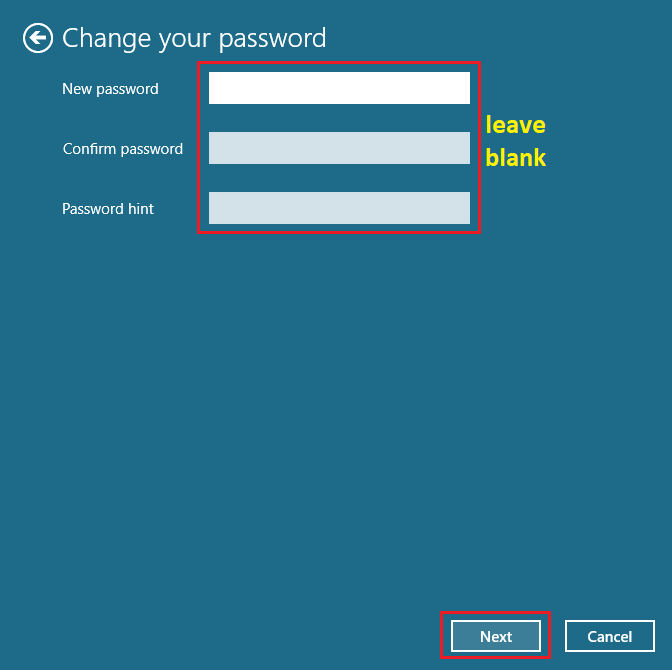
- Press the Finish button to remove your password.

After this, you can restart your computer. You will then see that you are not prompted for any password when you sign in to your computer.
Go and check our other article on install Windows 10 on second Hard Drive.
Conclusion
Anyone can sign in and access your files if you configure your Windows 10 computer with auto-login. This can be a privacy breach, but if you are the only one who uses your computer, you don’t have anything to worry about.
So, you can easily set auto-login on your computer by learning the ways of doing it from this guide and sign in effortlessly every time you power it on.