Let me guess; you got tired of entering your login password every time you boot your Windows 10 PC? It’s even worse when you’ve got a long & complex combination.
Fortunately, there are ways to automatically login into your PC without having to input the password again & again. So how can you enable this auto login feature in Windows 10? Or just simply remove the password? And what are the risks of doing so?
Let’s dive into this article & find out all the answers, shall we?
Quickly check our epic post on how to use password instead of a PIN to log into Windows 10.
How to Enable Automatic Login in Windows 10
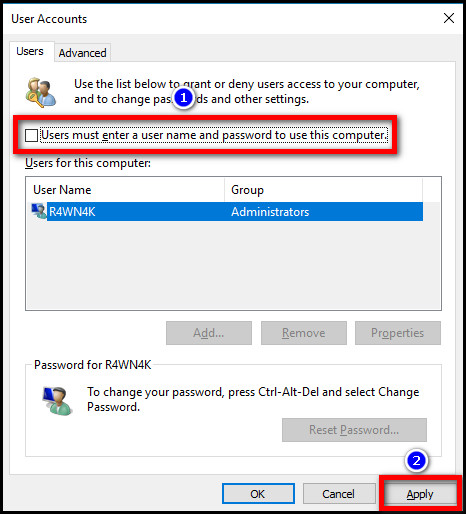
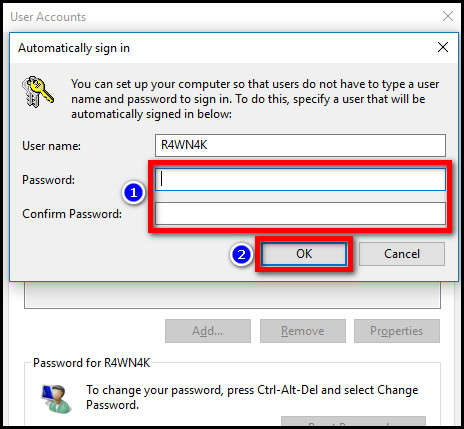
To enable auto login in Windows 10, type netplwiz in the search bar & hit Enter. Then remove the tick mark from the box labeled as Users must enter a user name & password to use this computer & click Apply. Now enter & re-enter your password and select OK.
You can use two precise methods to turn on the automatic login feature on your Windows 10 PC.
Here’s how to turn on auto login in Windows 10:
Method 1: Via NETPLWIZ command
- Press Windows Key+S & type netplwiz.
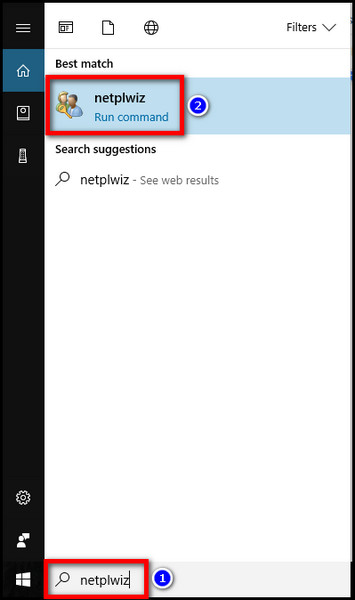
- Hit the Enter button on your keyboard.
- Uncheck the box next to Users must enter a user name & password to use this computer & click Apply.
- Type your password in the designated boxes & select OK.
Method 2: Via Registry Editor
- Press Windows Key+R & type regedit.
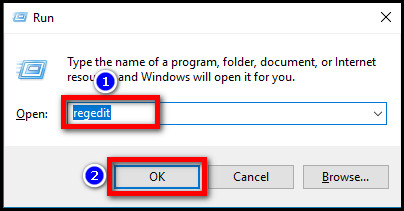
- Hit the Enter button on your keyboard.
- Clear the address bar & type
HKEY_LOCAL_MACHINE\SOFTWARE\Microsoft\Windows NT\CurrentVersion\Winlogon.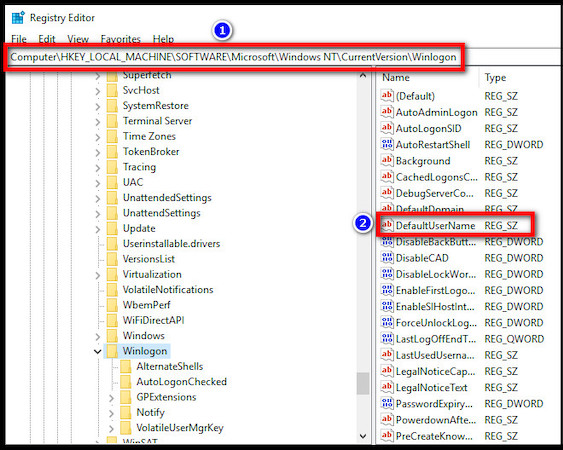
- Press the Enter button.
- Double-click on the DefaultUserName entry, type your username & hit OK.
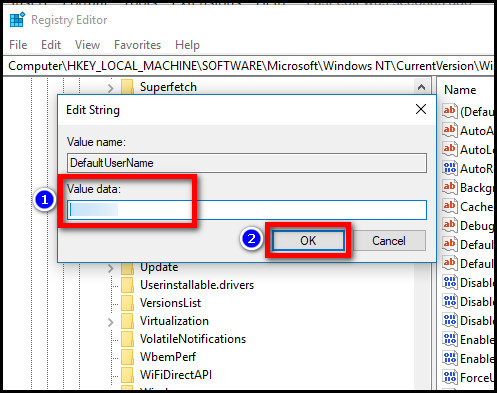
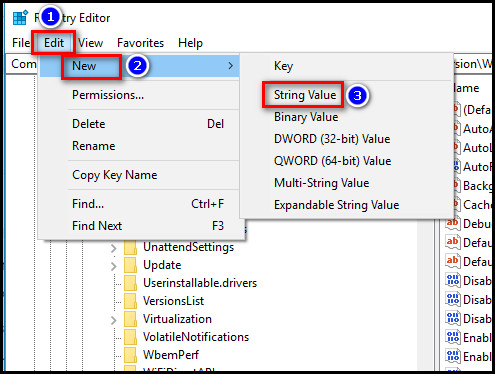
- Double-click on the DefaultPassword, enter your password & click OK. If the DefaultPassword value isn’t available, it needs to be added first. Here’s how:
- Click on Edit and select New > String Value.
- Type DefaultPassword & hit the Enter button.
- Click on Edit and select New > String Value.
- Click on the Edit menu & select New > String Value.
- Type AutoAdminLogon and hit Enter.
- Double-click on the AutoAdminLogon.
- Type 1 in the Edit String dialog box and select OK.
- Close the Registry Editor.
Now, shut down your PC & turn it on again to see if it logs in automatically. Make sure to follow these steps carefully, as serious issues might occur on your PC if you modify the registry incorrectly.
Personally, I prefer the first method as it’s risk-free & hassle-free than using a registry editor.
Read more on how to Activate Windows 10 auto login.
How to Remove Login Password on Windows 10
Removing the login password is another effective way to bypass entering a password every time you boot your computer. So if you want to enable Windows 10 auto login without a password, simply follow the steps given below.
Here are the steps to remove the login password requirement in Windows 10:
For Microsoft Account
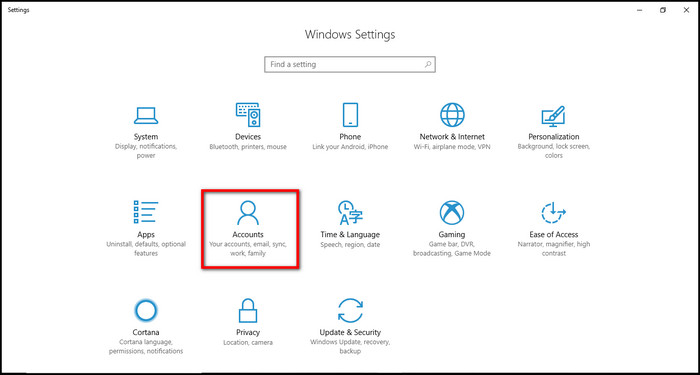
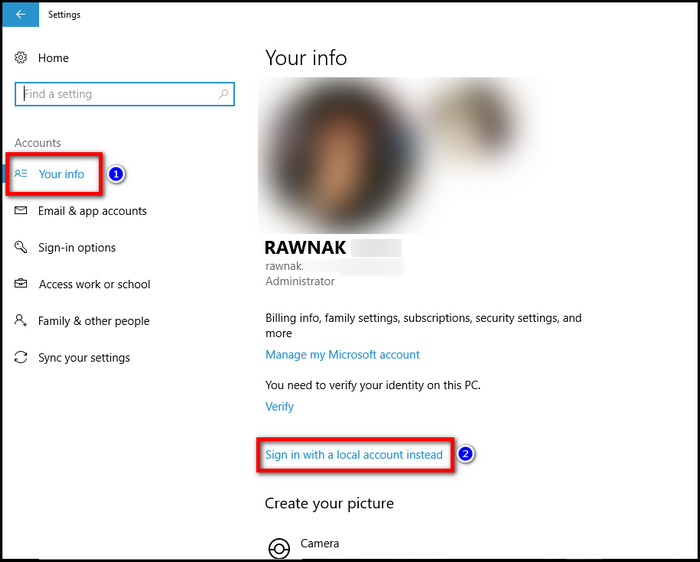
- Press Windows Key+I & navigate to Accounts > Your info.
- Select Sign in with a local account instead.
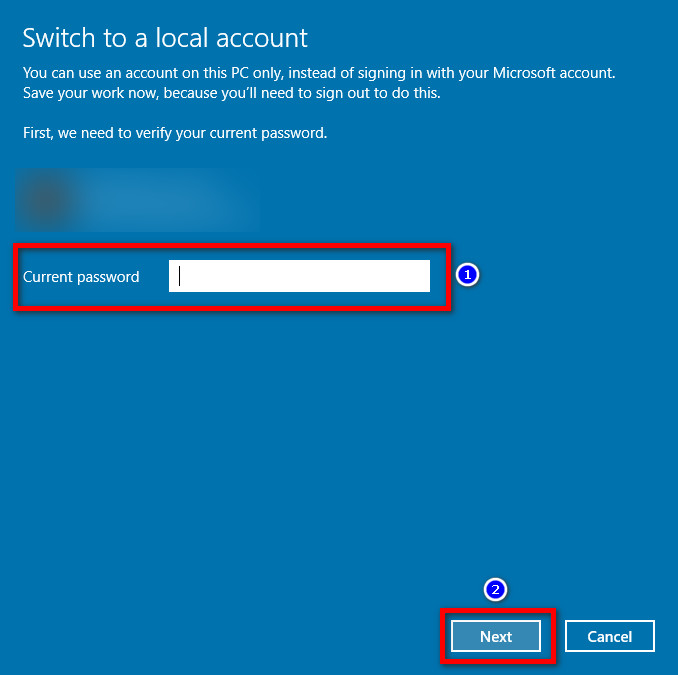
- Enter your existing password & click OK/Next.
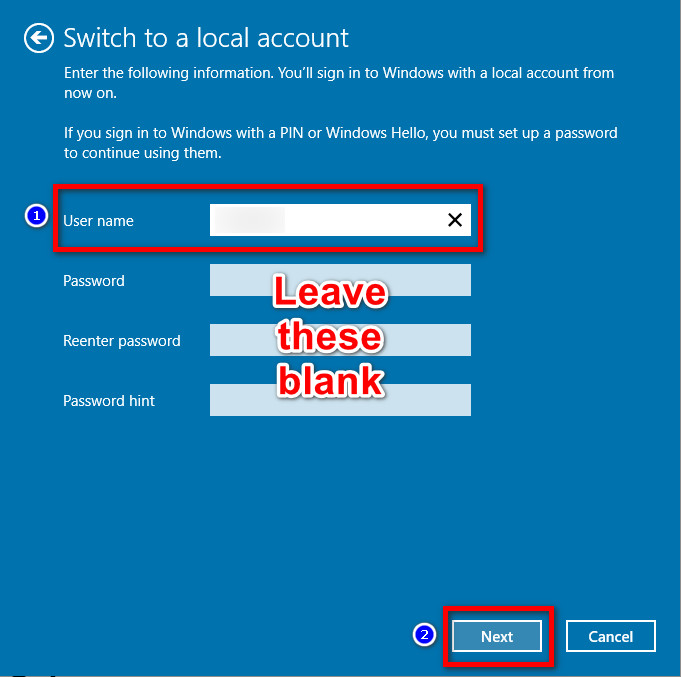
- Input your username in the User name box and leave the password fields blank.
- Select Next.
- Click Sign out and finish.
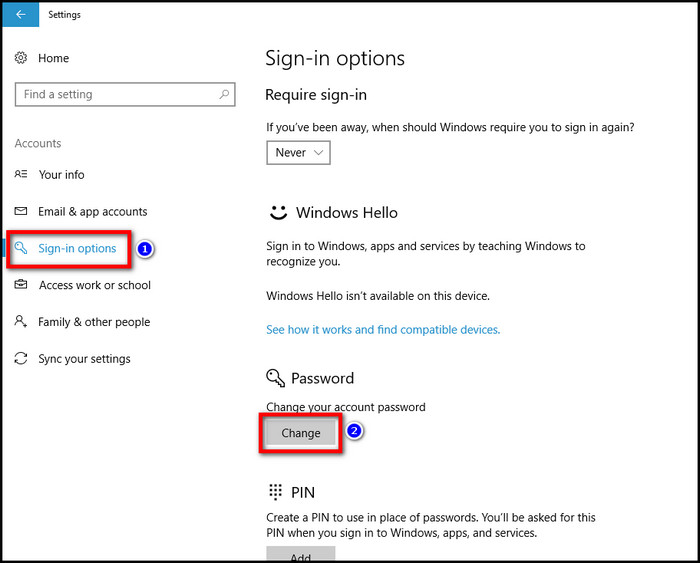
For Local Account
- Press Windows Key+I.
- Navigate to Accounts > Sign-in options.
- Click on Change under the Password section.
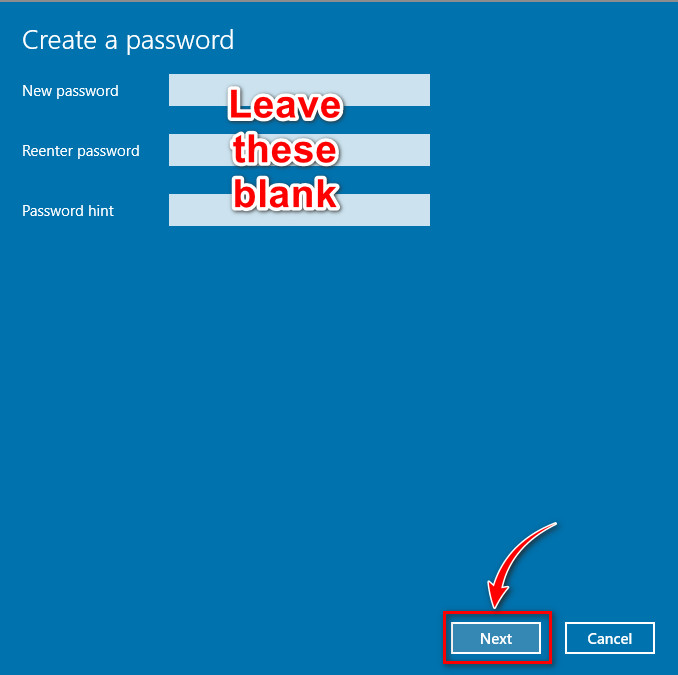
- Enter the existing password & hit Next.
- Leave the new password fields empty & click Next.
- Select Finish.
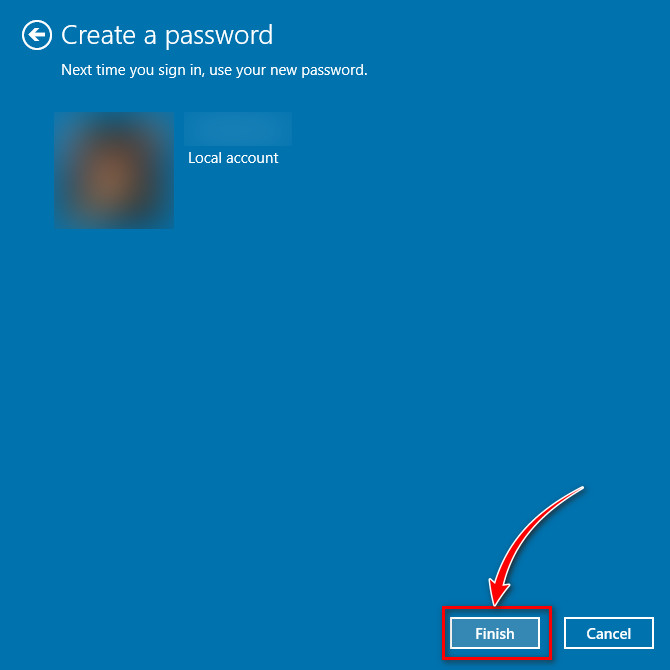
Now, reboot your PC. You will notice that the OS will automatically boot without having to enter the login credentials.
Follow our easy step-by-step guides to adjust page file in Windows 10.
FAQs
Can I enable the auto login feature on Windows PC without any security risks?
No. You will always have a potential security risk if your Windows PC has no login requirement or password.
How to remove the sign-in requirement when my PC wakes up from sleep?
To remove the sign-in requirement when your PC wakes up from sleep, go to Settings > Accounts > Sign-in options & select Never from the drop-down menu under the Require sign-in section.
How to disable the auto login feature in Windows 10?
You can disable the auto login feature in Windows 10 simply by typing netplwiz in the search bar & ticking the box labeled as Users must enter a user name & password to use this computer.
Conclusion
Using the auto logon feature on your Windows PC is a convenient way to get rid of a tedious task. But keep in mind that your device will be at a security risk as anyone who can physically reach your device will be able to use your PC & access any sensitive information.
That being said, I hope this guide has provided you with the easiest methods to turn on auto-login on your Windows 10 PC.
If you have any further queries on this topic, feel free to share your thoughts in the comment section below. Have a nice day!