Windows Search Index is a powerful tool for quickly searching any important files in the system. However, you might have seen that most of the time, search results are awful and sometimes, it doesn’t even work properly.
It may look like the system or the function is broken, but it’s not. With a few simple methods, you can fix the problem and search desired files with a stallion-like speed.
In this post, I have gathered the six best methods to fix any problem related to Windows Search Index.
So without further ado, Let’s fix this!
Check our epic post on how to turn on auto login in Windows 10.
How To Fix Indexing Problem In Windows 10
Windows Search Indexing is sometimes slow, depending on your PC’s performance and hardware components. But Indexing can stop working for a plethora of reasons, So in this post, I’ll add the best 6 methods I use when encountering the same problem myself.
Here Are The Methods To Fix Windows 10 Searching Index Problem:
1. Check For Windows 10 Updates
First and foremost, Check for updates before trying any of the methods below. Sometimes outdated Windows and drivers make the system unable to perform several Windows functionalities.
Windows update plays an important role in such conditions, so I recommend you update the Windows and especially emphasize updating your Graphics and Chipset drivers.
Follow The Instructions To Update Your Windows:
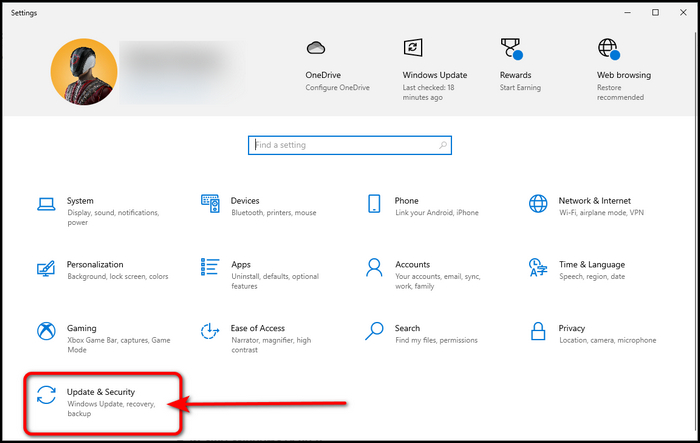
- Go to Start Menu and Click on Settings.
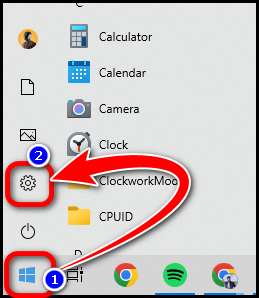
- Select Update & Security.
- Click on the Check for updates button.
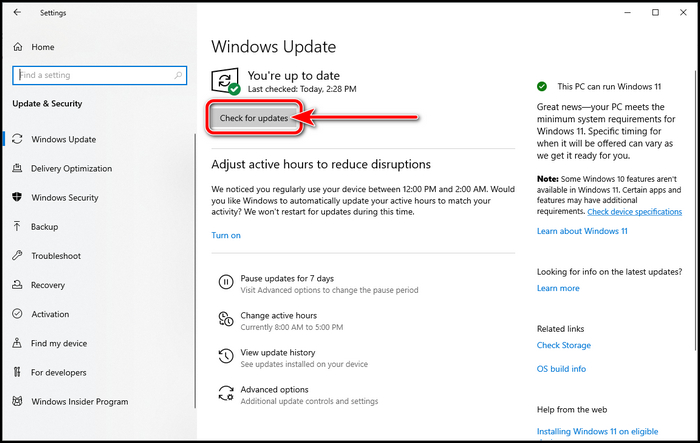
Update the Windows if it’s available for your Computer systems. And I suggest restarting the PC before moving to the second method if your Windows is already up to date.
Quickly check our epic post on how to use password instead of a PIN to log into Windows 10.
2. Reset The Search Index
Most of the time, resetting and rebuilding the Windows 10 search index works as a charm, and for this, you have to use the Command Prompt and add some value to the Windows registry.
Follow The Instructions To Reset And Rebuild The Search Index:
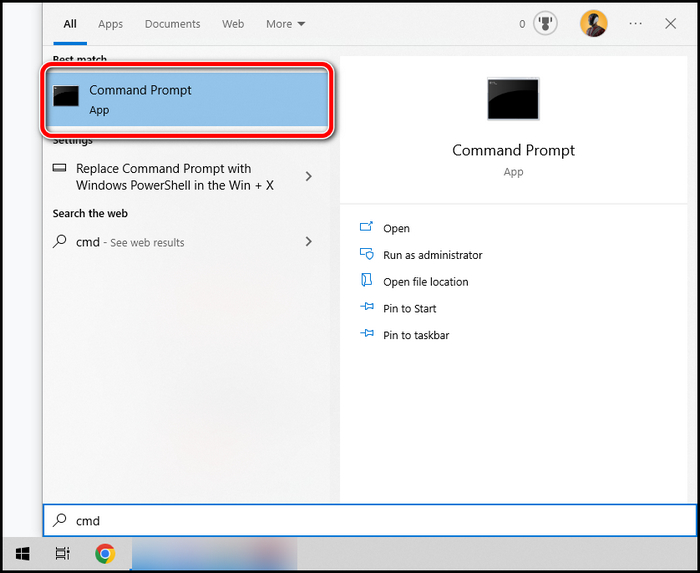
- Go to the Start Menu and open the Command Prompt with administrator privilege.
- Type in net stop wsearch and press Enter on your keyboard.

Now you have to go to the Windows Registry Editor and create a new DWORD in a particular location.
- Open Run Dialog Box by pressing Windows Key + R together.
- Type in regedit and press Enter.

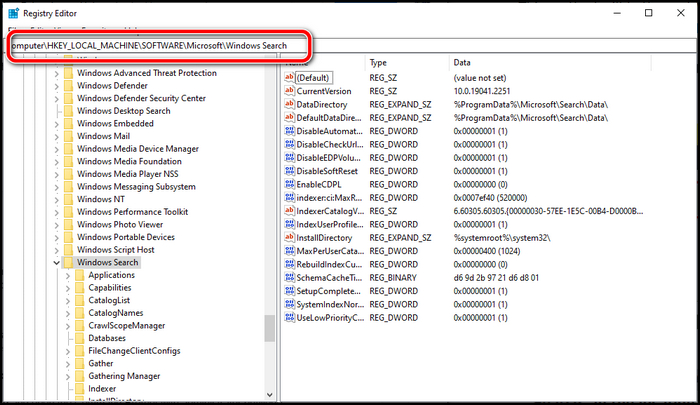
- Go to Computer\HKEY_LOCAL_MACHINE\SOFTWARE\Microsoft\Windows Search location or copy the whole directory address, paste it into the location bar, and hit Enter.
- Create a new DWORD (32-bit) Value and name it SetupCompletedSuccessfully.
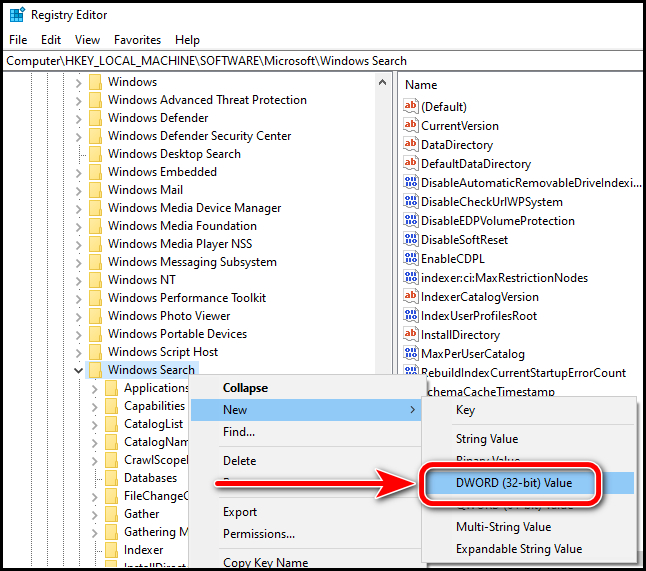
- Right-click on the SetupCompletedSuccessfully and select Modify.
- Set the value data to 0 and press OK.

Now open the Command Prompt again to start the Search Index.
- Open Command Prompt.
- Type in net start wsearch and press Enter.
After starting the Windows 10 Search Index, you must restart the computer to complete the process successfully.
Read more on how to Activate Windows 10 auto login.
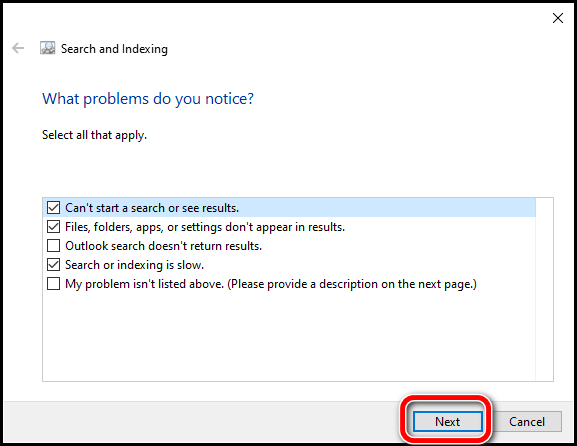
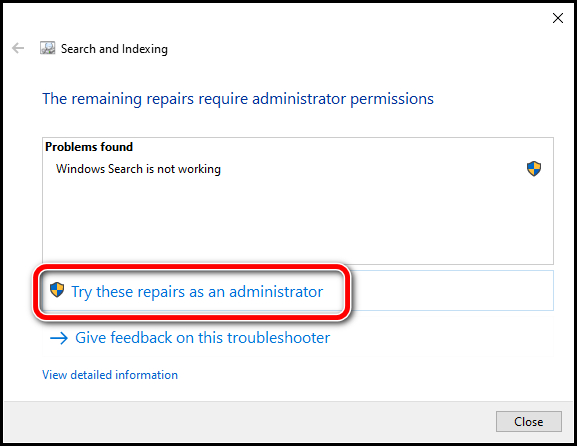
3. Run The Search and Indexing Troubleshooter
Another way to fix Windows 10 index searching is by Troubleshooter. If the above methods don’t work, you should check out this one.
Follow The Instructions To Fix Search Index Using Troubleshooter:
- Go to Start Menu and select Settings.
- Click on Update & Security Troubleshoot.
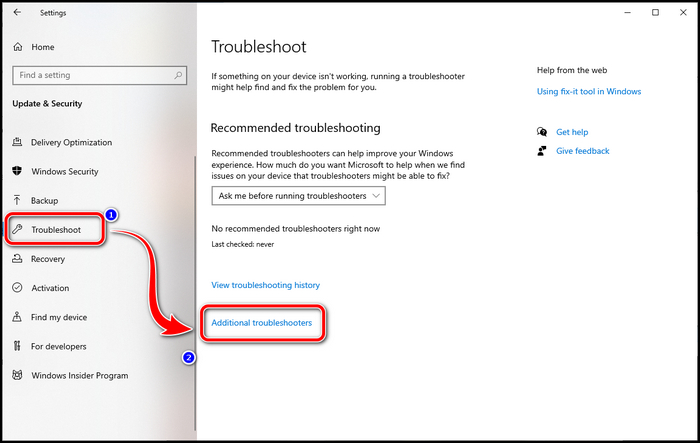
- Select Troubleshoot and go to Additional Troubleshooters.
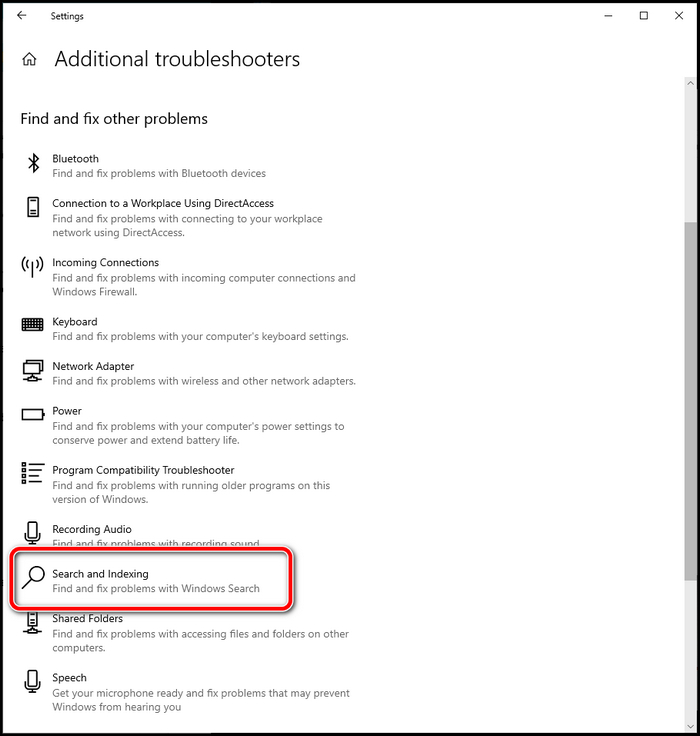
- Click on Search and Indexing under the Find and fix other problems section.
- Click the Run the troubleshooter and select Next.
- Select Try these repairs as an administrator.
- Close the troubleshooter after the task is complete.
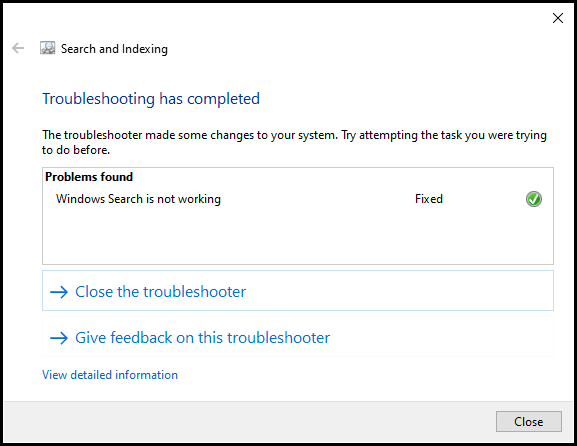
After executing the Troubleshooter, your problem should have been fixed by right now.
Follow our easy step-by-step guides to adjust page file in Windows 10.
4. Restart Windows Search Service
Sometimes Indexing stops working due to the Windows search service being stuck or glitched for a few reasons. In these situations, a restart of the service fixes the problem.
Follow The Instructions To Restart Windows Search Service:
- Open the Run Dialog Box by pressing Windows Key + R together.
- Type in services.msc and click OK.
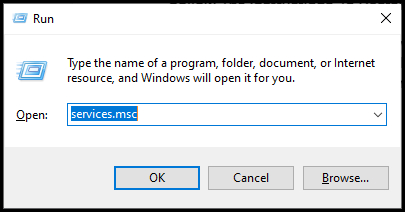
- Scroll down to locate the Windows search service.
- Right-click on the Windows search and select restart.
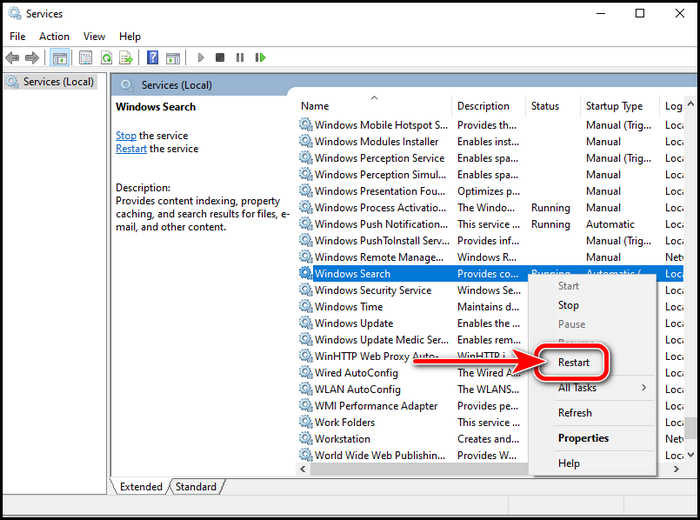
If this method doesn’t do its charm, then you can try the next method to repair Indexing files.
Also read how to update drivers on Windows 11.
5. Repair Indexing Files
In order to repair the indexing files, you must complete multiple tasks. So stick to the instructions as I enlist them here.
Follow The Instructions To Repair Indexing Files:
- Go to Start Menu and run PowerShell with administrator privilege.
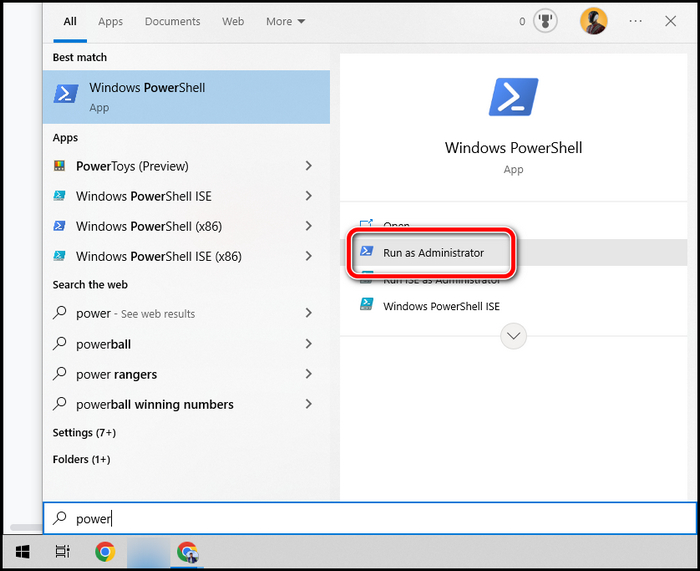
- Type in dism /online /disable-feature /featurename:SearchEngine-Client-Package and press Enter, and Restart your PC by inputting Y.

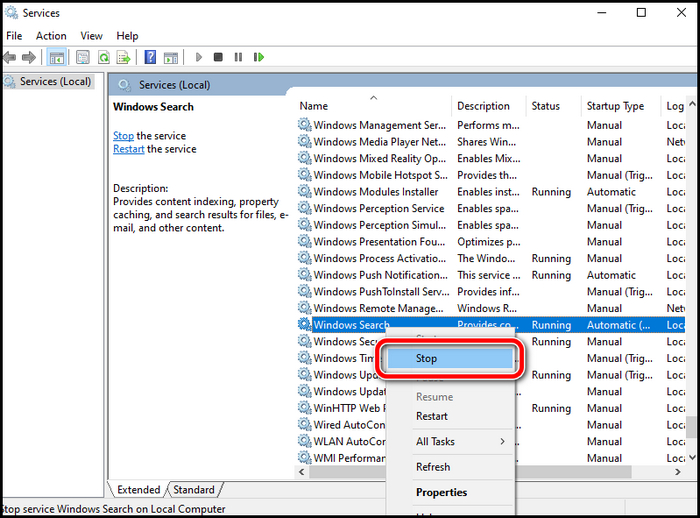
Now you have to open Run to stop the Windows Search service.
- Open Run Dialog Box by pressing Windows Key + R together.
- Type in services.msc and click OK.
- Scroll down to locate the Windows search service.
- Right-click on the Windows search and select Stop.
At this point of the method, you have to go to a directory and delete some old files.
- Go to C:\ProgramData\Microsoft\Search.
- Delete all the files inside the directory.
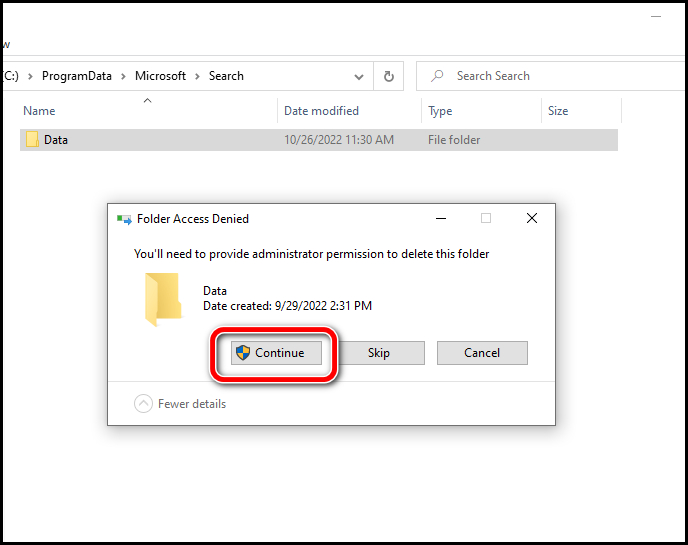
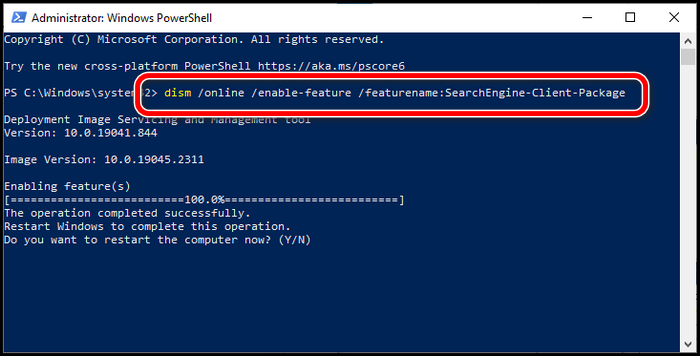
- Run the PowerShell with administrator privilege.
- Type in dism /online /enable-feature /featurename:SearchEngine-Client-Package and press Enter on your Keyboard.
You have successfully repaired the index file and deleted the possible faults in the corrupt indexing files. Windows 10 Search Index should be working back to normal again.
6. Rebuild The Search Engine Index
Rebuilding the search engine index is another great way to fix the problem. However, It may take a lot of time, depending on the storage device and the number of files you have in them.
Follow The Instructions To Rebuild The Search Engine Index:
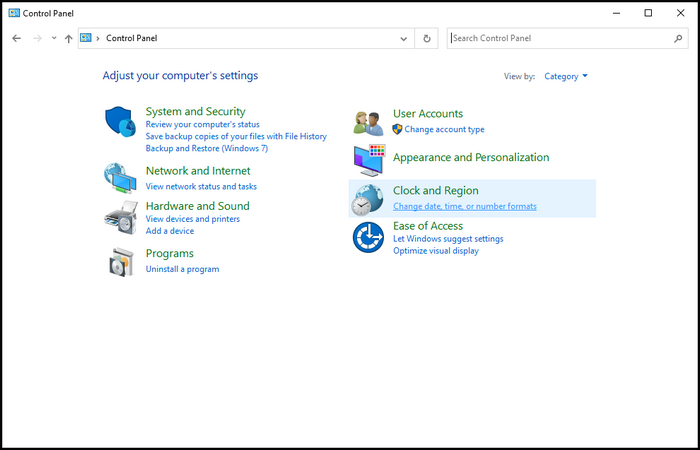
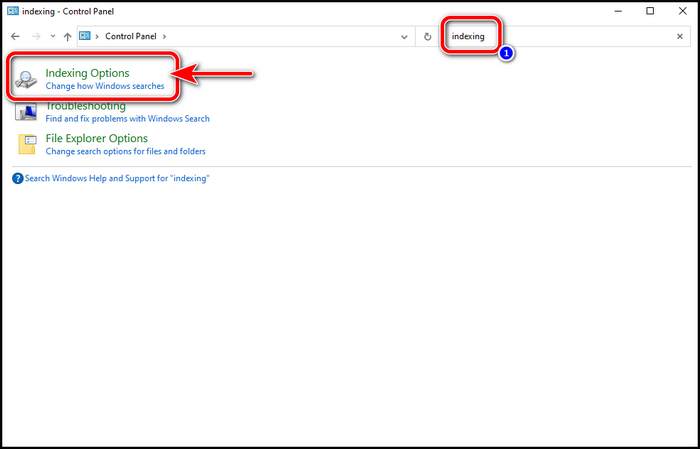
- Open Control Panel.
- Search Indexing Options and Open it.
- Click on the Advanced button.
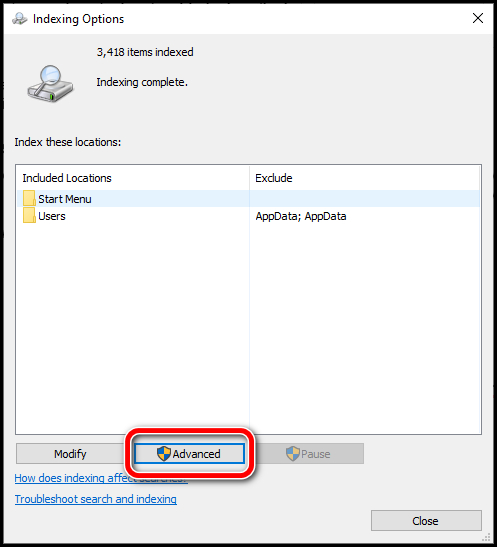
- Select Rebuild under the Troubleshooting section.

- Press OK on the Rebuild Index window to confirm your action.
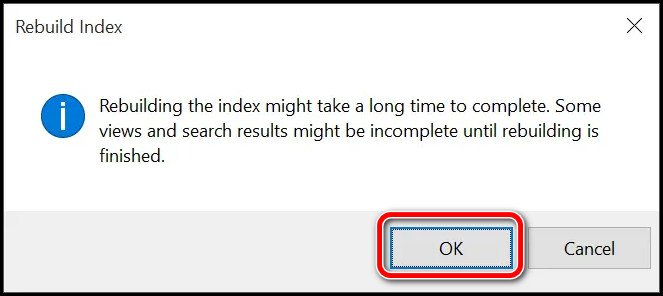
Rebuilding will commence after clicking the OK button, and depending on your PC’s overall performance, this process may take time between minutes to multiple hours.
Frequently Asked Questions
How Do I Fix A Corrupted Index File?
Rebuilding the Index is the best way to fix the corrupted Index File. For that, you can check out the 6th method of this post.
What Happens If I Disable Indexing?
Disabling the Search Index doesn’t provide any significant difference in the system. So if you disable the Indexing, then searching files will be slower than usual.
Does SSD Make Any Difference For Index Searching?
Yes, Index Searching relies on the hardware components of your PC. Index searching is faster on a Computer with an SSD than on an HDD.
How Long Does It Take To Rebuild Indexing?
Rebuilding usually takes around 10-15 minutes. But if you have problems with your storage devices, the process can take a couple of hours.
Conclusion
Windows Searching Index is a great tool for maximizing the overall user experience, and this accessibility function should be used all the time to save time. But it may stop working for uncertain reasons.
In this post, I’ve provided the methods for fixing the problem regarding Search Index, and if you follow my guide properly, your Searching Index problem will be fixed by now.
Don’t forget to let me know which method worked for you in the comments below.