Official documents usually require you to sign them at the end to verify their legitimacy.
The signature you handwrite onto physical documents can also be inserted into the Word documents that you create on your computer. Microsoft Word allows you to sign your electronic paperwork very easily.
This guide has comprehensibly described the process of creating and adding your hand-drawn signature into Microsoft Word to use at any time on any Word file you want.
Knowing how to add your signature in a Word document is sure to come in handy in many cases. So, look through the content of this guide, as it will show you how you can add your signature in Microsoft Word and insert it into any Word document that you create.
Read more on how to change language in Microsoft Word.
Can You Add A Handwritten Signature In Microsoft Word?
Microsoft Word is a great tool for creating official documents, formal reports, lists, itineraries, important letters and applications. It is also possible to add your handwritten signature in Microsoft Word and insert it into any document that you create using the app.
Most official documents you create using Word need to be signed by you.
Signing documents is a common practice that is done to verify any sort of document or report. It also adds an exclusive and personal touch to your documents. Microsoft Word can aid you in adding your signature to your documents and letters.
Since it is an app used solely to create documents, naturally, Microsoft Word allows you to add your handwritten signature.
You can add your signature to be stored in Microsoft Word. Your personalized signature will always remain there once you add and save it in Word. After you do that, you can insert that handwritten signature into any document at any time. You can select and insert your added signature without adding it every time you make a document file.
This is very convenient for anyone who has to prepare many documents frequently.
The method of adding a copy of your handwritten signature to Microsoft Word to be able to insert it anytime is described in the following section. Go through it to learn how to draw your signature on paper and add it in Word.
Find out how to use Microsoft Word read aloud.
How To Add A Handwritten Signature To Microsoft Word
Adding your handwritten signature to the Word app is as easy as it gets. First, you have to write down your signature. Then you have to create a clear image and add it to Microsoft Word. Along with your signature, you can also type extra information about yourself as text.
To add your signature, you have to use the AutoText tool in Microsoft Word to save it. You can paste it on any document after successfully saving it in the Word app. All you have to do then is select it from AutoText.
This section contains a step-by-step description of the method for adding your signature in Word. You can familiarize yourself with the process before you add it yourself.
Follow these steps to add a handwritten signature to a Word document:
- Write down your signature clearly on a white piece of paper.
- Create an image of the signature by taking its picture or scanning the paper using a scanner.
- Move the image file into your computer.
- Edit the image of your signature by cropping it to the right size.

- Paste the signature on a blank Word document.
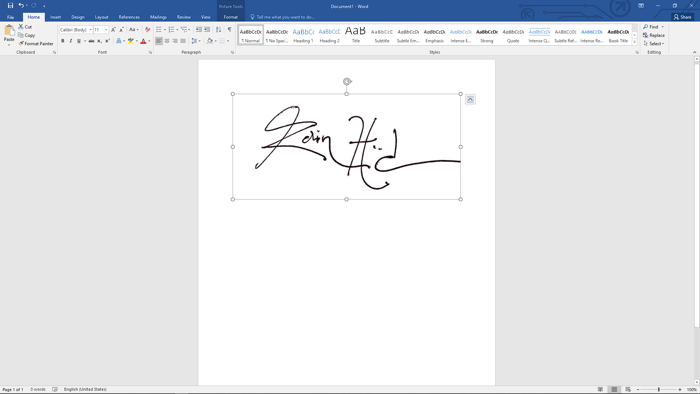
- Resize the signature to the correct size.
- Type in the information below your signature if you want to add any.

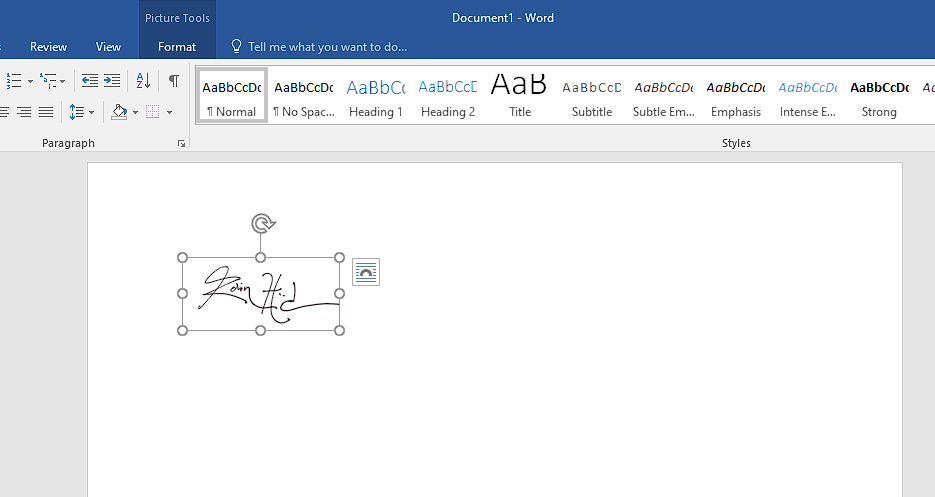
- Select the whole block, including your signature image and the text.

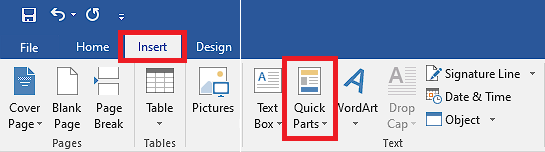
- Go to the Insert tab and click on the Quick Parts menu.
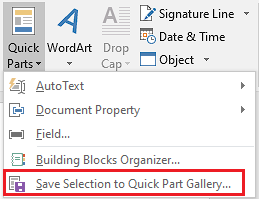
- Select the Save Selection to Quick Part Gallery.
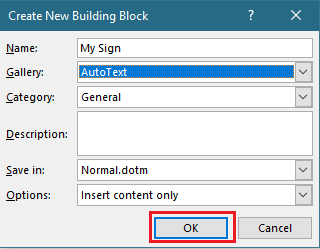
- Type in the name for your signature.
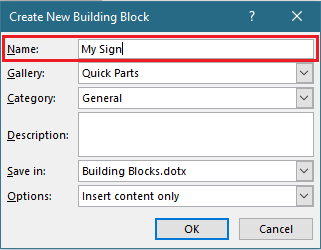
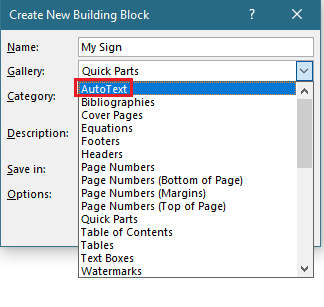
- Select AutoText from the Gallery list.
- Click on the OK button to save your signature.
The signature will now be saved and ready for use whenever you want. It will be accessible in the AutoText tool, where you can insert it into any document.
Here is the easiest guide to print in Microsoft Word.
You can now paste your signature on any document you create with just a click. This feature is very suitable and efficient as you do not have to write down your signature on every document. Although it may not seem like much, inserting your added signature instantly from Word saves much time in the long run. The way of doing it is presented here for you to apply.
Here’s how you can insert your signature into any Word document from AutoText:
- Open the document where you want to add your signature.
- Place your cursor in the place where you want your signature to go.
- Go to Quick Parts from the Insert tab.
- Select AutoText and click on your signature from the list.
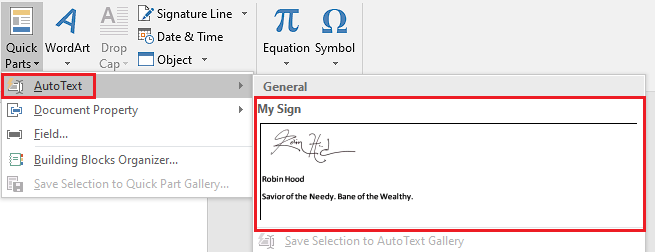
When you click on it, your signature will be instantly added to the part of the document where your cursor was. You can now save the document, print it, or mail it anywhere. Anyone who views your document can see your signature on it.
Quickly visit the links to find out how to double space in MS Word.
How To Add A Signature Line In Microsoft Word
You may have to print a document for someone else to sign. In that case, you would need a dedicated blank space for that individual to put his signature on. Thankfully, Microsoft Word can insert a Signature Line in your document that will designate a space for someone else to sign on.
The Signature Line option will insert a line under a blank space in your document.
If you want to sign the printed document by yourself, without inserting it while creating it or if you need someone else to sign it, you can use the Signature Line to insert a blank space with a line under it. You or anyone else can write down their signature on that space by hand after printing the document.
This is how you can add a Signature Line in your Word document:
- Open the document where you want to add your signature.
- Place your cursor in the place where you want the sign.
- Go to the Insert tab and click on the Signature Line option.
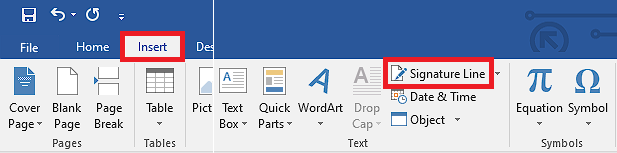
- Provide the relevant information and press OK.
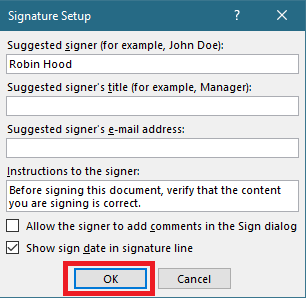
You will then see a space for signing on the document inserted where you initially placed your cursor. 
When you print out this document, the Signature Line and the relevant information you added with it will provide a reference for the person who is supposed to sign on it. If you have to put in multiple Signature Lines, make sure you put in the information, so it is easy to understand who is supposed to sign where.
Follow our ultimate guide if you want to fix Microsoft Word won’t open.
Conclusion
To ensure the credibility of any official document, it is a given that the document should be signed by someone who can verify that it is licit. If that someone is you, the document creator, you can easily add your electronic signature to it in Microsoft Word.
The process of adding your signature to a Word document will be made clear to you after you learn about it from the constituents in this guide.