Nowadays, surfing the internet has become a must for everyone. While doing so, you may have found that some websites are unavailable to you in normal conditions but using a VPN fixes this issue. After some research, I found out that modifying the Windows hosts file resolves the problem for good.
But the main problem arose when I edited the file and tried to save it. Windows showed an access denied message every time I tried to save the file. You may have faced the same issue while doing so as you are here.
Luckily, I have found several ways to fix the issue and will explain them further in the article. So stick to the article till the end, and hopefully, you’ll fix the problem in no time.
Why am I Getting ‘Access Denied’ While Editing Hosts File?
You are getting an Access Denied message while editing the hosts file because of a lack of authorization. The hosts file is located in the Windows installation directory, so it requires an authorized user or administrative permissions to access it.
A host file directs hostnames to designated IP addresses. A host file in a computer addresses the device in network nodes. To differentiate one device from another, a hostname is declared against every device that is easily understandable by humans.
You can find the host file here:
C:\Windows\system32\drivers\etc\hosts (Copy and paste the path address in your search bar to find out the hosts file)
The hosts file is very important for web developers and network administrators in developing websites. But it can also be used by cybercriminals to prevent users from visiting many websites where they can get anti-malware services.
Also read how to update drivers on Windows 11.
Fix Windows Access Denied Message
You can edit the hosts file in several ways. Here I will share the most reliable ways with the proper steps indicated.
NOTE: If you make any mistake while editing the file, some functions in your computer may not work properly. So be careful while editing.
Here are the methods to solve the access denied message and edit the hosts file:
1. Open Notepad with Administrator Access
When you try to open the hosts file using Notepad, an Access Denied notification may appear. Try editing the file in administrative mode to solve the from.
Follow the steps below to open the hosts file with Notepad as administrator:
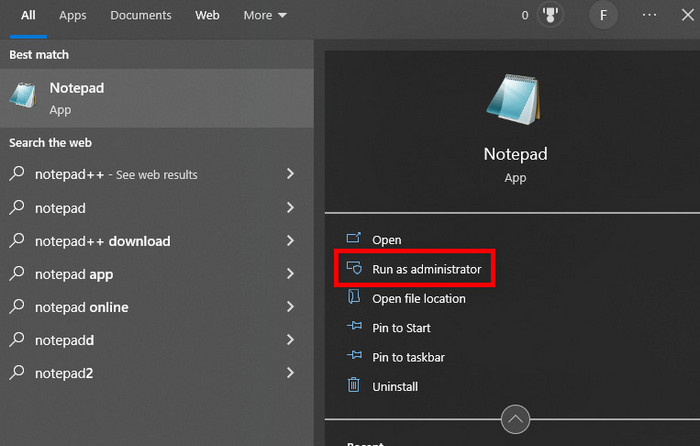
- Click on the Windows icon and type Notepad.
- Select Run as administrator.
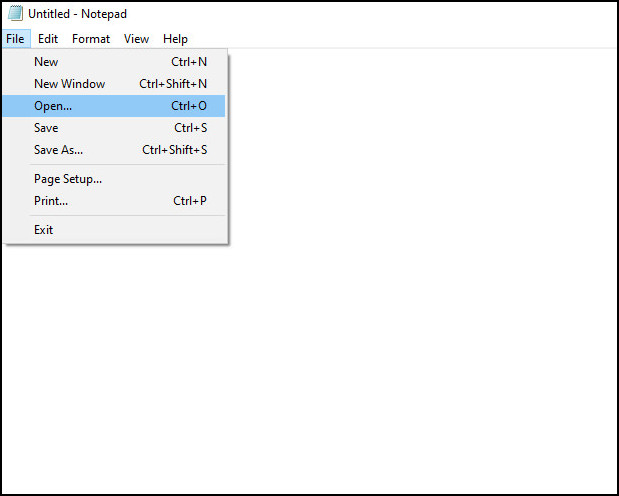
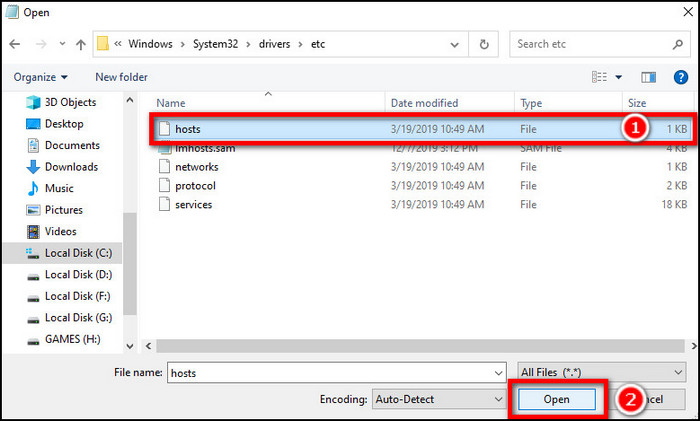
- Click File > Open from the top left corner.
- Head to the C:\Windows\system32\drivers\etc\hosts folder (make sure to change Text Documents (*.txt) to All Files).
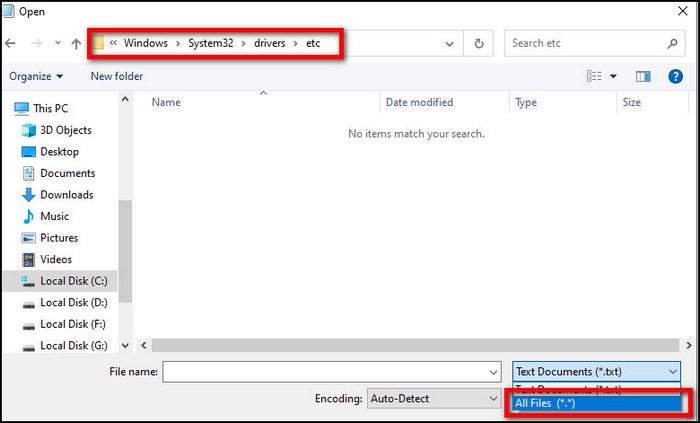
- Select hosts file and click Open.
- Now, Edit the hosts file and save it.
Make the necessary changes in the host file as you need. After saving the file, check whether your problem is solved or not. Otherwise, check the next solution if you see the denied access notification.
Also, check out our separate post on how to fix PC won’t go to sleep in Windows 11.
2. Run Notepad using Command Prompt
You can run the notepad giving administrative privileges by using the command prompt.
Following the steps below to run notepad using the command prompt:
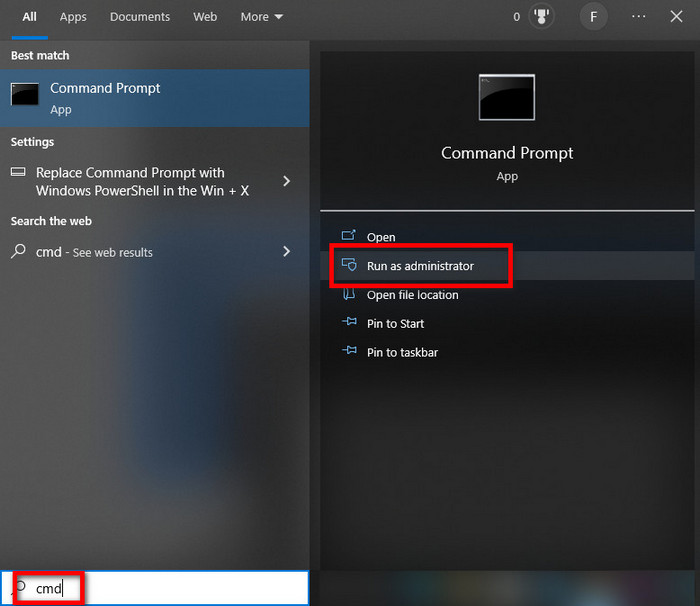
- Press the Windows icon and type CMD.
- Hit on Run as administrator.
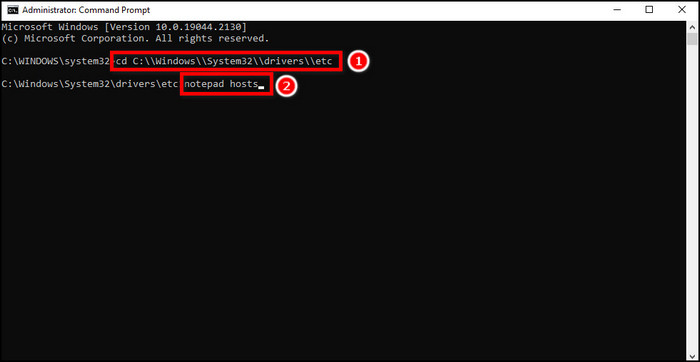
- Now, Copy and Paste the commands- cd C:\\Windows\\System32\\drivers\\etc (After pasting press Enter)
- Again Copy and paste this command- notepad hosts (Hit Enter)
- Edit and Save the hosts file.
This method should let you edit and save the hosts file without any message. If not, then try out the next method.
But before that, go through our epic guide on adjust page file in Windows 10.
3. Disable Read-Only For the Host’s File
Read-only is a file property that prevents you from editing the file. Read-only means the file is not editable. However, you can disable the option for the hosts file and edit it.
Follow the steps below to disable the read-only option:
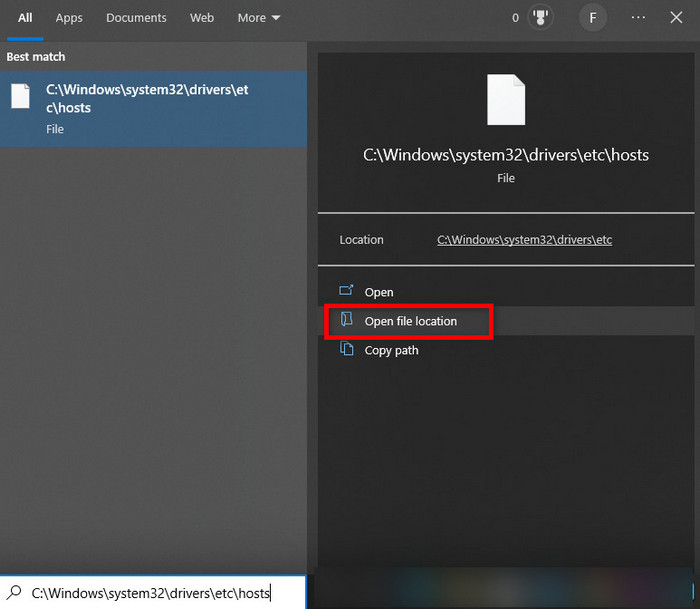
- Copy and paste the file path in your Windows Search bar– C:\Windows\system32\drivers\etc\hosts and click Open file location.
- Right-click on the file and select Properties.
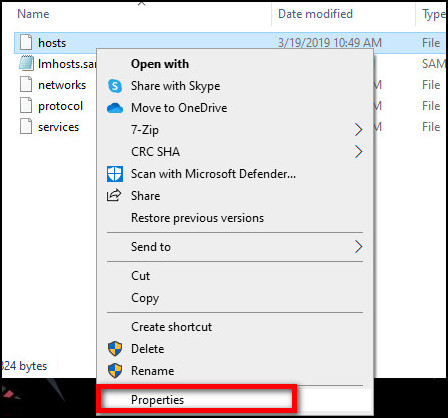
- Head to the Attributes section and unmark the Read-only option if marked.
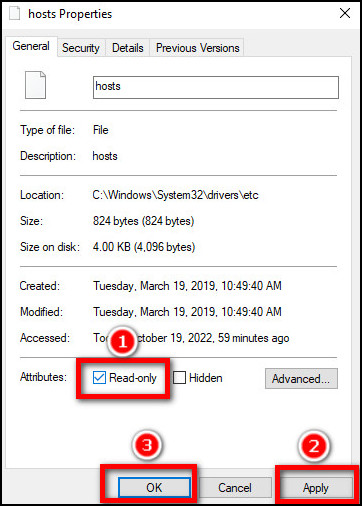
- Click Apply and OK to save changes.
- Now Edit and Save the host file.
This time you should be good to go. If you’re still facing the problem, head to the next method.
4. Change The Security Settings For The Hosts File
From the security settings, you can get full control over a file. So here we will do that for the hosts file. So follow the steps carefully.
Here are the steps to change security settings for hosts file:
- Go to C:\Windows\system32\drivers\etc\hosts directory.
- Right-click and select properties.
- Click the Security tab and click Edit.
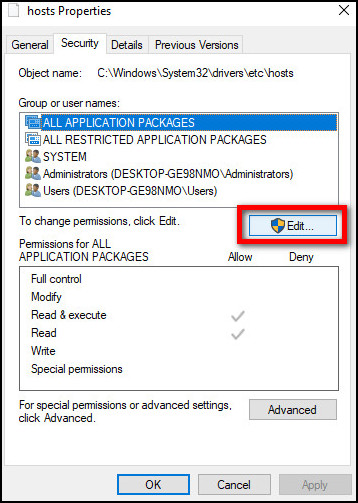
- Check the list of users that have access to hosts file. If your user name is included in that list, click it and set Permissions to Full control.
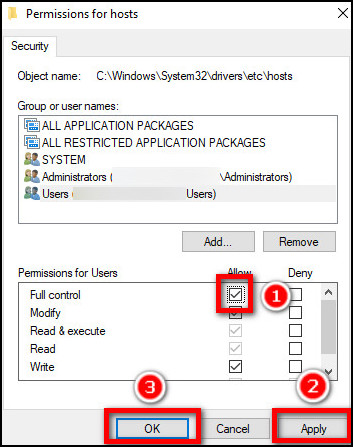
- Click Apply and OK to save the changes.
- Now, Edit the hosts file and Save it.
The procedure I have discussed above gives full administrative privilege over the hosts file. That means you can do anything with this file that an administrative account of your windows can.
5. Change The Host’s File Location
Changing the hosts file location may allow you to edit the file. Sometimes, taking administrative control over the file windows doesn’t allow you to edit the file in a specific location. In that case, you can follow this simple trick.
Follow the steps below to change the hosts file location:
- Open C:\Windows\system32\drivers\etc\ and find your hosts file.
- Copy the file and paste it on the Desktop.
- Open the file using Notepad.
- Save the changes.
- Finally, copy and paste it back to the C:\Windows\system32\drivers\etc\ directory from the desktop.
Hopefully, you have resolved your problem. There is some variation of access denied message and the solutions are the same. I’m mentioning them down below.
Follow our guide to fix blue screen on Windows 11.
Types of Access Denied Messages You May Face
A pop-up box with a notification will appear in front of you if you encounter any problems while trying to modify the file.
Here are the typical access denied messages you may face:
1. Access Denied
You have found the hosts file and are trying to open it using Notepad. The file is visible on the screen, but while opening it, an access denied message appears over the window and prevents you from doing further tasks with the file. 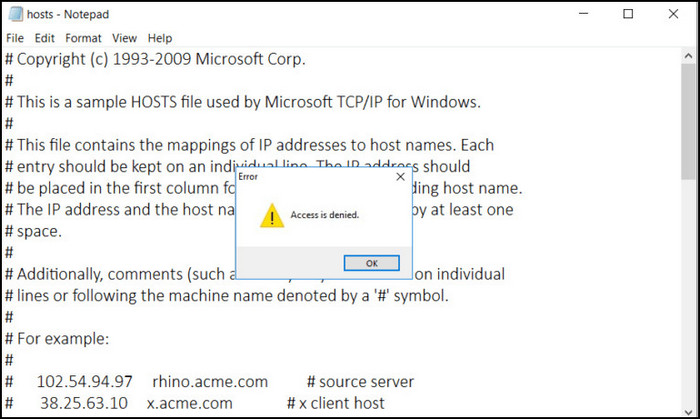
2. Hosts File Being Used By Another Process
Hosts file being used by another process is a common issue that prevents users from editing the host file. It means the file is currently working in the background.
3. Don’t Have Permission to Save Hosts File
This will show the same message as the first one. But it will appear when you try to save the file.
Don’t be disappointed after seeing these error messages. In the next segment, I will tell you how you can edit the hosts file in different ways. I will share several ways to resolve the problem.
Check out the easiest way to install active directory users & computers on Windows 11.
FAQs
Why can’t I edit the hosts’ file, even as an Administrator?
Earlier I told you in the 4th solution how you can take full administrative control over a file. However, the file may not be editable. The permission to edit the hosts file is controlled by SYSTEM and TrustedInstaller and may not be letting you edit it.
What IP address should I use in the host’s file?
This depends on what you are going to do. If you are trying to access a website, but it doesn’t respond, then you need to check whether the host file is blocking it. If the website is blocked, you will see an IP address like 127.0.0.1 with the hostname or web address. This is called mapping.
Simply remove it to solve the problem. On the other hand, if you need to block a website, then use the IP address 127.0.0.1 with the hostname to block it.
What are the rules for editing the hosts file?
Rules are very simple for editing a hosts file. The rules you must need to follow are described below:
- Only 1 mapping per line.
- No comment symbol(#) at the beginning of the line.
- Don’t give any extension to the hosts file.
- Use Notepad or another text editor to edit the file.
You can add mapping as much as you want. Just follow the rules above.
Conclusion
Now you should have resolved your problem. Many suggest reinstalling the windows to get rid of the problem. But I wouldn’t suggest that as it is a hassle. Using the command prompt is a good method of solving the issue.
In my case, I managed to save the file when I opened it on Notepad running in administrative mode. Don’t forget to comment below on how you solved the problem on your end.
If you have other queries, feel free to share them with us in the comment section, and we will try to get to you ASAP.