Having trouble moving multiple rows at a time in Microsoft Excel? Don’t worry, we’ve got you covered.
Despite the fact that MS Excel is the most user-friendly spreadsheet software right now, a lot of users like you find it difficult to move a row or column to a new location, whether it’s in a new worksheet or the existing one.
That’s why I took up this project to gather every method in the world to move rows and columns and compile them all in one post.
So, what are you waiting for? Grab some caffeine and head to the next section.
What Is A Row In Microsoft Excel?
Each column of a spreadsheet file usually contains a single type of information from each data entry in a row. So, columns categorize the information in rows and that information collectively forms a data entry in each row.
If you are to move row data, then you will have to collectively move all the cells present in that row because they altogether contain a set of data. You can do this very easily in Microsoft Excel.
Are you tired of having the title cells in your spreadsheet disappear while scrolling? If so, you may want to freeze the row. It’s strange how very few people know about this, but it saves a lot of time. Click the link to learn more.
The process to move multiple columns or rows in Excel is very simple and there are a few ways in which you can accomplish this. The method you will use depends on whether you want to move the row to replace another one or to move it in between two other rows without replacing anything.
The ways of doing these are presented in the next section in easy words so that you can apply them effortlessly. Go through the next sections to find out and use the method to move rows in Excel that suits your preference.
How To Move A Row And Column In Excel?
You can move rows and columns in Excel using two main methods. You can either learn how to move columns in Excel without affecting other rows, or move them by replacing other rows. The steps for both methods are completely different so I have explained both below.
The first two methods in the list are to move row to another place without overwriting the existing contents, whereas the last two will show you how to replace a row along with its contents.
Follow these steps to move a row in Excel without replacement:
1. Drag a Row Using Shift-Key
The simplest method of moving rows in Microsoft Excel is to select the column or row and drag it to the desired location while pressing the Shift-key shortcut. Note that this process will remove the previous row and transfer it to your wanted position.
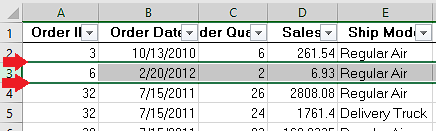
Moving the rows by dragging while holding the Shift-key will indicate where it is being moved by a green line. You can choose its new position by referring to this line.
Here’s how you can use Shift-key to move a row:
- Open your spreadsheet using Microsoft Excel.
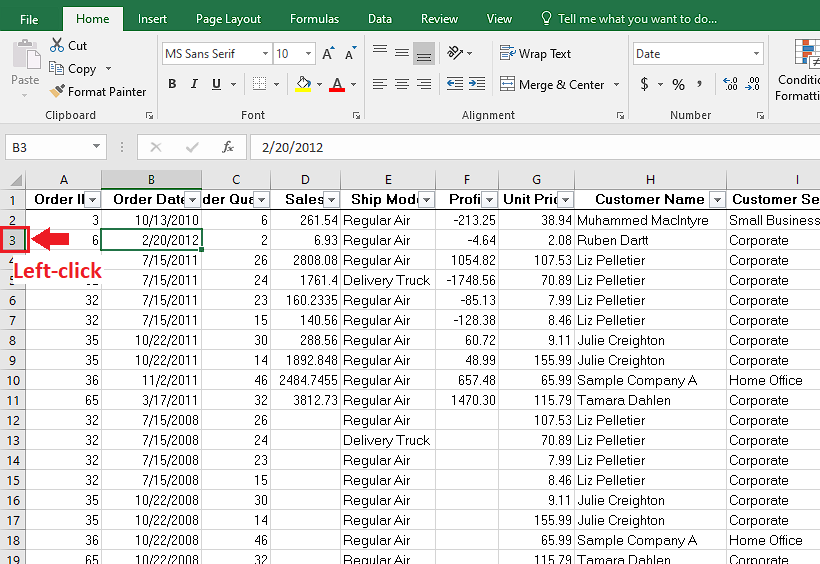
- Click on the row number to select it.
- Select multiple rows by pressing the Ctrl key and clicking additional rows, if needed.
- Move your cursor to the upper or lower edge of the highlighted row.
- Left-click and hold the mouse button on the edge.
- Drag the selected row with your mouse while holding Shift-key to your required position. (Shown by the green line)
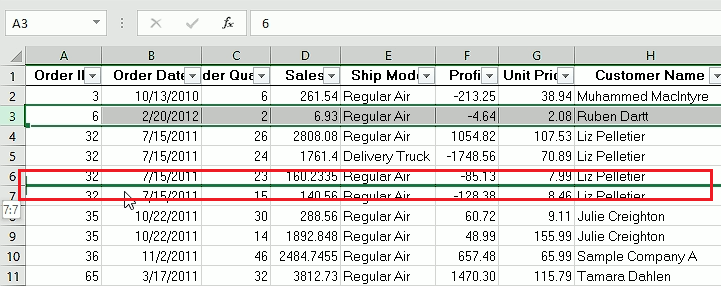
- Release mouse button when the row is in place.
After taking these steps, your row will have successfully moved to its new position in the spreadsheet among other rows without affecting any of them.
Find out how to fix Microsoft Excel freezing or slow.
2. Use Insert Cells Option
This method is similar to the one before as it gives the same result. The difference is that you can choose whether to also keep a copy of the row in its original position or if you want to move it entirely.
This method utilizes the Insert Cells option in Excel that allows you to insert a new row or column anywhere on your spreadsheet, be it a blank one or a row that you want to move.
This is how you can move rows or columns by using Insert Cells option:
- Run Microsoft Excel and open your spreadsheet.
- Right-click on the number beside the row you want to move.
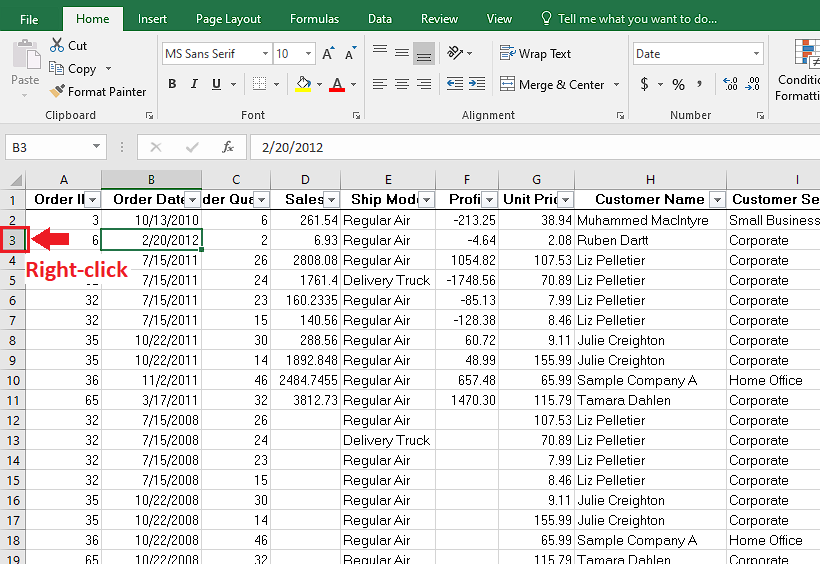
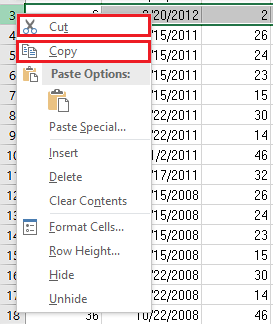
- Select Cut or Copy. (Select Cut if you want to move the row entirely from its original position and choose Copy if you want to the row to stay in the original position too after moving)
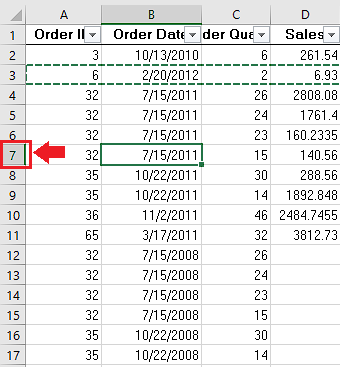
- Right-click on the row number beside your destination row. (For example, if you want to move to row 6, you have to right-click on row 7)
- Paste the row and click Insert Cut Cells/Insert Copied Cells.
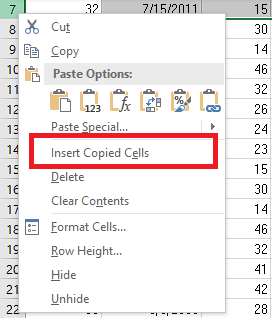
Your row will then be moved to the position before the row where you have inserted it.
Depending on if you selected Cut or Copy, your original rows will be moved entirely without any copy remaining in the earlier position or have copy of it in the former position respectively.
Excel is great at a lot of things but its rows don’t automatically adapt to the content, which makes the entire sheet look ugly and unorganized. Don’t worry, this article has step-by-step instructions to change row height easily so give it a read.
How To Convert Columns To Rows, Or Rows To Columns?
Converting columns to rows or rows to columns can be done in several ways. To convert an entire row, the first step is to move or copy the row by clicking and dragging it to another location. Then select the empty row and move the pointer to the first cell of that row.
To convert a single row, select that row and use the Copy/Cut-Paste technique.
For multiple contiguous rows, click on the topmost row, hold down the Shift key, and then click on the last row. If you want to move or copy just some cells in a row, drag your pointer over those cells while holding down the left mouse button.
You can even move or copy multiple rows at once; just click on one of them, hold down Ctrl and then select additional ones before moving them with Cut/Copy-Paste.
To convert from column B to column C for example, click on column B and drag it to destination column C; when you release your mouse button all contents of column B will be moved into column C.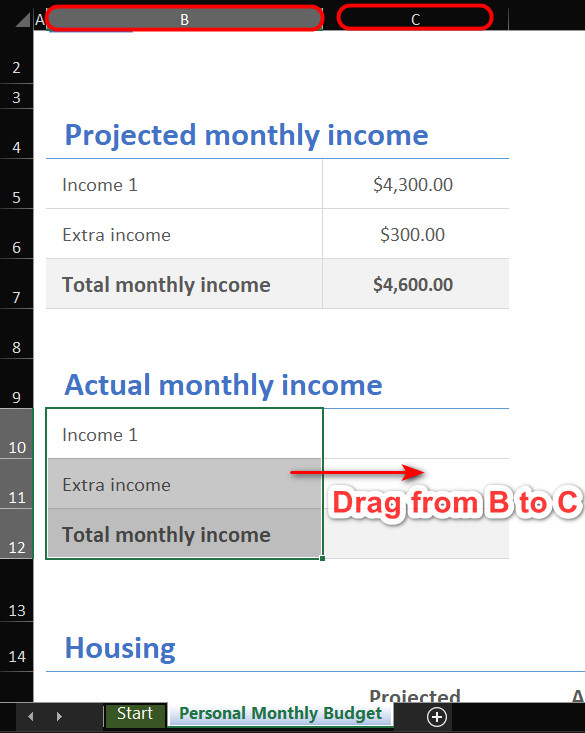
To convert from a single cell in a single row to multiple cells in a different row, simply drag that cell and drop it onto the desired destination cell in another row – this will also move multiple rows as needed along with it!
Follow our guide to highlight duplicates in Excel.
Final Thoughts
As a spreadsheet app, Microsoft Excel provides you with lots of helpful features that directly contribute to the scalability of your spreadsheet file. You can move and copy rows where you want using Excel is something that can be done with ease and in a very short time as well.
Apply any of the methods from this guide that suits your preferences when moving a row in Microsoft Excel. Going through them here will allow you to employ these methods at any time.