HDR is the abbreviation for High Dynamic Range, a feature to improve your viewing experience widely. Nowadays, this feature is supported by almost every new monitor, and the users are loving it.
Some users reported a bug where in Windows 10, the HDR looks washed out, i.e., the display does not show the feature correctly.
Note that even if you have HDR features, you need to enable it from settings to actually use it.
As I am a big enthusiast of new technologies and features, I have already tried HDR, which is undoubtedly awesome. But the errors some users face are making their experience bad. I have compacted all I could about the fix in this article.
What is HDR?
HDR is a relatively new feature that conveys more details than any traditional means, so the image becomes more vivid. But for some users, it is working quite the opposite, making their already normal display fade and washed out.
To know about the problem, we must know the feature clearly.
HDR adds details to the image by showing the black as not only a simple black but different levels of brighter blacks. Same with other colors. This helps to create a more lively image and video.
You may have thought that all the videos can be played in HDR if you have this feature. But that is not the case. You need an HDR-enabled display which is pretty costly and HDR content. HDR content refers to the video you will be watching.
Read more on how to get Windows 10 for free as a student.
Why is HDR washed out?
HDR is washed out, maybe because you have a display that does not support HDR. There are various reasons why HDR might feel washed out. If the display does not support it, then it’s no use tinkering with the settings and all.
If you already have an HDR-supported monitor, another reason for a washed-out display is the content itself. Not all the contents are in HDR.
If you think a little, you will understand it quite clearly. HDR is more precise, and more data is needed to show more details. So only the HDR contents have information about the details; thus, HDR does not work for normal content.
Fix HDR Washed Out Windows 10
As they say, great powers come with great responsibilities; as a tech enthusiast, I often get to play with various features as well as hardware before they are launched commercially. Depending upon my usage and some internet scouring, I have come across some solutions to fix the washed-out Windows 10 problem.
Here are the solutions for fixing HDR washed-out Windows:
1. Use a Display compatible with HDR
HDR-compatible external monitors or TVs are costly, but they are worth the price as your viewing experience will increase tremendously. So first, you should check if your built-in display or external display supports HDR or not.
Here are the steps to check if your display is compatible with HRD or not:
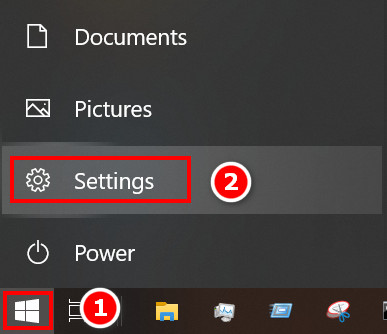
- Click on the Windows icon at your screen’s bottom-left corner. Hover your mouse pointer over the Settings icon and click on it.
- Select Apps from the options.

- Select Video Playback from the left panel, and some options will appear in a new window.
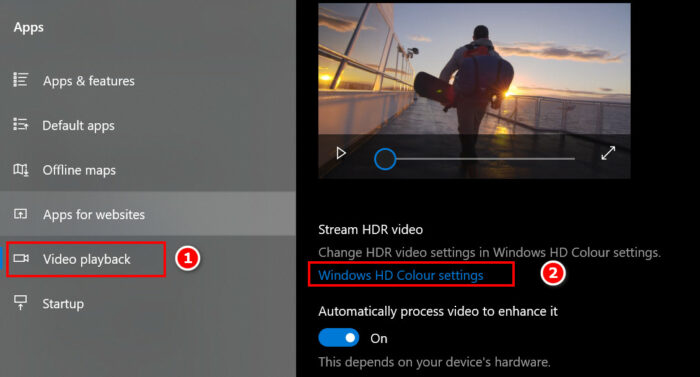
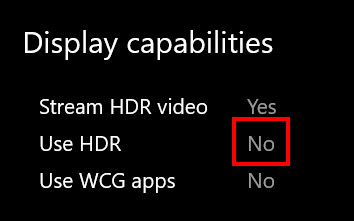
- Click on Windows HD Color Settings, and you will see Display capabilities there. If you do have HRD capabilities, you will see them there. If not, then your only choice is to upgrade your display.
2. Enable HDR in settings
Even if you have an HDR-supported display or HDR-supported computer, you will not see the difference if you do not turn it on. This might be the reason you are seeing washed-out HDR content.
Here are the steps to enable HDR in settings:
- Click on the Windows icon located at the bottom left corner of your screen. Hover your mouse pointer over the Settings icon and click on it.

- Select Apps from the options.

- Select Video Playback from the left panel, and some options will appear in a new window.
- Click on Windows HD Color Settings and toggle ON the Use HDR option below.

Quickly check our epic post how to use password instead of a PIN to log into Windows 10.
3. Adjust Windows brightness
Sometimes lower brightness might cause the washed-out effect of HDR even when HDR is turned on, and you already have an HDR-capable display.
Here are the steps to adjust Windows brightness:
- Click on the Windows icon located at the bottom left corner of your screen. Hover your mouse pointer over the Settings icon and click on it.

- Select Apps from the options.

- Select Video Playback from the left panel, and some options will appear in a new window.
- Click on Windows HD Color Settings.

- Drag the Brightness bar to the right to increase the brightness and left to decrease the brightness from the HDR brightness.
4. Create a color profile for Monitor
Sometimes creating or installing a new color profile from your monitor’s manufacturer helps solve this problem. You have to find your manufacturer’s home page and download the color profile.
Here are the steps to create a color profile:
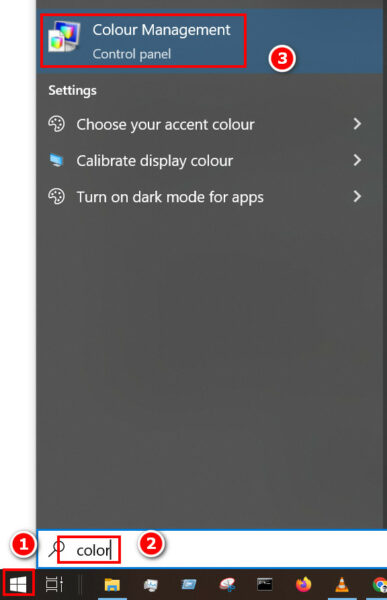
- Click on the Windows icon at the bottom left corner of your screen and type Color.
- Select Color Management, and a new screen will appear.
- Click on the Display of your device and then check the box saying Use my settings for this device.
- Look at the lower left corner of the window and click on Add.
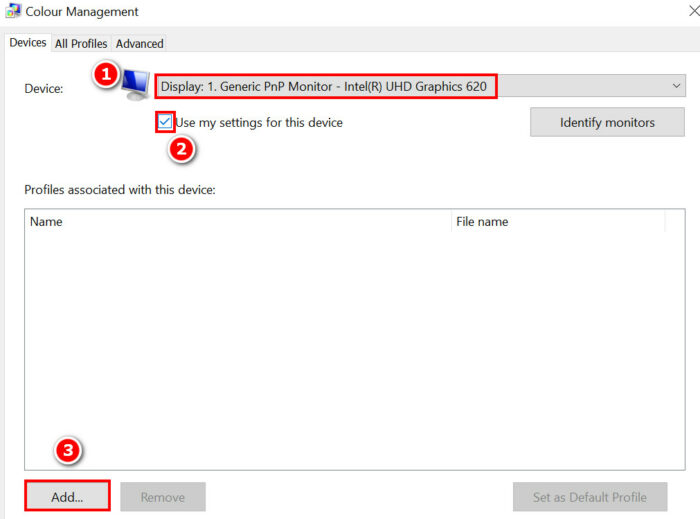
- Select Browse in the next step and go to your manufacturer’s color profile you just downloaded.
- Select that color profile and click on OK.
- Restart your browser and see if the problem still persists.
Here’s a complete guide on how to reduce RAM usage in Windows 10.
5. Calibrate windows color
Calibrating the Windows color might help. It will also change the gamma as well as texts on your screen. So it is worth a try if the previous methods failed for you.
Here are the steps to calibrate the Windows color:
- Click on the Windows icon located at the bottom left corner of your screen and type calibrate display colour.
- Select Calibrate display color.
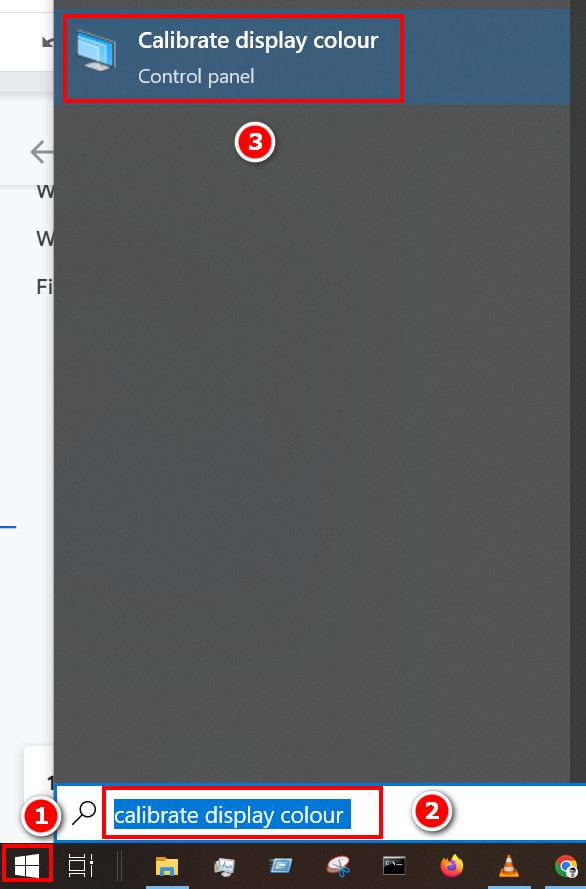
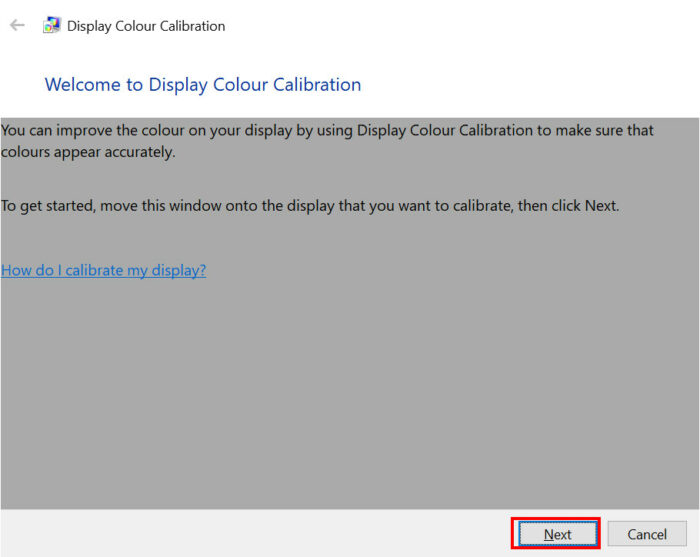
- Click on Next in the color calibration window.
- Hover the vertical bar till you see the images as instructed in the window.
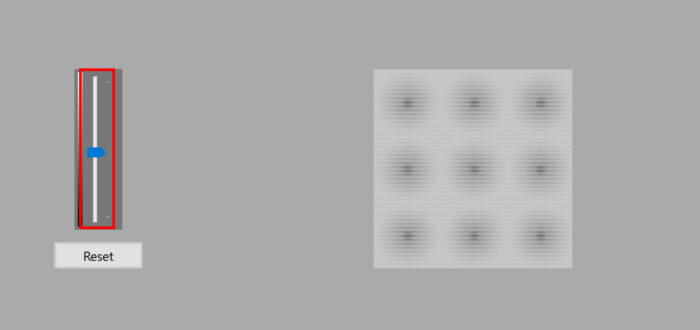
- Proceed according to your windows instruction and check the image. If the image seems as it is said on the screen, proceed to the next step.
Find out how to enable & disable CD burning.
6. Change color bit depth
Color bit depth is important for HDR as it uses a 10-bit color, whereas Standards is 8-bit. So changing color depth from 8 to 10 might be a good idea.
Follow the steps below to change the color bit depth:
- Click on the Hidden icon on the bottom right corner of your desktop.
- Right-click on the NVIDIA icon and select NVIDIA Control Panel.
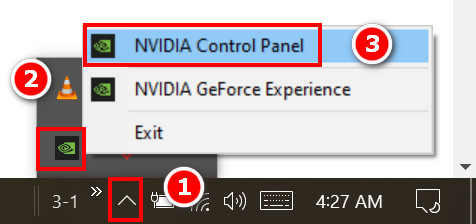
- Look at the left panel and select Display.
- Select Change Resolution and click on change output color depth.
- Click on 10 bpc and hit Apply.
7. Keep monitor driver up to date
Keeping your monitor or another display driver up-to-date is a good idea as it helps fix bugs and improve performance.
Here are the steps to keep the monitor driver up to date:
- Click on the Windows icon located at the bottom left and type Device Manager. Select the best match.
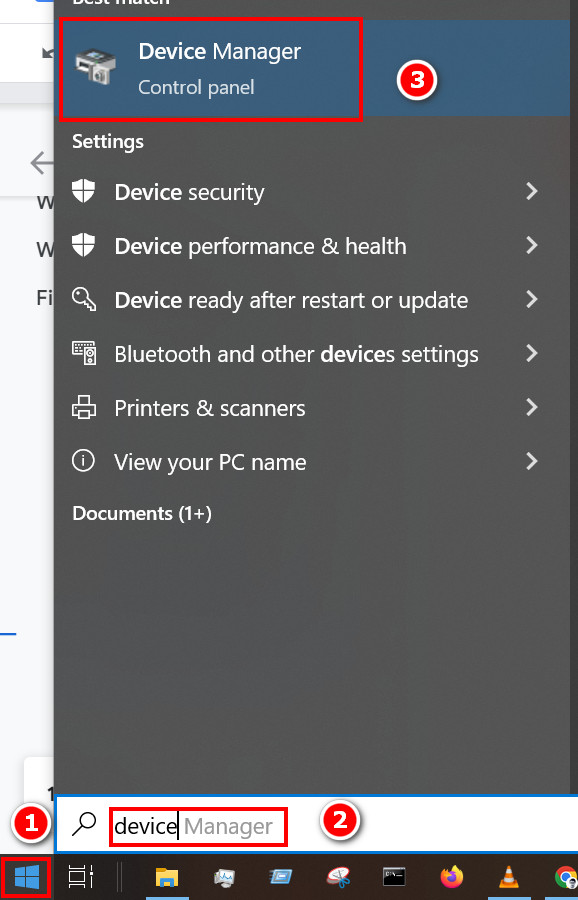
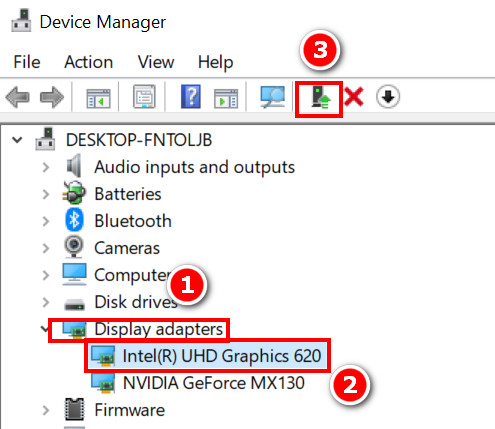
- Click on Display adapters and then select the one you want to update.
- Click the Update icon on the top of the display.
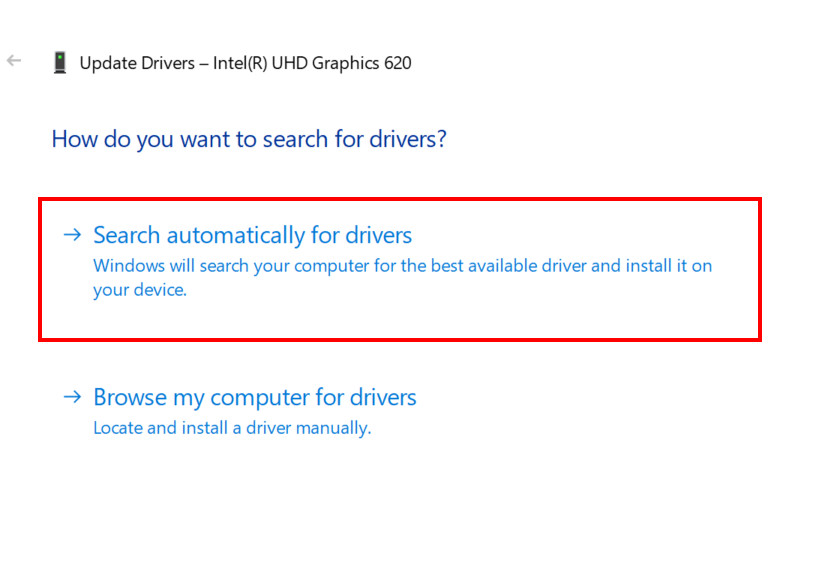
- Select Search Automatically in the next pop-up window, and your device will search for the best adapter online. If it is already installed, then you will see it there.
Also read why won’t Windows 10 install from usb.
Conclusion
As one of the latest features, it is natural that people want to experience HDR and compare the difference between a standard display and an HDR-capable one.
Problems due to wrong settings or misconceptions about HDR might lead to discomfort and a bad taste in an awesome technology. So always try to check if there are any wrongs in your settings or not.
Remember to restart after you try every fix and check if the problem is already gone or not. If it is not, then proceed to the next steps. I hope this article will help you better understand HDR and solve the washed-out HDR problem you faced completely.
Let us know if you want to know more about your hardware and software. Have a good day.