You bought a new NVMe drive, correctly installed it on the PCIe slot, and booted into the BIOS to verify that the SSD was recognized. However, the NVMe vanished in Windows 11.
You are not alone! Many users reported they had encountered similar issues after updating from Win 10 to Win 11 or updating their display driver. Even though most cases had an AMD system, we can’t throw Intel out of this problem.
From this article, you will acknowledge why NVMe is detected in BIOS but not Windows 11 and how to solve it.
Let’s begin.
Why is NVMe SSD showing up in BIOS but not in Windows 11?
There can be various reasons your newly bought NVMe storage drive is detected in the BIOS but failed to recognize in the Windows operating system. One of the leading causes is having incompatible storage controller drivers. Misconfiguration in BIOS or Windows 11 OS can also provoke the issue.
Here are the reasons why the NVMe drive isn’t showing in Windows 11 but appears in BIOS:
- Improper NVMe Storage Controller Driver installed.
- The NVMe drive partition lacks a drive letter.
- The NVMe storage drive is not initialized in the Operating System.
- Wrong file system format, instead of NTFS or FAT32.
So, when you are ready to move games from HDD to SSD, but the NVMe is not detected in Windows 11, keep reading to learn the solution.
How to Fix NVMe Drive Detected in BIOS but Not in Windows 11
To show the NVMe in Windows 11, ensure the NVMe slot is not disabled in BIOS accidentally. In addition, verify you have installed the correct NVMe storage controller. Moreover, you must initialize a newly installed NVMe drive to appear in Windows File Explorer.
Due to various reasons, NVMe drives may not appear in Windows File Explorer or disk management. So, for example, when you install a second SSD to reinforce storage space, and it’s missing on the Windows, you must perform the following solutions to resolve it quickly.
Here are the methods to fix NVMe SSD detected in BIOS but not in Windows 11:
1. Perform Windows and Hardware Troubleshooter
You can use Windows Troubleshooter if the connected M.2 NVMe drive is missing. If it relates to Windows, it will try to fix the issue.
To use Windows and Hardware Troubleshooter:
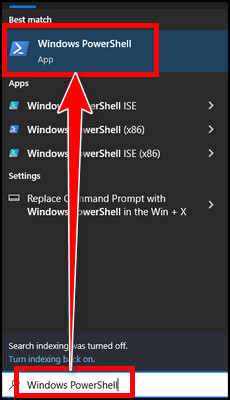
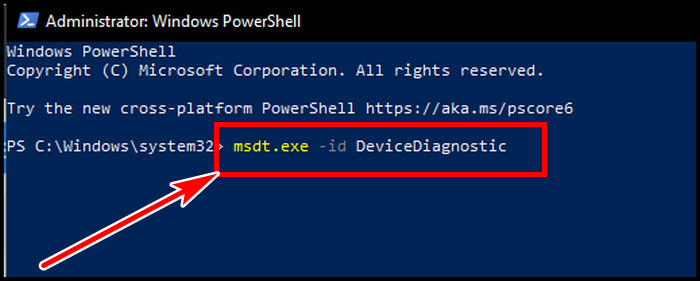
- Search Windows PowerShell and open the best result.
- Type msdt.exe -id DeviceDiagnostic and hit enter.
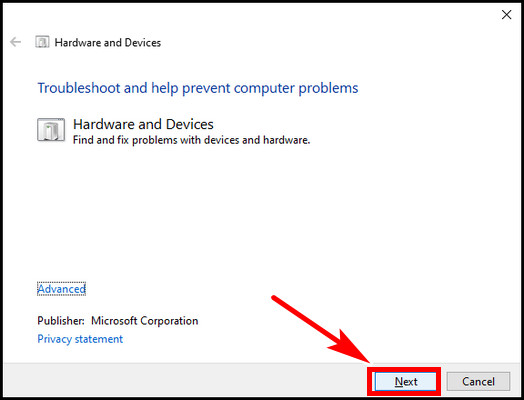
- Click Next in the new popped-up window.
Wait to finish the action. If the wizard identifies any root causes, click on them individually and follow the prompted steps to troubleshoot.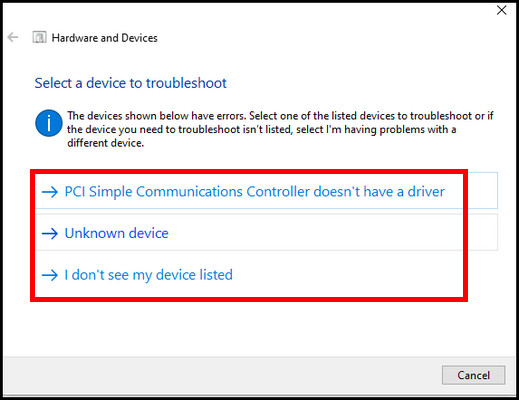
After that, reboot the system, and the NVMe drive should appear on Windows.
2. Install Correct NVMe Storage Controller Driver
When I had an AMD system a few months back, I bought a new Solidigm P44 Pro NVMe SSD. After booting to Windows, when I went to File Explorer to check it, the brand new 1 TB NVMe drive was gone.
I was beginning to worry and started some research. Later, I found that when I installed the AMD Chipset and display driver, it installed an AMD-RAID Bottom Device driver under Storage controllers in Device Manager. I switched to Microsoft’s default NVMe controller, and voila! There’s my NVMe in front of me!
If you are an AMD user and encountering such an issue, you must verify this.
Here are the steps to install the correct Storage Controller driver:
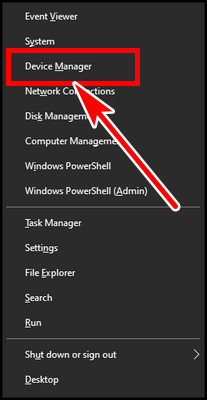
- Press Windows+X and select Device Manager.
- Expand Storage controllers.
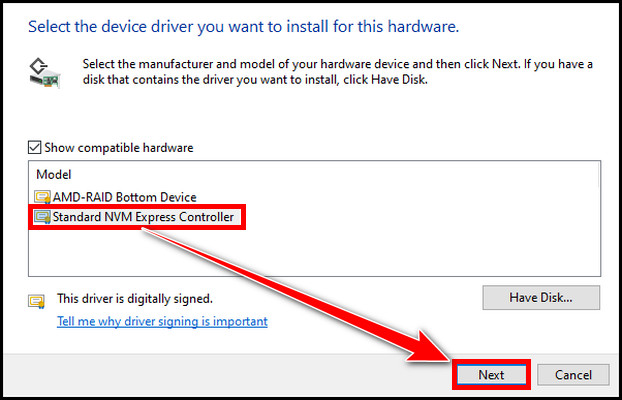
- Select AMD Raid Bottom Device or AMD Raid Storage Controller, right-click on them, and select Update driver.
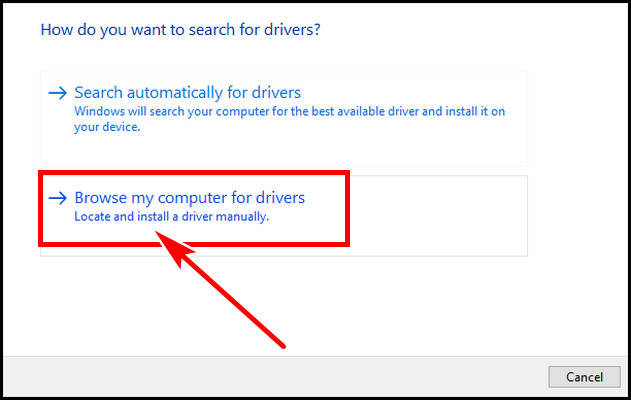
- Choose Browse my computer for drivers.
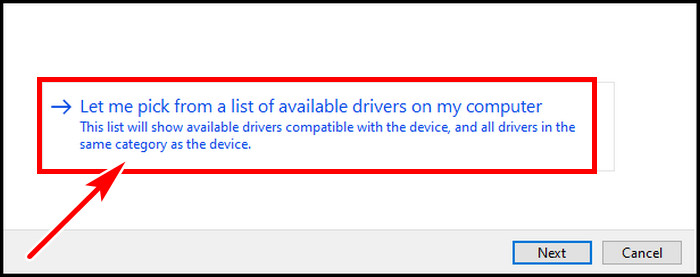
- Click Let me pick from a list.
- Select Standard NVM Express Controller from the list and hit NEXT.
- Reboot the PC.
After booting to the OS, you should see the NVMe SSD in the Windows ready to use.
If you are on the Intel system or the MS standard controller is already installed, you can download the latest driver from your SSD manufacturer’s official website and install it to resolve the issue.
3. Initialize the NVMe Storage Drive on Windows
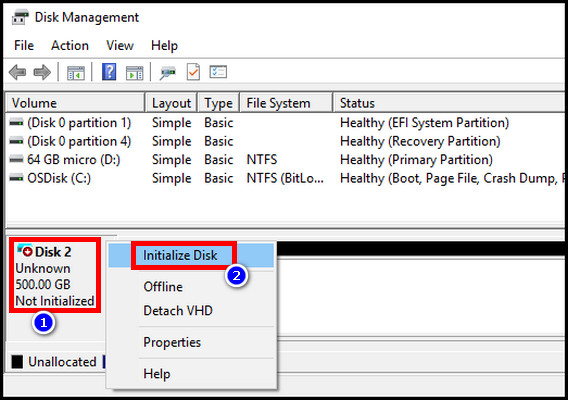
When you install a new storage driver, the drive remains unallocated until you give it a drive letter. Until the drive is initialized, it will appear in Windows Disk Management but not Windows Explorer.
Follow the steps below to initialize NVMe SSD and assign a letter:
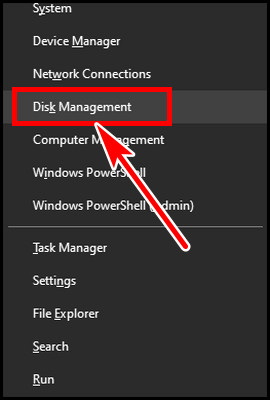
- Press Win+X and select Disk Management.
- Right-click on the Not Initialized drive and select Initialize Disk.
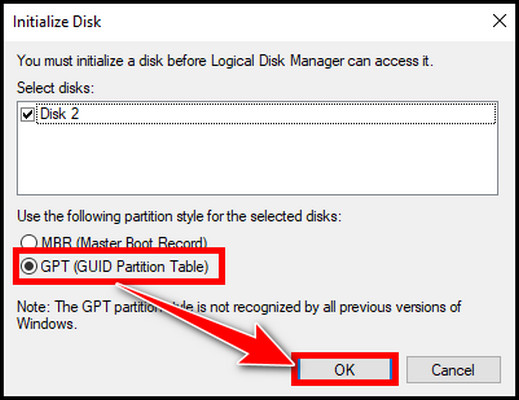
- Choose GPT (GUID Partition Table) and hit OK.
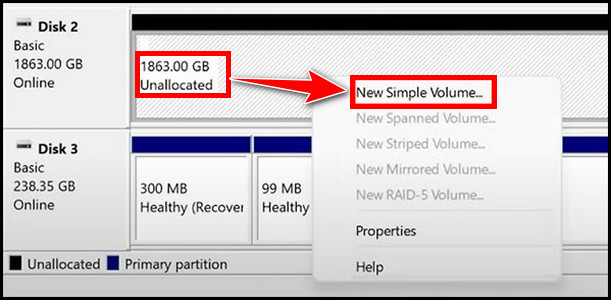
- Right-click on the Unallocated space and choose New Simple Volume.
- Click Next on the New Simple Volume Wizard window.
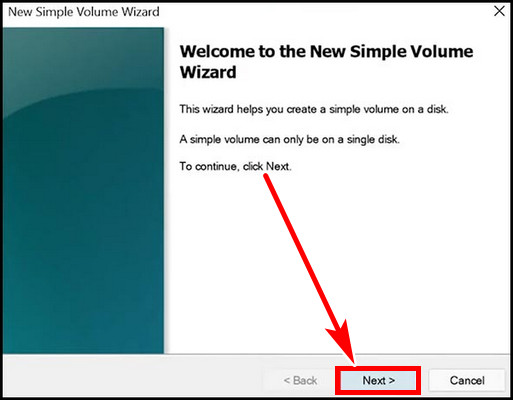
- Select the desired size of the volume and click Next.
- Assign a drive letter and click Next.
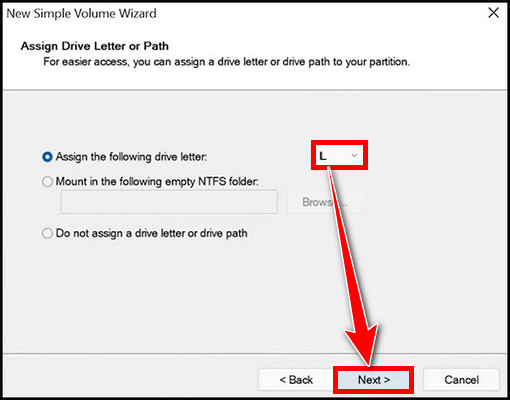
- Format with the NTFS file system, select Next and Finish the process.

Your NVMe SSD Drive will appear in the Windows 11 File Explorer; finally, you can store data in it.
4. Format NVMe Drive to Correct File System
The wrong File system can cause the NVMe not to show in Windows 11 but in BIOS. If so, you must format the drive to NTFS using Diskpart.
To format the NVMe drive to the NTFS file system:
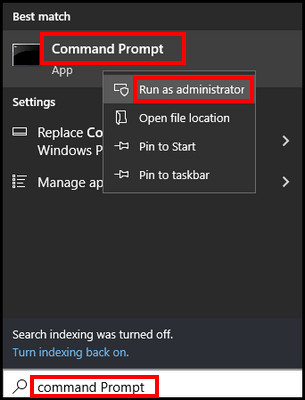
- Search command prompt in the Windows search and run it with admin privilege.
- Type diskpart and hit Enter.

- Enter the following commands individually and hit Enter after each command.
list disk
select disk X (X=your disk number which is corrupted)
clean
create partition primary
format fs=ntfs
assign
Exit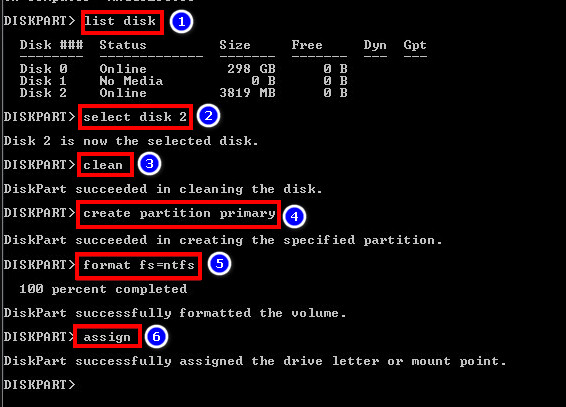
Now, the NVMe should display on Windows.
If the NVMe SSD shows in BIOS but not during the Windows 10/11 install when you want to set the SSD as a boot drive, you can disable the VMD controller. Then, the SSD will appear in the Windows setup wizard, and you can set the NVMe SSD as your new boot drive.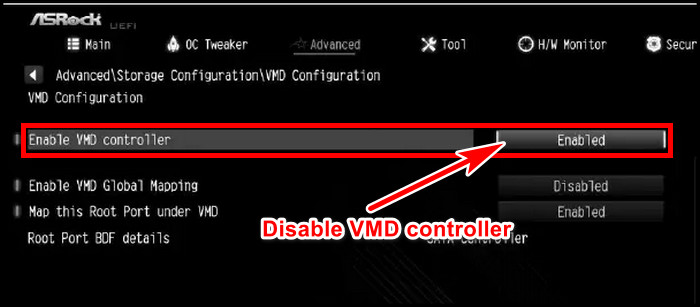
Final Thought
Due to the wrong file format or not initialization and even the wrong storage controller can prevent showing the NVMe SSD on Windows, even though it is detected in BIOS.
You must ensure the proper NVM express storage controller is installed and the file system is in supported format with a drive letter. If you have any further queries, please leave a comment.
Have a nice day!