Imagine being able to make the same changes in multiple worksheets together.
I know it would save many precious hours in your work.
Luckily, you can edit or add data to multiple worksheets in Excel after grouping them together.
That’s why today I’m about to share with you how you group multiple worksheets together in Excel.
After going through the entire post, you will have a clear idea about the various advantages of grouping worksheets in Excel and the process.
So read the post till the end.
Why Would You Group Worksheets In Excel?
You probably have multiple worksheets with the same data structure in your work.
For example, you can have the sales figure for different branches of a shop/office divided into worksheets in a single workbook. Then except for the data/values, the column will be identical on all worksheets.
Now you want to perform the same set of calculations on all worksheets. Typically you would write the formula on each worksheet individually.
Fortunately, there is a way to combine or group worksheets in Excel which I’ll elaborate in the next section.
After grouping, you can edit the identically structured worksheets in a single go. The edit will take place on the exact cell location for all worksheets.
So, for example, if you enter a formula for the C2 cell in any grouped worksheet, all worksheets will have the same formula in the C2 cell.
If you group some worksheets, then set C2 = A2*B2 in any grouped worksheet. All grouped worksheets will multiply their A2 and B2 cells and put the result in cell C2.
As you can see, grouping worksheets are pretty powerful when you have identically structured worksheets. It will save hours of your time at work.
The usefulness of grouping worksheets is not limited to performing the same calculations or adding the same data.
You can print the same section of all grouped worksheets, change the layout in a single go and do much more.
Also, check out our separate post on 4 ways to group rows In Excel.
Here are some reasons to group worksheets in Excel:
- Add new data in the exact location on all grouped worksheets.
- Edit the same cell(s) on all grouped worksheets.
- Perform the same calculation in exact cell(s) on grouped worksheets.
- Change the layout of all grouped worksheets.
- Print out the same region of all grouped worksheets.
If you want to take advantage of grouping worksheets, let’s learn how to do it in the following section. Don’t worry; it’s pretty straightforward and only takes a couple of clicks.
In fact, it is pretty similar to selecting multiple files or folders in File Explorer.
How To Group Worksheets In Excel
There are two ways to group worksheets in Microsoft Excel: grouping selected worksheets and grouping all worksheets inside the workbook.
Notice that in either method, you are unable to group worksheets across workbooks (i.e., grouping worksheets of different workbooks).
Follow the methods below to group worksheets in Excel:
1. Group selected worksheets
You can select which worksheets you want to group manually before grouping them together.
As you would perform the same action across all grouped worksheets, you must select only those worksheets which have an identical layout and structure.
Grouping worksheets with different layouts or structures is possible, but it has no advantage.
Here is the procedure to group selected worksheets:
- Open a workbook in Excel containing identically structured worksheets.
- Press and hold the Ctrl key.
- Click on the worksheets you want to group one by one from the bottom row. Keep pressing the Ctrl key during the process.
- Release the Ctrl key when you are done selecting worksheets.
To group a range of worksheets (worksheets lying side by side or consecutive worksheets in the bottom row):
Click on the first worksheet, press and hold the Shift key, then click the last worksheet in the range. Release the Shift key, and you are done.
After grouping worksheets, you can confirm that, indeed, they are grouped by looking at the workbook name. If the word “Group” is appended to the workbook name, it means some worksheets are grouped.
Also, grouped worksheets have a white background in the bottom row, while ungrouped ones have the usual gray background.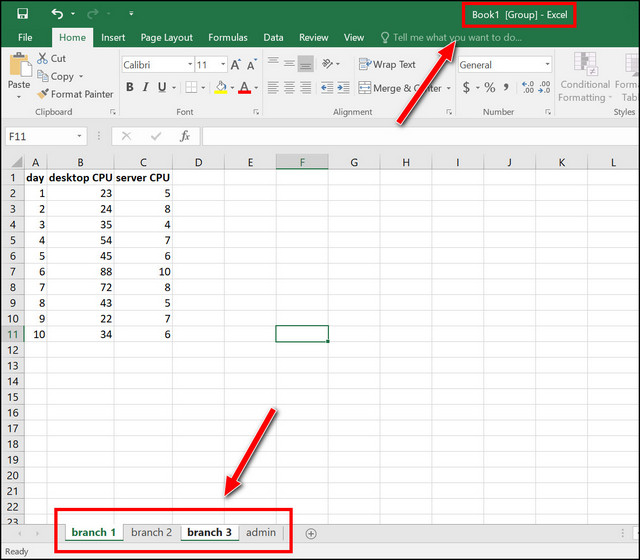
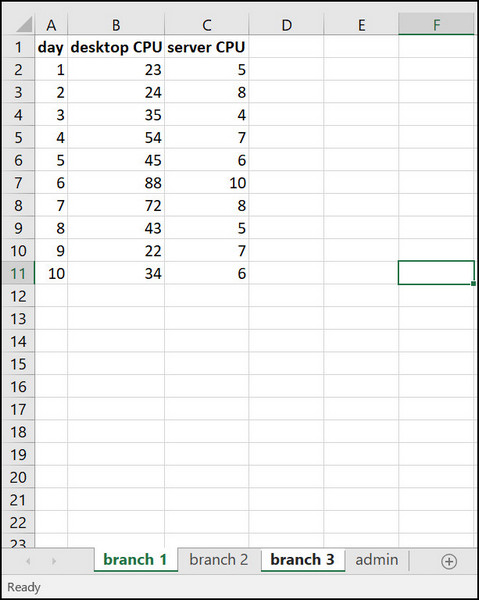
As an example, I have a workbook containing 4 worksheets: branch 1, branch 2, branch 3 and admin. The three “branch” worksheets have a similar structure; they include the desktop and server CPU sales for each day in a different row. 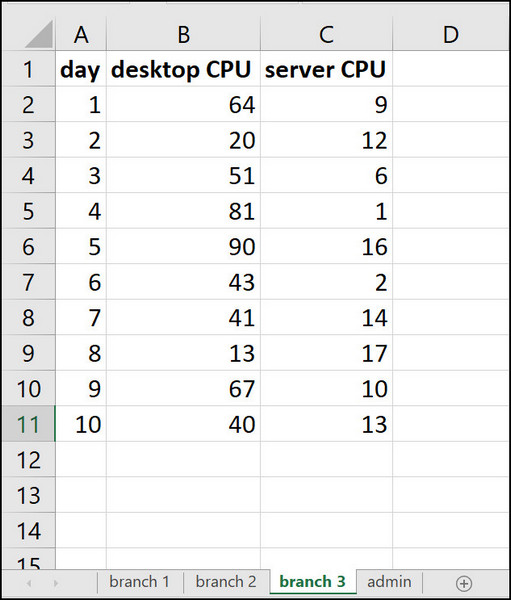
Now I want to calculate daily sales for all the branches. Instead of doing it three times for the three branches, I will group the three “branch” worksheets and then apply the required formula.
So I open the workbook in Excel, then click on the three “branch” worksheets while holding the Ctrl key. The grouped worksheets have a white background, confirming that they’re indeed grouped.
Notice that I have the desktop and server CPU sales in the B and C column, respectively. The daily sum of CPU sales (desktop+server) will be in the D column.
Now that the worksheets are grouped, I can open any grouped worksheet (I chose to open the “branch 3” worksheet) and write the formula (=B2+C2) in the D2 cell.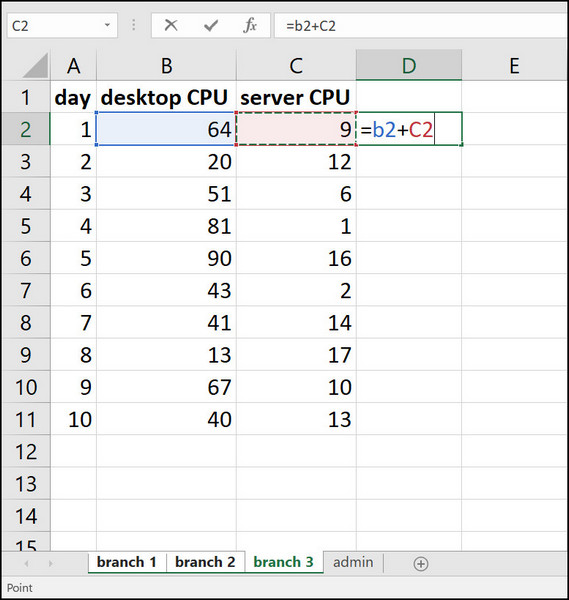
Then I will drag the auto-fill handle to calculate for the rest of the days (row 2 through row 11). 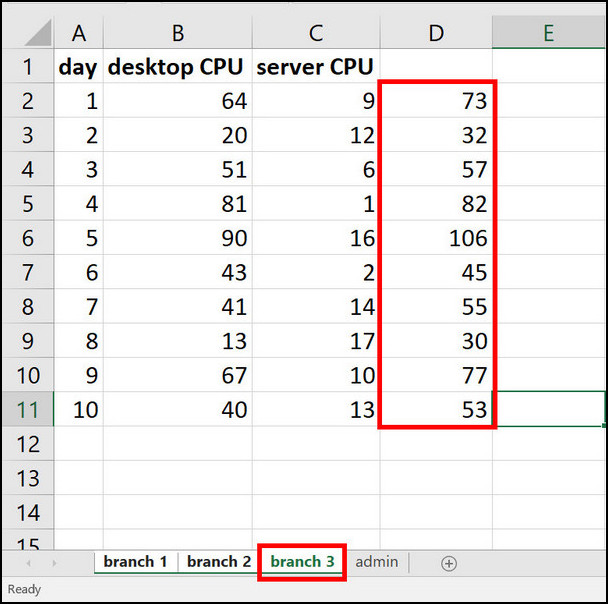
When I’m done, I can switch worksheets and see that the summation is done for all the grouped worksheets. 
Now let’s set the header for the summation (D column) as “total” and make it bold. I have done it in the “branch 2” worksheet. Now switching to the “branch 3” worksheet, I can confirm that the header was set to all the grouped worksheets. 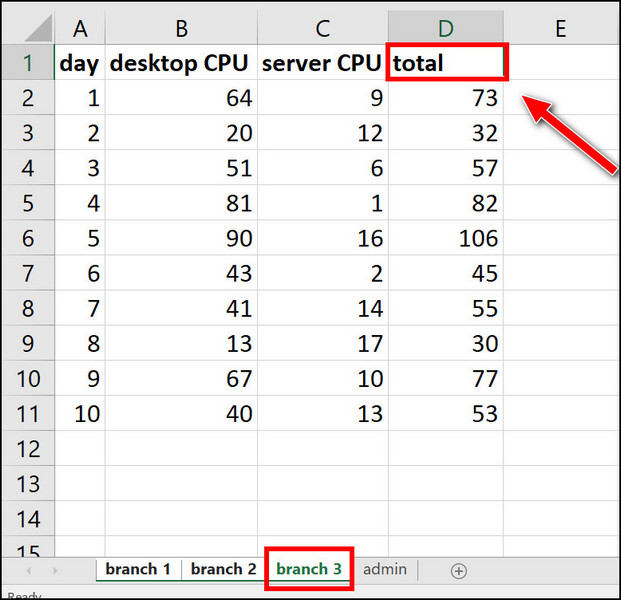
In this way, you can perform similar actions across multiple worksheets through the grouping option.
You may also like to read how to freeze a row on Excel easily.
2. Group all worksheets
If all your worksheets in a workbook have the same structure, you can select them all in one go. There is no need to hold Ctrl or Shift and select them one by one.
Here are the steps to group all worksheets in a workbook:
- Open the workbook containing all structurally identical worksheets.
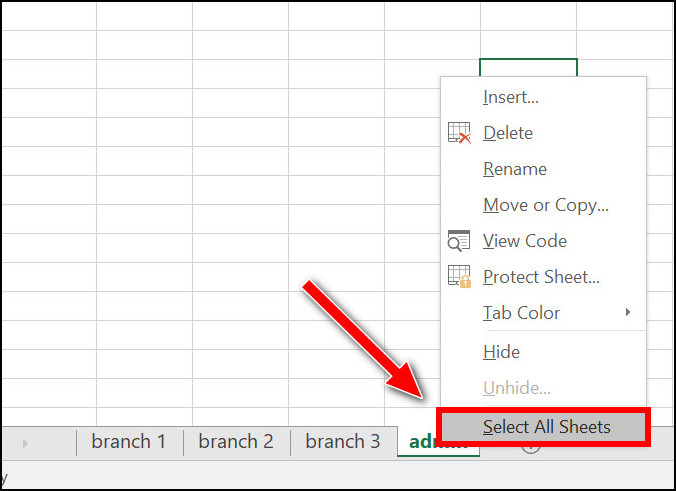
- Right-click on a worksheet from the bottom row. It will bring up the context menu.
- Click on “Select All Sheets” from the context menu.
Again, all the worksheets will have a white background in the bottom row. You will also see the word “Group” at the end of the workbook name.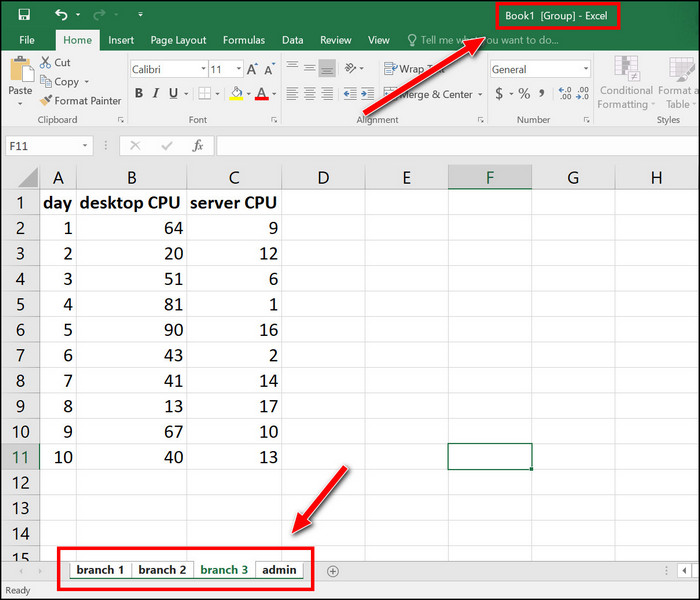
Group Worksheets In Excel Mac
Grouping Excel worksheets in a Mac computer is pretty similar to that of Windows.
Here’s the procedure for group worksheets in Excel Mac:
- Open a workbook containing similarly structured worksheets.
- Press and hold the Command key.
- Click on the worksheet tabs from the bottom one by one to select them for grouping.
- Release the Command key when you are done selecting. The selected worksheets will be grouped.
If you want to select a range of worksheets, the process is exactly the same as that of Windows. Select the first worksheet in the range, then press and hold the Shift key. Release the Shift key after selecting the last worksheet in the range and you are done.
Check out our separate post on how to Autofill Dates in MS Excel.
How To Ungroup Worksheets In Excel
Ungrouping Excel worksheets are easier than grouping them. In fact, you might have already done that without noticing.
So it is essential to know about ungrouping worksheets. Then you will not find out later that all your hard work went in vain (because the actions were applied only to one worksheet instead of the grouped ones).
After you have finished editing multiple worksheets at once through grouping, you need to ungroup worksheets to work on them individually.
Here are the different ways to ungroup worksheets in Excel:
- Click on any ungrouped worksheet from the bottom row. It will ungroup the worksheets and switch to the worksheet you have clicked on.
- Switch to a different worksheet from the bottom row (applicable when you have grouped all the worksheets). It means that you can browse through grouped worksheets without ungrouping when you have not grouped them all. But if you try to browse through worksheets when you have grouped all, it will ungroup.
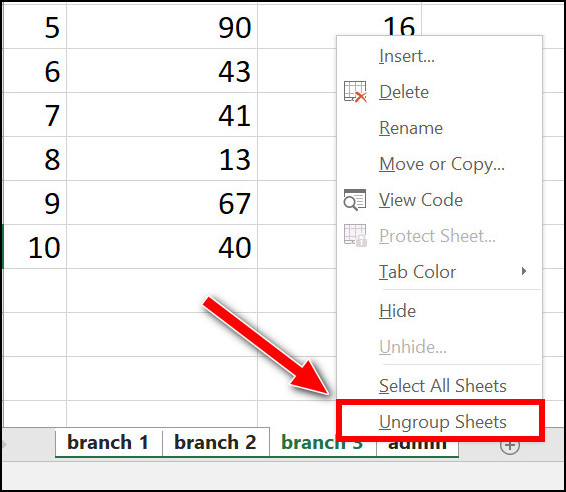
- Right-click on any grouped worksheet from the bottom row, then select “Ungroup Sheets” from the context menu.
When ungrouping, you will see the “Group” word being removed from the workbook name at the top of the window.
Some more guides on how to post bank statement in Excel to quickbooks?
Final Thoughts
Grouping worksheets in Excel has the significant advantage of editing and performing calculations on identically structured worksheets in a single go.
If the grouped worksheets are not identically structured, there’s more harm than good in grouping them.
Grouping worksheets are not a very involved process. It’s similar to selecting multiple files/folders in a file manager.