The Remote Desktop app on Windows 11 allows users to access another remote computer by connecting to its IP address using the device in front of the user which is a very resourceful feature that Windows operating systems have had for a while.
Unfortunately, Remote Desktop runs into errors at times when a user attempts to connect to a distant device.
The most common one is the “Remote Desktop can’t connect to the remote computer” issue. 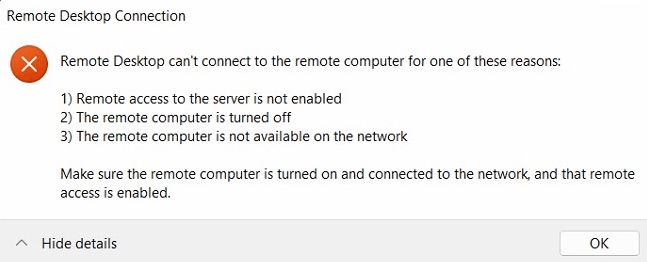 Users will not be able to connect and access the remote computer if such an error occurs.
If you are one of the users who have run into this problem and want to fix it, you have come to the right place! In this guide, the methods of resolving Remote Desktop not connecting on Windows 11 are explained here very simply.
Also, read how to update drivers on Windows 11.
What is a Remote Desktop app?
The remote Desktop app is a feature of Windows 11 that lets you connect to and access a computer in another location. By using this app, you can view the remote computer’s desktop on your screen and also use your keyboard and mouse to interact with that computer. 
The app does not require you to be physically present with a computer. You can just use the Remote Desktop feature to use your own computer and access the remote computer through it.
It allows you to see a remote computer’s desktop screen on your own monitor, lets you interact and give inputs through your mouse, keyboard and other input devices, transfer audio through the connection created to your own audio device and run programs on the remote computer.
All of these are done using the resources of the remote computer. You just control that computer using your input and output devices from another place.
Also, check out our separate post on how to fix PC won’t go to sleep in Windows 11.
Why should you use Remote Desktop?
The remote Desktop app is a very efficient feature for people who have to access computers at a remote location for whatever purpose. Since it lets you access and interact with a distant computer’s desktop, it is useful for working with a computer without being physically present.
The Remote Desktop app’s uses include:
- It is useful for people who do not have a laptop and have to use their home desktop for work from their office, or it might be the other way around when people have to access their work computer from home.
- It is also helpful for performing tasks on a desktop computer or transferring files from a computer that is in another location.
- Remote Desktop is used by troubleshooters to fix a problem on your computer live by connecting to it from another place. This saves them from the trouble of coming to you physically to solve your problem.
- It is also used by academic lecturers to demonstrate a lesson or a program running on their own computers at home because of the limited availability of resources in the classroom.
Similar to these, the Remote Desktop app is used by users for every other purpose that requires you to remotely access a computer. Its applications are endless and it can save a lot of time for the users as well.
Sometimes Remote Desktop runs into errors while connecting to a desktop in Windows 11. It can be quite a nuisance for the users attempting to remotely access any desktop.
There are a few reasons why Remote Desktop does not work on Windows 11. Move on to the next section to find out what they are.
Follow our guide to fixing blue screen on Windows 11.
Why doesn’t Remote Desktop work on Windows 11?
Remote Desktop may at times run into errors when you are trying to connect with a computer using the app. This might be happening for a few reasons like network problems or unavailability of the network, the feature not being enabled or the app is blocked.
Below are the reasons why Remote Desktop does not work in Windows 11:
- Remote Desktop not being enabled
- Firewall blocking Remote Desktop
- A remote server that both computers need to connect to being disabled
- Anti-virus program preventing Remote Desktop from working
- No network available
- Slow or congested network traffic
- Connection not configured properly in Remote Desktop
If you have run into this error appearing on your own computer, it should because of one of these reasons. It is important to figure out why your problem is happening at first if you want to solve it.
After tracking the cause of Remote Desktop not working, you can figure out how to fix it by going through the methods that have been presented in the following section.
Check out the easiest way to install active directory users & computers on Windows 11.
How to fix Remote Desktop not working?
The inconvenience caused by Remote Desktop not connecting on Windows 11 can be resolved easily by following a few steps, depending on what the reason for the problem is. This problem has to be troubleshot according to the causes mentioned earlier.
Even if you are not sure why Remote Desktop is not working on your Windows 11 computer, you can try out these processes to solve the problem.
Follow these steps to solve Remote Desktop not working on Windows 11:
1. Enable Remote Desktop from settings
If you attempted to connect to a remote computer using your own desktop but Remote Desktop showed you the error message, it might be because you have not enabled it yet in your settings. To fix this, you have to turn on Remote Desktop in Settings on your computer.
Here’s how you can enable Remote Desktop:
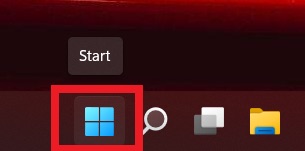
- Open Settings from Start Menu/Press Win + I to open Settings.
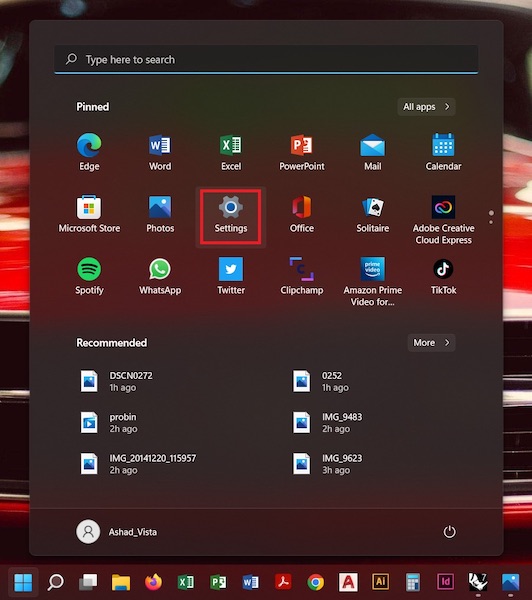
- Go to Remote Desktop from System
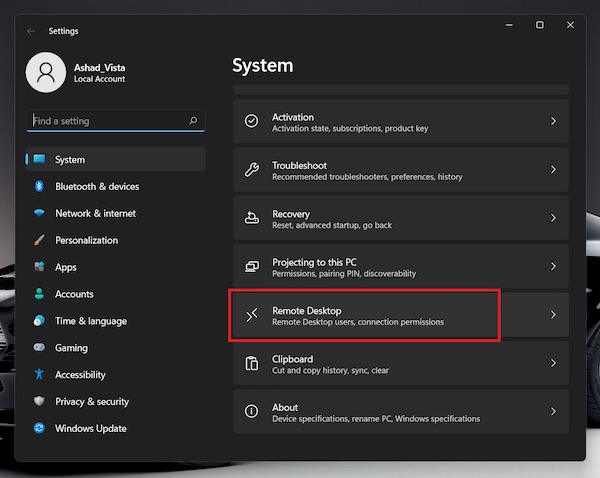
- Turn on Remote Desktop.
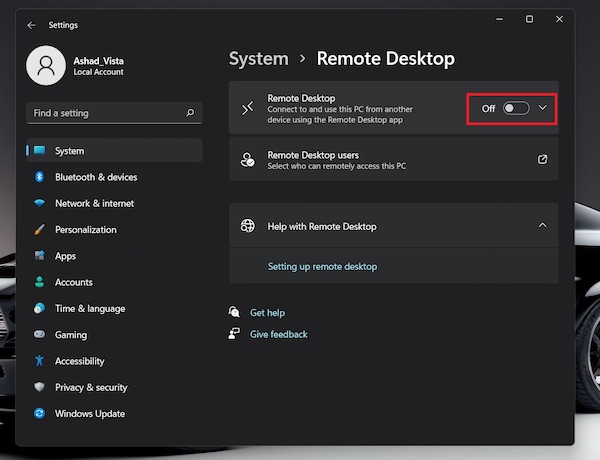
Now the Remote Desktop app should work if it was disabled before.
Follow our guide to fix Windows can’t access network drive on Windows 11.
2. Allow Remote Connection and Remote Assistance
If Remote Assistance and Remote Connection are disabled on your computer, the connection cannot be established with another computer. They need to be enabled for Remote Desktop to work properly.
Here is the process of turning on Remote Assistance and Remote Connection:
- Go to Search from the Taskbar/Press Win+S for search bar.
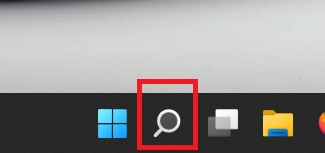
- Search for control panel.
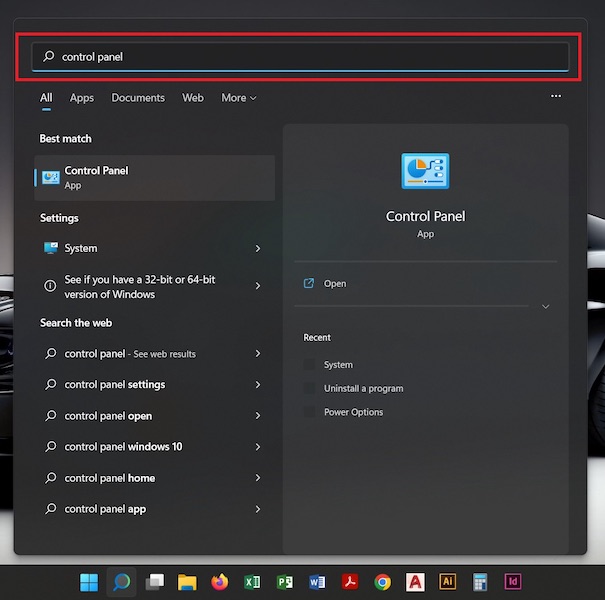
- Open Control Panel.
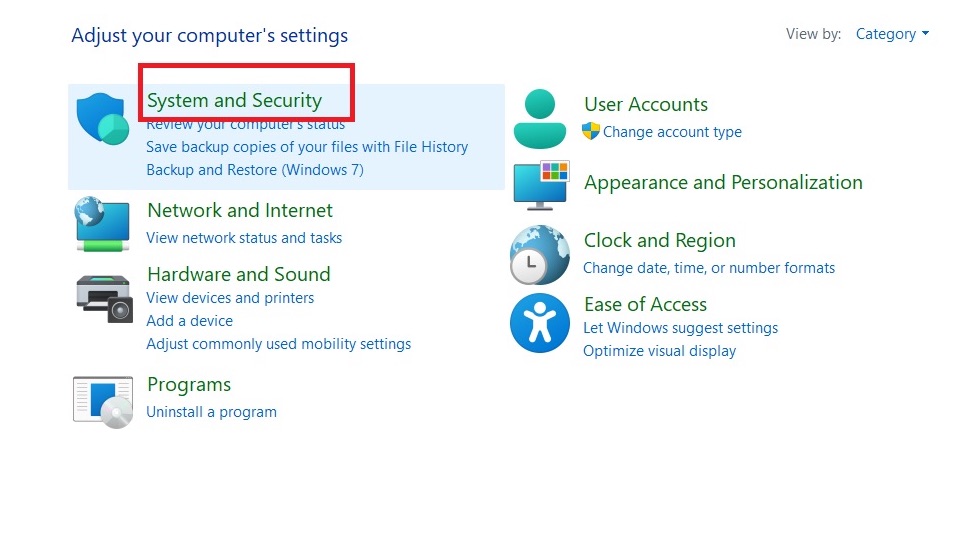
- Go to System and Security.
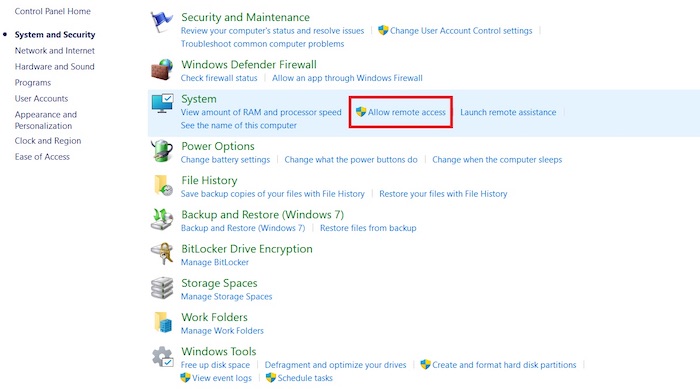
- Click on Allow remote access.
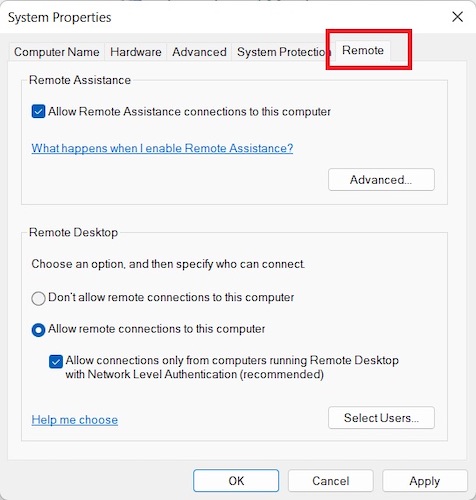
- Select Remote
- Make sure Allow Remote connection to this computer is checked.
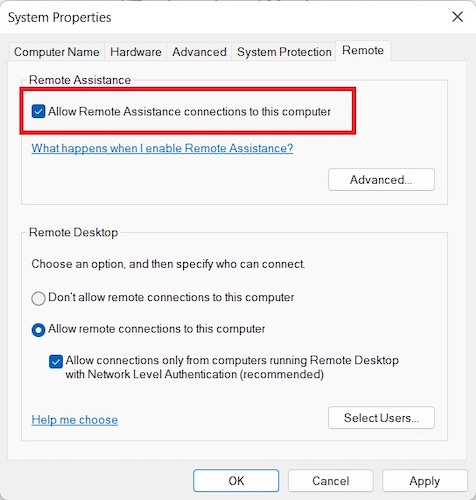
- Enable Allow remote connections to this computer.
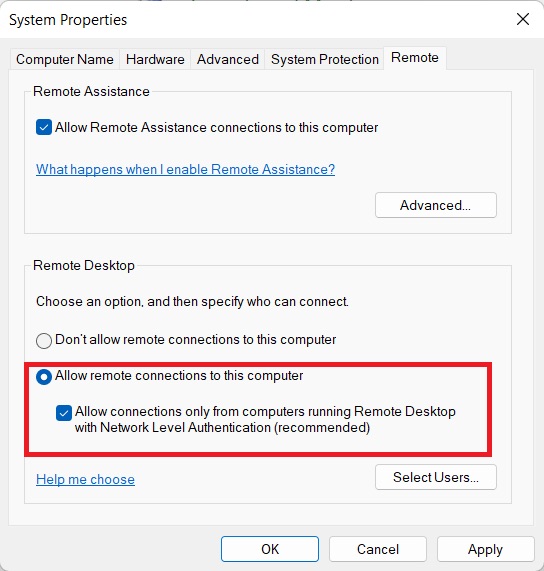
- Click on Apply, then OK.
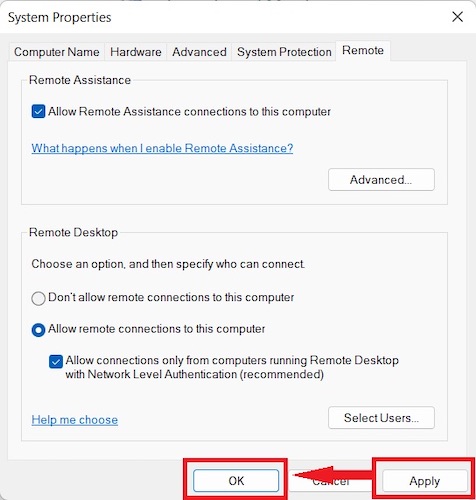
After having gone through these steps, check if your problem of Remote Desktop not connecting has been solved.
3. Enable Remote Desktop Protocol Services
It is possible that your Remote Desktop Protocol Services is not enabled if the Remote Desktop app does not work on Windows 11.
Go through these steps to enable RDP services:
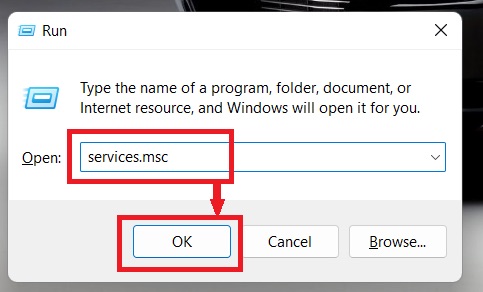
- Press Win + R for the Run dialog box.
- Type in services.msc and press OK.
- Select Remote Desktop Services from the list.
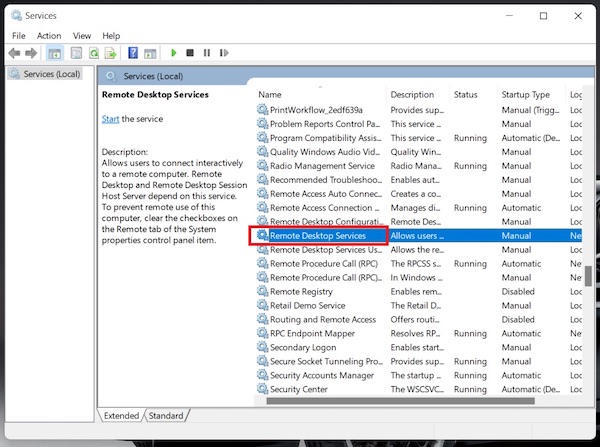
- Press Enter to open Remote Desktop Services Properties.
- Click on Startup type
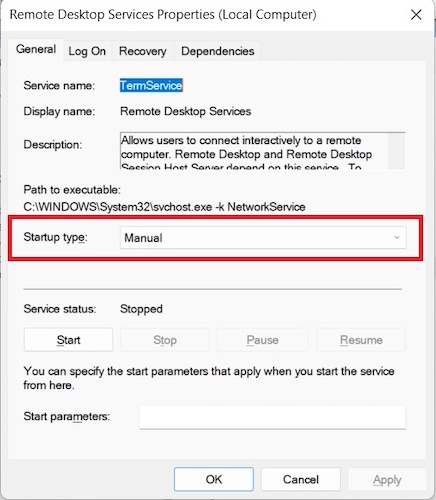
- Choose Automatic from the list.
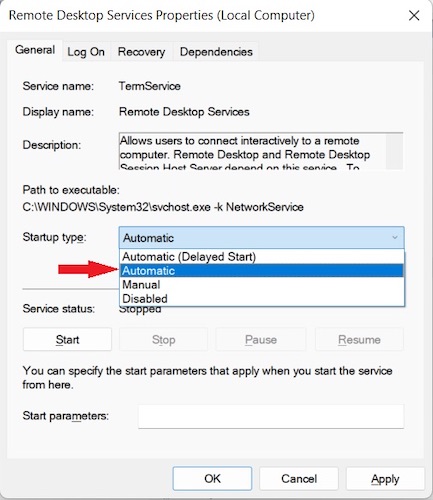
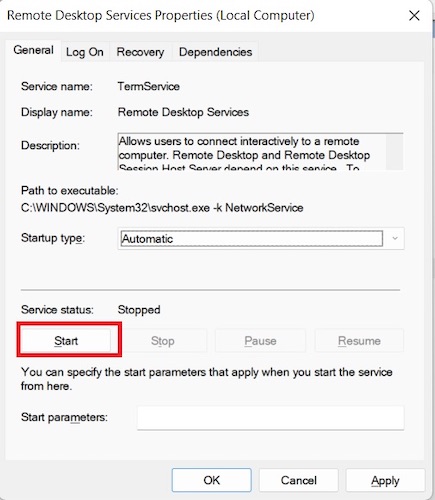
- Click on Start button if Service status is stopped.
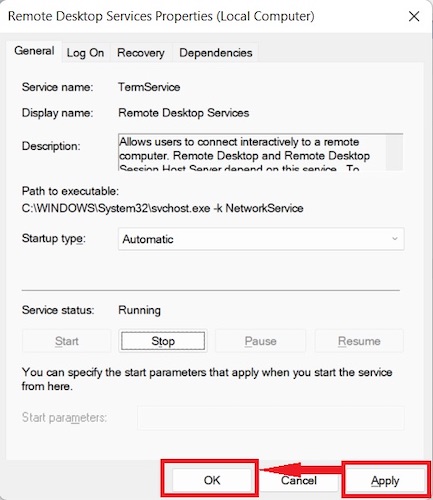
- Click on Apply, then OK.
- Go back to Services.
- Select Remote Desktop Services UserMode Port Redirector and repeat the steps.
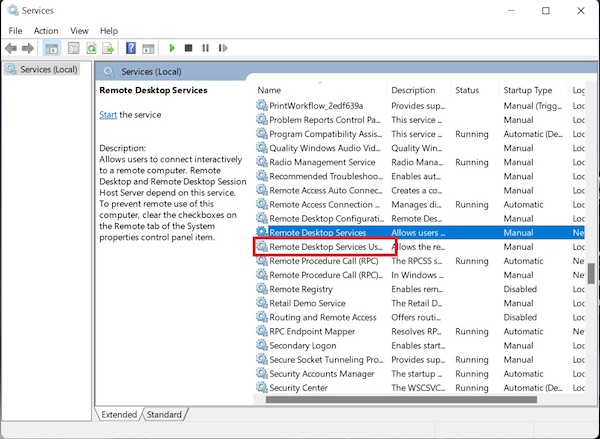
If Remote Desktop was not working for you before due to services being turned off, it should work properly now.
4. Make your network profile Private
Appointing your network profile to be Private from Settings may fix Remote Desktop not working on your Windows 11 computer.
To set a Private network profile, do these:
- Open Settings from Start Menu/Press Win + I to open Settings.
- Go to Network & Internet
- Select Wi-Fi or Ethernet, according to your network type.
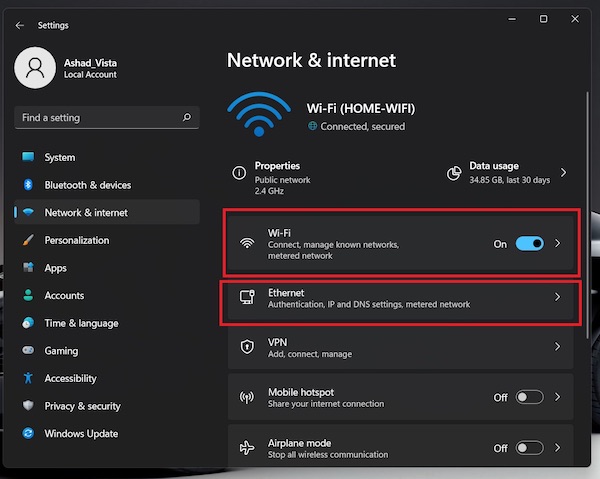
- Choose Private.
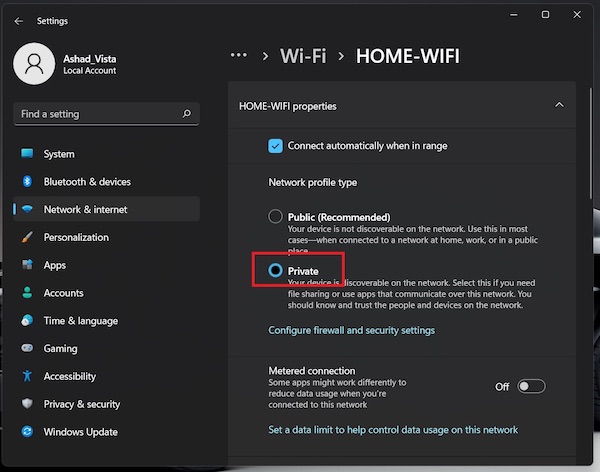
When you have completed following these steps, you can try connecting to another computer using Remote Desktop to make sure your issue is resolved.
5. Make your network discoverable
Remote Desktop app will not work if your network discovery is disabled. You have to turn it on from Control Panel to fix Remote Desktop not working.
Here is the process of enabling network discovery:
- Go to Search from the Taskbar/Press Win + S to search.
- Type in control panel.
- Go to Control Panel.
- Select Network and Internet.
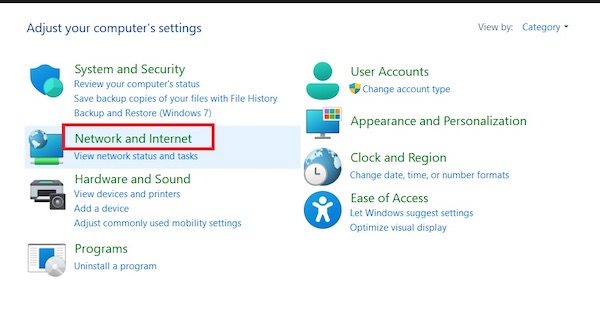
- Click on Network and Sharing Center.
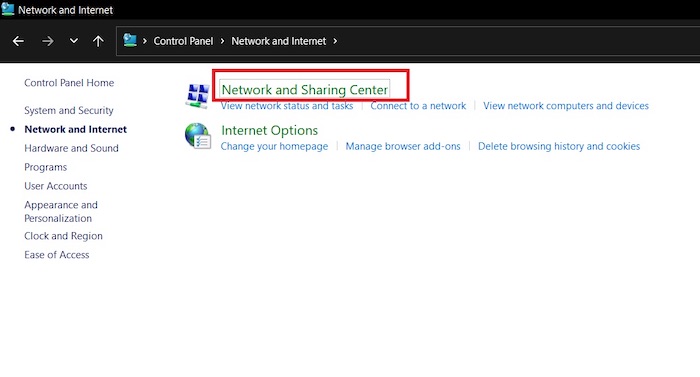
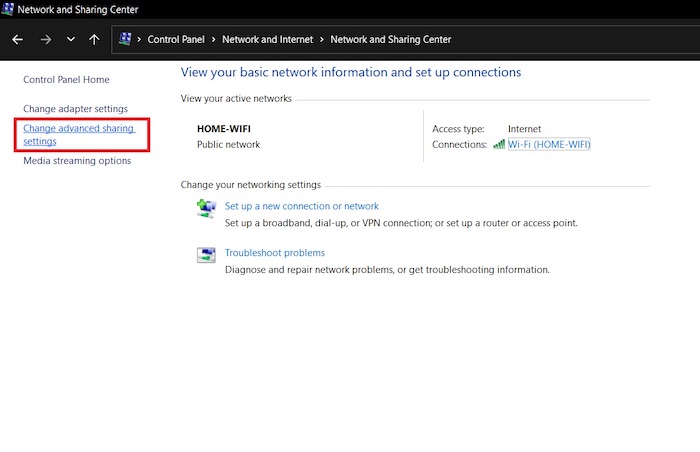
- Go to Change advanced sharing settings from the left.
- Enable Turn on network discovery.
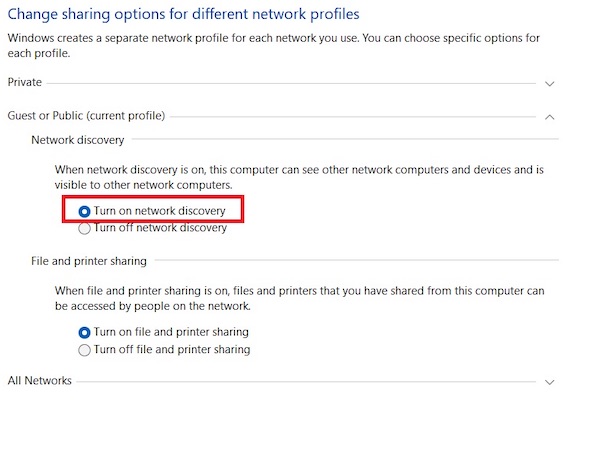
- Select Save Changes.
After having done all these, your network discovery will now be turned on and you can use Remote Desktop app properly.
6. Permit Remote Desktop in Firewall
Your Firewall might be blocking Remote Desktop app which may cause it to not work on Windows 11.
Here’s the way to enable Remote Desktop through Windows Defender Firewall:
- Search for windows defender firewall.
- Open Windows Defender Firewall.
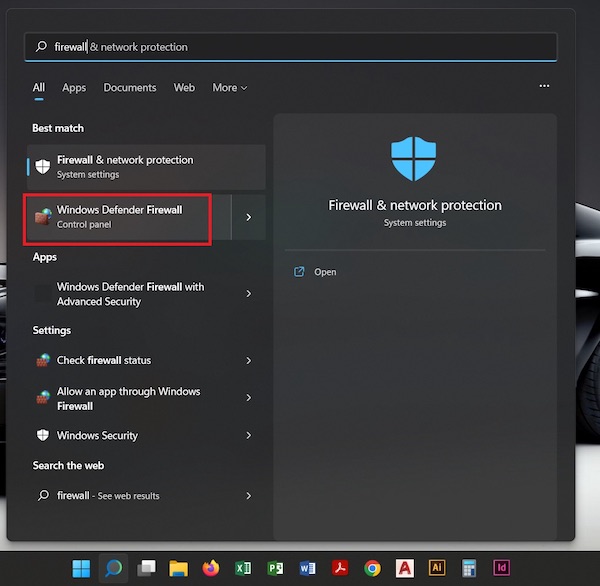
- Go into Allow an app or feature through Windows Defender Firewall.
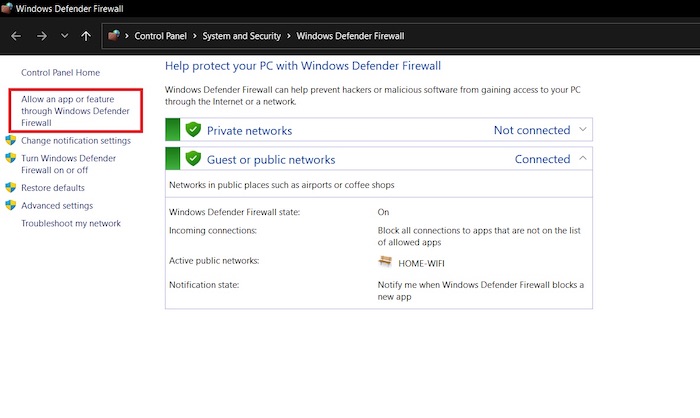
- Click on Change Settings if it is not greyed out.
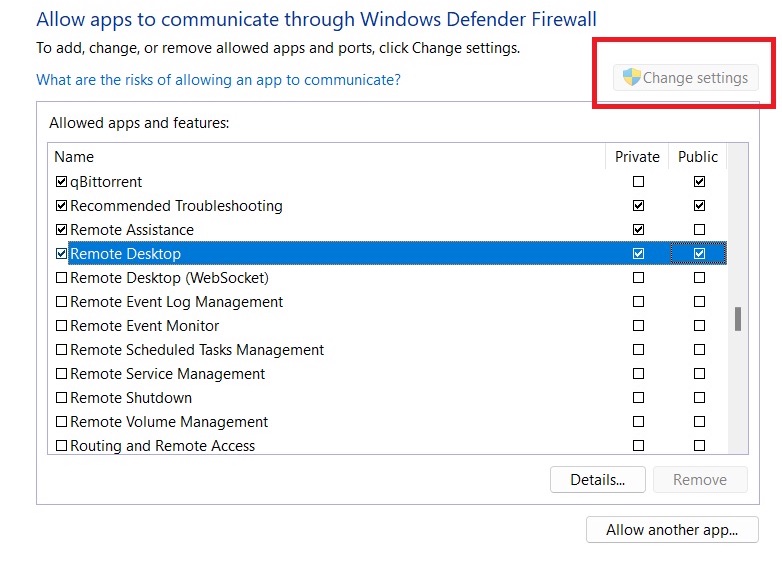
- Check all the boxes for Remote Desktop.
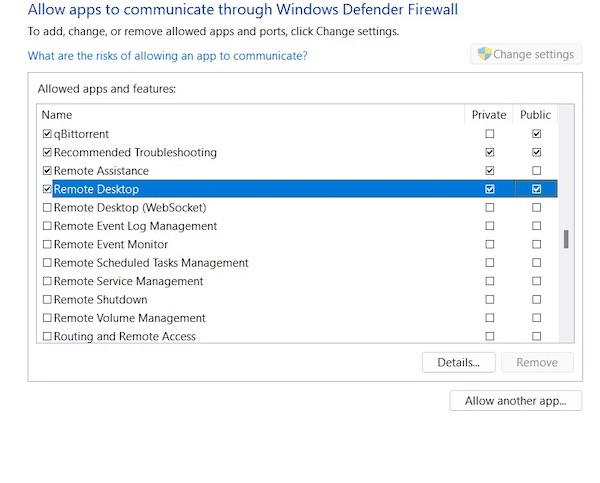
- Click on OK.
Remote Desktop app is now allowed through Windows Defender Firewall on your computer after carrying out this process.
7. Uninstall your anti-virus
It is possible that your anti-virus is impeding the activities of Remote Desktop app which is not allowing it to connect to a remote computer. You need to uninstall any antivirus from your Windows 11 computer to solve this.
Uninstall your anti-virus in this way:
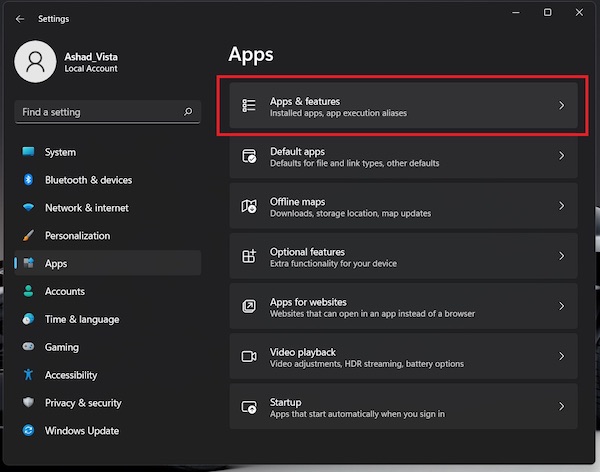
- Open Settings from Start Menu/Press Win + I to open Settings.
- Go to Apps tab on the left.
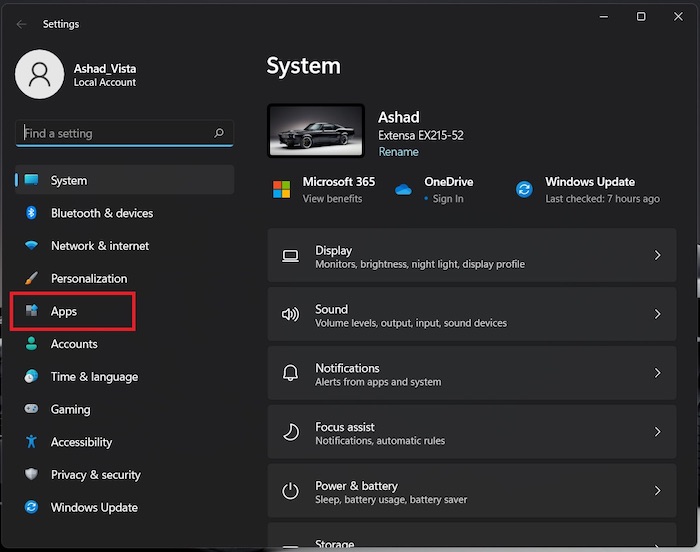
- Select Apps & features.
- Find your anti-virus from the list.
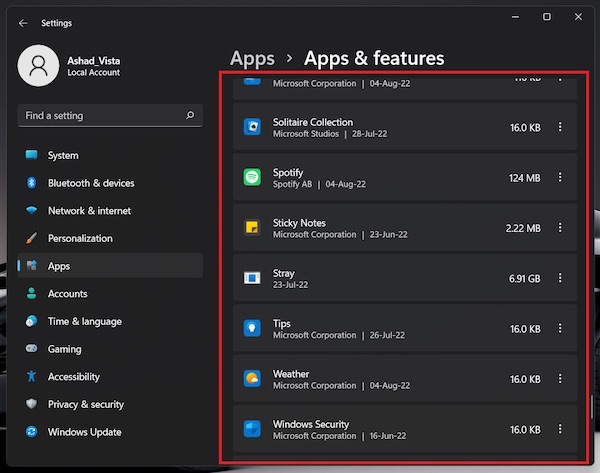
- Click on the three dots on the right.
- Select Uninstall to remove anti-virus.
Removing the anti-virus will then stop it from creating obstacles in establishing a connection with a remote computer.
Then your problem of Remote Desktop not functioning on Windows 11 will be fixed.
Conclusion
Remote Desktop is a very ingenious feature on Windows 11 that can save you a lot of time by allowing you to connect to a desktop far away just by sitting at your home. You do not have to travel physically all the way to that computer to access it.
Although the app runs into some errors at times, they can be effortlessly overcome by following the methods in this guide.