Like the previous version of Windows, Windows 10 also lets the user share folders in the network. But sometimes, you may face difficulties when trying to access the shared folders.
So in this article, I will assist you in accessing a shared folder in windows 10. As you are here, that means you are encountering errors while trying to access the shared folders.
Don’t panic; follow the solution I have illustrated for you here. Over the internet, there are only a few reasonable solutions regarding this issue. So stick with me till the end to get complete guidance about this issue.
Follow our guide on how to enable all cores in Windows 10.
A shared folder is a feature of windows that allows you to share movies, music, etc., files within a local area network among the devices connected to the network. By configuring a media server, you can share files between two PCs connected to the same network.
The concept of sharing a folder in a local area network is nothing new. But it was like a nightmare setting up a sharing network back in the early days.
Windows 10 has made improvements in this sector and has made the Sharing protocol more simplified. Despite that, you may face different types of errors while trying to access the shared folder.
If you’re trying to access a folder, but it’s not working, then you need to check if everything is okay at your end. First thing, you have to ensure that you are connected to the same local network as the host computer. Otherwise, you won’t be able to access your shared folder.
Here are methods to access your shared folder on Windows 10:
1. Try to Access Using Command Prompt
Command prompt is always a problem solver. So, you can try accessing the folder by command prompt instead of using the file explorer.
Follow the steps below to open your shared folder:
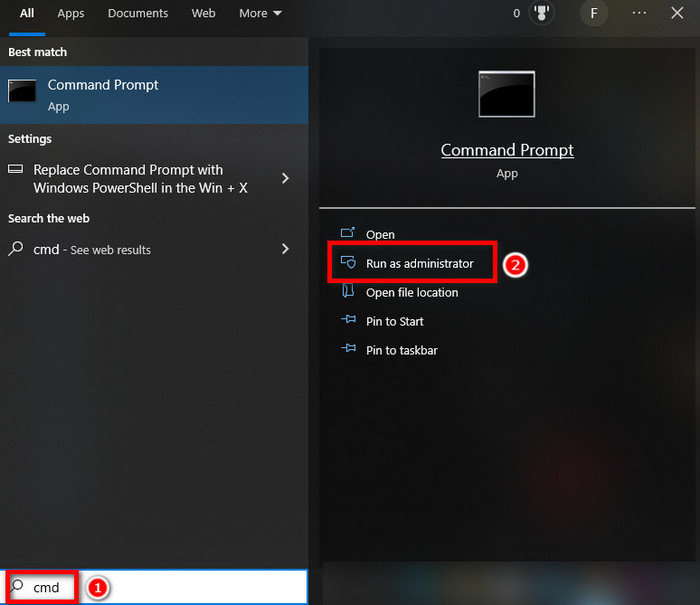
- Press the Windows key and type CMD.
- Click on Run as administrator.
- Type the command for opening the folder – net use <DeviceName>: \\<ServerName>\<ShareName> (Replace the names with device name, server name, and folder name)
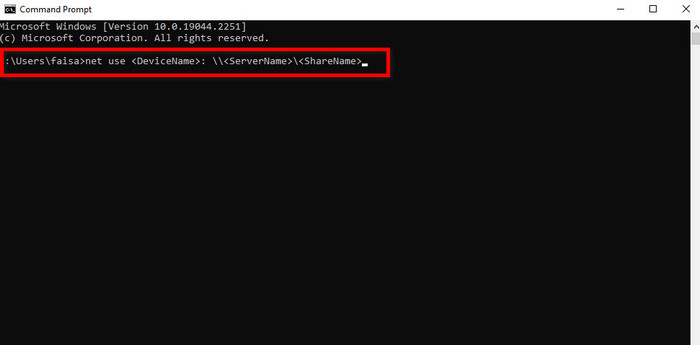
- Press Enter and wait for the result.
Now, if the command opens the shared file, everything is okay. If it fails to open, I recommend you recheck every file sharing setting. So, check out the following methods.
Read more on how to configure Windows 10 auto-login without password.
2. Turn on the SMB 1.0 Support Feature
Sometimes if SMB 1.0 Support feature is turned off, then you may not find the shared folder you are looking for. Try turning it on.
Follow the steps below to turn on SMB 1.0 Support feature:
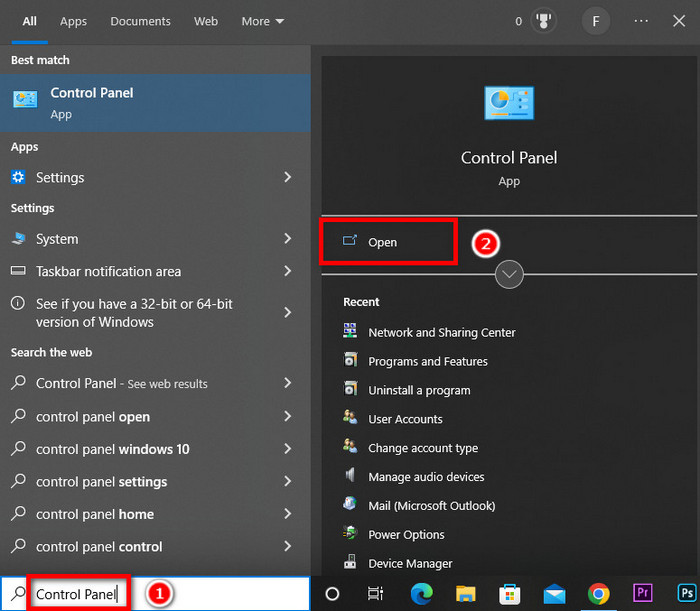
- Press the Windows key and type Control Panel and Click open.
- Hit the Programs and Features and make sure the view by the Lagre icon is selected.
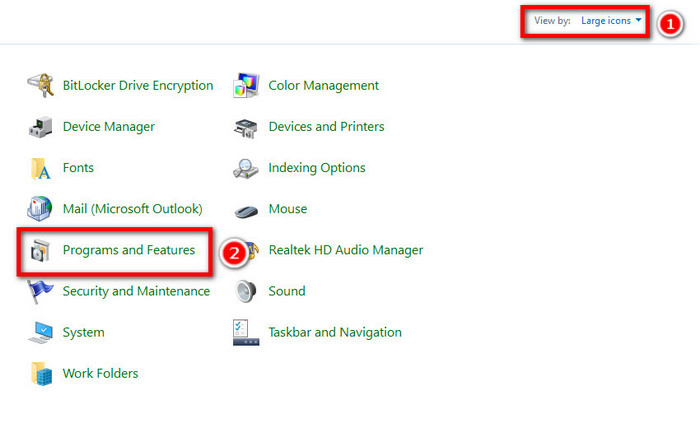
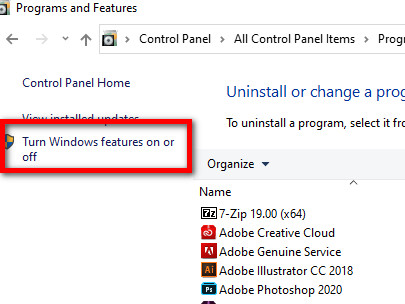
- Select Turn Windows features on or off from the top left corner.
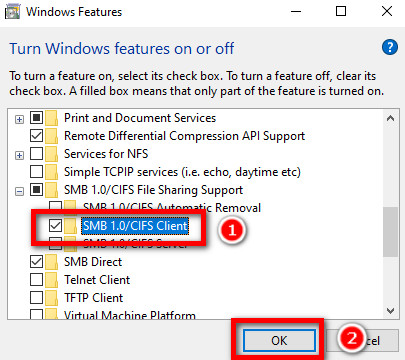
- Look for SMB 1.0/CIFS File Sharing Support from the list.
- Check the box on the left side of the SMB 1.0/CIFS Client option, then Click OK.
It will enable your SMB1.0 feature, and you should be able to access your desired shared folder. If not, then head over to the next method.
Go through our epic guide on how to fix nvidia graphics card not detected in Windows 10.
3. Turn on Network Discovery and File and Printer Sharing
Another important setting you need to configure carefully is Network Discovery, and File and Printer Sharing if you want to access a shared folder.
Follow the steps below to turn on Network Discovery, and File and Printer Sharing:
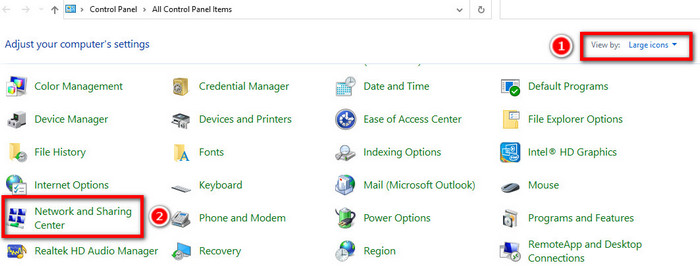
- Press the Windows key and type Control Panel.
- Click Open to open the Control Panel.
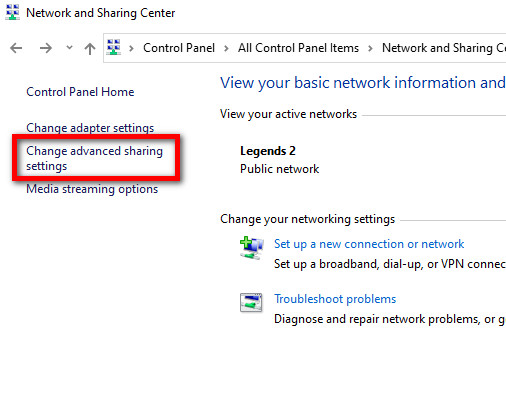
- Ensure the view by the Lagre icon is selected and hit on Network and Sharing Center.
- Select Change advanced sharing settings from the top left corner.
- Check the radio button named Turn on network discovery and Turn on file and printer sharing under the Private network profile.
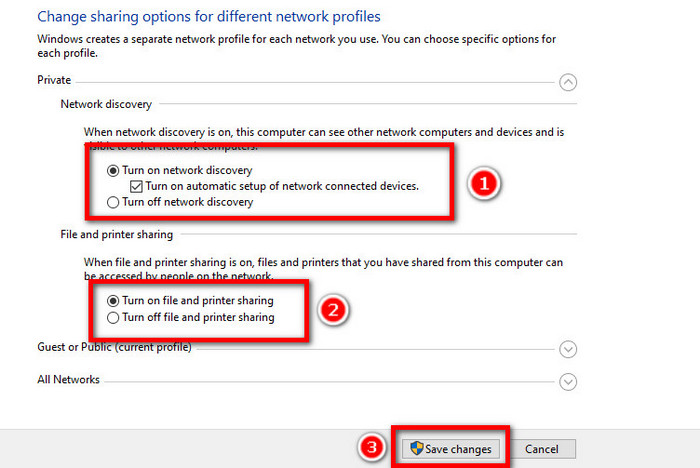
- Click on the Save changes button at the bottom of the window.
Now check if you can find your shared folder on your computer. If not then follow the next method.
Read more on why is drag and drop feature not working in Windows 10.
4. Make Your Computer Visible to the Network
If your PC remains hidden in the network, you may face a problem accessing the shared folder. To make your PC visible, you need to set some service startup type to automatic. The services you need to make change are listed below:
- Function Discovery Provider Host
- Function Discovery Resource Publication
- SSDP Discovery
- UPnP Device Host
Follow the steps below to make your computer visible to the network:
- Press the Windows key and type Services, and select Open.

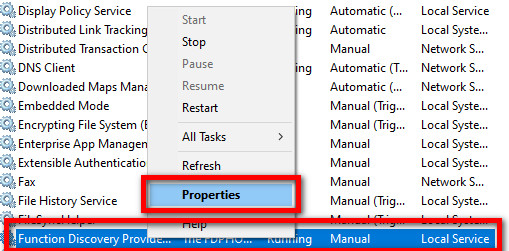
- Look for the services listed above and right-click on them.
- Head over to properties and click on it.
- Set Startup Type to Automatic and click Apply, then OK.
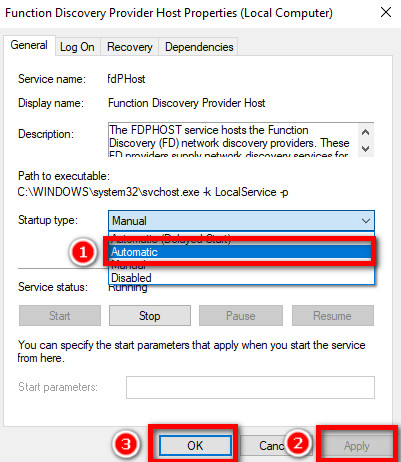
- Restart your PC.
So you just need to configure these settings primarily to access a shared folder in windows 10. Still, you may encounter different types of errors.
You can use these methods to find your shared folder, but sometimes you may get an access permission denial error. To solve that issue, check out the next segment.
Check out the easiest way on how to sign out of Windows 10.
You Do Not Have Permission to Access
This type of message is generally shown when the shared folder doesn’t have full permission for everyone. You can ask the file owner to make it available to everyone.
Here are the methods to grant permission to access a shared folder:
If you don’t permit access to your shared folder, then on other devices, you will not be able to open the shared folder.
Follow the instructions below to share permission with everyone for the folder you want to share:
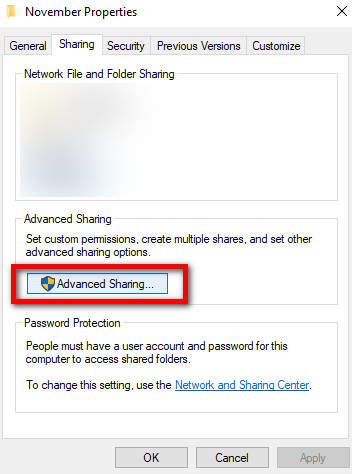
- Right-click the shared folder.
- Click on Properties.
- Select Advanced Sharing on the Sharing tab.
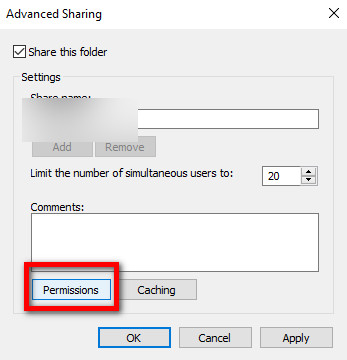
- Click on Permissions.
- Check the Full Control option for Everyone, and click Apply followed by OK.
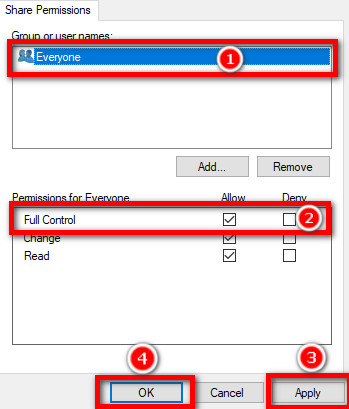
Now everyone should have access to your shared folder.
2. Allow Full Control Permission to Everyone
Sometimes you may need to give full control permission to open the shared folder.
Follow the steps below to allow Full Control permission to Everyone:
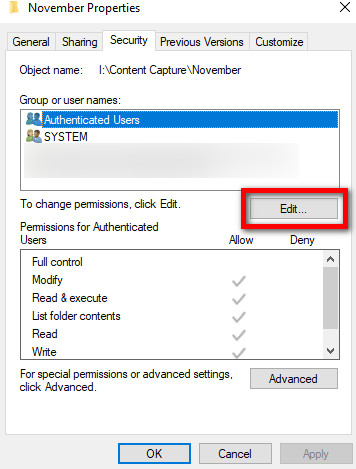
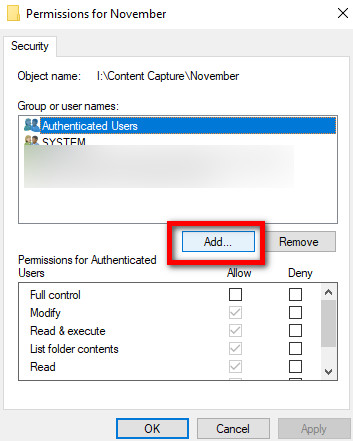
- Move to the Security tab and click edit.
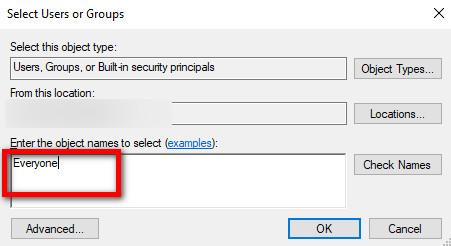
- Click on Add, type Everyone in the box, and hit Enter.
- Check Allow for Full control of Everyone, and press Enter.
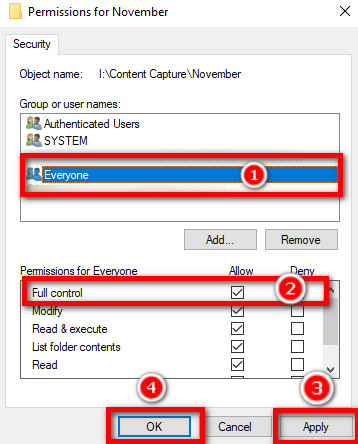
- Close the Properties dialog box.
3. Enable TCP/IP NetBIOS
You should make sure the TCP/NetBIOS is enabled; otherwise, you may get an access denied error message on your screen.
Follow the instructions below to make sure TCP/IP NetBIOS is enabled:
- Press the Windows key and type Services.
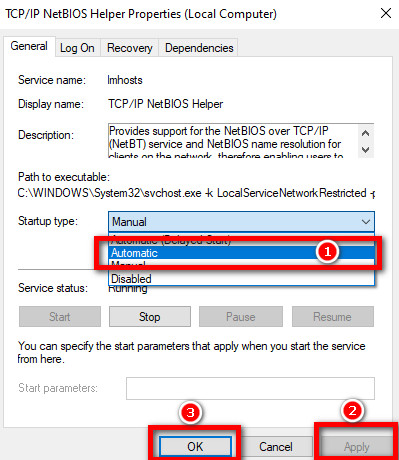
- Look for TCP/IP NetBIOS Helper and open properties by double-clicking on it.
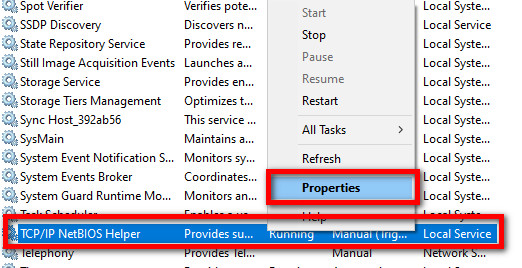
- Make sure the startup type is automatic and click Apply then Ok.
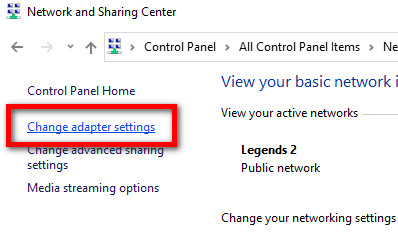
- Enter the Control Panel, then click Network and Sharing Center.
- Click on Change adapter settings from the top left corner.
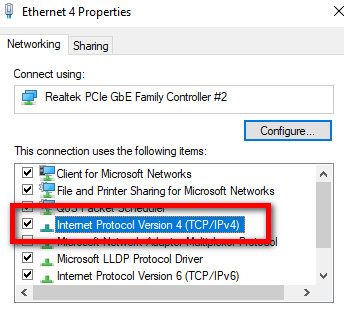
- Double-click on Ethernet to open Properties and double-click Internet Protocol Version 4 (TCP/IPv4) on the Networking tab.
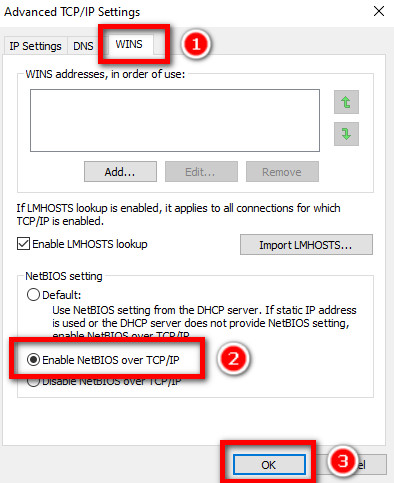
- Click on Advanced, head to the WINS tab, and Enable NetBIOS over TCP/IP.
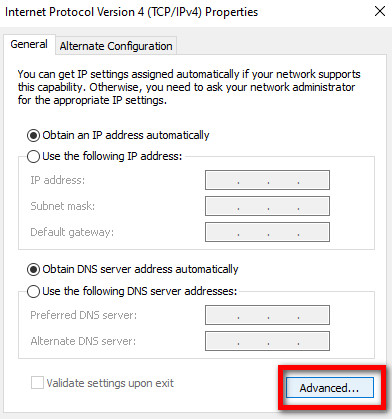
- Click OK in every window opened for the task.
Your TCP/NetBIOS is now enabled, and you are free to access your shared folder and files.
FAQs
Is it safe to access a shared folder?
Yes, it is safe to access a shared folder until you trust the provider and your windows defender or anti-virus is working properly. There is always a chance of being attacked by various malware over the internet but ensure your safety before accessing a shared folder.
Is it safe for me to change the shared folder settings?
Yes, it is. You can make the changes without any hesitation. The changes won’t affect your security. It will just enable your device to access a shared folder.
How many folders can I access?
The number is not fixed. The folders are available on the shared network and don’t need special permission; you can access them.
Conclusion
By now, you should have solved your problem and are enjoying the shared file of your local network. In this article, I have shown the exact settings you need to access a shared folder, and then I have pointed out some errors and their respective solutions.
If your problem hasn’t been solved yet, don’t hesitate to let us know in the comment box below. We’ll reach out to you with the best possible solution ASAP. Also, let us know if you have queries about other Windows 10 features.