SSDs make your PC incredibly fast in everything, whether program loading time, transferring large files or navigating through the OS.
However, they suffer performance deterioration after sustained usage. So, what should you do when deceleration befalls your SSD’s performance?
No worries, I will walk you through diverse ways to improve SSD performance in this article.
Let’s begin, shall we?
Quickly check our epic post on access SSD from another Computer.
How to Improve Improve SSD Performance on Windows 11
SSD performance is easily optimizable for faster performance on Windows 11. Numerous other tweaks will help preserve the solid-state drive default operation.
For example, I have prevented my SSD from slowing down by reducing the number of apps that loads when I turn on my computer. It’s simple yet highly effective.
Here are the 6 best ways to improve your SSD performance on Windows 11:
1. Reduce Startup Apps
Heaps of startup applications handicap the boot-up time of a computer. Windows first loads up all the necessary softwares at the beginning, including the system and third-party apps.
So, the low number of startup apps speeds up the booting process. Disable the apps that consume abundant resources.
Here’s how you can reduce startup apps:
- Press Ctrl+Shift+Esc to open the Task Manager.
- Select the Startup tab on the top bar. Look at the Startup impact tab and see how much resource it takes to load.
- Right-click on a program and choose Disable.
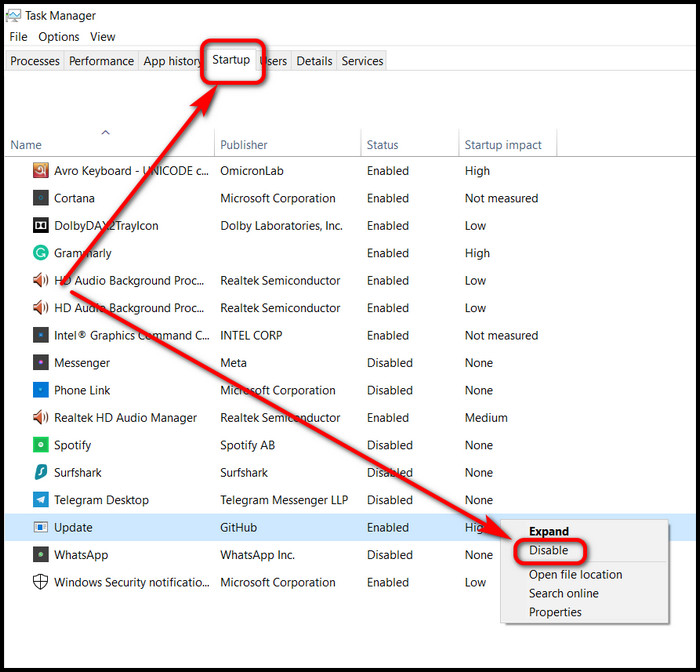
Once you disable a startup program from the next boot, it will not try to initialize. Hence the performance of the SSD will improve significantly.
Also read how to move files from SSD to HDD.
2. Activate Fast Startup
Another brilliant yet effortless way to increase SSD performance on Windows 11 is to activate the fast startup. It works exactly as the name suggests. Yes, allows your computer to start way faster after switching it off.
Here are the steps to activate fast startup on Windows 11:
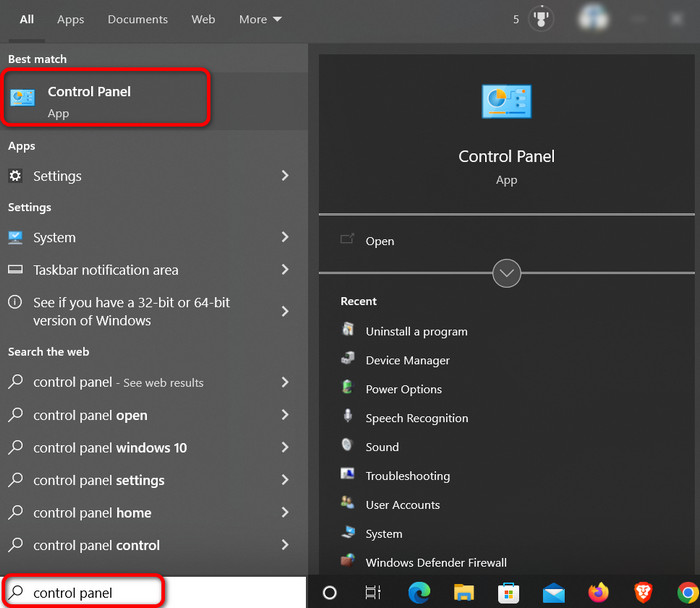
- Type Control Panel on the search box at the bottom.
- Click on the search result to get into the Control Panel menus.
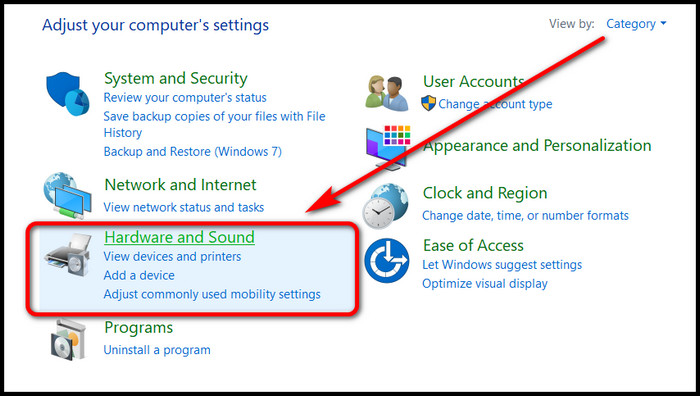
- Click on the Hardware and Sound option.
- Choose the Power Option.
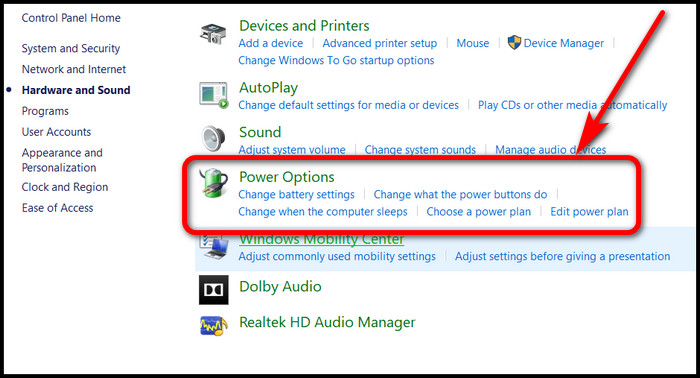
- Select Choose what the power buttons do option from the left panel.
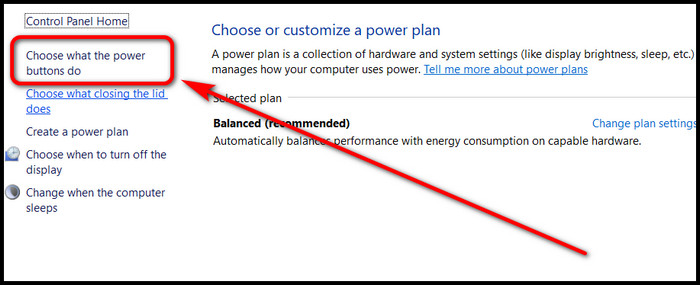
- Click on the Change settings that are currently unavailable text from the top half of the next window.
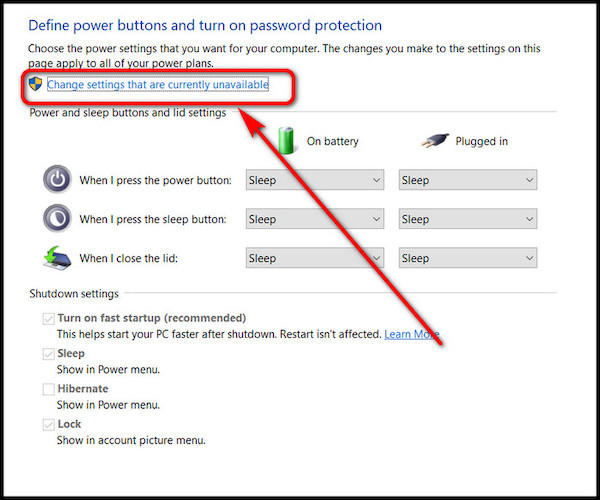
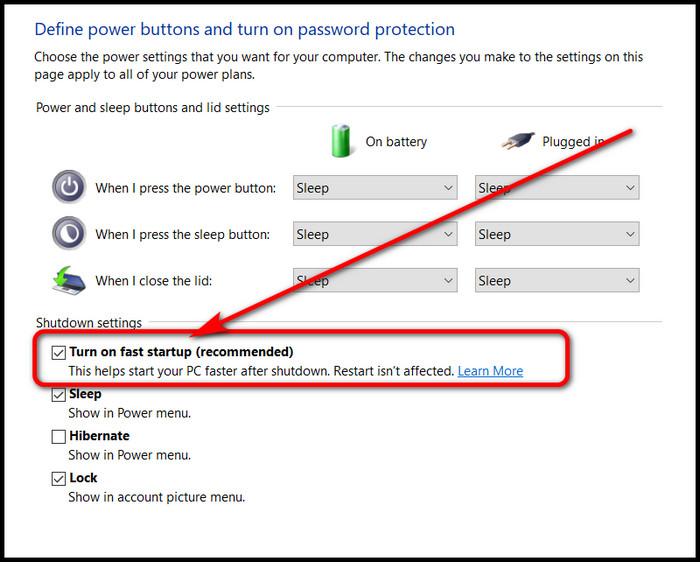
- Click on the Turn on fast startup(recommended) box and check it.
Want to know whether it works? Take a stopwatch and note down the boot-up time before and after the activation of this feature. You’ll be surprised.
Follow our guide to know should I partition my SSD.
3. Free up SSD Space
You probably see a drop in SSD performance due to low space on the drive. SSDs work differently than a standard Hard Drive.
You see, when you search for particular information, it goes through all the stored data and then finds the desired result. This process takes way longer when your drive is full due to less headroom.
Keep at least 20% free space on your SSD drive to help retain the optimal speed.
Follow our ultimate guide if you want to boot into safe mode in Windows 11.
4. Set Windows Power Mode to High Performance
Windows power management tool helps you to choose between 3 profiles. One of them is the High-Performance mode.
It allows the system to draw necessary power from the wall and maintain top performance.
The difference from going Balanced to High Performance is noticeable in your CPU, GPU and SSD behavior.
Here is a way to set Windows power mode to high performance:
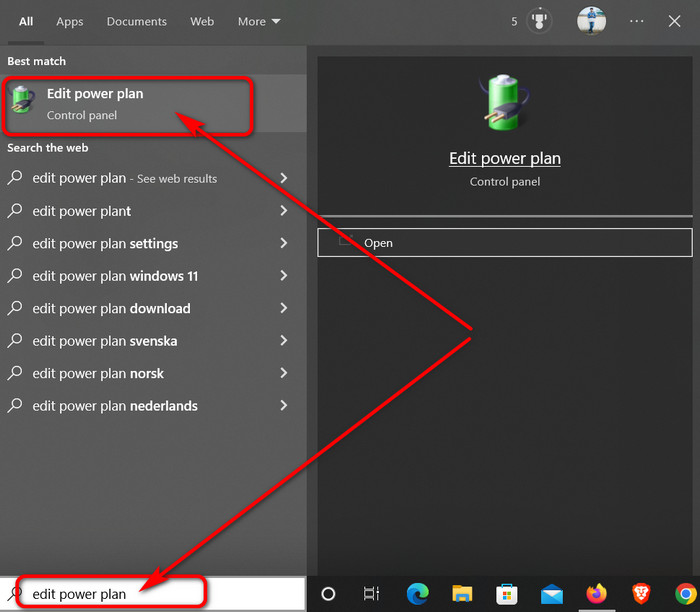
- Press the Windows+S on your keyboard.
- Type edit power plan.
- Select the first search result labeled as Edit power plan.
- Click on the Change advanced power settings text.
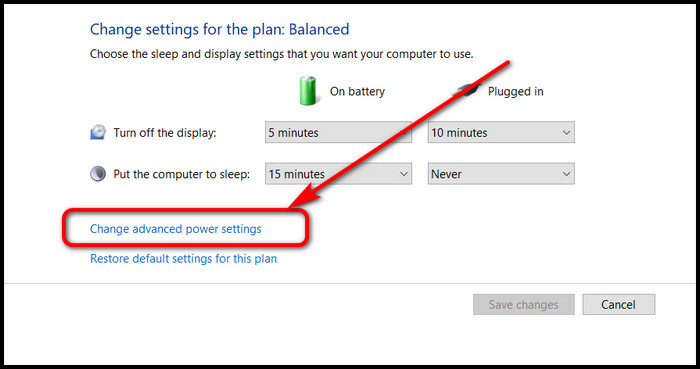
- Click on the drop-down menu and choose High Performance / Performance mode.
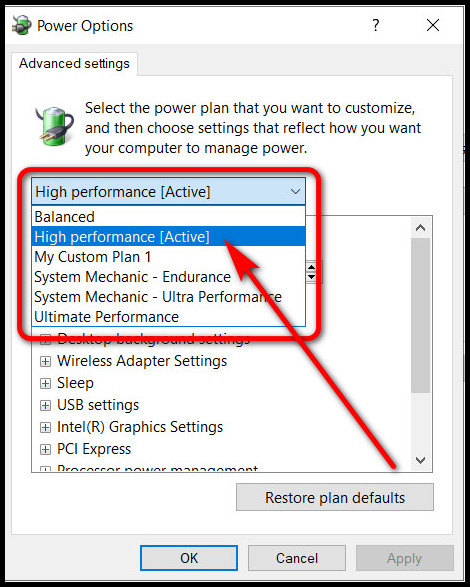
- Hit Apply and click OK.
Your computer is now able to deliver the peak performance of the hardware. You’ll notice less stuttering and hiccups in applications.
Check out some of the best ways to check RAM in Windows 11.
5. Enable Write Caching
Write caching is a fantastic feature in Windows. It temporarily allows a write command to reside in the memory queue until the SSD is ready to execute it.
For example, imagine you have a plate full of fruits in front of you, and you must eat them all. Now, another apple is brought to you to eat, but there’s no space on the plate to place an extra fruit.
So what should you do? You place the apple on a secondary plate until your main plate has some room to hold another fruit.
Likewise, the system memory on your computer acts as the second plate until the SSD is ready to carry out another write command.
This provides the SSD headroom and does not hinder the writing process. As a result, it will deliver peak performance.
Here is the procedure to enable write caching on Windows:
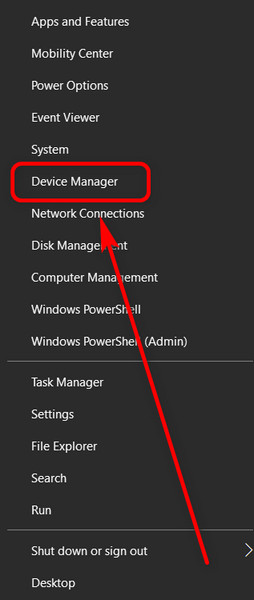
- Right-click on the Windows icon from the bottom left of your screen.
- Click on the Device Manager.
- Scroll down and double-click on the Disk Drives It will show you all the installed disk drives.
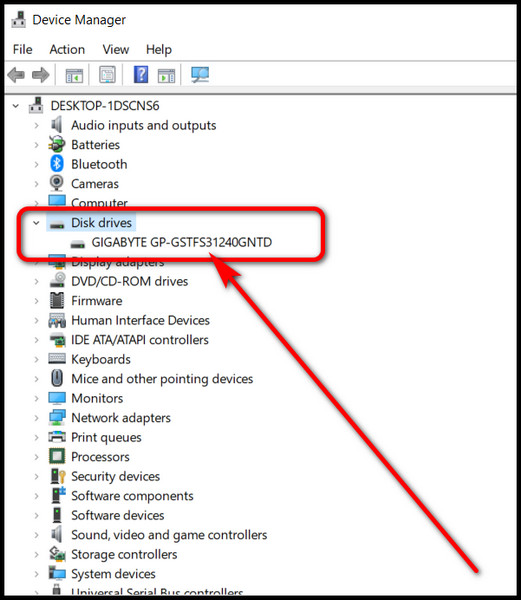
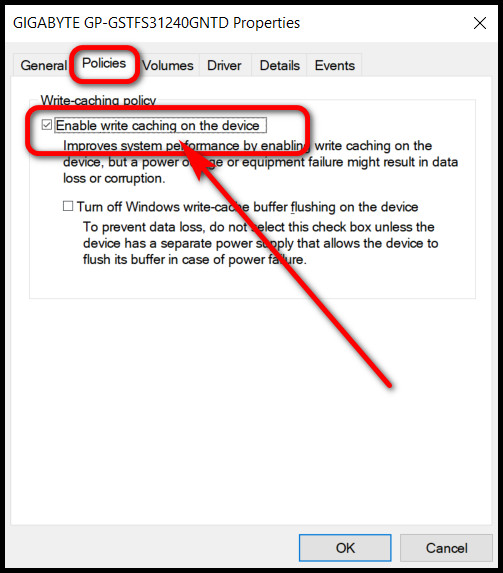
- Double-click on your preferred disk drive name and go to the Policies tab.
- Check the Enable write caching on the device box.
Restart your computer to allow the changes to take effect. You’ll have much better consistent performance across the board.
Also read how to update drivers on Windows 11.
6. Disable Disk Defragmentation
You may have heard that disk defragment is helpful for a hard dive. So the question remains why you should disable disk defragmentation for your SSD?
You know, SSDs work differently from mechanical hard drives. In terms of HDD, when you perform a defragmentation of the disk, the stored data are brought closer, filling in the gaps between them.
So every time the drive tries to access a piece of data, it has to spin for less amount of time, thus making the process faster.
On the flip side, on SSD, when you seek specific data, it goes through all of them and places the desired data on top of the queue. So the time required to find the data is significantly lower.
When you defrag an SSD, it is not beneficial at all. Rather increased reading and writing processes may degrade the SSD’s health.
Windows has a built-in defragment tool. It can automatically defrag your SSD.
Here are the steps to disable Windows defragment utility:
- Click on the Windows search box and write defrag. You’ll see a result named Defragment and Optimize Drives.
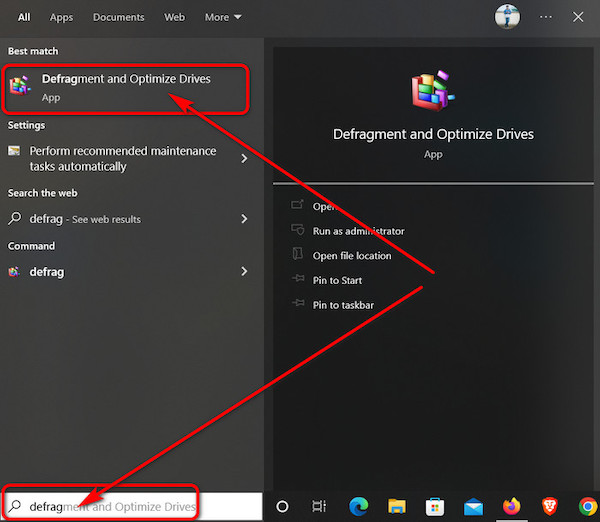
- Click on the search result to open the Optimize Drives window.
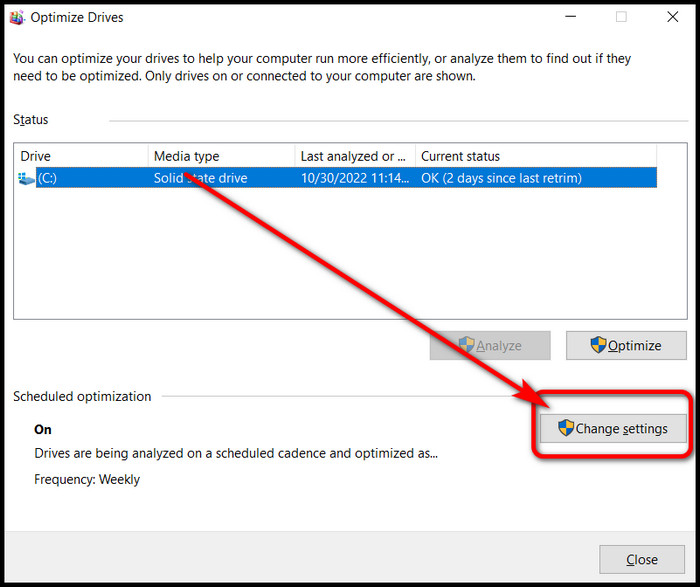
- Select the Change settings option under Scheduled optimization.
- Uncheck Run on a schedule(recommended) box.
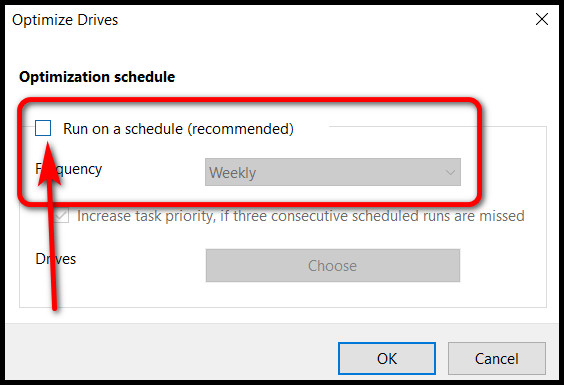
- Click OK.
Well done! Automatic disk defragment is now disabled. This will ensure a longer endurance for your SSD.
Here is the easiest guide to fix drag and drop not working on Windows 11.
Why Does SSD Improve Performance?
The read and write speed of an SSD is significantly faster than a mechanical hard drive. It does not have to spin any magnetic disk to obtain data but rather digitally access it. So the read speed is insanely fast compared to a hard drive. As a result, the overall performance of your computer increases.
Unlike a hard disk drive, SSD has no moving parts. It can directly access data when needed. The flash storage inside the SSD lays out data in a spreadsheet. It’s also known as a grid array.
So when data needs to be fetched, it goes through the spreadsheet digitally. And the process is way faster than a spinning drive, thanks to no data storing in layers.
Consequently, this makes the app open and close operation, navigating through the OS way faster, and the computer provides a smooth experience.
FAQs
Does Windows Run Faster on SSD?
Yes, Windows runs much faster on SSD thanks to it’s incredible read and write speed.
Why is my SSD filling up?
Your SSD is filling up due to cache and temporary files. Also, hidden unnecessary files, corrupted system files, etc., are responsible.
Is 256 GB SSD enough for Windows 11?
Yes, 256GB SSD is enough for Windows 11. Microsoft recommends at least 64GB of disk space to install the OS.
Ending Remarks
SSDs slowing down after a prolonged period is a natural phenomenon. But if it occurs sooner than expected, it’s worrisome.
I hope this article is everything you ever need to retain the maximum performance and lifespan of your SSD.
For more information, comment down below.