Have you ever wanted to get rid of the annoying red underline in Microsoft Word on specific words permanently? Of course, you can right-click on it and choose to Ignore all, but then you would have to repeat that every time you open the document.
The better option is to add that specific word to the built-in dictionary in MS word. This way, you won’t see the red underline for that word in all your future documents. That’s basically how you can create your very own custom dictionary.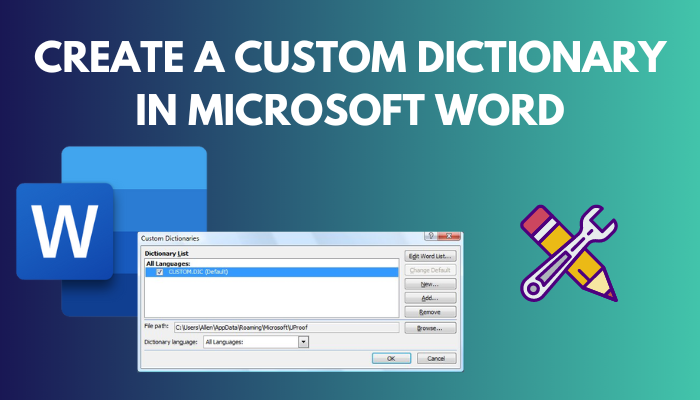
You can also customize the dictionary however you want and delete words you no longer need. Move on to the next section to get started with this feature.
You may also like to read about how to change language in Microsoft Word?
How to Create Your Own Dictionary in Word?
You can create your own dictionary in Word by launching the backstage view and navigating to the Proofing section of its Options. Once you launch the Custom Dictionaries dialog box, you will see options to add or edit Word lists along with the ability to choose the file save locations.
One of the best things about custom dictionaries is that you can easily switch between multiple dictionaries so that Word provides accurate corrections for your writing. You can also back up these files by copying them to another folder or uploading it to Cloud Storage.
This way, you can add and use the same custom dictionaries on another PC or if your factory reset your device.
Another point I should add is that although the screenshots in this tutorial are from a Windows computer, they will work perfectly for a Mac, too, since both applications have an identical design.
Follow these steps to create your own dictionary in Word:
- Go to your Desktop and double-click on the Word shortcut to launch it. Alternatively, you can search for it in the Start menu and launch it.
- Create a Blank Document or open a previously created document from the Recent or Pinned section at the bottom.
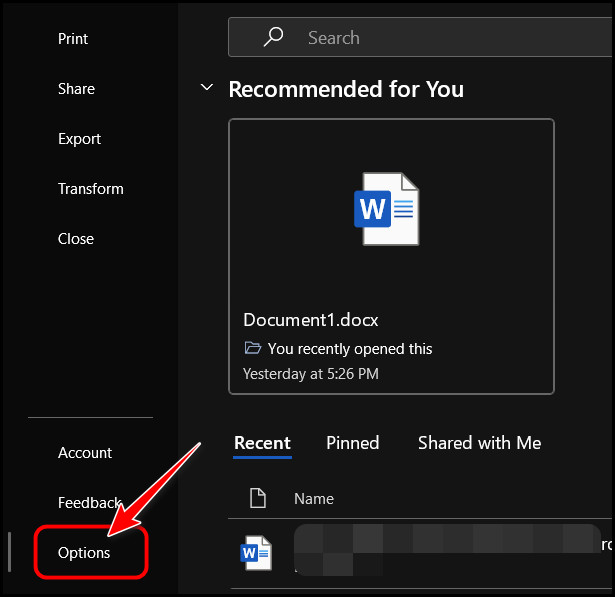
- Locate the File menu button at the top left corner of the window beside the Home tab and click on it.
- Move the mouse cursor to the bottom left corner and click on the Options button.
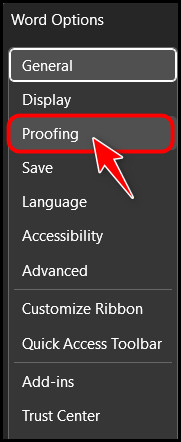
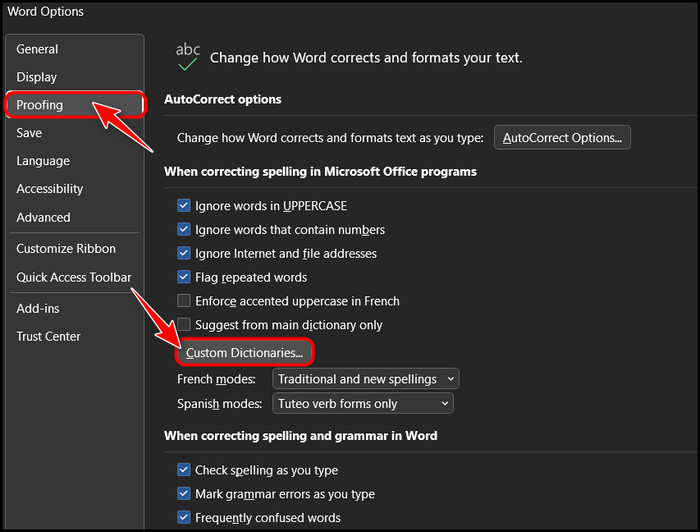
- Find the navigation panel on the left side of the new window and select the Proofing tab from it.
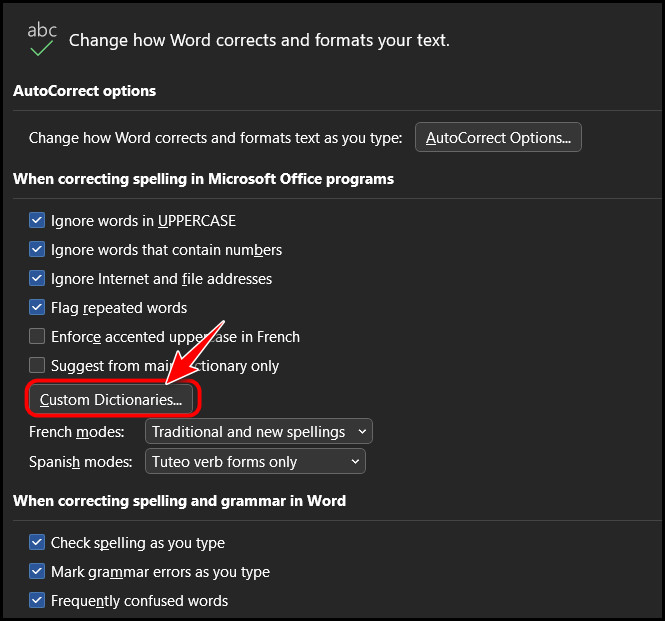
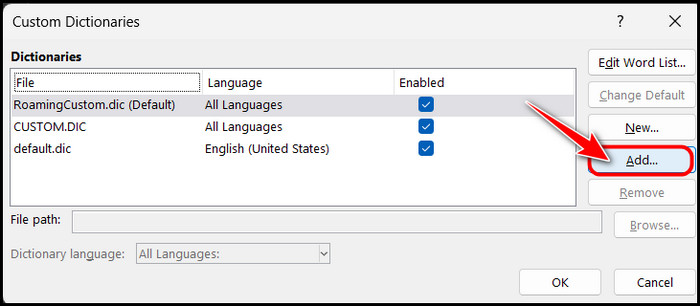
- Click on the Custom Dictionaries button on the right panel under the ‘When correcting spelling in Microsoft Office programs’ section.
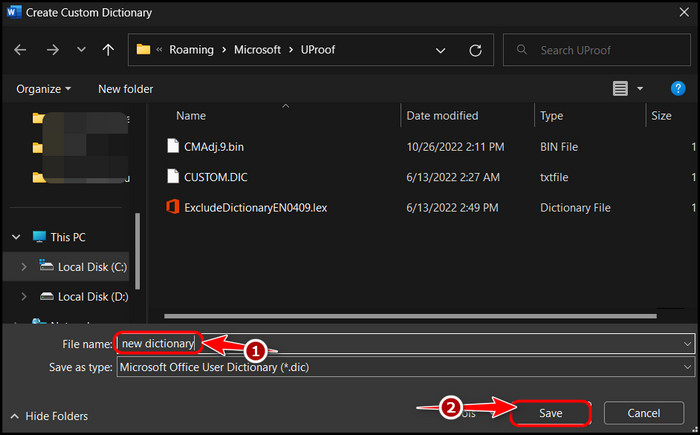
- Select the New button on the right panel to create a new custom dictionary in Word.
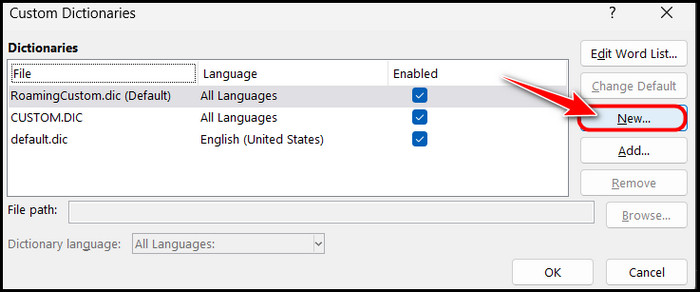
- Change the location using the File Explorer pop-up window if you prefer, but I recommend leaving it to default if you are unsure. Type a name for the dictionary in the File Name text field. Once that’s done, click on the OK button to save the dictionary.
Congrats! You have successfully created your first custom dictionary in Word!
However, I know that this is not enough if you want to use the feature properly. So, if you want to learn how to add words and modify each of your dictionaries, read the following section for step-by-step instructions.
Related content you should read about how to use Microsoft Word read aloud?
How to Edit or Add Words to a Custom Dictionary?
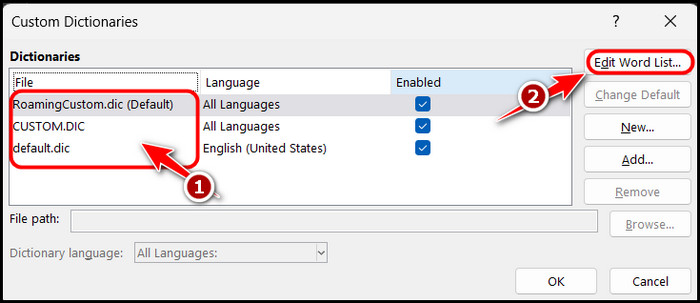
You can edit or add words to a custom dictionary by opening the custom dictionaries dialog box, selecting one, and launching the Edit menu. From there, you can see a complete list of all the words in that dictionary and add or remove specific words from it.
Apart from this, you can also search for specific words if the word list is too long.
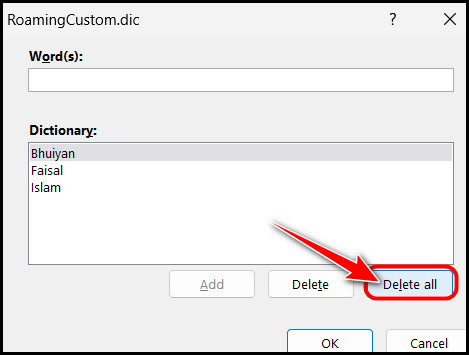
When it comes to deletion, you can either remove everything from the entire dictionary by simply clicking on the Delete All button or select a specific word and delete it separately.
Also related to this guide on fix Microsoft Word won’t open.
Follow these steps to Edit or Add Words to a custom dictionary:
- Launch MS Word and click on the Options button from the backstage view.
- Go to the Proofing section and click on custom dictionaries.
- Select a dictionary that you want to modify from the list and click on the Edit Word List button on the right panel.
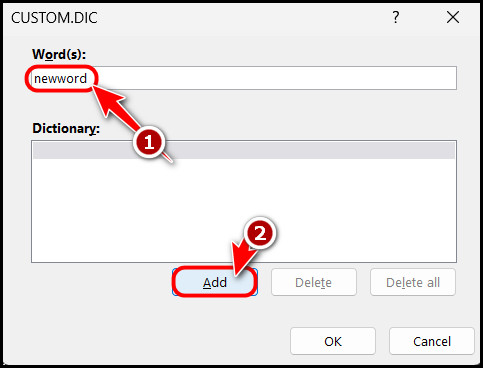
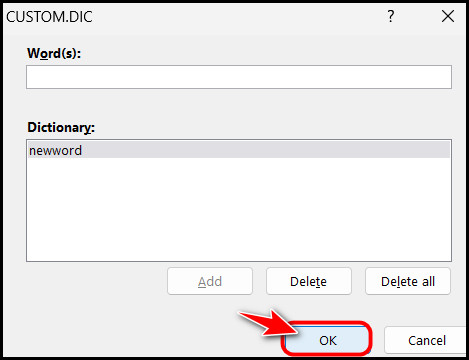
- Type something in the Word(s) text box and click on the Add button at the bottom left corner to add it to the list of words in that dictionary.
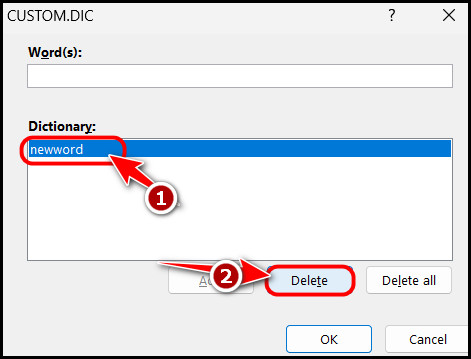
- Select a single word from the Dictionary text area and click on the Delete button if you want to delete that word.
- Click on the Delete All button at the bottom right corner if you would like to remove all the words in the dictionary and start from the beginning.
- Select the OK button at the bottom left corner of the dictionary window after you have made all your changes to make sure the changes are saved.
- Click on the OK button in the previous custom dictionaries window to ensure the changes you made to the dictionaries are all stored.
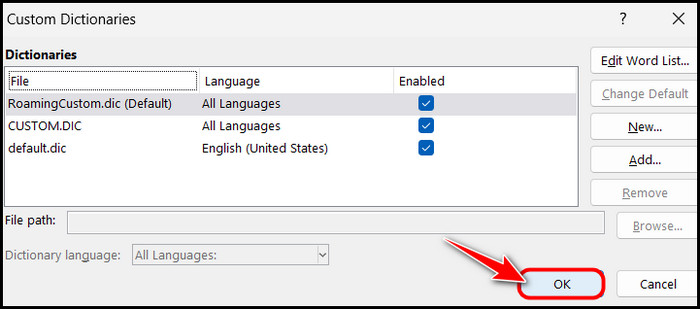
An important point you need to keep in mind is that just selecting OK on the specific dictionary window won’t save the words you added or deleted. Instead, you also have to select OK on the custom dictionaries window.
Related guide on how to print in Microsoft Word?
How Do I Import a Dictionary into Word?
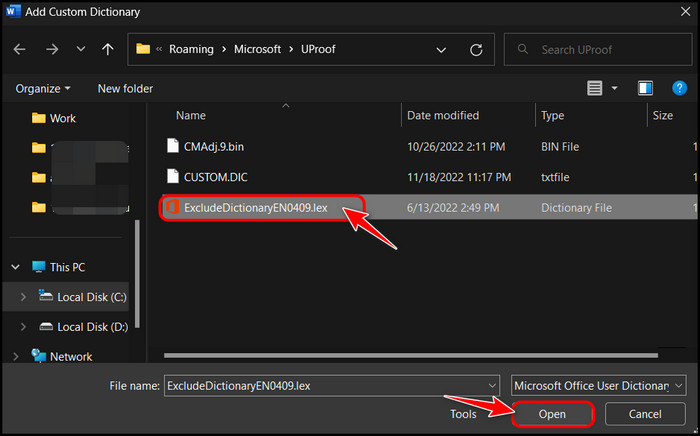
You can import a dictionary into Word by opening the File menu in Word and clicking on the Options button. After that, once you go to the Proofing section and open the custom dictionaries window, you need to click on the Add button on the right panel to open a menu that lets you import dictionaries.
As I mentioned earlier, you can move custom dictionaries between computers with a pen drive or cloud storage. Once you do that, you need to import them safely into the Word application that’s installed on that PC. I will show you how to do that here.
Read more on how to double space in MS Word?
Follow these steps to import a dictionary in Word:
- Search for Microsoft Word on the Start menu and launch it.
- Select the File menu at the top left corner to go into the backstage view.
- Choose Options from the bottom corner of the left navigation panel to proceed.

- Select the Proofing tab on the left panel and then click on the Custom Dictionaries button on the right panel.
- Click on the Add button in the right corner to open a dialog box.
- Navigate to the folder where you downloaded the custom dictionary .dic file and select it. Once you have done that, click on the Open button.
- Select the OK button on the Custom Dictionaries window to save the dictionary and integrate it into all future Word documents.
Now, you should be able to manage your dictionaries like a professional. That’s pretty much everything you can do with dictionaries in Word.
If you have further questions, read the FAQ section below to try and find an answer. If that doesn’t work, feel free to type it in the comments.
FAQ
Question: How do I copy a custom dictionary in Word?
Answer: You can copy a custom dictionary in Word by locating the dictionary file using a File Explorer, right-clicking on it, and selecting Copy. You can then paste it to another location or your pen drive. After that, you can easily import it to any Word document.
Question: Why can’t I add words to my Word dictionary?
Answer: You can’t add words to your Word dictionary because the word you are trying to add has symbols that are unsupported by that specific language. This typically happens when you try to add words from another language to the dictionary.
Final Thoughts
In conclusion, it doesn’t take a lot of effort to master the art of managing custom dictionaries in Word. Although it seems like there are many functions to learn, they are quite simple.
This article started by showing you the steps to create your first custom dictionary and then instructed you on editing those dictionaries. After that, I showed you how to import dictionary files in Microsoft Word for better portability.
If you have any questions, feel free to let me know in the comments.