Having prepared a spreadsheet in Microsoft Excel, you are now about to print it out. As you are about to print the worksheet, you notice that it is aligned at a corner of your page and not the center. This makes the worksheet on the page look displeasing to the eye since it is in an unusual and inconvenient position. If you have faced something like this, you must be looking for how to properly center align your worksheet on the page when you print it. There are actually a few ways you could do this in Microsoft Excel.
In this guide, the ways of centering your worksheet horizontally in Excel have been presented elaborately.
So go through the methods to learn how to center your worksheet horizontally in Excel.
How to Horizontally Center Your Worksheet in Excel
Centering your worksheet in Microsoft Excel is as simple as toggling on the option of horizontal center alignment within a menu. The only work you have to do is to access that menu and you can do this in a few different ways. These ways are explained here in this section.
You can either turn on the horizontal centering option for your worksheet or you can set the alignment manually to center your sheet.
The methods of doing the former are presented here and then the process of manually setting your margins to align your worksheet as you prefer is given in the next section of this guide for you to learn and apply.
Follow these steps to center-align the worksheet horizontally in Excel:
1. Use the Page Setup Dialog Box Launcher Icon
You can access the center horizontally option through the Page Setup dialog box in Microsoft Excel. You can open it by only a click on its launcher icon from the Excel ribbon menu at the top of your worksheet under the Page Layout tab.
This is how you can center the worksheet horizontally by using Page Setup dialog box:
- Open your worksheet using Microsoft Excel.
- Select the part of the spreadsheet that you want to print by dragging the mouse.
- Go to Page Layout tab on the top.
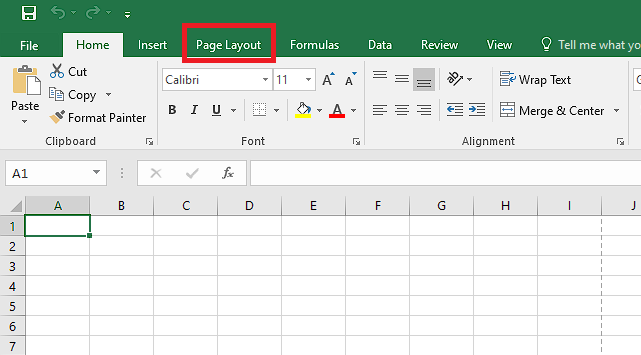
- Click on the launcher icon in the Page Setup section.

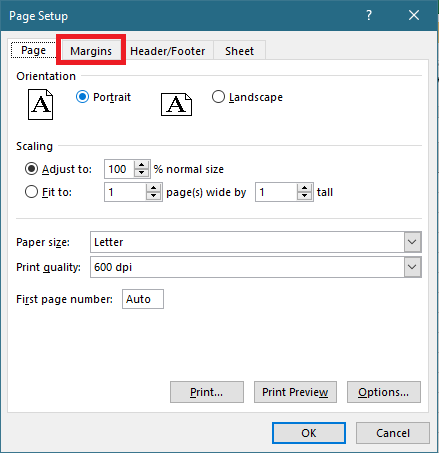
- Go to the Margins tab on the Page Setup dialog box.
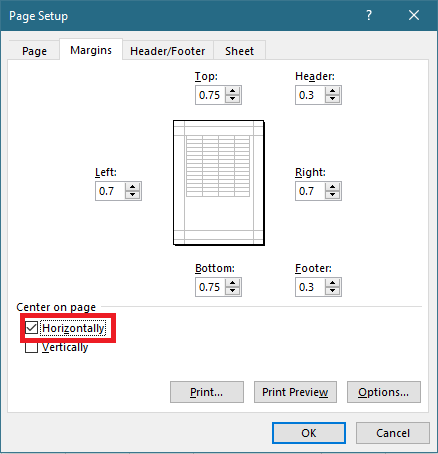
- Check the box beside Horizontally under Center on page to enable horizontal centering.
- Click on OK.
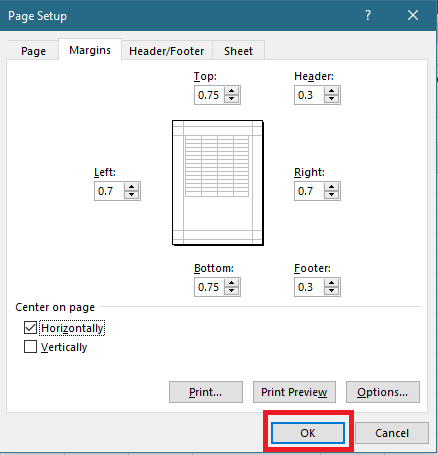
This is one of the processes by which you can horizontally center your spreadsheet for it to appear in the middle of the page when you print it. After you have done all this, your sheet will now be automatically horizontally centered if you attempt to print it.
Here’s a complete guide on how to Highlight Duplicates In Excel.
2. Use Custom Margins Option
The Page Setup menu box can also be accessed from the Custom Margins option from the Excel ribbon menu on the top of the app’s window. This is another way of enabling horizontal centering options in Microsoft Excel.
Here’s how to center the worksheet horizontally using Custom Margins in Excel:
- Open your worksheet using Microsoft Excel
- Select which part of the spreadsheet you are going to print by dragging.
- Go to Page Layout tab on the ribbon menu.
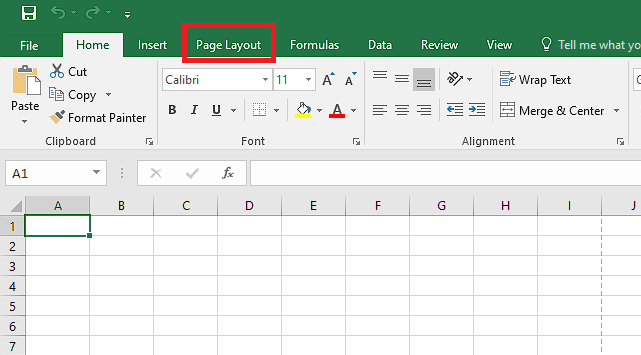
- Click on Margins option to open a drop-down menu.
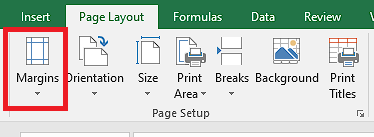
- Select Custom Margins on the drop-down.
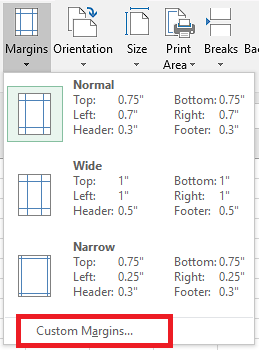
- Check the box beside Horizontally under Center on page to enable horizontal centering.

- Click on the OK button on bottom of the Page Setup box.
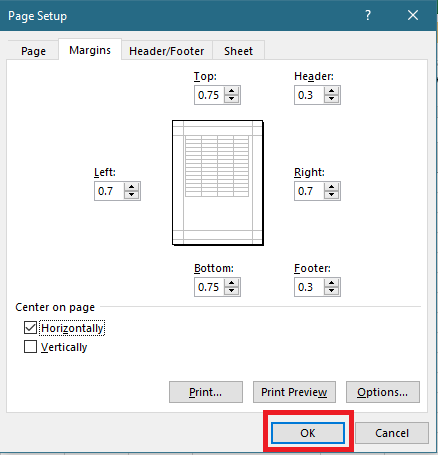
By the time you have gone through these steps, you will have enabled horizontal centering for your worksheet and do not have to worry about it anymore when you are going to print it.
Check our epic guide on how to Freeze Panes In Excel Easily.
3. Open Custom Margins In Print Option
There is yet another way to open the Page Setup dialog box in Microsoft Excel and it is done from the Print option in the File menu of the app.
Go through these steps to center your worksheet horizontally from the Print option:
- Open your worksheet using Excel.
- Select the part of the spreadsheet that you are going to print by dragging.
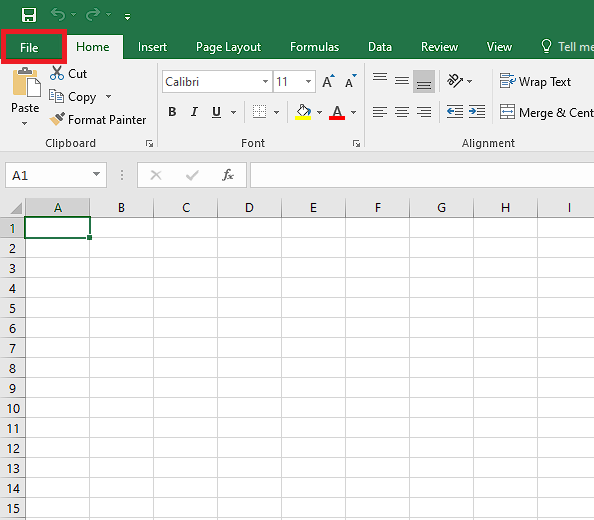
- Go to the File tab on the top-left.
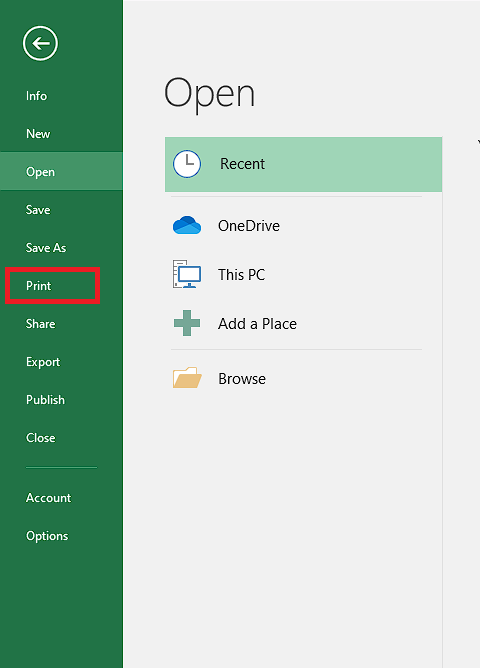
- Select the Print option from the left pane.
- Click on the Margins menu for a drop-down.
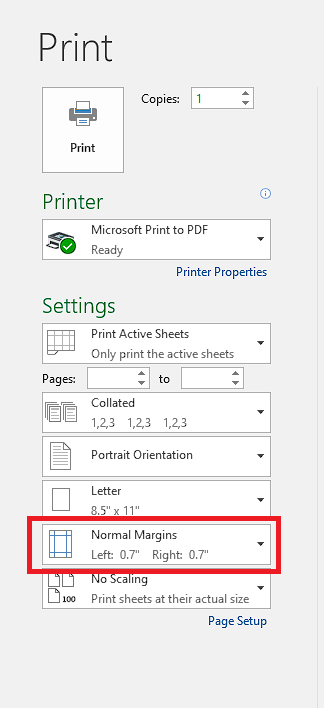
- Select Custom Margins from that drop-down menu.
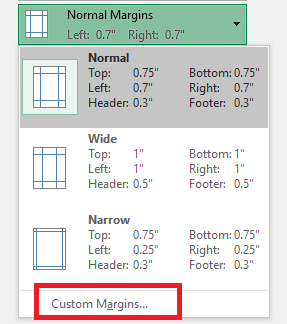
- Check the box beside Horizontally under Center on page.

- Click on the OK button on the bottom.

After this, your spreadsheet will be successfully centered horizontally.
Although you have to access this box differently from the other methods, the results of every process are similar. So, it is actually up to you to use whichever process you want to use for centering your worksheet in Microsoft Excel.
Quickly visit the links to find out how to freeze a row on Excel easily.
How To Center Your Worksheet Manually In Excel
In some situations you may not want your worksheet exactly on the center of the page. Maybe you want it a bit to the right or left from the center. Microsoft Excel allows you to manually fine tune your margins according to your preference so that you can set your worksheet anywhere on your page.
To manually set the custom margins on your worksheet, follow this process:
- Run Microsoft Excel and open your worksheet.
- Open the Page Setup dialog box by any of the methods explained previously.
- Go to Margins tab.
- Make sure the Horizontally option is unchecked.
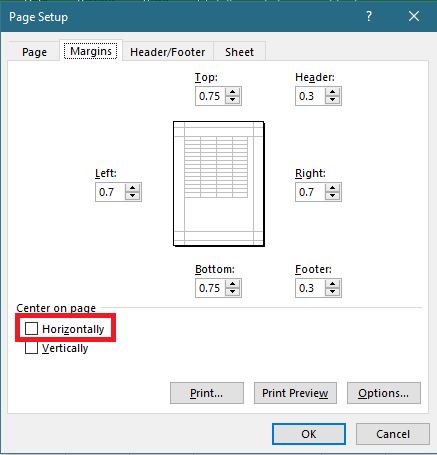
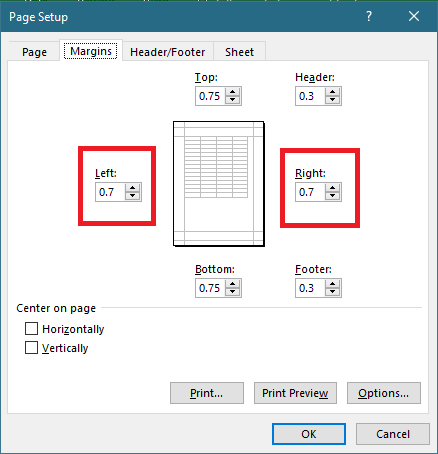
- Customize the left and right margins manually to fix the horizontal alignment of your worksheet.
- Click on OK after you have made your preferred settings.
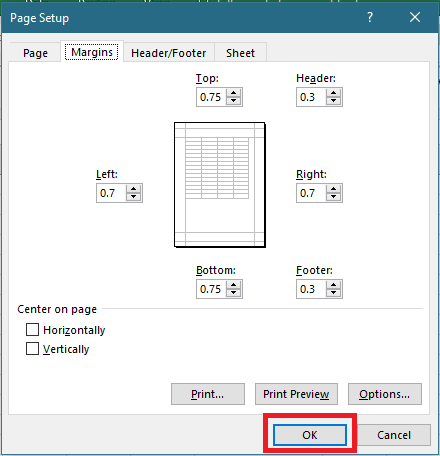
In accordance with the margin settings that you have just applied, your worksheet will now be aligned.
Here is the easiest guide to lock a cell in Excel.
Why Should You Center Worksheet Horizontally in Excel?
When you are trying to print out your desired spreadsheet and find out that it appears at the corner of your page, you have to center the worksheet so that it has a symmetric look. Centering your worksheet horizontally will make it appear in the middle of your page.
You can set the alignment of your worksheet both horizontally and vertically in Microsoft Excel very easily according to your preference.
Center alignment is usually the most commonly used when you are trying to print your sheet.
Spreadsheets can be of varying sizes and dimensions, and so it can get a bit complicated when you are trying to print your worksheet out. No two worksheets will be similarly printed unless they have the exact same dimensions, which is highly unlikely. So, you have to orient and align every worksheet differently before printing.
Aligning your worksheet horizontally to the center will move it to the middle of the page when you print.
Otherwise, it will appear on the top-left by default when you have a comparatively small-sized worksheet, which does not look very professional and can also impair visibility when it is attached to other official documents. Your worksheet will then look like the work of an unskilled Excel user, which is something that I am sure you would not want.
Follow our ultimate guide if you want to know how to post Bank Statement in Excel to Quickbooks.
Conclusion
Microsoft Excel gives you several versatile tools that you can use to display your incredible skill in presenting your worksheets to others. Horizontally centering the worksheet is one of the ways you can exhibit competence when you print your worksheet.
After functionality and productivity, presentation is also an important part of professionalism in the workplace or anywhere else.
Acquiring this skill will be an effortless job if you go through the methods of centering your worksheet horizontally in Excel that are presented in this guide. This skill will definitely come in handy if you are someone who uses Excel to prepare worksheets a lot.