Categorizing Outlook Emails comes really useful for organizing your inbox and finding necessary emails quickly. What’s more, you can auto-categorize Outlook emails, so you don’t have to label your email messages manually every time.
But how to really auto-categorize email messages in Outlook?
In this article, I have provided the appropriate approach to easily auto-categorize Outlook emails.
So, let’s begin!
Check out our separate post on how to fix Email Icons Not Showing Forward/Reply Status In Outlook.
How to Automatically Categorize Emails in Outlook
To categorize your emails in Outlook in automatic mode, create a new rule and add a condition for email categorizing. After that, your Outlook will automatically use color code labeling matching the subject line of your emails and the criteria you set.
However, the steps are a little different depending on whether you are using the Outlook Desktop application or Outlook Web Access(OWA).
Worry not! I have experience using both versions. So, let me break down each step in the simplest way possible.
Here are the ways to categorize emails in Outlook automatically:
Method 1: Via Outlook Web Version (OWA)
You can navigate to the Outlook web page to categorize emails automatically. From my experience, I find it easier using the OWA to auto-categorize emails rather than the desktop application.
Follow these steps to categorize Outlook emails automatically through Outlook web:
- Go to Outlook webpage and sign in to your account.
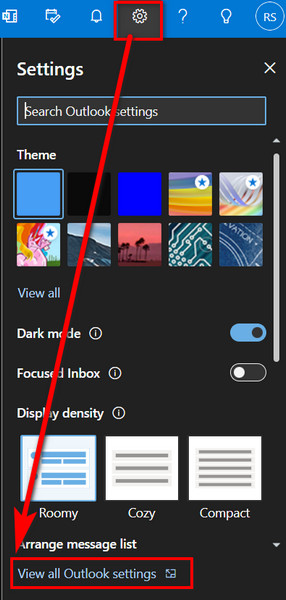
- Go to Settings and select View all Outlook settings.
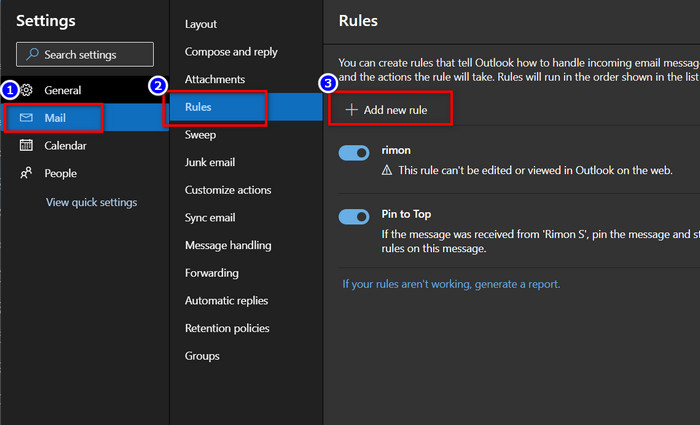
- Select Mail and then, Rules.
- Select Add new rule.
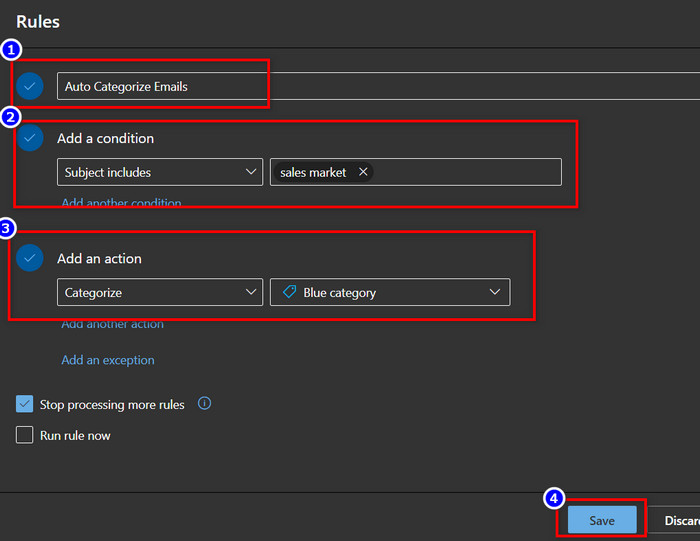
- Type a name for the rule under the Name your rule text box.
- Select the Add a condition dropdown arrow and choose the condition you want to use to assign a category.
- Select the Add an action dropdown arrow.
- Choose Categorize and pick the category you want to assign.
- Hit the Save button.
After that, the new rule will be added to the Rules settings dialog box, and any incoming emails that match the rule criteria will get assigned to the color category.
Also, check out our separate post on how to fix Outlook Icons Not Showing Forward Reply Status.
Method 2: Via Outlook Desktop App
Alternatively, you can use the Outlook desktop application to easily auto-categorize email messages. For that, you must create rules and add some criteria based on your needs. Plus, the steps to auto-label emails are almost the same in Outlook 2013/2016/2019 versions.
Here’s how to auto-categorize email messages via the Outlook desktop application:
- Launch the Outlook desktop app and go to the Home tab.
- Click on Rules and then, Create Rule.

- Select Advanced Options in the Create Rule dialog box. A new Rules Wizard will pop up.
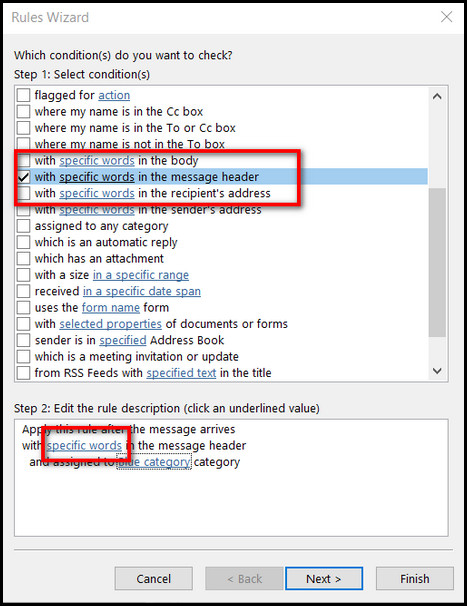
- Select the with specific in message header check box.
- Click on the text underlined in blue to open the Search Text dialog box.
- Type the keywords or phrases in the title you want to color categorize emails based on automatically.
- Hit the Add button.
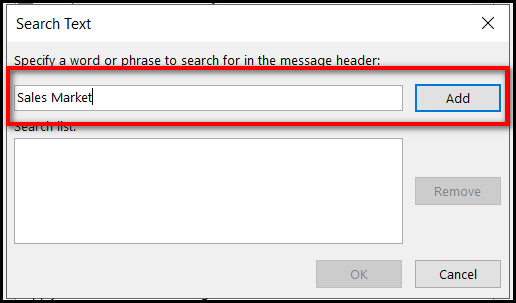
- Click OK in the Search Text dialog to go back to Rules Wizard.
- Click Next. A new Rules Wizard will appear, asking What do you want to do with the message.
- Check the assign it to the category option under the Select action(s) section.
- Click on the category underlined in blue below Edit the rule description.
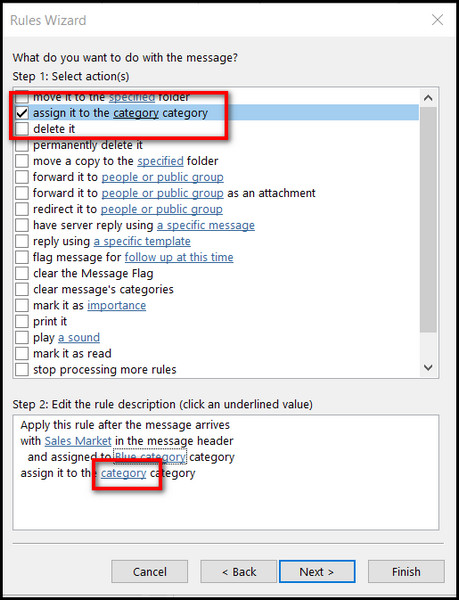
- Pick any color category you like.
- Click OK in the Color Categories dialog to go back to Rules Wizard.
- Click Next. A Rules Wizard will appear, asking Are there any exceptions.
- Select expectations, if there are and edit them in the description.
- Hit Next.
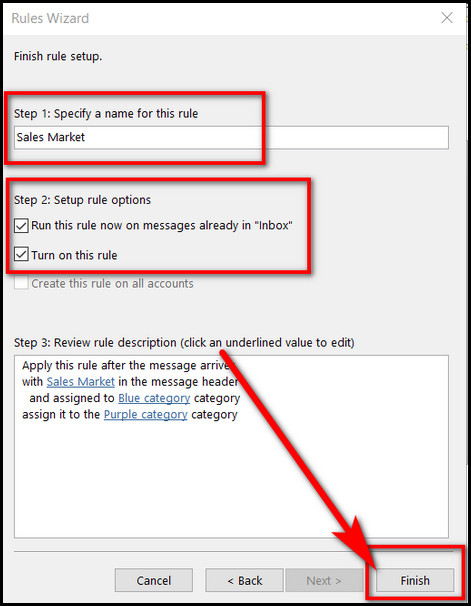
- Type a name in the Specify a name for this rule input box.
- Check the Run this rule now on messages already in “Inbox”
- Check the Turn on this rule option.
- Hit the Finish button.
- Click Ok to confirm the changes.
Once you complete the steps, the condition will match the conditions you entered and the emails in your inbox and automatically categorize each of them. If you need to categorize more email messages based on other keywords or phrases, you can repeat the steps as much as you like.
Now that you know the techniques to auto-categorize email messages, knowing the way to categorize emails can also be helpful in certain situations manually.
Read the following section to learn how you can do it.
Read more on how to fix undeliverable emails in Outlook.
How to Categorize Emails in Outlook Manually
Manually categorizing Outlook emails can be executed very fast. And the steps are exactly the same for both the Desktop Outlook app and Outlook Web Access (OWA).
Here you have two options. Either you can assign your emails to the built-in color categories or create a new color code category for yourself. Let’s check out both methods step by step.
Here are the methods to manually categorize emails in Outlook:
Assign Built-in Color Categories
Using the default Outlook color category options to label you emails requires only a few clicks.
Here’s how to use the default color code to categorize emails in Outlook:
- Launch Outlook and open the mail Inbox.
- Right-click on any emails you want to categorize with color.
- Select Categorize.
- Pick the color category to like.
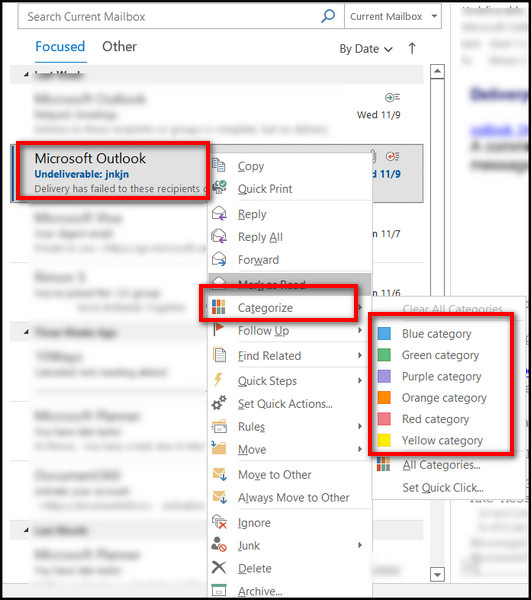
And boom! Your selected email will be categorized under that color code.
Also read how to add new Mailbox in Outlook easily.
Create New Color Categories
If you want to create custom color category options for your emails, you can create new categories in Outlook.
Here are the steps to create custom categories to filter emails in Outlook:
- Launch the Outlook application and click on the People icon.
- Select Categorize under the Home tab.
- Select All Categories from the drop menu. The Color Categories window will prompt up.
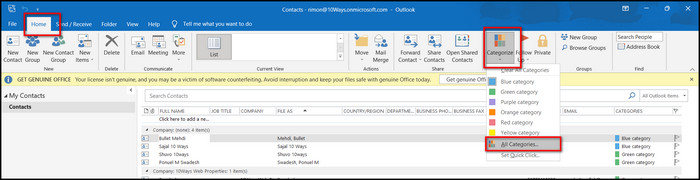
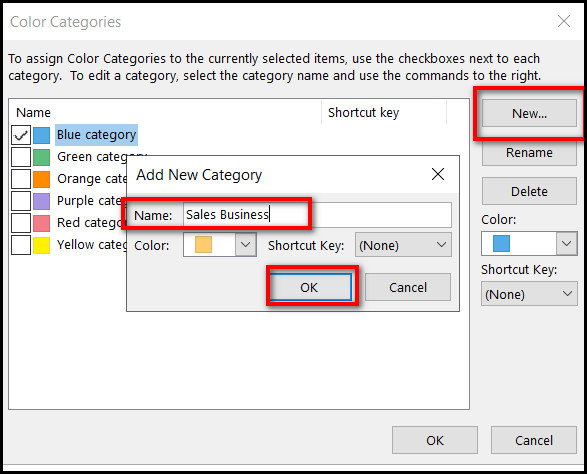
- Select New to create a custom category option.
- Enter a name for your category and pick a color of your choosing.
- Hit OK to apply the changes.
You can repeat these same steps to add multiple customized categories.
Once done, select your desired email and click on the Categorize drop-down menu. You will find your newly created category option. Choose it, and your contact will be organized under that category.
Follow our guide on how to add BCC in Outlook Calendar invite.
Final Words
If you want to organize your Outlook inbox and separate important emails, color categorizing is a must. And fortunately, you can set an auto-categorizing rule to ask Outlook to do it for you.
Finally, I felt really happy to share my expertise and help you auto-categorize your Outlook emails.
Feel free to comment any questions regarding Outlook below. I will gladly help you.