Cells in your spreadsheet file can contain any sort of data or values in the form of numbers or strings of text. If the length of this data exceeds the default width of a cell in Microsoft Excel, they are not completely shown to a viewer.
In these cases, you have to AutoFit the column that will change its length to match that of the longest string of data.
Changing the length of the cell by using AutoFit feature on the column containing the cell with long data is a very easy process. You could do it in a few ways and these are simply discussed here in this guide for you.
So keep reading in order to know how to AutoFit columns in Microsoft Excel.
What Is AutoFit In Excel?
The AutoFit option available in Microsoft Excel can be used to allow cells to automatically change their width and/or height to accommodate the size of the value present in a column or row. AutoFit feature can be applied to both columns and rows.
When the value within a cell in your spreadsheet is bigger than the cell itself, it can’t be displayed fully. That is when you should apply AutoFit to the column.
If one or more cells in a column have values bigger than themselves, applying AutoFit will automatically change the width of that column according to the biggest value present in the column.
Later, if any data which is longer than the ones on in the column is entered into your file in any cell of the AutoFit applied column, the column’s width will automatically adjust according to the new big value. This is the great advantage of AutoFit.
Once you apply it, you will not have to worry about manually changing the width of the column every time there’s a size mismatch in any cell. 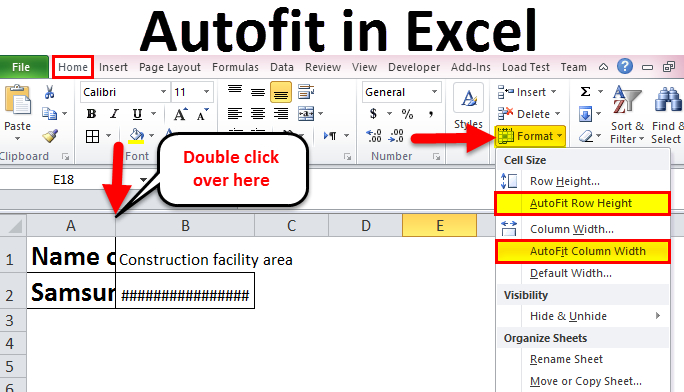
Every spreadsheet file is unique, containing different types of data entries within the cells in a column or multiple columns. It is very probable that one or more columns will have cells that do not show the complete data.
You can just apply AutoFit on those columns and forget about the issue without having to think about it again.
The methods of employing AutoFit are among the simplest tasks in Excel and they are explained in simple words on the next section so that you can easily understand and apply them.
Move on to the following part of this guide to learn how to AutoFit columns in Microsoft Excel app.
Some more guides on how to group rows in Microsoft Excel.
How To Apply AutoFit To Columns in Excel
Applying AutoFit to columns in Microsoft Excel requires the minimum amount of effort. It is only a matter of clicks to turn on AutoFit for a column. You can either do this by double-clicking on the border of a column’s header or by selecting the option from Format cells.
AutoFit can come in very handy when your spreadsheet is going to have data entries of variable lengths that may cross the cell’s width.
Data not being completely shown in cells won’t be a problem if you have AutoFit turned on. With AutoFit applied, the columns will be automatically adjusted so that the longest string of data is visible in its respective cell.
You can turn on AutoFit for a column easily by the processes explained here.
Follow these steps to apply AutoFit to columns in Excel:
1. Use Double-Click to AutoFit Column
This method is as easy as it gets when it comes to turning on AutoFit. Microsoft Excel users can AutoFit a column or a number of columns simply by double-clicking on the border of the column’s header. It will instantly AutoFit the columns whose width you want to change.
Here’s how you can use double-click to AutoFit columns in Excel:
- Run Microsoft Excel and open your spreadsheet file.
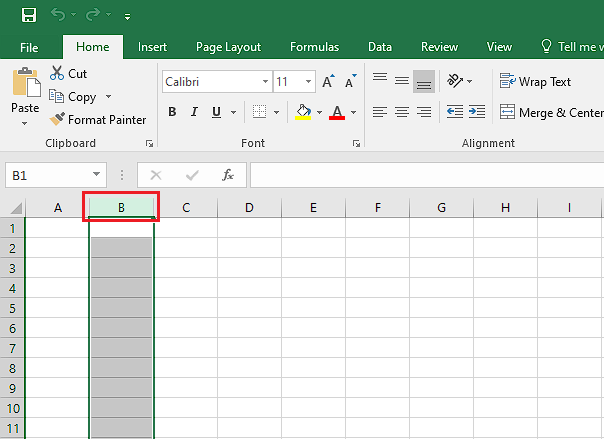
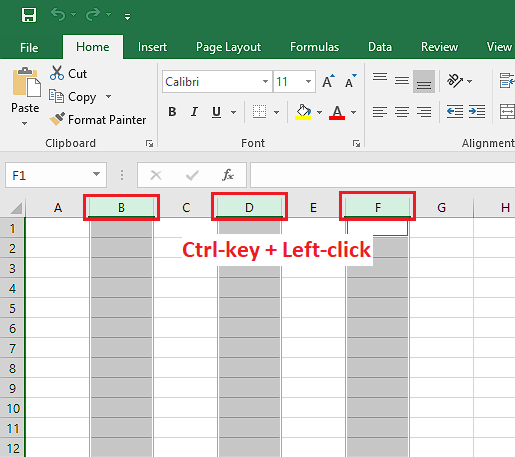
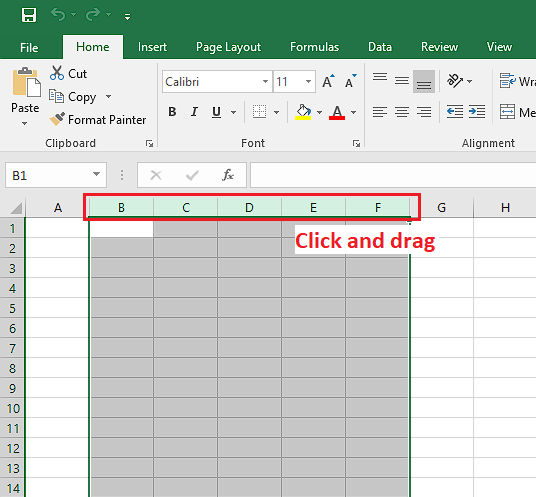
- Left-click on the header of the column you want to AutoFit. (use Ctrl + Left-Click to select multiple non-consecutive columns or click and drag through the headers of consecutive columns to select them. You can also click on the arrow icon on top-left of the sheet to select ALL columns)
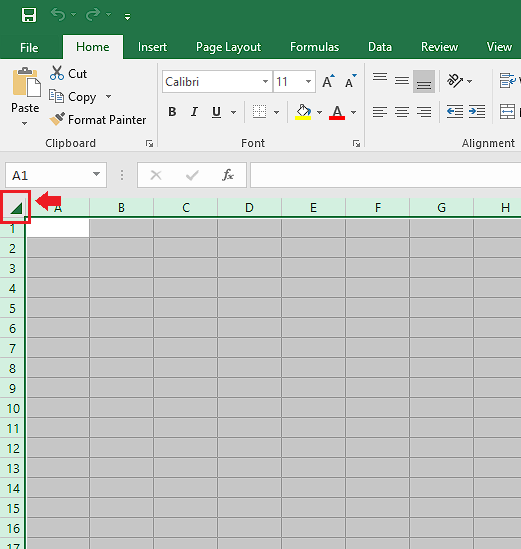
- Move your cursor to the border of the header of any column that you have selected.
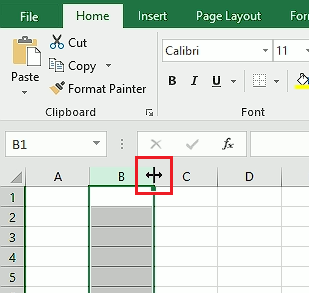
- Double-click on the border with left mouse button.
When you take these steps, you will see that your column width has been changed if there were any cells which were not displaying the full data because of size mismatch. Instead of double-clicking, you can also AutoFit columns by applying it in cell Format options, which is explained in the second method.
Related guides on how to delete a sheet in Excel.
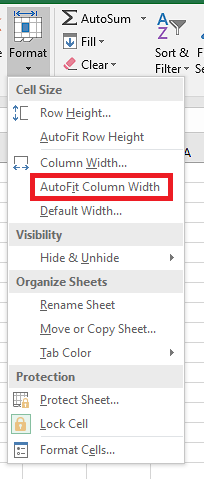
2. Apply AutoFit from Format option
The AutoFit feature is available in the Excel ribbon menu on top when you open the app within Format option. You can AutoFit columns using it too.
This is how you can AutoFit columns from Format option in Excel:
- Run Microsoft Excel and open the spreadsheet.
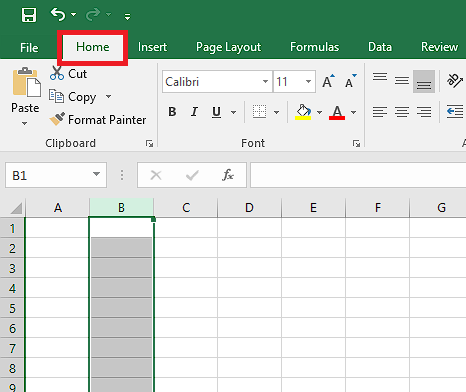
- Left-click on the header of the column you want to AutoFit. (select multiple non-consecutive columns using Ctrl + Left-click OR click and drag through the headers of consecutive columns to select them OR click on the arrow icon on top-left of the sheet to select ALL columns)
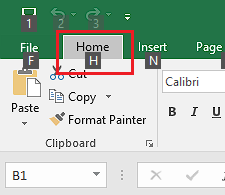
- Go to Home tab in Excel app.
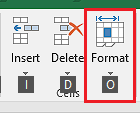
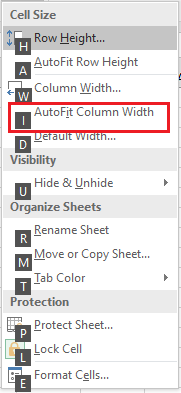
- Open Format menu.
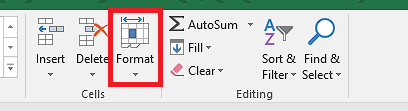
- Select AutoFit Column Width.
After you select the AutoFit option, you will see that your column’s width have been changed to accommodate the longest data in it. If you enter any other data that is longer than this one, column width will also automatically change to adjust to new length of data.
But, before that, do check our latest post on 4 ways to group rows in Excel.
3. Use the Keyboard Shortcut to AutoFit Column
You can AutoFit your columns in Microsoft Excel without even touching your mouse, by using keyboard shortcuts. This is possible in Excel because almost every option has a keyboard shortcut button that you can press to access it.
Go through this process to use keyboard shortcut to AutoFit column in Excel:
- Open your spreadsheet in Microsoft Excel.
- Use left-click on the header of the column to select it. (click and drag through the headers of consecutive columns to select them OR select multiple non-consecutive columns using Ctrl + Left-click OR click on the arrow icon on top-left of the sheet to select ALL columns)
- Press the following keys in succession: Alt-key > H > O > I.
Pressing the keys will now apply AutoFit on the column or columns that you have had selected. Now your columns will automatically adjust themselves to show all the data present within them.
Check out the easiest way on how to randomize a list in Excel
Why Is AutoFit Row Height Not Working In Excel?
In Microsoft Excel, you may notice that sometimes using AutoFit does not have any effect on the row or column that you have applied it to. There is a common reason as to why this happens.
AutoFit Row Height option will not work when your row has a cell or cells that are merged with other cells.
To fix this, you have to follow either of the two processes:
- Unmerge the cells in the row that are merged together.
- Manually adjust the row height.
You can fix your AutoFit Row Height option not working problem by going through any of these methods at your preference.
Related guide: how to Add a Trendline in Microsoft Excel.
Conclusion
Microsoft Excel is most people’s spreadsheet app of choice and there is a reason for it. It is because of all the features available in this app that users prefer it over any other spreadsheet editors. AutoFit is one of those efficient scalability options that Microsoft Excel provides you.
Excel’s features basically do most editing and scaling jobs for you. The AutoFit facility is no exception.
By now, if you have gone through the methods of applying AutoFit to columns that have been presented in this guide, you should be able to get it done in no time. You can try out whichever method you prefer to AutoFit columns in Microsoft Excel as they will all bear the same results.