Microsoft Outlook has such an outstanding feature to boost your productivity level.
I have my own organized Outlook. So I must admit how much productive stuff this is.
You must be a skilled organizer if you want to communicate effectively. This same rule applies to Outlook mailboxes.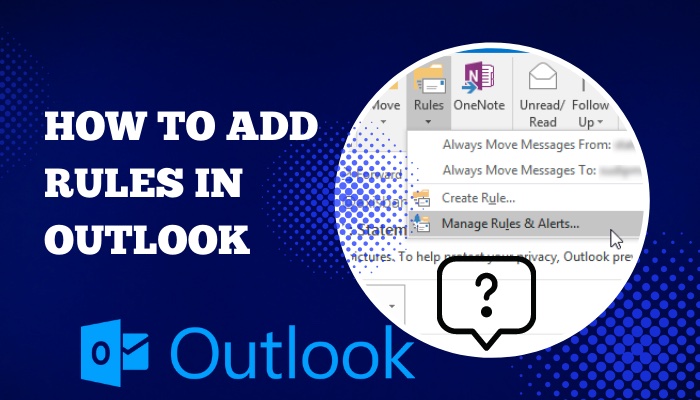
Your capacity to cooperate and interact is hampered by an unorganized inbox. By automating processes, you may skip regularly screening incoming messages.
Keep reading, As I’m about to show you how to add Outlook rules as a complete beginner.
What is an Outlook rule?
Outlook rules are criteria that automatically determine the email’s communication (send/receive) according to your applied criteria.
According to Microsoft Outlook rules, it will allow scheduling tasks that you would often have to perform manually. When a letter satisfies certain requirements, rules are followed. 
If you get a lot of bills from different sellers, you may need to optimize the sorting procedure. In this case, Outlook will help you a lot.
It will follow the rules. Outlook will send the tax forms to the appropriate groups programmatically.
So let’s jump into our main topic. It will help to organize your work dramatically fantastic.
Also read how to fix Outlook junk mail rules not working.
How to add rules in Outlook
I understand how much excited you are now to know the rules. I will properly guide you. Just stay with my instruction.
Below are the methods for adding rules in Microsoft Outlook. I’ve included a list of techniques in this post.
Here are the steps to add rules in Microsoft Outlook.
1. Add rules by template
You may make a rule using a template. It is so quick and easy than you think.
Just have a look at these procedures.
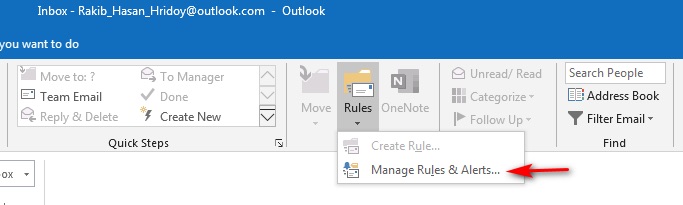
- Select Rules from the navigation bar.

- See Manage Rules & Alerts… Click on it.
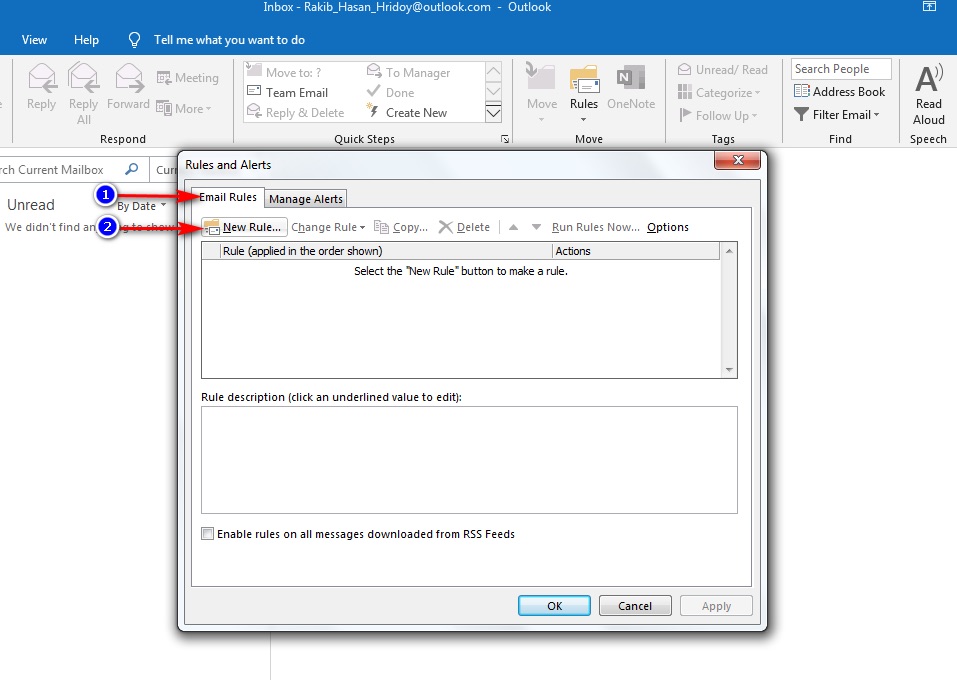
- Find there will be a pop-up window. Select Email Rules, then click on the New rule…
- See, there are options to choose a template and its category. You can choose any option from Stay Organized and Stay Up to Date as well. This is totally upon you.
- I am selecting the second option from the Stay Organized section.
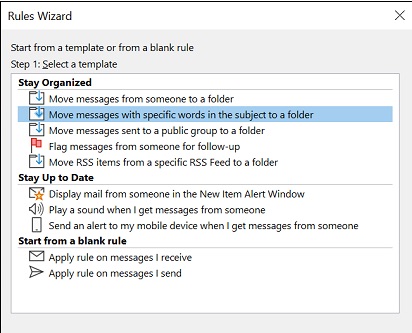
- Click on the Next>
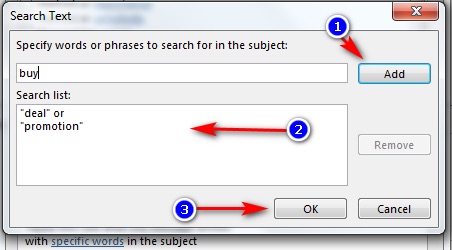
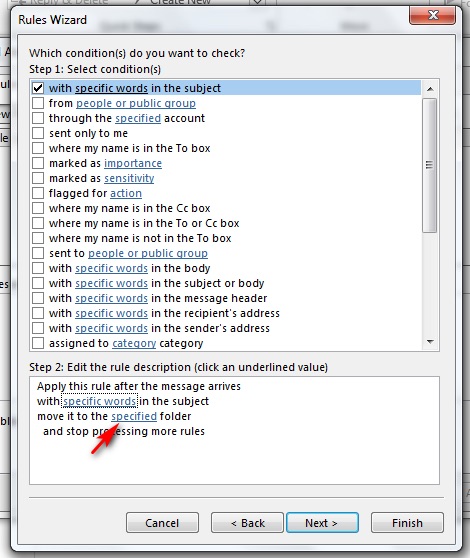
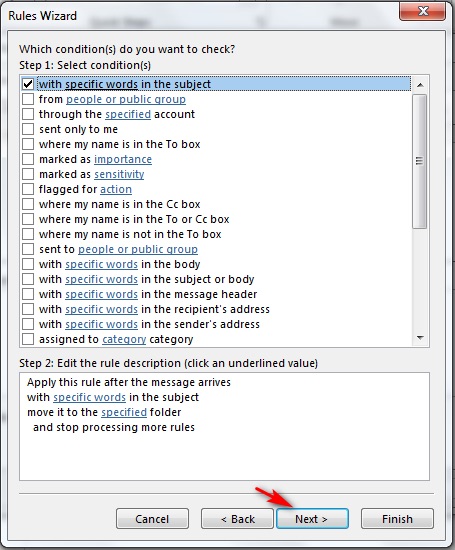
- Then You have to pick any underlined value from Edit the rule description Pick the Specific words option.
- Click on the Next>
- Find a text box to input values. Just Add them and click the OK button when you are done.
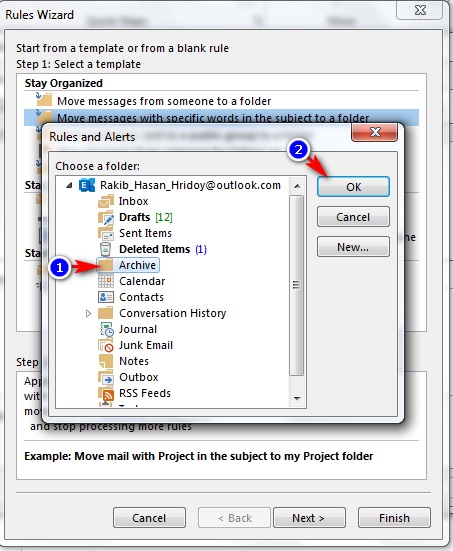
- Again you can pick the underlined value Specified folder from Edit the rule description section.
- Now select your folder where your emails should be.
- Click on the OK button after all is done.
- Notice after again. The starting window will be back. Just click on Next> whenever you need it till the process.
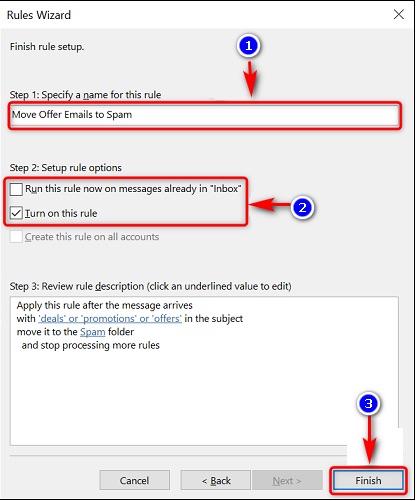
- Find an appeared window named Finish Rule Setup.
- Here in Step 1, you have to enter your rule’s name. You will find Specify a name for this rule.
- Describe your words. Remember that you have to use them later. So mark them as you can recognize them later also.
- For the Step 2 section, click on to enable the option named Tun on this rule from the Setup rule option.
- Click on the Finish.
- Click Apply and OK In the pop-up window.
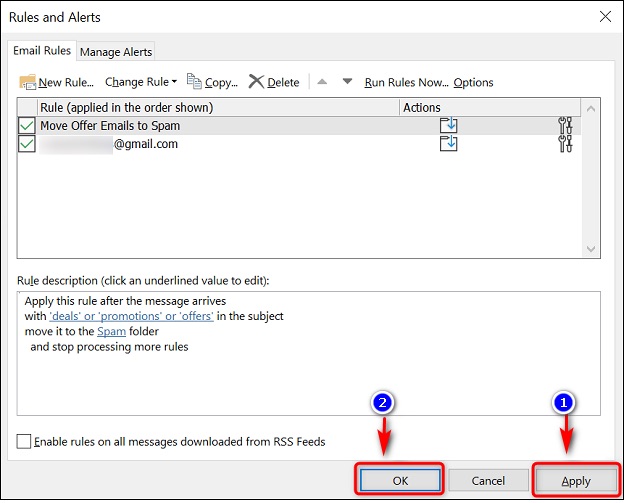
- You are prepared now. Your created rules are active now.
It will classify and act quickly on the Microsoft outlook that you’ve specified.
Follow our guide step-by-step to solve Outlook rules not working in Windows 10.
2. Add rules by using the current email
You can use your current email to enjoy this feature.
Just follow these simple steps below.
- Go to your outlook
- Select any email you want to apply your customized rule.
Here I am selecting an email from my friend to show you the process.
- Do a right-click on the targeted email. Now you will find a setting option named Rules. Click on it. Then select Create rule …
- Notice there is a new mini window named Create Rule. If you want to change or rename the contents of the fields, then you can do so.
You should click on that checkboxes to enable the features.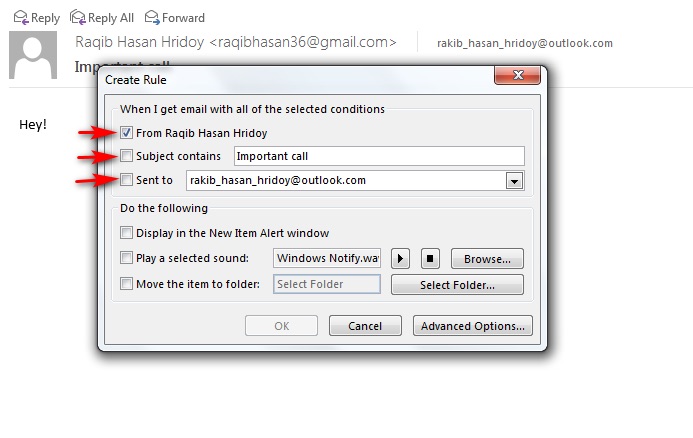
Just feel comfortable whatever you want to do and what remains suitable for you.
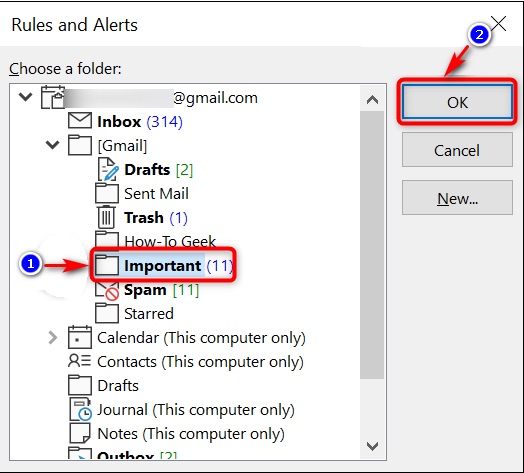
- Then to the bottom portion, named Do the following. Just click to enable the option named Move the item to folder. Then select your preferred folder.
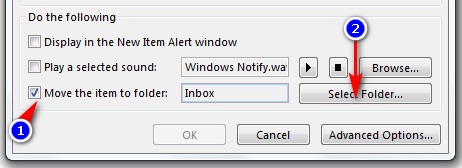
- Get the Rules and Alerts window. Please wisely select your folder. From now, all your emails will be stored in this folder.
So please try to remember it.
- Select the OK button after completing.
- Then you will find the Create Rule window again. Also, click on the OK icon.
- See ultimately, a little screen will appear titled Success.
- Press the OK button on the window.
Congratulation, you have done such an outstanding job. Now enjoy the features and save your time.
Just a moment! Sometimes you may need to import or export the rules in Outlook.
I know how important step this is.
Don’t get worried.
I am now giving you some bonus information.
Don’t think to miss it.
3. Export rules
So you want to know how to export rules. Take a look at these.
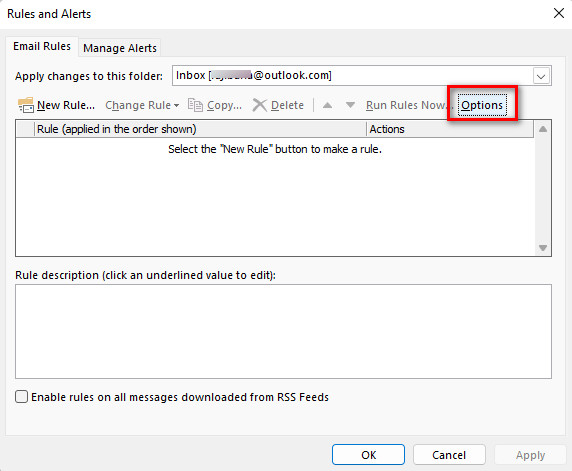
- Select Rules from the navigation bar.
- You will see Manage Rules & Alerts… Click on it.
- See, a Rules and Alerts named window will appear. Click Options from it.
- Then set your rules by the Export Rules.
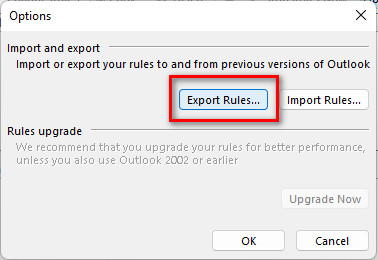
- You have to set a file name for those rules files.
- Just set a location for them after giving a name. They must be kept in a particular directory.
- Save your changes after completing the whole process by pressing the Save.
Yes! This is such a simple and easy method. To import rules, you have to follow such easy steps too. But there is a slight difference.
I am giving the steps below. Try it.
Quickly check out our separate post on Outlook rules not running automatically.
4. Import rules
Here is the short process on how to export rules in outlook
- Select Rules from the navigation bar.
- You will see Manage Rules & Alerts… Click on it.
- A Rules and Alerts named window will appear. Click Options from it.
- Set your rules by the Import Rules.
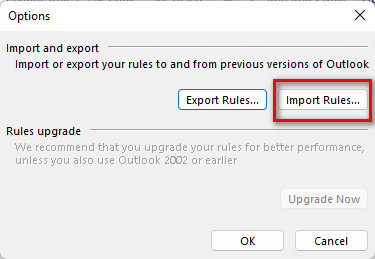
- Set a location for them after giving them a name. They need to be imported into a specific folder.
- Click the Open button and then the OK
Congratulation again. You have successfully done the bonus steps also.
I told you that they are so easy than your thought. I honestly hope you really liked reading everything I’ve mentioned.
But there is no hamper if you want to know more. Knowing additional details about a topic is a smart idea.
Find out how to fix Outlook server-side rules not working.
FAQ
How many rules can I have in Outlook?
Users are not limited to a certain amount of restrictions. Only activated policies are subject to the quota for Inbox filters. There really is no limit to the number of disabled criteria that may be contained in an inbox.
Why are rules in Outlook not working?
Reasons Outlook Policies Don’t Perform
- Rules are more than the limit set for your letter box.
- A send/receive file is corrupt.
- Rules that only apply to a single machine.
- Utilizing a POP3 / IMAP account for unauthorized access
Do rules slow down Outlook?
Outlook does have 32 kilobytes of RAM set out for settings. Too many guidelines are added by users. Outlook takes too many times to process them. This actually slows down the overall Outlook process.
Conclusion
Outlook is an outstanding emailing planning tool. Now you have the chance to get finish your productive tasks more efficiently.
You have a completed and well-documented tutorial now. Just try to maintain the instruction properly as I told you.
Enjoy the feature and make sure that you are utilizing them properly. Please don’t stop counting on me. You will feel the differences from today.