The trusted location is the folder or network drive that is specified as safe. You can use this safe drive to run macros, data connections, and ActiveX controls without being blocked by security.
However, several reasons can prevent you from adding new trusted locations. If you cannot add new trusted locations in Microsoft Office, don’t panic.
In this article, I will discuss the reasons behind this error and demonstrate six methods to make it work again.
Without further ado, let’s get started!
Why is Trusted Location Not Working in Microsoft Office?
Microsoft Office apps restrict you from adding new trusted locations because the “Allow Trusted Locations on my network (not recommended)” is turned on by default. Moreover, an invalid network location or misconfigured group policies can restrict you from adding trusted locations by blocking access.
While recreating the problem, I noticed that outdated software and violations of policies can also block users from creating new trusted locations. Let me describe the reasons with an in-depth discussion for a better understanding.
Here are the reasons why the trusted location is not working:
Inappropriate Trust Center Settings
Primarily, users cannot add trusted locations because of inaccurate Trust Center settings.
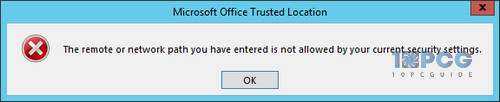
If the “Allow Trusted Locations on my network (not recommended)” option is disabled, Microsoft Office cannot access the files and shows the following error.
Wrong File Path and Permissions
In case you’re trying to add a wrong file path to the trusted location or don’t have the necessary permissions, MS Office’s trusted location won’t work.
Invalid Network Location
If the file you’re trying to add to the trusted location is stored on a network drive, you will encounter an error saying, “the path you have entered cannot be used as a trusted location.”
Misconfigured Antivirus Software
Your antivirus programs can conflict with the trusted location settings and lead to the trusted location not functioning issue.
Closely examine if your antivirus program is detecting Trusted Locations macros as a threat. If so, Office applications will fail to add new trusted locations.
Inaccurate Server Mapping
If you’re using a network drive and mapping using the server IP, the trusted location of Microsoft Office won’t work.
Now that you know the reasons behind this issue, jump to the next section to resolve the error.
How to Fix Microsoft Office Trusted Location Not Working
To fix the MS Office trust location missing or not functioning issue, turn on the Allow Trusted Locations on my network (not recommended) option. Besides, you can run Microsoft Office as an administrator, use a new user profile, or try uninstalling and then reinstalling Microsoft Office.
Also, check for group policies that can restrict you from adding new trusted locations. In such scenarios, contact your IT administrator to update the group policies.
Here are the methods to fix trusted locations now working in MS Office:
1. Alter Trust Center Settings
Let’s begin with updating the Trust Center Settings. To be able to add new network locations, you must enable the Allow Trusted Locations on my network (not recommended) option.
Here’s how to turn on Allow Trusted Locations on my network (not recommended) option:
- Launch any Office program.
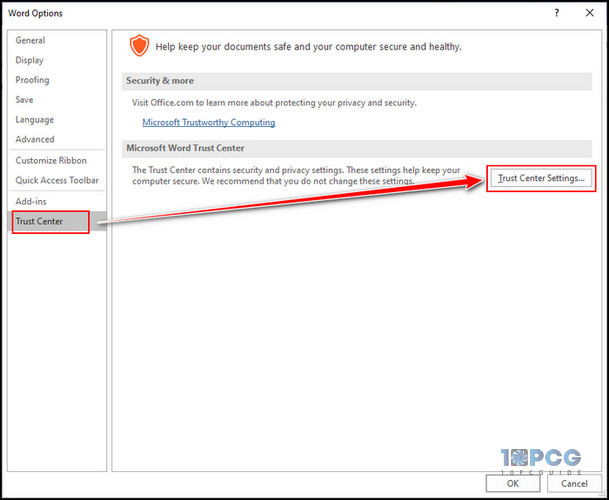
- Navigate to File > Options > Trust Center.
- Click on Trust Center Settings.
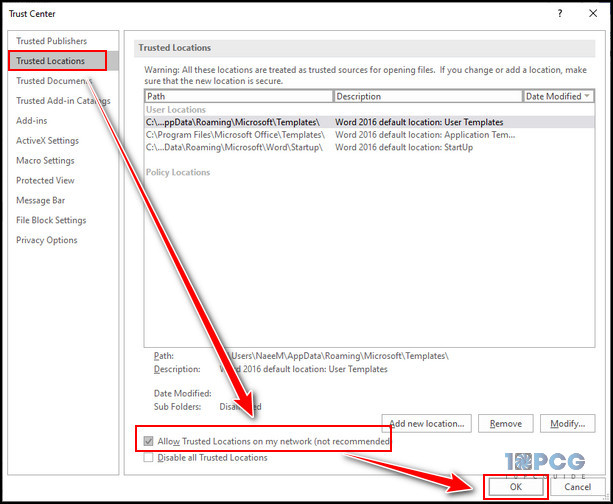
- Switch to the Trust Locations tab.
- Locate the Allow Trusted Locations on my network (not recommended) option at the bottom of the window.
- Check the Allow Trusted Locations on my network (not recommended) option.
- Click OK > OK to save the changes.
It will allow trusted locations on the network, and you will no longer encounter trusted locations that are not functioning.
2. Use the Correct File Path and Permissions
When adding files to the trusted location, ensure you’re using an accurate file path; otherwise, MS Office’s trusted location won’t work.
Moreover, check if you have the necessary permissions to add a trusted location and access the file. If you’re using an organization account, ask your IT admin to allow the necessary permissions for your account.
3. Ensure the Network Location is Valid
Only the network locations can be added to Microsoft Office as trusted locations. You will get an error if you’re trying to add a folder on your computer’s hard drive as a trusted location.
To resolve the issue, add the folder that is located on a network drive or move your local drive folder to a network drive, and then you can effortlessly add trusted locations in MS Office.
4. Disable Antivirus Software
As I mentioned earlier, your antivirus apps can conflict with settings and restrict you from adding new trusted locations. In such scenarios, you should temporarily disable the security programs.
Here are the steps to temporarily turn off the default antivirus apps:
- Press the Windows key and search for virus & threat protection.
- Click on the first search result.
- Select Manage Settings under virus & threat protection settings.
- Toggle off Real-time protection.

If you’re using third-party antivirus applications, you can disable them from the system tray. Simply right-click on the antivirus icon and choose Quit.
5. Disable Server Verification and Remap Location
Because of server verifications and incorrect network IP configurations, Office apps can be restricted from adding new trusted locations.
Here’s how to bypass the server verifications to resolve the trust location-related issues:
- Press Windows + R to open the Run dialog.
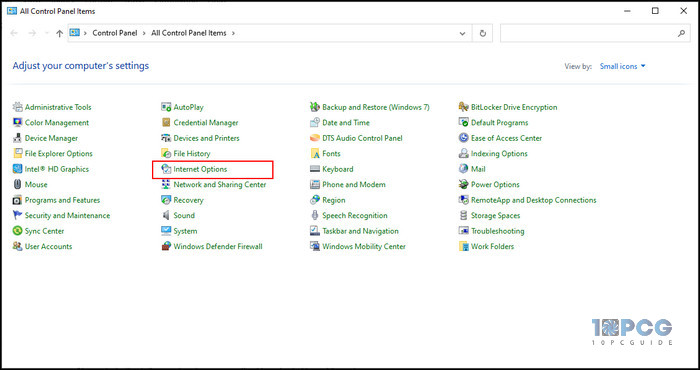
- Type control and hit Enter.

- Select Internet Options.
- Navigate to Security > Trusted Sites > Sites.
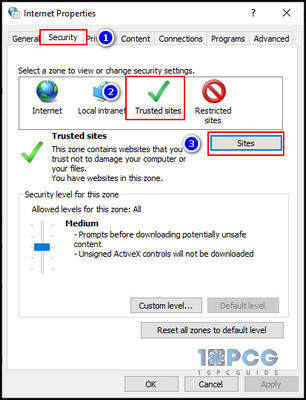
- Uncheck the Require Server verification (https:) for all sites in this zone option.
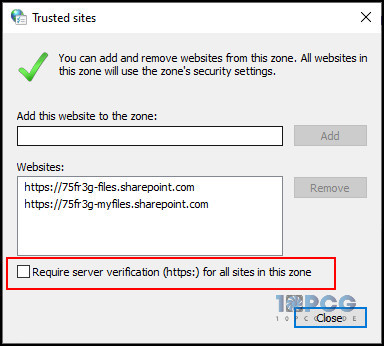
After altering the site settings, you should remap the server using \\fileserver\servername in place of the server IP.
Once you do that, you can add new trusted locations from the Trust Centre settings. However, if the problem persists, move down to the last method.
6. Reset Trust Center Settings
If none of the above methods works, you should reset the trust center settings from the Registry Editor. To do so, perform the following steps.
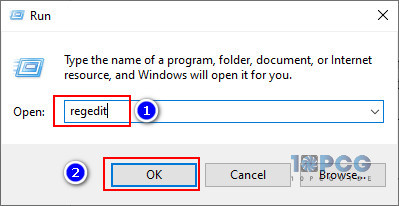
- Press the Windows + R keys to open the Run dialog box.
- Type regedit and hit Enter.
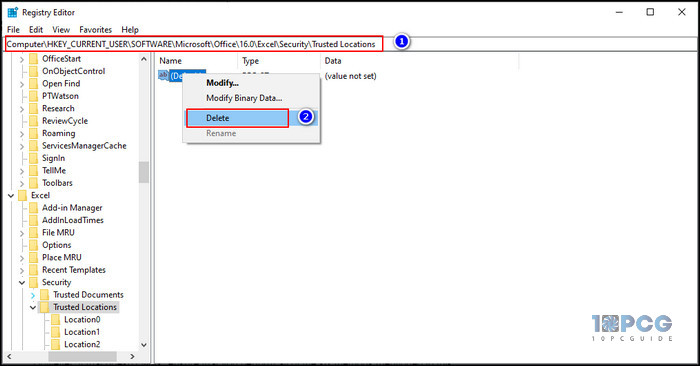
- Navigate to the following locations using the Registry Editor address bar:
- Computer\HKEY_CURRENT_USER\SOFTWARE\Microsoft\Office\16.0\Excel\Security\Trusted Locations
- Right-click on the registry key and select Delete.
Now restart your machine and relaunch the Office application. Certainly, you’re now out of the issue and can add and remove trusted locations.
Wrap Up
To add a trusted location in Microsoft Office, open any Office program and navigate to File > Options > Trust Center > Trust Center Settings > Trusted Locations.
However, if that doesn’t work, ensure that you perform all of the six methods mentioned in this article, and you will certainly be out of this annoying issue.
For further queries, leave a comment below.