Microsoft PowerPoint allows you to add tables as you could in Microsoft Word.
When working with a table, adding rows and columns after a while is common.
If the amount of data inside the table decreases later, you might also need to remove table rows and columns in PowerPoint.
This post will guide you through the process of adding or deleting table rows and columns in PowerPoint.
You will also learn about different methods of inserting a PowerPoint table in detail.
So keep reading the post till the end.
Check out our separate post: use cameo in PowerPoint.
How To Add Or Delete Table Rows And Columns In Powerpoint
After adding a table in PowerPoint, if you realize that there are some extra rows or columns, you can remove them as needed.
The same goes for adding rows and columns. If you see that there are not enough rows and columns to fit all the data, you can add rows and columns later.
PowerPoint is flexible regarding adding or deleting rows and columns in a table. So you do not need to stress about not having the perfect number of rows or columns in a table.
To add or remove rows and columns from a table, you must select the table first, then go to the Table Layout tab. In the Table Layout tab, you will see the options to add, delete or select rows and columns there.
Follow the steps below to add and remove table rows and columns in PowerPoint:
1. Add rows to a table
You can add rows in the specific location of the table in PowerPoint.
Here are the steps to add rows to a table in PowerPoint:
- Launch PowerPoint software.
- Open the presentation file.
- Go to the slide containing the table.
- Select the table.
- Go to the Layout tab from the top.
- Select any cell in the row above/below which you want to add a row.
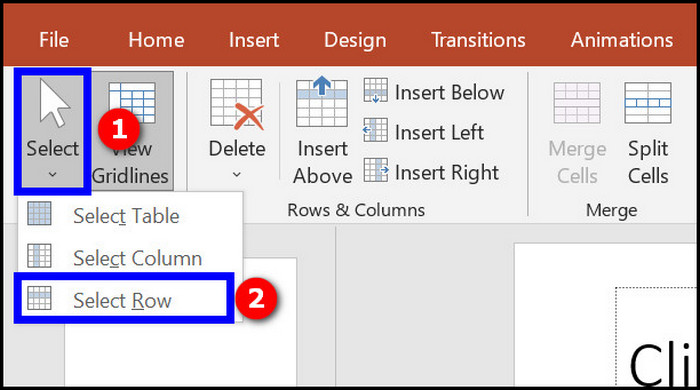
- Click on the Select option from the top ribbon. A dropdown list will open.
- Click on Select Row. The entire row of the selected cell will be highlighted.
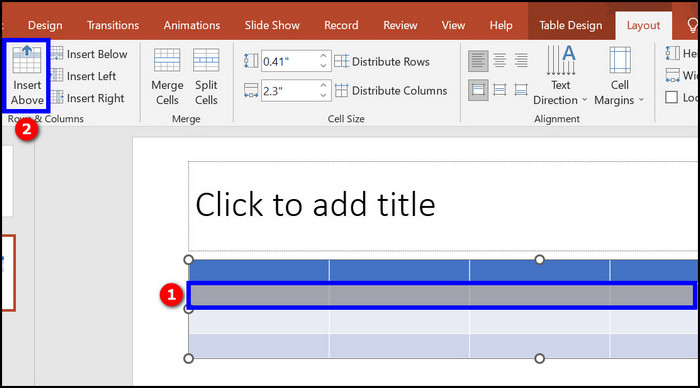
- Click on the Insert Above button to add a row above the selected row.
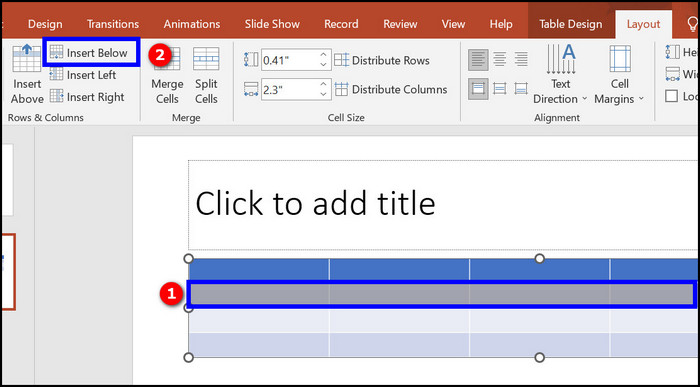
- Click the Insert Below button to add a row below the selected one.
Note that you cannot add multiple rows with a single click. A single click on the corresponding button will only add a single row. So you need to press the button multiple times to add multiple rows.
You may also like to read: 3 ways to add grammarly to PowerPoint.
2. Add columns to a table
Like rows, you can add columns in your specified table location in PowerPoint.
Here are the steps to add columns to a table in PowerPoint:
- Open the presentation file in PowerPoint.
- Go to the slide containing the table and select the table.
- Go to the Layout tab from the top.
- Select a cell in the column left or right to which you want to add a column.
- Click on the Select option from the top. A dropdown list will open.
- Click on Select Column. The entire column corresponding to the selected cell will be highlighted.

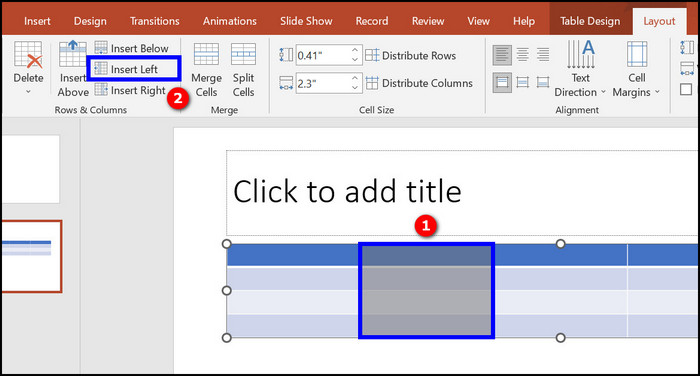
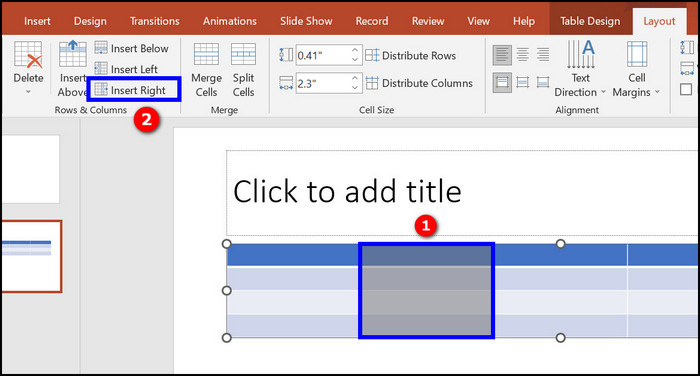
- Click on the Insert Left button to add a column left to the selected column.
- Click on the Insert Right button to add a column to the right of the selected column.
Similar to the case with rows, you cannot add multiple columns with a single click. So you need to press the Insert Left or Insert Right button multiple times to add multiple columns.
Follow our guide to fix PowerPoint design ideas not working.
3. Delete rows and columns in a table
Deleting rows and columns is even more straightforward as it is done with a single button.
Here are the steps to delete rows and columns in PowerPoint:
- Open the presentation file in PowerPoint.
- Go to the slide containing the table and select the table.
- Go to the Layout tab from the top.
- Select the cell of the row or column which you want to delete.
- Click on Select on the left of the top ribbon. A drop down menu will appear.
- Click on Select Row or Select Column. The row or column will be highlighted respectively.
- Hold the Shift key and press the arrow keys (up, down, left, right) to select adjacent rows/columns. This step is needed if you want to delete multiple rows or columns together.
- Click on the Delete option from the top ribbon. A dropdown list will appear.
- Select Delete Rows or Delete Columns as needed.
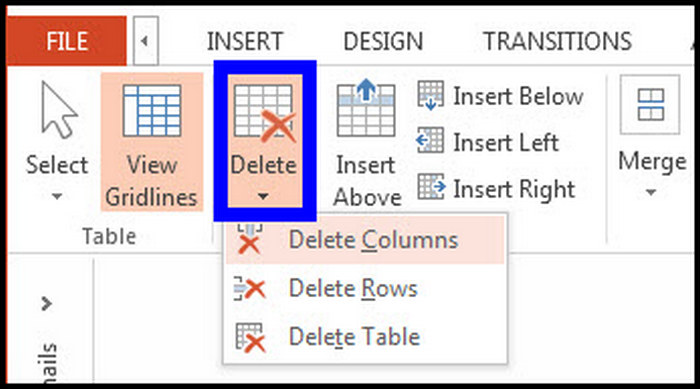
Note: Clicking on the Delete Table option will delete the entire table.
While working with tables in PowerPoint, you might be interested in knowing the different ways of inserting tables in PowerPoint. You can even import an Excel table to a PowerPoint slide.
Head over to the next section to know more.
Quickly check out our separate post: your browser is up to date error on PowerPoint.
How To Add A Table In Powerpoint
PowerPoint gives you the option to use tables in the slides. The feature is similar to that of Microsoft Word.
There are multiple ways to insert a table in a PowerPoint slide, giving you a lot of flexibility. You can follow any process based on your needs.
Follow the methods below to insert a table in PowerPoint:
1. Insert table using cells
The Insert tab has the Table option, which allows you to insert a table based on the number of cells you specify.
Here are the steps to insert a table using cells:
- Go to the slide where you want to add a table.
- Go to the Insert tab.
- Click on Table from the top ribbon. A dropdown will open.
- Hover your cursor over the white cells in the dropdown from the top-left corner to specify the number of rows and columns you want to insert. You will see a live preview of the table as you hover the cursor.
- Click on the table’s bottom-rightmost cell once you have highlighted the required number of rows and columns.
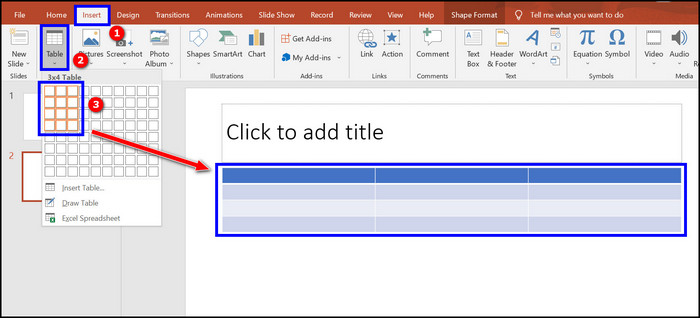
The table with the specified number of rows and columns will be inserted in the slide. This method is the quickest if you have to add a table with a small number of rows and columns.
Related content you should read: how to merge shapes in PowerPoint.
2. Insert table using row and column number
If you have a large number of rows and columns that cannot be inserted using the previous method, this method should be followed.
Here are the steps to add a table using row and column numbers:
- Go to the slide where you want to insert the table.
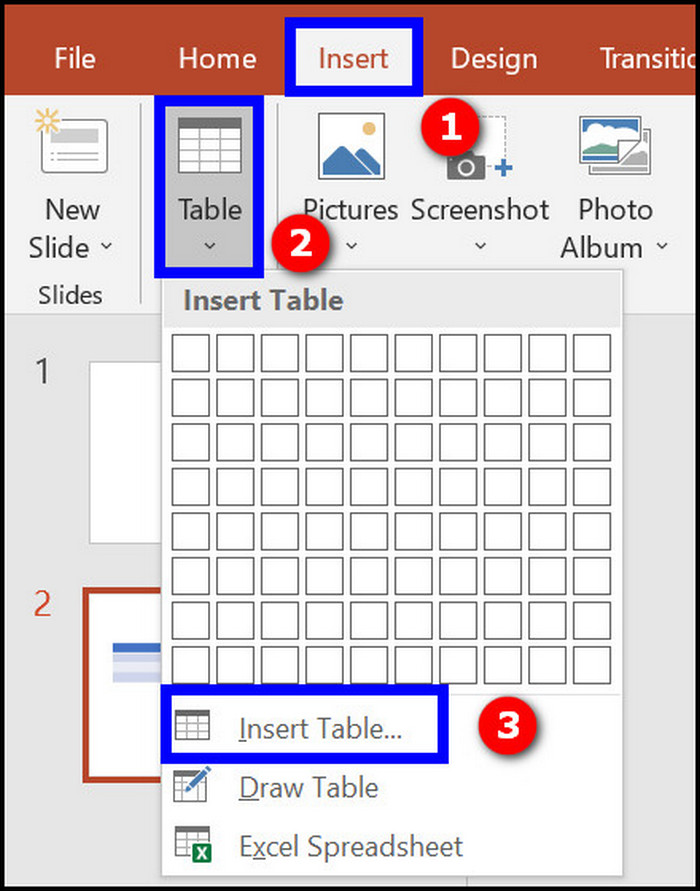
- Go to the Insert tab.
- Click on Table to bring down the dropdown menu.
- Click on Insert Table. A dialogue box will appear.
- Enter the number of rows and columns for the table.
- Click on the OK button.

As you can see, the method is easy for adding a big table in PowerPoint.
Also, check out our separate post on how to remove picture background in PowerPoint.
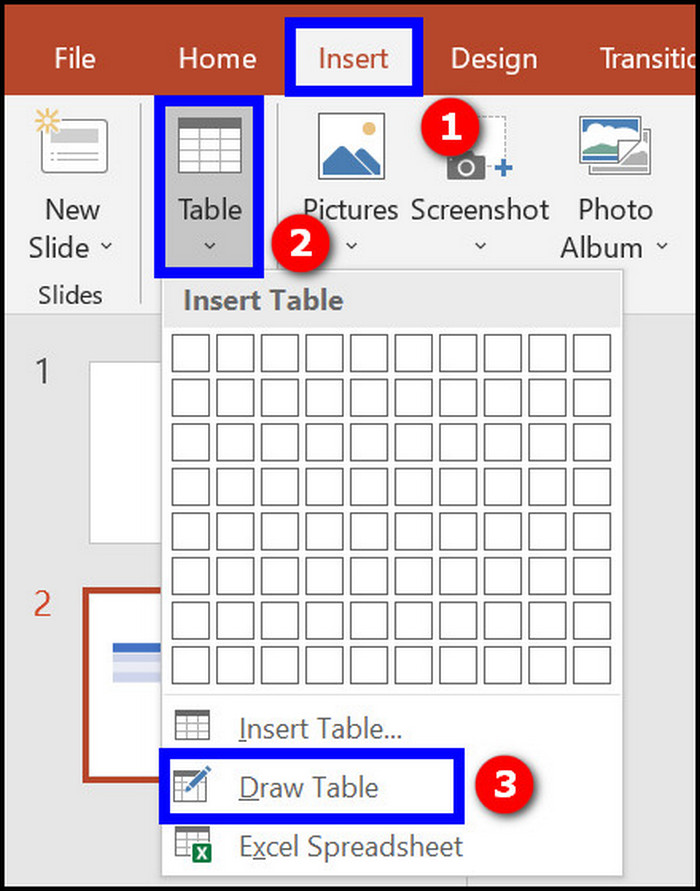
3. Draw tables
You can draw tables in PowerPoint, similar to drawing a shape. If you want to have a table with uneven spacing, use this method.
Here are the steps to draw tables in PowerPoint:
- Go to the slide where you want to draw a table.
- Go to the Insert tab from the top.
- Click on Table.
- Select Draw Table from the dropdown menu. The cursor will change into a pencil.
- Go to the slide and draw a rectangle with the pencil icon. The rectangle will be the outer perimeter of the table.

- Go to the Design tab.
- Click on Draw Table. The cursor will transform into a pencil icon again.
- Draw a line across two opposite edges of the table perimeter. It will add lines inside the table, forming rows or columns.

- Repeat the previous step until you have all the cells drawn.

Though the table cells will have uneven spacing, you can make the spacing even later using distribute rows and columns option.
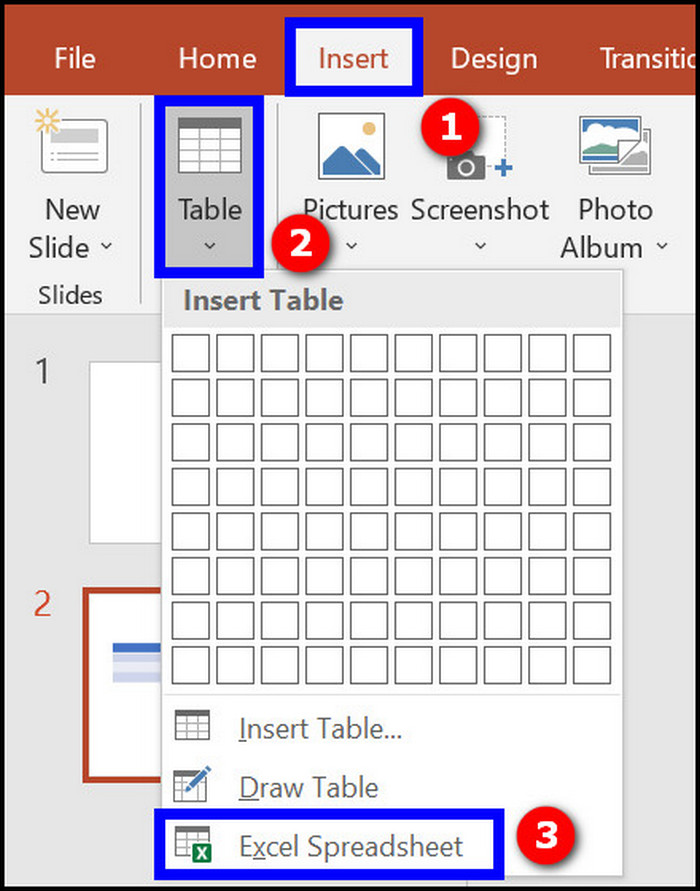
4. Insert an Excel sheet
In addition to inserting tables, you can insert Excel sheets too.
Here are the steps to add an Excel sheet to a PowerPoint slide:
- Go to the slide where you want to add an Excel sheet.
- Go to the Insert tab.
- Click on Table from the top ribbon.
- Select Excel Spreadsheet from the dropdown. An Excel sheet with two rows and columns will be added to your slide. The top ribbon will change to that of Excel.
- Drag the handles of the Excel sheet to add rows and columns.
Now you can work with the Excel sheet as you please. When you want to return to the PowerPoint options, click on any area in the slide (outside the Excel sheet), and the top ribbon will change to the PowerPoint ribbon. 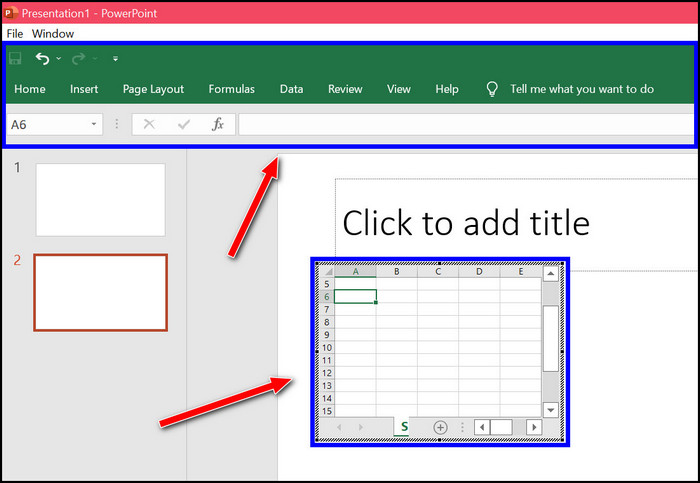
Check out our latest post to fix drawing tab gone in PowerPoint.
Final Thoughts
While working with tables in PowerPoint, you might need to add or remove rows or columns. PowerPoint gives you easy methods to achieve so.
You need to select the row or column and then insert rows/columns in the specified direction.
Deleting rows or columns in PowerPoint is even easier as you can do it with a single click.
The versatility of a table in PowerPoint shows while inserting a table too. There are multiple ways of adding a table to a PowerPoint slide.
You can even insert an Excel sheet and get Excel functionalities inside the PowerPoint slide.