Business and project presentations have reached a point where even the most beautifully designed slides can look mundane. That’s because almost all the presentations out there follow a similar pattern.
So, why not make yours stand out by using the cameo feature in Microsoft PowerPoint?
This functionality was introduced in the second quarter of this year, so a good number of people need to be made aware of its benefits.
Have you ever wondered: how to insert a camera in PowerPoint?
This feature was not available all this time, but after a recent update, the PowerPoint app can now integrate an active camera feed into your presentation with the help of the Cameo feature, and it even works when you are viewing a slide show.
I had to present some projects via Google Meet recently, and this feature really spiced up my demonstration.
So, if you plan on taking part in any online presentations in the near future or just want to learn a new way to present, put on your reading glasses and dive into the next section.
You may also like to read about enable Automated Kiosk Presentation on PowerPoint.
How To Add Cameo In PowerPoint?
Before proceeding to learn the steps to enable and use Cameo in your slides, you should be aware of some of its abilities or features.
An excellent functionality of Microsoft’s Cameo feature in PowerPoint is that you can treat the integrated video feed as if it’s a photo or object in the slides. As a result, you will be able to customize its shape and add stunning effects like transitions or styles to it.
There are also some prerequisites you need to keep in mind before moving on to the steps.
Follow our guide to fix Microsoft Teams Black Screen.
Here is a list of prerequisites to keep in mind for using Cameo in PowerPoint:
- Microsoft Office updated to the latest version.
- A webcam or internal camera attached to your computer.
- All camera permissions granted for Microsoft PowerPoint.
Note that an attached microphone and granted microphone permissions are also required if you want to include your voice in the feed.
The steps below also show you how to configure and select a webcam if you have multiple installed and how to customize the look and feel of the live camera feed.
Check out the easiest way about how to undo in Microsoft Word?
Follow these steps to add a cameo in PowerPoint:
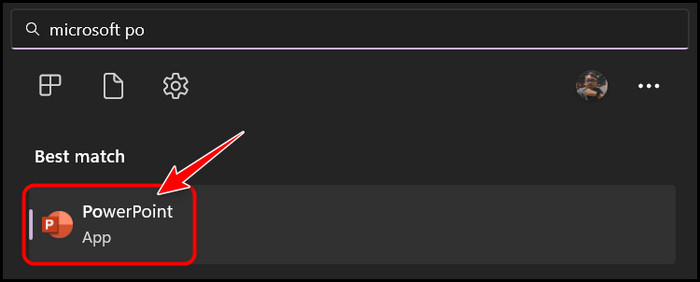
- Launch Microsoft PowerPoint by searching for it in the Start menu or from the desktop.
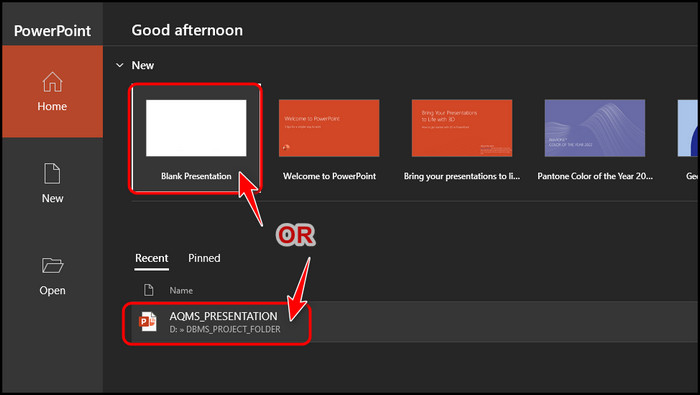
- Click on Blank Presentation to start a new presentation or select an existing one under the Recent section.
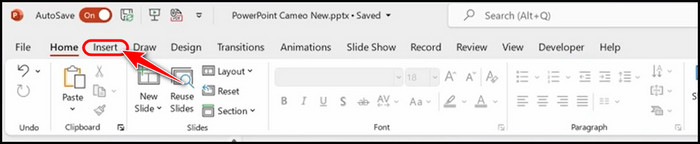
- Look for the Insert tab at the top menu bar and switch to it.
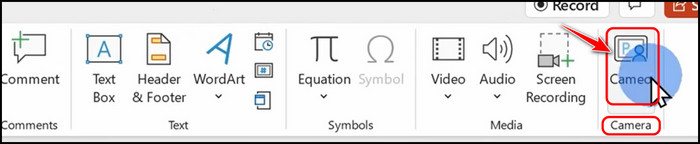
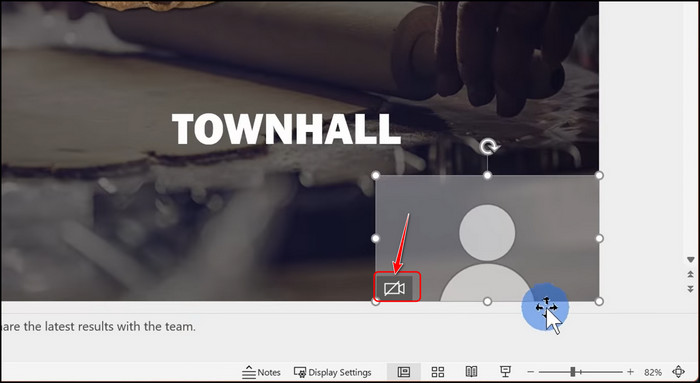
- Locate the Camera category inside that tab and click on Cameo from there.
- Click on the tiny video icon inside the newly added rectangular object at the bottom right corner. This will enable the webcam and display a live video feed in your slides.
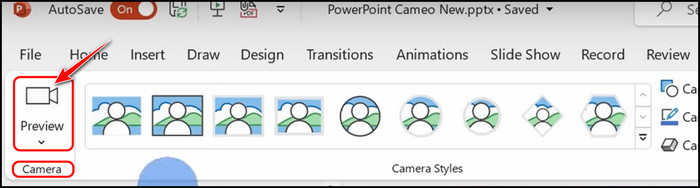
- Switch to the newly created Camera tab from the top menu bar if you are not already on it.
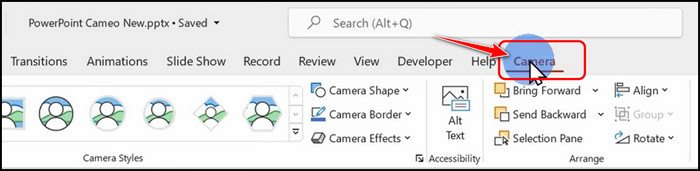
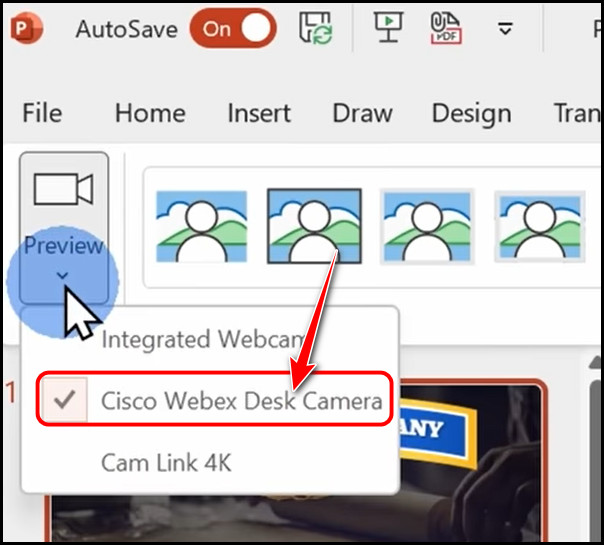
- Locate the Camera section inside the tab and expand the Preview drop-down menu.
- Select a different webcam from this list if you have multiple cameras installed.
- Explore the Camera Styles category and select a style from the drop-down menu to design your camera feed. You can also choose a camera shape, border or effects to apply to it.

- Choose a design template if you are confused or don’t know how to move forward with the slide layout. You can do this by going to the Home tab from the top menu bar.

- Move your mouse cursor to the Designer category in this tab and click on the Design Ideas option.

- Scroll through the layout templates in the right panel that appears and select one that looks appealing to you. Repeat the same for as many slides as you want.

Finally, save the presentation in a PPT file to save the Cameo.
As you can see, it’s pretty simple and straightforward to set up, so it shouldn’t take more than five minutes to integrate it into your workflow.
Important Note: There are plans to move the Cameo feature to the Record tab, so if you can’t find it in the Insert tab, look for it in the Record tab.
Speaking of tricks to improve your presentation skills, did you know you can move the notes of each slide above the slide preview? Read the following section to learn more.
Related contents you should read about Microsoft Outlook error 0x80040115.
Can You Do a Teleprompter in PowerPoint?
Yes, you can do a teleprompter in PowerPoint by switching to the teleprompter view while recording your presentation.
However, before doing that, you need to write some notes for each slide.
Teleprompters are basically anything that assists you in describing lengthy pieces of text flawlessly without worrying about memorizing anything. In PowerPoint, you can get some text above your slides when you are in the Teleprompter view to do this.
Also related to this guide Set Different Footer on Each Page in Microsoft Word.
Follow these steps to do a teleprompter in PowerPoint:
- Launch Microsoft PowerPoint and open a new or existing PPT file.
- Switch to the View tab from the top right corner of the menu bar.
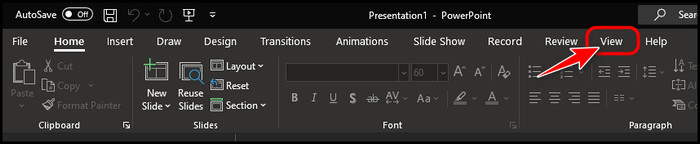
- Look for the Notes Page option in the Presentation Views category and select it.

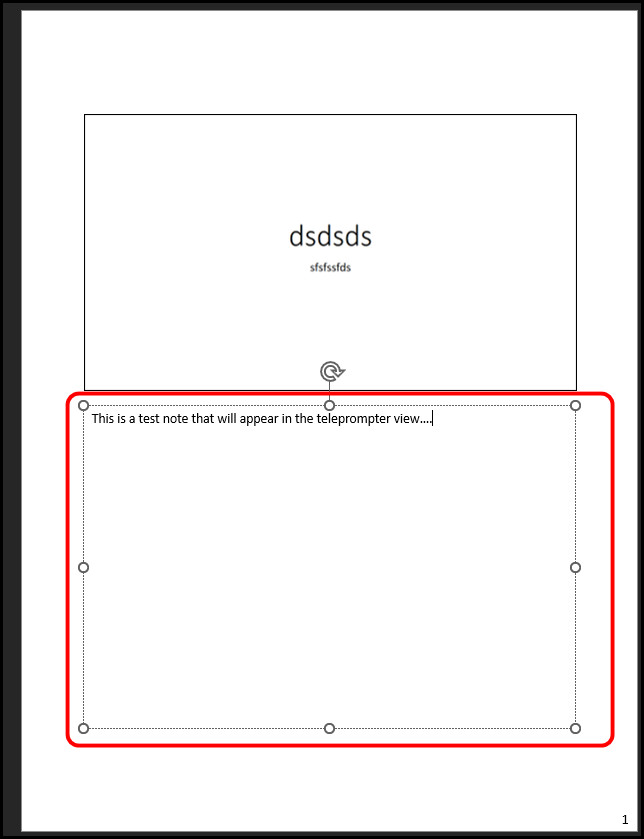
- Move your mouse cursor to the ‘Click to add text’ section and type all the notes that you want to appear in the Teleprompter view.
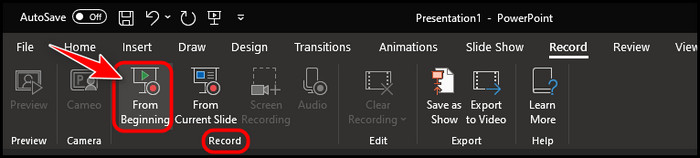
- Go back to the top menu bar and click on the Record tab this time.

- Locate the Record category and select the From Beginning option.
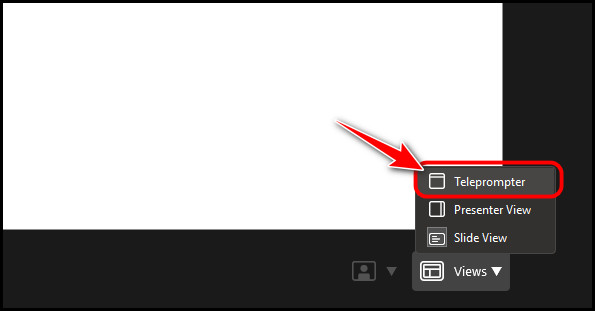
- Click on the Views option at the bottom right corner to expand a small list of options.
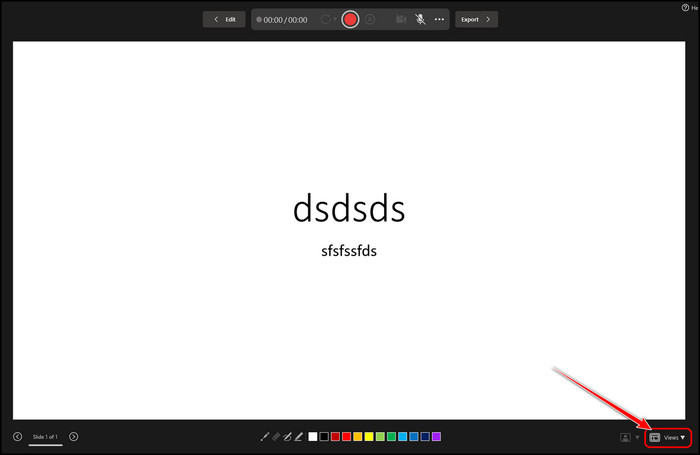
- Select Teleprompter from the list to switch to Teleprompter view.
Now, you should be able to read the notes while also viewing the slides in the Teleprompter view. Don’t worry about the length of the text in the notes. If it’s long, you will be able to scroll through it using a slider.
While this may have answered one of your curiosities about Microsoft’s PowerPoint, you can read the FAQ section below to see what other people are asking.
Also, check out our separate post on Compare Documents in Microsoft Word.
FAQ
Can PowerPoint play MIDI files?
Yes, PowerPoint can officially play MIDI files. You can import MIDI files to slides in the same way you import audio or videos. Basically, you have to go to the Insert tab and select the Audio option to import MIDI files.
How do I video my PowerPoint presentation?
You can video your PowerPoint presentation by selecting the File option in the top left corner and then clicking on Export from the left panel. You should find an option named Create a Video that lets you save an auto-generated video of the presentation.
How do I make a silhouette in PowerPoint?
You can make a silhouette in PowerPoint by right-clicking on the image and selecting Format Picture. From there, you need to adjust the Brightness and Contrast in the Picture Corrections category to make the image look like a silhouette.
Final Thoughts
Finally, Microsoft’s PowerPoint is bundled with numerous features, which is precisely why newly released features like Cameo get lost in the crowd. However, you don’t have to worry about this if you have read the first section of this article word for word.
I highlighted a critical point at the end of that section, so make sure to complete that part. Before I leave you to your business, how do you plan to use the Cameo feature?