The mail merge feature in Outlook is quite handy when you want to send a large number of personalized emails.
But for a new user, doing Outlook mail merge can seem a little complicated.
As a regular Outlook user, I am here to help. In this article, I will describe efficient ways of merging emails in Outlook that I follow myself.
So let’s begin!
Follow our guide on how to add BCC in Outlook Calendar invite.
What is a Mail Merge?
A mail merge is a system of creating bulk personalized emails connecting Ms word email messages with an Excel spreadsheet and then sending them through Outlook.
Basically, the mail merge option uses the details of multiple recipients from a source data file and inserts them into your email message template. After that, You can easily send multiple emails in an instance via Outlook.
Now comes the question, why should you use Outlook mail merge?
Well, Outlook itself doesn’t have any sending limits, but Outlook web and Microsoft 365 subscribers certainly have the limitation. For example, MS 365 users can send emails to a maximum of 5,000 recipients daily, and you can only send 30 messages per minute.
For these limitations, merging email can be really useful for users with a small list. In case you have a very large amount of recipients, advanced personalization features will be needed.
Find out how to add picture on Outlook email.
How to Perform Mail Merge in Outlook
To perform a Mail Merge in Outlook, you need to do some basic steps beforehand. First, you need to set up Mail Merge data in MS Excel and create email content in MS Word. After that, you need to link the mailing list with the email and then send the merger mail through Outlook.
Seems like a long and hefty process? Let’s discuss each step briefly so that you can understand better.
Here are the steps to use mail merge in Outlook:
Step 1: Create Mail Merge Data in MS Excel
In the very first step, You must create an Excel sheet file with the mail merge information.
Here’s how you can prepare mail merge data in MS Excel:
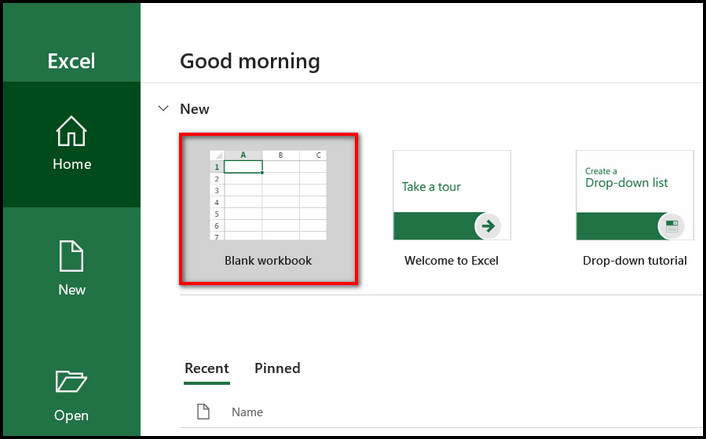
- Launch Microsoft Excel and select Blank workbook.
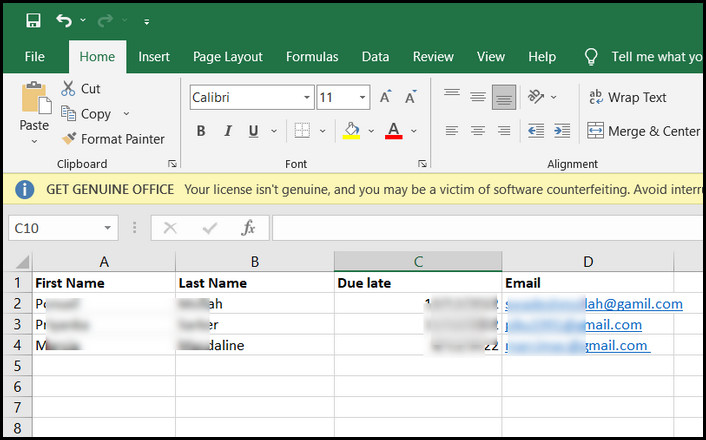
- Add column headers for the data you want to personalize in the email body text, such as First Name, Due Date, etc.
- Add data under the column headers.
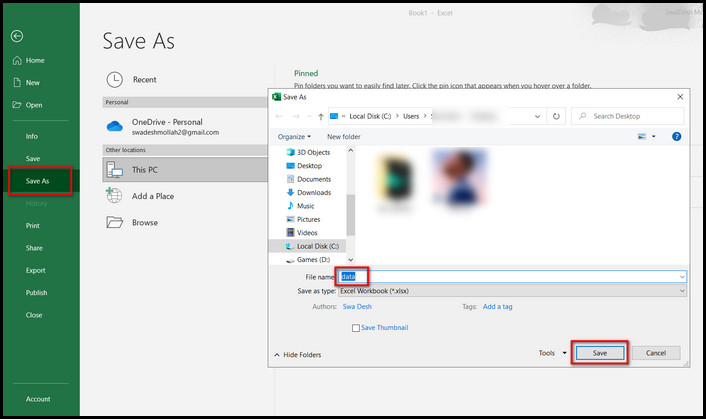
- Click on the Files button and choose Save As.
- Give a name to your mail merge data file and click Save.
After that, now it’s time to create an Email body massage.
Also read how to add new Mailbox in Outlook easily.
Step 2: Prepare an Email message in MS Word
After the Data creation in the Excel sheet, you need to create an email body using Microsoft Word 365 application.
Here’s how to set up email messages in MS Word:
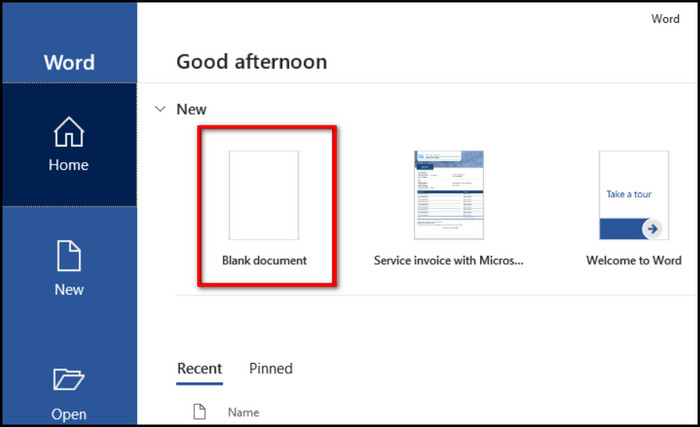
- Launch Microsoft Word and choose Blank document.
- Switch to the Mailings tab in the Menu bar.
- Hit the Start Mail Merge button.
- Choose E-mail Messages from the drop-down list.
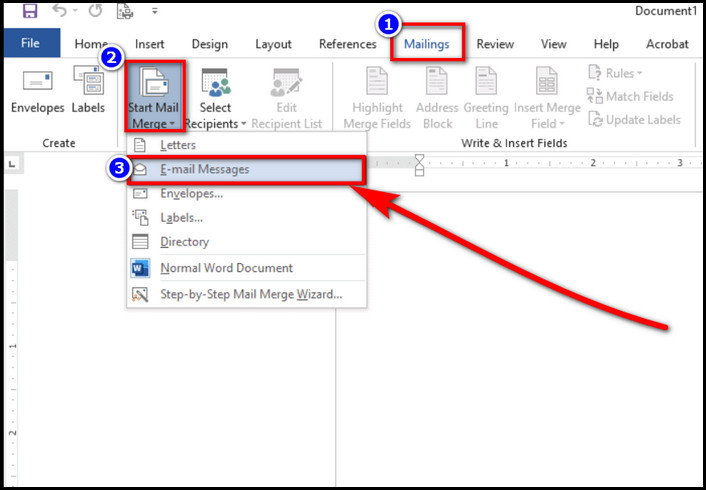
- Type email message in plain text format.
- Match placeholders with the data sheet you create above in the email message for personalization, like First Name, Due Date, etc.
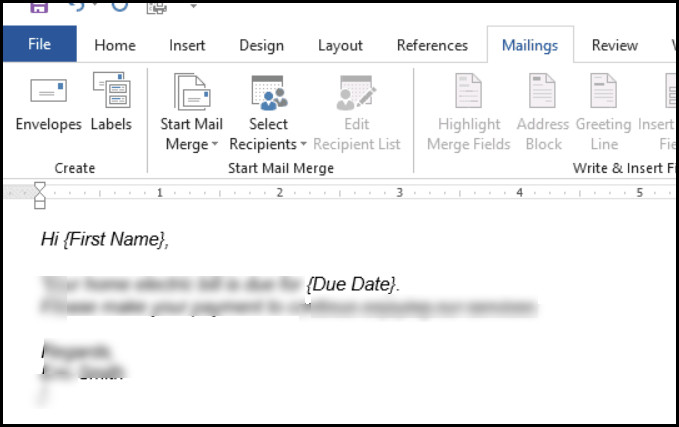
After that, Save the email when you are done writing the body text.
Check out some of the best ways to add someone to a distribution list in Outlook.
Step 3: Link the Email File With Mail Merge Data File
Now it’s time to link the mail merge data sheet and the email content.
Follow these steps to Link the Email File With Mail Merge Data File:
- Open the Select Recipients under the Mailings tab.
- Click on Use an Existing List.

- Select the mail merge data file and hit the Open button.
- Choose the sheet that contains your data in your data file.
- Check the box for First row of data contains column headers and Hit OK.
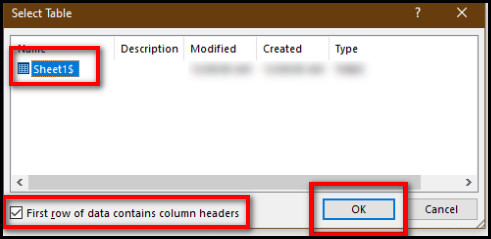
- Clicking on the Insert Merge Field button.

After that, both the contents connected with each other.
Read more on why Outlook rules not running automatically on shared mailbox.
Step 4: Preview and Finish the Mail Merge
Before sending the merged mail, you should preview and test whether the mail merge is working.
Here’s how to preview the mail merge:
- Click the Preview Results button under the Mailings tab.

- Verify that the mail merge fields are displaying correctly.
- Click the arrows next to Preview Results to toggle between mail merge records and check for any merge field issues.
- Select Finish & Merge and choose Send Email Messages.

- Choose the column header containing email addresses for the To: field.
- Type in the message Subject line,
- Select All under Send records and click OK.
Now, your email is ready to be sent in Outlook.
Step 5: Send Merged Mail in Outlook
Finally, you can now send out the mail merge emails through Outlook.
Here are the steps to send merged mail in Outlook:
- Launch the Outlook application.
- Click the Outbox folder from the left–hand menu, and you’ll find the personalized mail merge messages within the folder.
- Click the Send/Receive All Folders button.

Once done, your merged emails will now go to each person on your recipient list.
FAQs
Does Outlook support mail merge?
Yes, Outlook does support mail merge. You can send personalized emails to outlook contacts using the mail merge option.
Where is the Mailings tab in Outlook?
You can find the Mailings tab in the Tools menu when you are viewing your contacts folder.
How do I connect Ms word to outlook for mail merge?
To connect Ms word to Outlook for mail merge, write an email content on Ms word and then select Mail merge under the Mailings tab.
Final Words
As you can see, performing mail merge is not as hard as people think. You just need to follow the accurate approach.
Hopefully, this article has fulfilled your need, and you can now easily merge emails in Outlook.
For further queries on Outlook issues, feel free to comment down below.