Microsoft Teams is a business communication platform that offers workspace chat and videoconferencing, file storage, and application integration. Teams also provide a unique feature known as Auto Attendant.
Using the auto attendant feature, you can create a navigation menu system for your organization to speak the people to the right department, call queue, person, or operator using the Microsoft Teams admin center or with PowerShell.
This article covers a step-by-step guide to setting up an auto attendant in Microsoft Teams for your organization and the necessity of using the Auto Attendant feature.
Without further discussion, let’s dive into this guide to setting up an Auto Attendant in Microsoft Teams.
Check out the easiest way to set up delegate in Microsoft Teams.
Why do You Need to Set up Auto Attendant in MS Teams?
Setting up an auto attendant lets people call your organization and navigate with a menu system to contact the correct department, call queue, person, or operator. You can effortlessly set up an auto attendant for the organization with the MS Teams admin center or PowerShell.
Auto attendant only applies to Office 365 Commercial environments with Global Administrator privileges. You should create a Resource Account to associate with the Auto Attendant.
Auto attendant is able to redirect calls based on callers’ input to several destinations. Check the below list of destinations for more information.
Here is the list of destinations to redirect calls based on callers’ input:
- Operator.
- Person in the organization.
- Voice app.
- Voicemail.
- External phone number.
- Announcement (Audio file).
- Announcement (Typed).
To redirect a call to a Person in the organization, the person must be voice-enabled. Though defining an Operator is optional, it is recommended to do that. Auto attendant can redirect calls to the Operator when the caller doesn’t make a selection or selects invalid options.
Check out our recent article on optimize Microsoft Teams performance.
How to Set up Auto Attendant in Microsoft Teams
You can set up an auto attendant in Microsoft Teams by navigating to Microsoft Teams admin center > Voice > Auto attendants > Add. Once you click Add, follow the on-screen instructions to set up the Auto Attendant for your organization perfectly.
The process of setting up the auto attendant is a little tricky. Go through the procedures below to configure auto attendant for Microsoft Teams.
Here are the steps to add auto attendant for Microsoft Teams:
1. Open Teams Admin Center
Using the Teams admin center, you can access the Auto Attendants feature. Follow the below instructions to access Auto Attendants.
Here are the methods to open the Teams admin center:
- Open Microsoft Teams and log in using the login credentials.
- Click on the Side Panel.
- Select Voice from the menu.
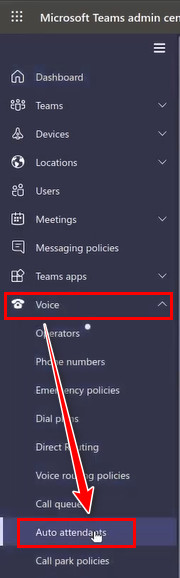
- Choose Auto Attendants from the submenu.
The above steps will open the Auto Attendants window. In this window, you can add new Auto Attendants.
Check out the easiest way to change time zone in Microsoft Teams.
2. Add an Auto Attendant
In the Auto Attendants window, you can see the list of previously created Auto Attendants and can create new Auto Attendants.
To add a new attendant, click on the Add button, which will open a new window named Add auto attendant. 
3. Set General Info
On the Add auto attendant window, you need to add some general information for the auto attendant. Check the list below to set basic details.
Here is the list of general information:
- Name Auto Attendant: Set a name for the Auto Attendant.
- Operator: Optional.
- Time Zone: Choose your time zone from the drop-down menu.
- Language: Set your default language.
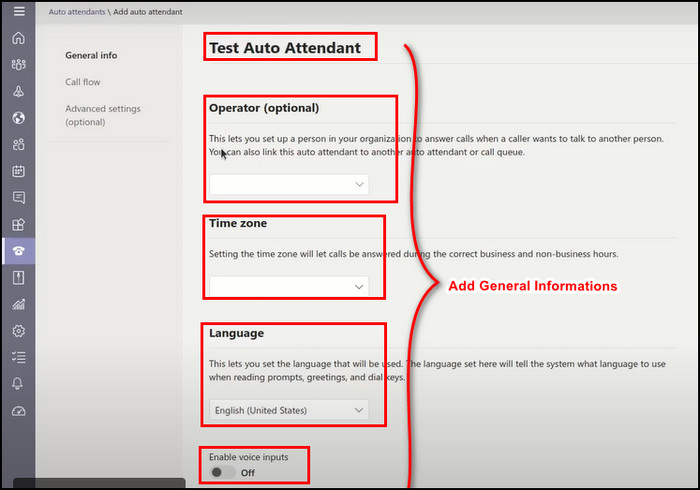
- Enable voice inputs: Allow/disallow voice commands.
After setting the general information, click Next from the bottom of the page. It will take you to the next page.
Here’s a complete guide on how to create breakout rooms in Teams Meetings.
4. Call Flow
On this page, you can set greetings for the caller and set a route for calls to send the call to the right person. Follow the directions below to set greetings and route the call.
Here are the procedures to set greetings and route the call:
- Select the setting for First play a greeting message.
- Select No greeting if you don’t want to set any greetings.
- Select Play an audio file to set an audio file as a greeting.
- Select Type in a greeting message to set custom text as a greeting.
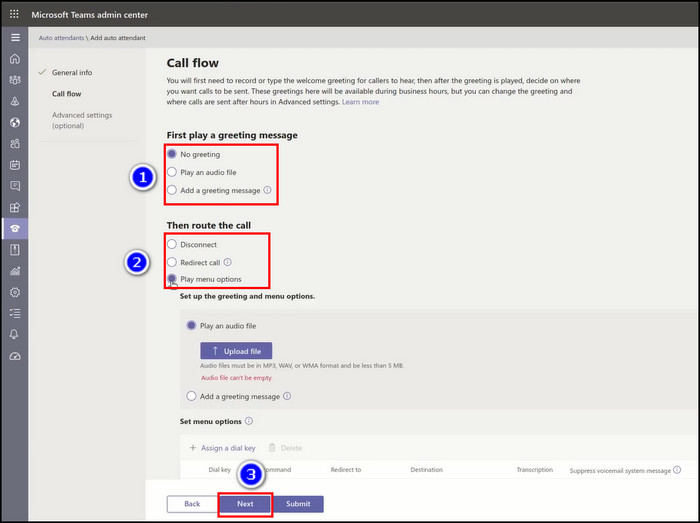
- Select Then route the call to set route.
- Select Disconnect to hang up the call.
- Select Redirect call to set call routing destinations.
- Select the Play menu options to Play an audio file or Type in a greeting message.
Once you set the call flows, click Next to move on to the next page. On the next page, you can select the available business hours.
Follow our guide step-by-step to turn yourself into a potato on MS Teams.
5. Set Business Hours
You can quickly set your business hours on this page. If you don’t put any business hours, all days and all hours in a day will be considered your business hours, as a 24/7 schedule is set by default.
If you set custom business hours, all of the hours that are not set as business hours are considered after-hours. You can click Add new time if you want to select multiple times as business hours. 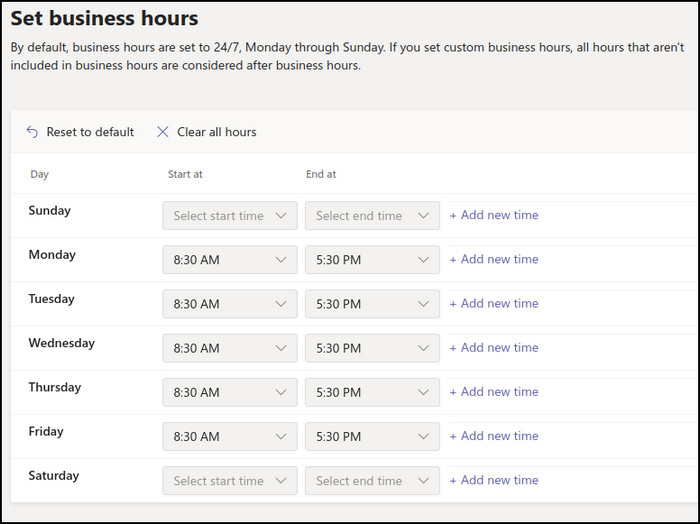
You can click on the blank option under the starting and ending times to set all day as after hours.
Follow our guide on how to add guests to Microsoft Teams.
6. Set Call Flow for After Hours
You can configure the message to be played business after hours and set call routes for after hours. Check the instructions below to set greetings and route the call for business after hours.
Here are the methods to configure greetings and route the call for business after hours:
- Select the setting for First play a greeting message.
- Select No greeting if you don’t want to set any greetings.
- Select Play an audio file to set an audio file as a greeting.
- Select Type in a greeting message to set custom text as a greeting.
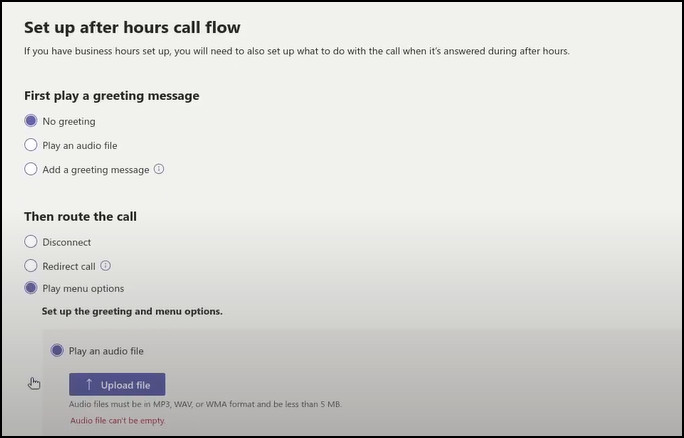
- Select Then route the call to set route.
- Select Disconnect to hang up the call.
- Select Redirect call to set call routing destinations.
- Select the Play menu options to Play an audio file or Type in a greeting message.
After configuring the business after hours, click Next to configure call flows for the holidays.
Follow our guide to know can Microsoft Teams chat be monitored.
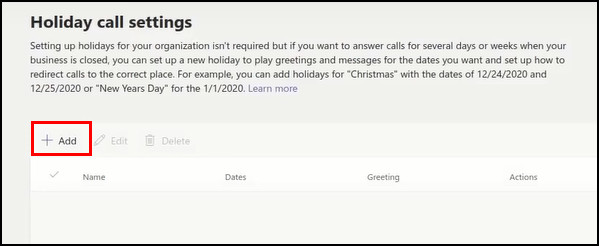
7. Set Up Call Flows for Holidays
Your call attendant can use a call flow for holidays. In a single call attendant, you can add 20 scheduled holidays. To configure call flows for holidays, follow the subsequent instructions.
Here are the steps to configure call flows for holidays:
- Click on Add on the Holiday call settings page.
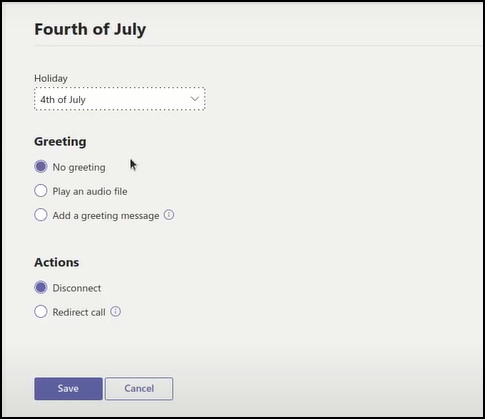
- Type a name for the holiday settings.
- Select the holiday from the Holiday dropdown menu.
- Choose the greeting style you want to use.
- Choose between the Disconnect, Redirect or Play menu options depending on your need.
- Select Redirect and set the call destination.
- Select the Play menu options to configure the greeting style.
- Click Save to save the changes.
After configuring the call flows for holidays, you can move to the next page to set up dial scops.
Also read why Microsoft Teams can’t change status from offline.
8. Set Up Dial Scope
Dial scops are used to define which users in the directory are available when callers use dial-by-name or dial-by-extension. All online users are the default for dial scops, which means all your organization’s users are included.
Using the Custom user group under Include or Exclude option, you can include or exclude specific users. If you put users in both lists, they will be excluded from the directory.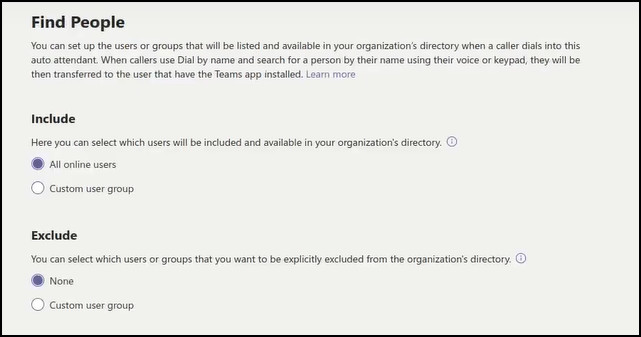
It can take up to 36 hours to show the user name listed in the directory.
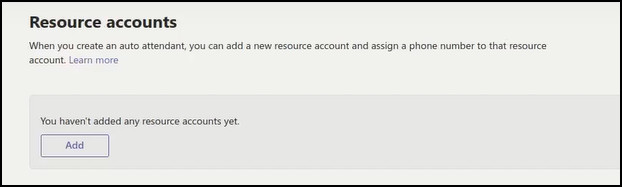
9. Add Resource Account
As I mentioned earlier in this article, adding a resource account for the auto attendant is necessary.
Here are the procedures to add a resource account:
- Click on Add accounts and search for the account you need to add.
- Click on the account name once it appears on the list, then select Add.
After adding the resource account, click Next. And finally, Click on the Save button to save the changes.
Find out how to export chat history in Microsoft teams.
Frequently Asked Questions
How does an auto attendant work in Teams?
An auto attendant is a set of voice prompts or audio files that are used to manage the caller’s voice call without a human operator under an organization. An auto attendant allows users to move through the menu system or place calls.
What type of account is needed to set up an auto attendant?
A resource account is needed to set up an auto attendant. A Resource Account license and a service number are also required.
Is auto attendant the same as IVR?
Though auto attendant and IVR offer almost the same features, the main difference is that IVR provides a higher level of customer self-service and more advanced configuration with several input options than auto attendant.
Wrapping Up
If you are an admin of the Teams application for your organization, setting up an auto attendant can save a lot of time with better customer management. You can set up an auto attendant for better efficiency.
In this article, I have covered the procedures to add an auto attendant to your organization with all the basic and advanced features for better customer call management. I have also covered the reasons why you should use this great feature.
Do you have additional queries? Mention them in the comment section.