When you have thousands of files & need to filter them, the best way is to tag the files with metadata. But think about the time you will need to add a metadata for the thousands of files one by one.
It will be a nightmare. But don’t worry. Let’s dive into this article, where you will learn how to bulk tag files in SharePoint.
A few months back, I reorganized one of my SharePoint sites. I & few team members were arranging our files in different folders as we were used to the folder system. After attaining training on how to boost Sharepoint user adoption, we learned that we have made a colossal mistake.
Actually, the folder system is hard to maintain in SharePoint online, because it is not intended to have metadata attached to them. A little example will help you understand the point.
Suppose, In a SharePoint document library, you are storing files without folders. When you select a file & go to its details, you will get to input information in its metadata column. However, with a folder’s detail pane, your hands are restricted to only the name of that folder. This is one of the main reasons to stay away from folders in SharePoint.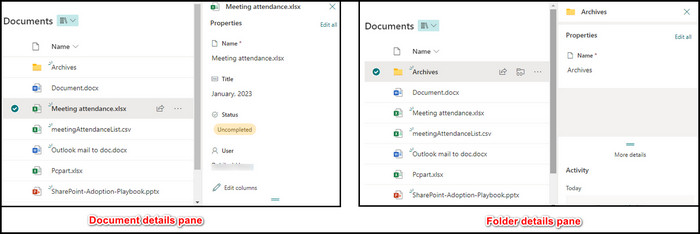
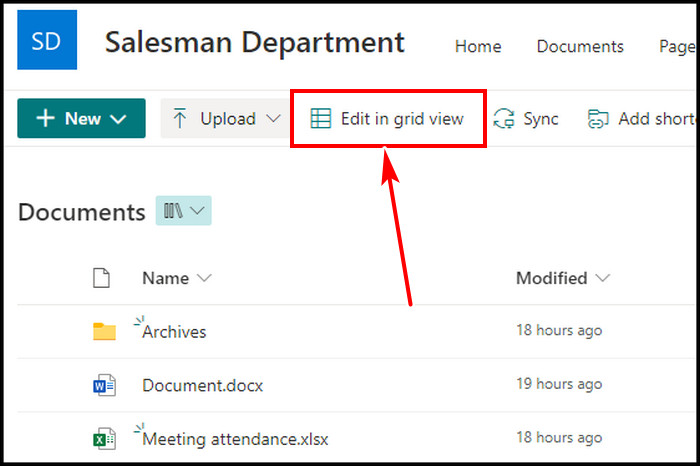
But there is a quick alternative way to bulk tagging in SharePoint, even the folders. But the content inside the folder will not have an effect. In the Document library, you will see an option Edit in grid view on the top.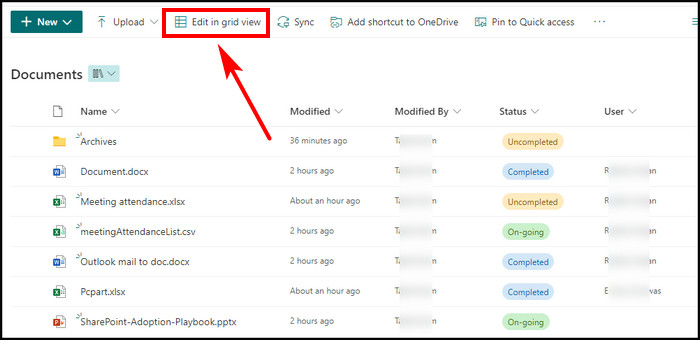
If the option is unavailable for you, then you have to enable the edit in grid view from the list settings. After clicking the option, the document library will turn into a grid view. You will be able to tag files like Excel. 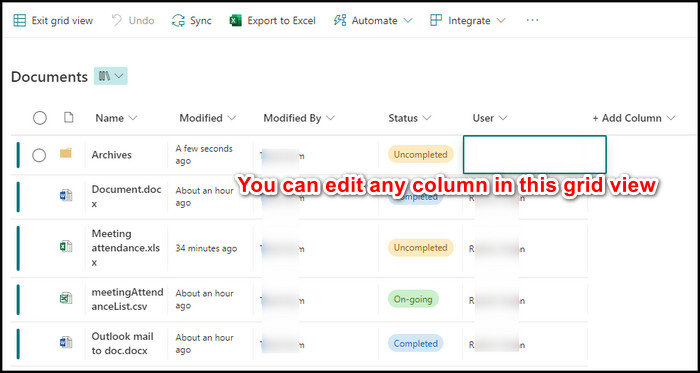
You can select specific documents or tick the circle on the left side of the column line for all files. 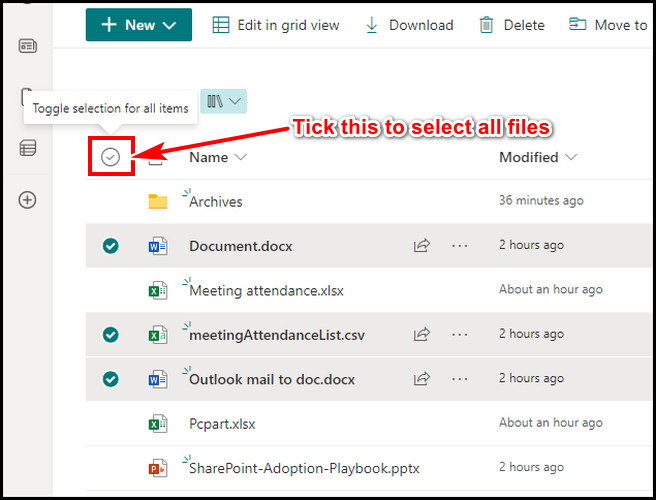
Note that the document view should not be in group view. If the view option is in group mode, you can’t edit column in SharePoint list.
Now it is way easy to store & sort data with metadata in SharePoint. Follow below to learn how to add metadata in SharePoint.
Generally, metadata can be controlled centrally in SharePoint & adding metadata tags makes it easy to find documents. After all, SharePoint is all about findability. Metadata can be a location, a date, a user contract, content type, etc. Furthermore, it allows filtering and ordering documents based on their properties.
I will add a new metadata column with the assignment term set for my SharePoint library. Follow the steps below to add a new metadata tag to many documents in SharePoint simultaneously.
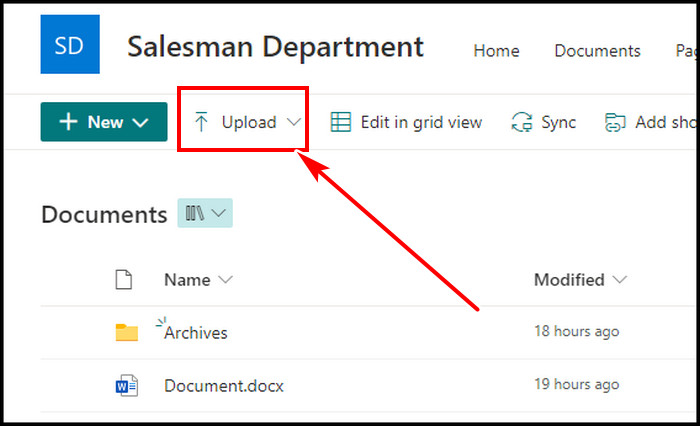
- Go to your SharePoint document library.
- Upload your essential files.
- Click on Edit in grid view.
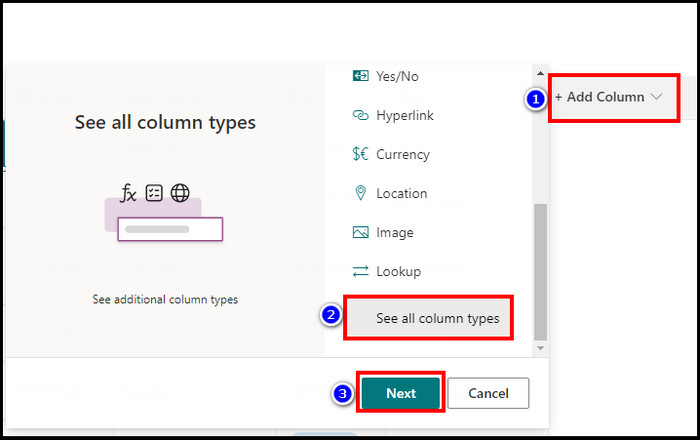
- Select +Add Column.
- Scroll down and select See all column types, then Next.
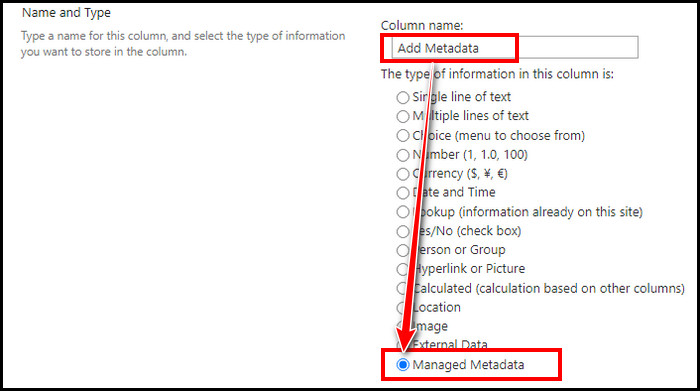
- Give a name to the column & choose Manage Metadata.
- Scroll below and find Term Set Settings section.
- Choose to Customize your term set & create your term set.
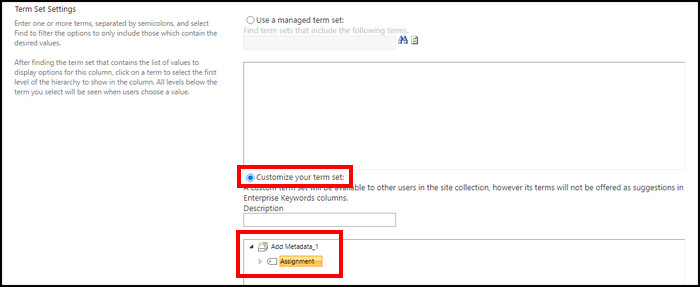
- Hit OK from the bottom right.
Now go back to your SharePoint Document library & then Edit in grid view. Select a document you want to tag with the metadata & click on the tag icon. ![]()
Select the metadata tag which is Assignment for me & hit Apply. Then press Enter on your keyboard. 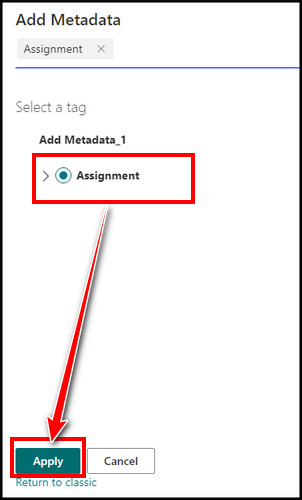
For bulk tagging, select the metadata column box & there you will find a + icon in the bottom right corner of the box. ![]()
Click the +icon & drag the mouse below. It will automatically fill up & tag all the documents with metadata. 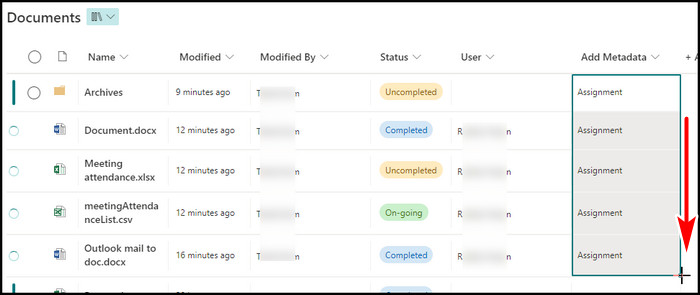
FAQs
How to hide a column in SharePoint?
Go to the SharePoint document library. Click on the column you want to hide, hover the mouse cursor on the Column settings & select Hide this column. This will hide the column in your SharePoint.
How to display a hidden column in SharePoint?
To bring a hidden column in SharePoint, click on any column header. Put the mouse cursor on the Column settings & pick Show/hide columns. Tick box the column you want to display from the Edit view options pane on the right side.
Where is the delete option for column in SharePoint?
You can hide a column in SharePoint. However, if you want to remove the column permanently, go to your document library in SharePoint, click on the gear icon from the top right side, and select the library setting. Click More library settings, scroll down, and find & select the column you want to remove. Except for some mandatory columns like Title, or Modified by, you will get the Delete option at the bottom of the page.
Final Thought
Editing a single file one by one consumes a lot of time. By bulk tagging, you can swiftly modify items like in an Excel sheet.
You can use the Edit in grid view option in the SharePoint document library to tag multiple files at once. Also, you can add a managed metadata column to tag multiple files in SharePoint, which I elaborated on in this article.