If you use a Windows PC for work or study purposes, you probably have a ton of different files organized into separate folders for a much cleaner look. Each of those files can occupy drastically different sizes in the HDD or SSD.
I found this issue on my PC when I was cleaning up unnecessarily large folders. I realized it was nearly impossible to tell which folder was more oversized and using more resources. After a bit of tweaking Windows settings, I managed to get it working.
So, take a five-minute break from your activities and stay with me till the end of this article to enable folder sizes in Windows 11.
Why Does Windows Explorer Not Show Size of Folders?
As a result, it could lead to frequent application crashes and slow response times.
Consider a situation where you are opening a folder in Windows Explorer that contains over a hundred different folders, each with more than 1 Gigabytes of data.
Since there are multiple files inside each of those folders, Windows would have to read the file sizes of each file inside numerous folders at the same time. This will consume more CPU power and occupy more RAM, decreasing the overall performance.
After reading that, you might be wondering:
Is there a way to show folder size in Windows 11?
Well, as it turns out, there is more than one way to show individual folder sizes in Windows, so move on to the next section to discover them.
Also, check out our separate post on how to fix PC won’t go to sleep in Windows 11.
How To Show Folder Size in Windows 11
Windows didn’t make any changes to minor UI elements like this, so these methods that were tested on Windows 11 will also work for Windows 10 flawlessly.
Follow these methods to show folder size in Windows 11:
1. Use The Mouse Cursor
You must have realized that hovering the mouse cursor over specific Windows icons will reveal some details if you have been using Windows for more than two months. One of those details includes the file/folder size.
This is the quickest method available, so follow these methods to try it:
- Launch the File Explorer.
- Navigate to the folder where you want to see the folder size.
- Move the mouse cursor on top of the folder without clicking on it.
- Wait for a few seconds for some details to appear. The value next to the size is the folder’s total size.
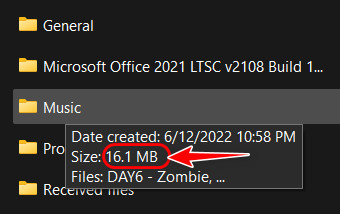
Note that this won’t work if you hover on top of an empty area. You need to make sure to place the mouse cursor on top of the folder name’s text.
2. Check Folder Properties
If the details in the small window from the previous method seem to lack information, the folder properties should satisfy you. This will also help you in case the hover method is buggy or disabled in your version of Windows.
Keep in mind that the Properties window is mainly used for larger tasks, like setting security permissions, instead of such a minor task.
Follow these steps to check folder properties and identify folder size:
- Launch the File Explorer.
- Move to the folder where you want to check the sizes.
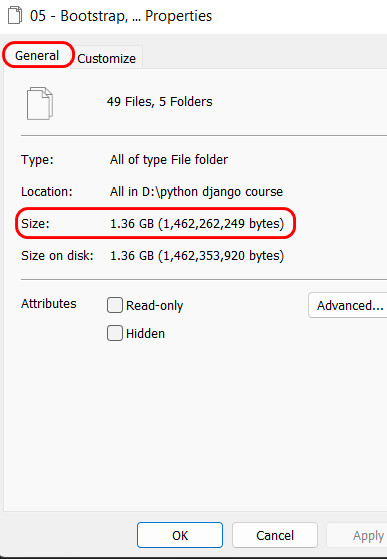
- Select the folder, right-click on it, and select Properties from the context menu. Note that you can also press the Alt and Enter keys simultaneously to launch the Properties of the selected folder directly.
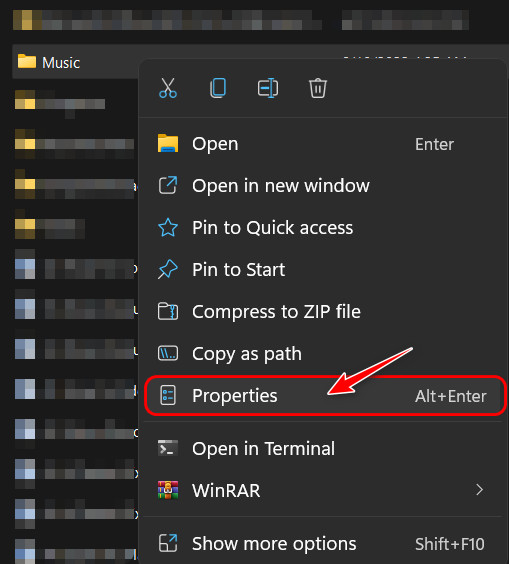
- Switch to the General tab from the toolbar at the top if you are not already on it.

- Look for the value next to Size in the window to find the exact size of your folder. The value here is more accurate and detailed because it’s represented in bytes.
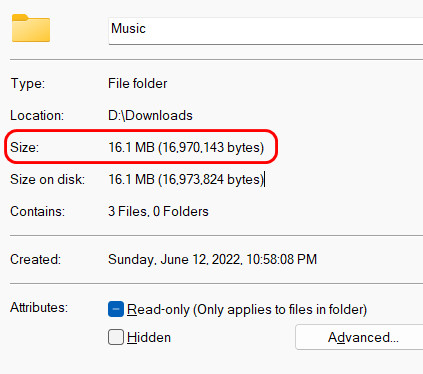
One point to keep in mind here is that you need to consider only the value for Size and ignore the Size on Disk value for folder size. While those values are going to be identical most of the time, they can change if the folder is stored after compression.
Follow our guide to fix blue screen on Windows 11.
3. Use a Command Prompt Window
The last two methods should be enough for most users, but if you want to use the CMD window to carry out cool functions or if you use the Command Prompt window often, it can be helpful to know this simple command to find precise folder sizes quickly.
Follow these steps to use Command Prompt and find folder sizes:
- Launch the File Explorer.
- Navigate to the location where your folder is stored.
- Click on the address bar at the top of the Explorer window so that all the text inside it is selected.

- Replace all the existing text with CMD by typing it. After that, press the Enter key to launch a Command Prompt window in the same directory as the folder.
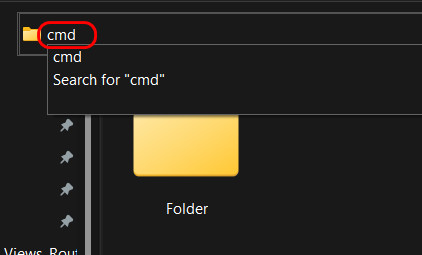
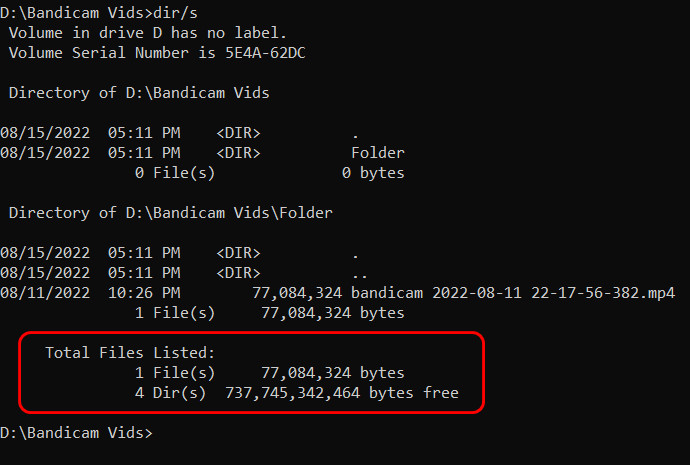
- Type dir/s in the CMD window and press the Enter key.

- These will go through all folders, files, and subfolders in that directory and evaluate the overall sizes. As a result, remove the rest of the folders from that directory before running the command if you want to find the folder size of one folder.
4. Install Third-Party Software
You shouldn’t have to come this far since one of the methods listed above should have worked by now. However, if you want a dedicated application to check folder sizes or the Windows folder checking seems too slow, there are many alternatives that are worth checking out.
Before moving forward, it’s important to note that I wouldn’t recommend doing this since it increases the risk of malware infecting your system, especially if the software is downloaded from an unreliable site.
Some of the most popular applications in this segment include TreeSize or Folder Size for Windows.
Follow these steps to use Folder Size to display size:
- Go to the Folder Size app SourceForge page to download its installer.
- Click on the green Download button once the page opens.

- Wait for a few minutes for the download process to start.
- Launch the MSI file as soon as it finishes
- Follow the instructions in the Setup window to finish installing the program.
- Launch a File Explorer folder and navigate to a folder.
- Look for a small window at the top right corner that looks similar to the File Explorer The only difference is you will be able to see folder sizes as well.
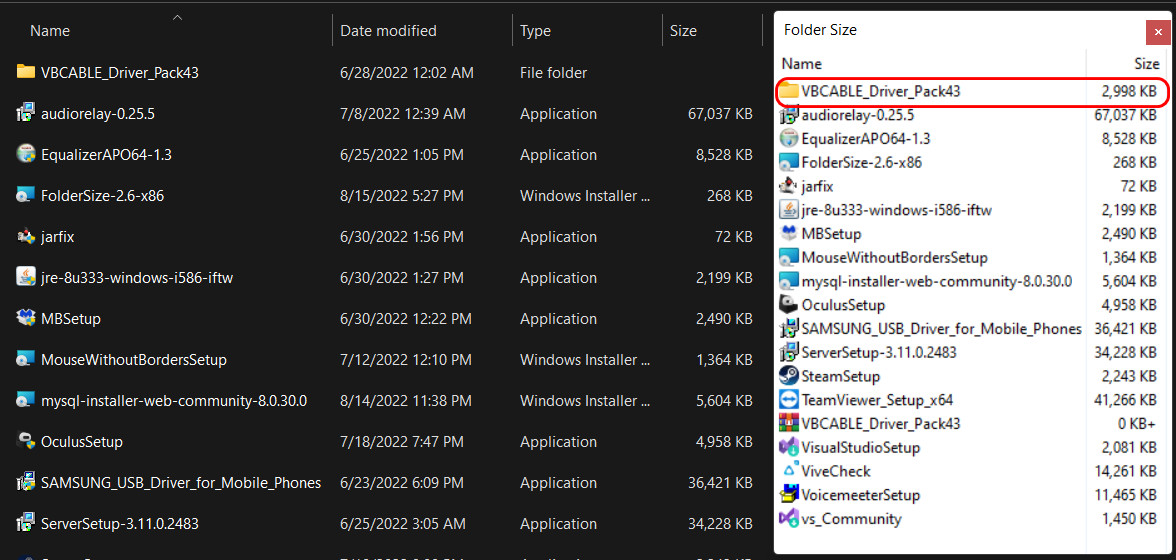
The advantage of using third-party apps for viewing folder sizes is that they are more efficient and don’t slow down the PC.
Find out how to fix lock screen stucked on Windows 11.
How to Show Multiple Folders Size in Windows 10
So far, we have seen how to find individual folder sizes in Windows. But what if you want to delete or move multiple folders and want to see the sizes of both of them combined?
Well, you could launch a Calculator and manually add the sizes of each individual folder. But why do that when Windows can do it for you?
Follow these steps to show multiple folders size in Windows 10:
- Go to your Start menu and launch a File Explorer
- Move to the location of the folders.
- Move the mouse cursor above the first folder and drag it to the last folder while pressing the left mouse button to select all the folders.
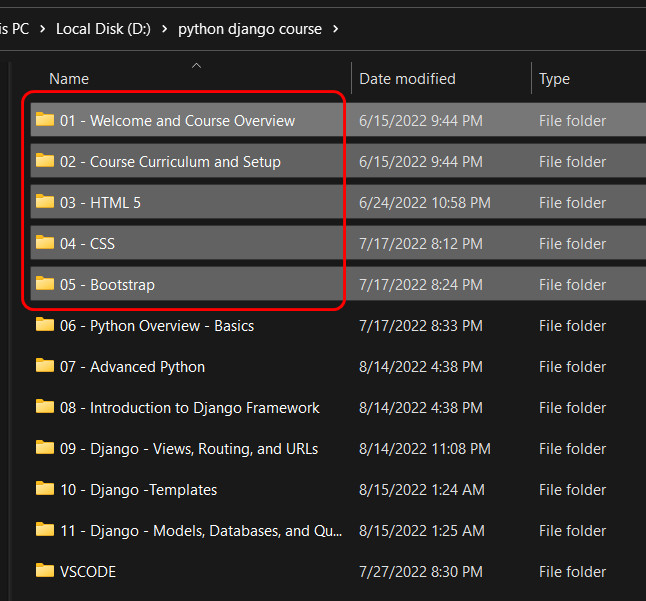
- While the mouse cursor is on top of a selected folder’s name, right-click and select Properties. Note that all the selected folders should still be highlighted. If they are not, reselect them.
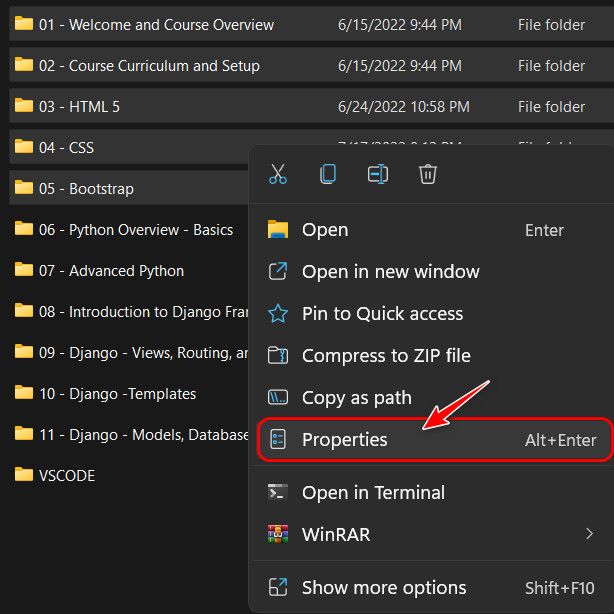
- Switch to the General tab and note the value next to Size. This is the total size of the combined folders.
- You can also select multiple folders that are in separate positions by pressing the Ctrl button while selecting each folder.
For additional information, see the article dTPM Vs PTT: which one is Windows 11 compatible.
Final Thoughts
Most of the files present in your windows computer are sorted into folders automatically by the OS or manually. While the size information for all the files is present in File Explorer by default, the folders lack the feature.
I suggested a possible reason for this in the first section before moving on to the methods to let Windows calculate and display folder sizes to you.
I typically use the first method to determine folder sizes, but my friends prefer installing the Folder Size app to quickly see multiple folder sizes at a glance. Which one do you use? Let me know in the comments.