Basic Input Output System, commonly known as BIOS, is a crucial component of any PC. Without it, your PC would have no chance of booting up properly. This means that every single computer out there has a microchip that’s dedicated to BIOS.
However, on more than a few occasions, your PC might not enter BIOS, no matter what you do. Instead, you will face a never-ending black screen with no beeps or sounds.
If you are currently stuck in a similar situation, there’s nothing to worry about since it’s not a new issue. Although it’s a little challenging to identify what’s causing this precisely, you can fix it in a matter of minutes, if not seconds.
After combing through more than a dozen BIOS-related articles, I’ve prepared this detailed guide, so grab a cup of coffee and start reading already.
Why Can’t I Load Into BIOS?
There is a long list of possibilities for why you can’t load into BIOS. The most common reason is usually that your system’s hardware is faulty, which fails the Power-On Self-Test (POST) test. Apart from this, the Fast Startup feature introduced on Windows 8 is typically the culprit.
The fast startup feature enables you to instantly boot into Windows whenever you turn on your PC by putting your computer in a hibernation state while closing all apps. This means that only a few specific operating system files are left untouched.
As a result, when you turn on your PC, your system will directly launch Windows since it’s still running.
Because of this, you don’t have the opportunity to make the selection to boot into BIOS.
In other cases, your computer won’t boot or enter BIOS because you are simply not following the proper method to boot to it. You need to follow a specific set of steps and press a different key to boot into BIOS, depending on the manufacturer or brand of your PC.
Here are the keys to enter BIOS mode for major brands:
It’s important to note that it’s not quite as simple as pressing a key to boot into BIOS. There are additional steps before that.
Follow these steps to boot into BIOS on any PC:
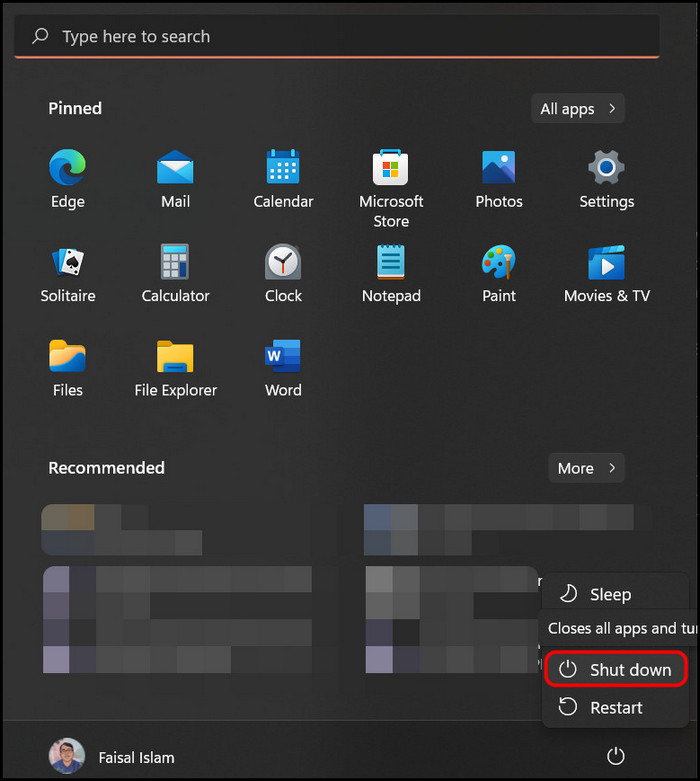
- Turn off your computer. Make sure you select Shutdown from the options and not Hibernate or Sleep.
- Press the Power button to turn on your PC. Immediately after that, keep pressing the BIOS key specific to your brand repeatedly. If you need help, review the table above.
If everything is working correctly and your system passes the POST, then you should immediately boot into BIOS.
You may also like to read about keyboard and mouse work in BIOS but not in Windows.
How To Fix A PC That Won’t Boot To BIOS?
If the issue persists even after following proper steps, you are not doing anything wrong. Instead, your system is at fault. It’s usually quite simple to fix this problem, but you might have to change one of your hardware components in a few rare cases.
Follow these methods to fix PC Won’t Boot to BIOS issue:Brand Key HP F10 Lenovo F1/F2 for new models, Ctrl+Alt+F3 for old models Asus F2 Dell F2 for new models, Ctrl+Alt+Enter for old models Acer F2/Delete for new models, Ctrl+Alt+Esc for old models MSI Del Samsung F2 Toshiba F1/Esc Gigabyte Del
1. Turn Off Fast Startup
As I implied earlier, the fast startup needs to be disabled in order to boot into BIOS without any interference properly. However, it’s important to note that it might take a significantly long time to boot to Windows after doing this.
Follow these steps to turn on fast startup:
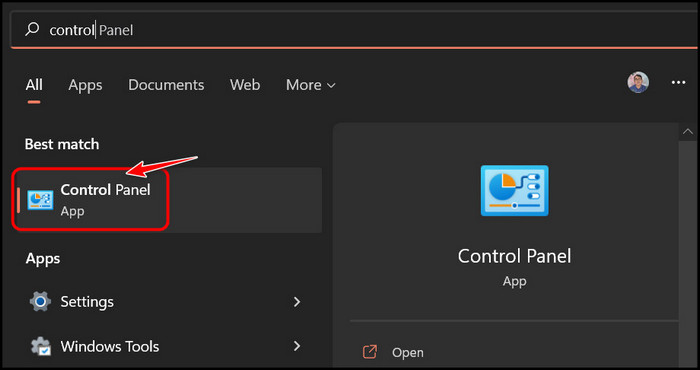
- Launch the Control Panel from the Start menu.
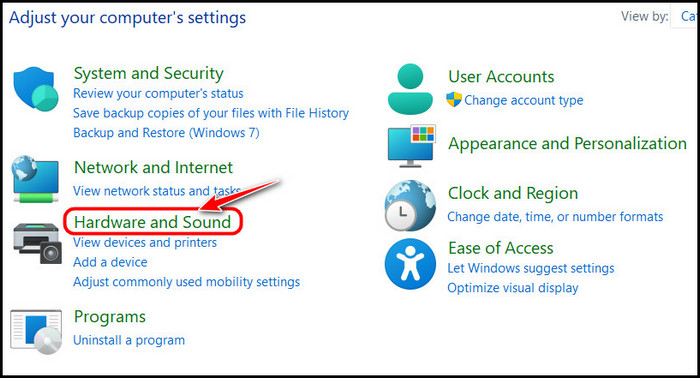
- Select the Category view from the drop-down menu at the top right corner.

- Click on Hardware and Sound after that.
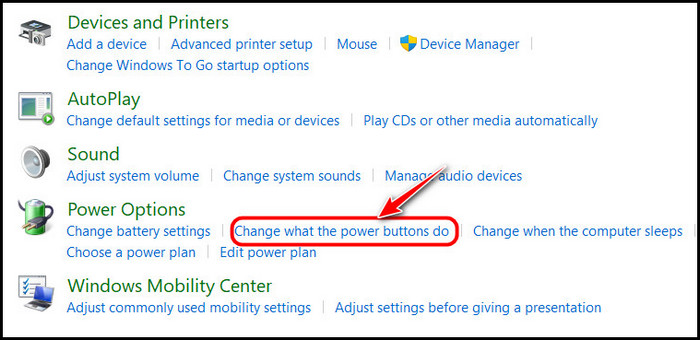
- Look for an option that says Change what the power buttons do in the Power Options section and click on it.
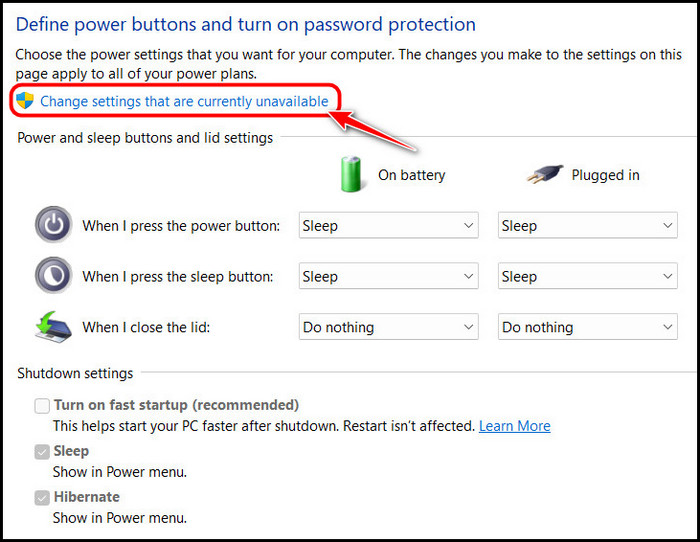
- Select Change settings that are currently unavailable from the top of the window.
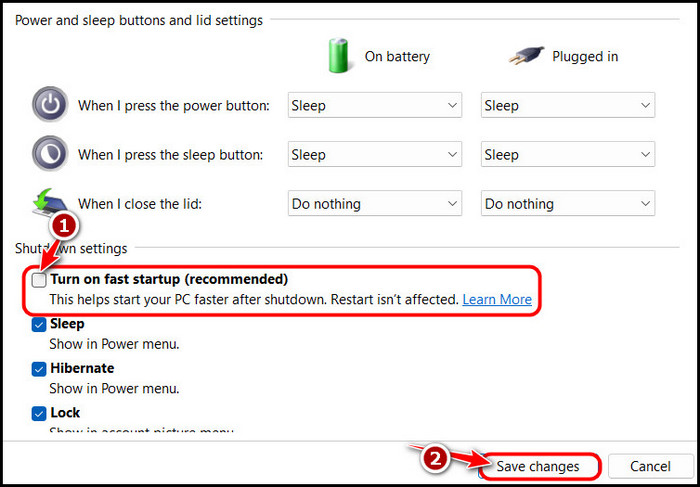
- Look for the Turn on fast startup option below Shutdown settings and make sure it’s unchecked. Click on the Save Changes button to confirm the selection.
- Reboot your PC as soon as that’s done to boot into BIOS.
Make sure to try booting into BIOS using the steps I mentioned in the previous section and if that doesn’t work, try the next fix.
2. Use Advanced Startup
If you have used Windows for more than a year, you must have used Advanced Startup. This is basically a recovery mode that allows you to perform several operations to fix problems.
A popular use for this is to roll back or downgrade Windows updates.
However, this can also be used to boot into BIOS. You do this by booting to UEFI firmware settings. As the name suggests, your PC must support UEFI for this method.
This shouldn’t be an issue since all modern computers come with it.
Follow these steps to use advanced startup:
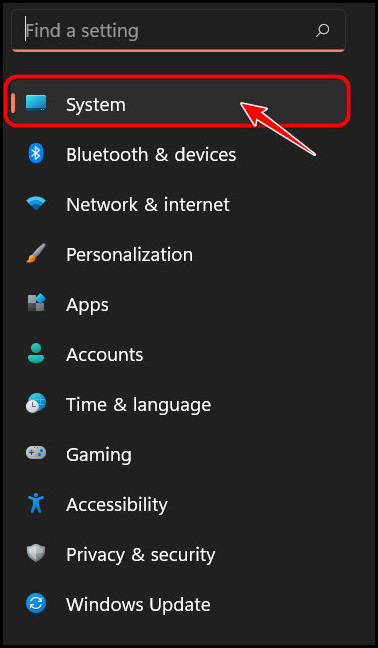
- Press the Windows, and I keys at the same time to launch the Settings app.
- Select the System tab from the navigation panel if it’s not already selected.
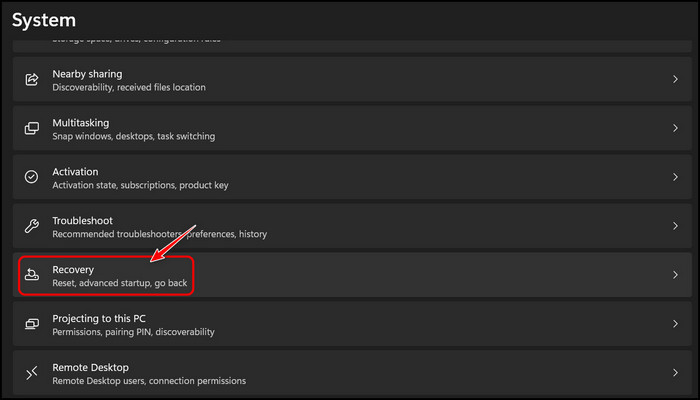
- Scroll to the Recovery option on the right panel and click on it.
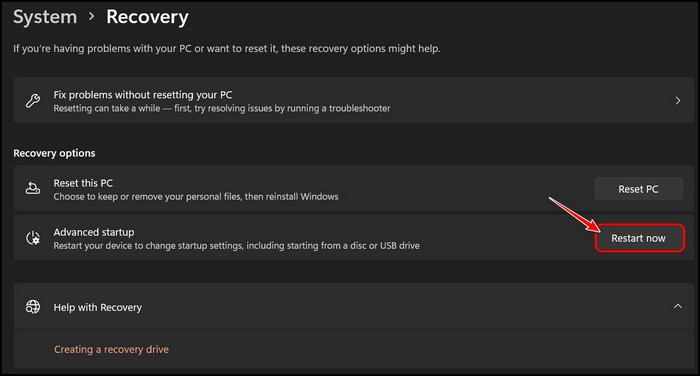
- Select the Restart Now button below Recovery options to boot into Advanced startup.
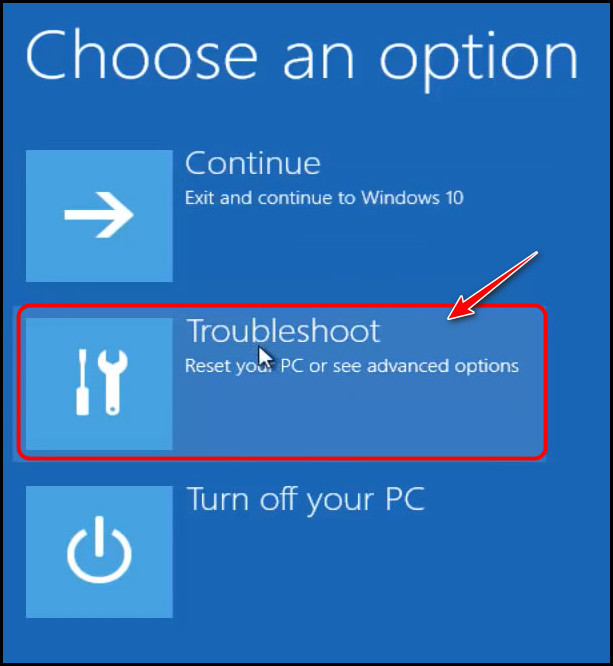
- Select Troubleshoot once a blue page appears on display.
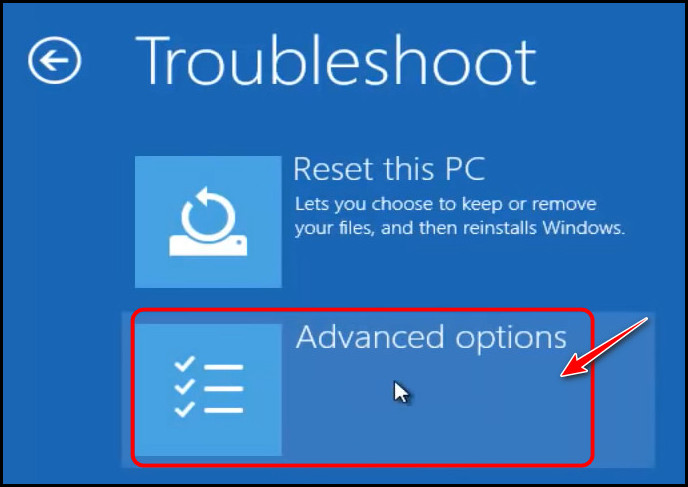
- Click on Advanced options on the next page.
- Select UEFI Firmware Settings from the page.
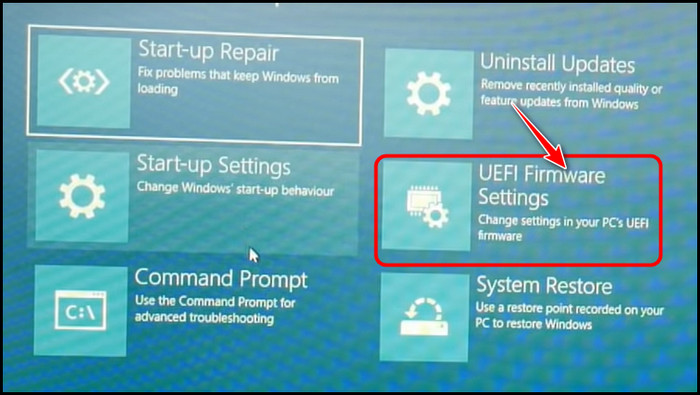
You should immediately boot into BIOS if your PC supports UEFI perfectly. However, several people have reported that the UEFI settings option is missing, so if you face that problem, you can try the next fix.
3. Perform a CMOS Reset
CMOS is where the BIOS stores all of its configuration details, so if you are facing issues with your BIOS, that’s where you need to look. Since there is no way to edit the configuration in CMOS without booting to BIOS, your only option is to wipe it clean.
As a result, your BIOS will load with its default settings and configuration, which should solve your issue.
Check out these steps to perform a CMOS reset:
- Power off your computer.
- Unplug it If it’s connected to an external power source.
- Unplug all wires attached to the CPU if you are using a desktop.
- Remove the CPU protective casing utilizing a screwdriver.
- Look for the CMOS battery and remove it carefully. It should be shiny and round, like a button or coin, wrapped within a small holding socket.
- Leave your CPU and CMOS battery separated and do something else.
- Reconnect the CMOS battery to your motherboard after thirty minutes and reattach the CPU protective casing.
- Connect all the required wires to the CPU.
- Turn on your PC after plugging it into an external power source.
4. Update Your BIOS
It’s usually best to leave your BIOS on its default version, but if you are facing issues, it’s a good idea to install a new version to fix it. However, it’s essential to install the BIOS firmware that’s specifically made for your device.
If you end up installing one that’s made for another PC, your PC could go into a damaged state where you won’t be able to boot into any operating systems or BIOS.
I recommend visiting your laptop’s official webpage and documentation to locate the BIOS firmware files. If you are unsure, you can always contact the support team for assistance.
Some more guides on how to change default display adapter in BIOS?
FAQ
How do I force boot into BIOS?
You can force boot into BIOS by repeatedly pressing the BIOS key that works for your manufacturer. Another way to do this is to press the Esc key repeatedly. This will take you to a menu where you can choose to perform some advanced functions, including booting to BIOS.
How can I enter BIOS if the F2 key is not working?
You can’t enter BIOS if the F2 key is not working. In order to boot into BIOS, you must have an external keyboard. If you are currently having issues with yours, I suggest borrowing one from your friend to enter BIOS.
Final Thoughts
To sum it up, your PC is not booting to BIOS due to a hardware issue or one of the reasons mentioned in the first section. Regardless, the fixes mentioned after that should work perfectly on all PCs.
If you face any issues, you can always leave a comment down below. On another note, I’d love to hear which method got you out of trouble. Let me know in the comments.