At present, maximum PC users own an external microphone beside the built-in microphone for purposes like quality audio recording, clear conversation while streaming, virtual meetings, and so on.
So, knowing how to choose a specific microphone for a certain situation is mandatory.
Yet, some people don’t know the simplest approach for managing default microphone settings. Hence, as a long-time Windows beta tester, I am here to help.
Through this article, I will share my expertise to help you guys enable and configure the default mic in Windows 10 easily.
Let’s begin!
Check out our separate post to Microphone level keeps going to 100.
How to Enable Microphone in Windows 10
Before you start using your Windows 10 microphone feature, you must enable it first. Usually, the built-in mic is enabled by default. But certain apps or settings can disable the Microphone without your knowledge.
So, manually checking the microphone settings and enabling your required mic is important so that you can continue using your default mics without any issues.
There are several ways to enable microphones in Windows 10. Every approach works to full succession. Therefore, you can follow any of the ones you prefer.
Let’s discuss the mic-enabling process more thoroughly.
Here is the easiest solution to fix HDR washed out Windows 10.
Here’s how to enable microphones in Windows 10:
1. Go to Sounds Option
This is the simplest but the most effective way to enable any microphone device on any Windows PC.
Here are the steps to enable microphones in Windows 10 via the Sounds option:
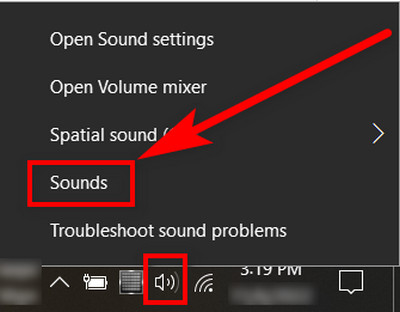
- Right-click the Speaker icon under the System icon menu.
- Select the Sounds option.
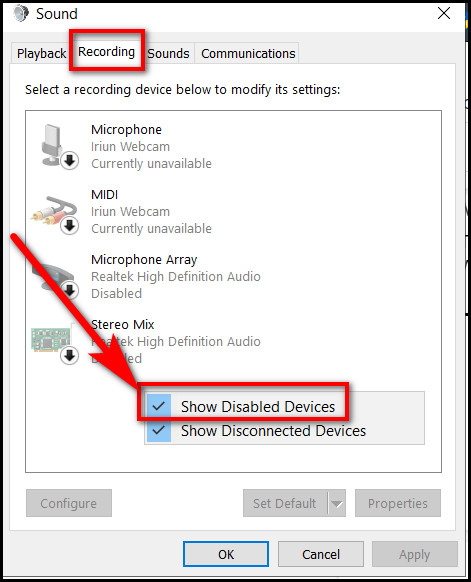
- Switch to the Recording tab.
- Right-click on any empty space of the tab and select Show Disabled Devices.
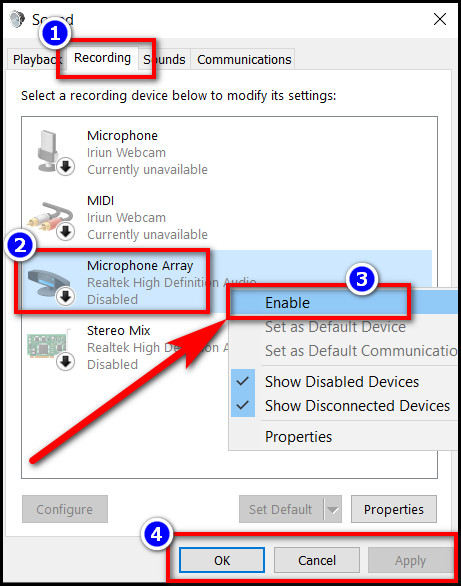
- Right-click on the Microphone device you want to activate and hit the Enable button.
- Hit Apply and then, Ok to save the changes.
After that, your selected mic device will be activated for your use.
Read more on how to get Windows 10 for free as a student.
2. Use Sound Settings
You can move into the device properties to enable your input audio device as well.
Here’s how you can enable microphone in Windows 10 through device properties:
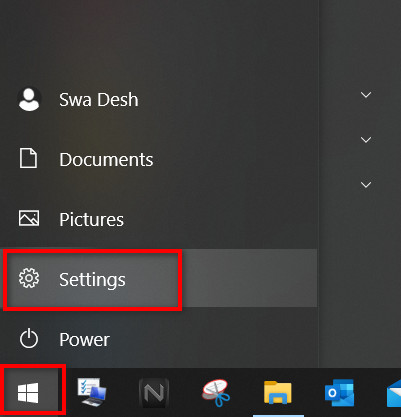
- Open the Start menu and click on Settings.
- Choose System and then move to the Sound tab.
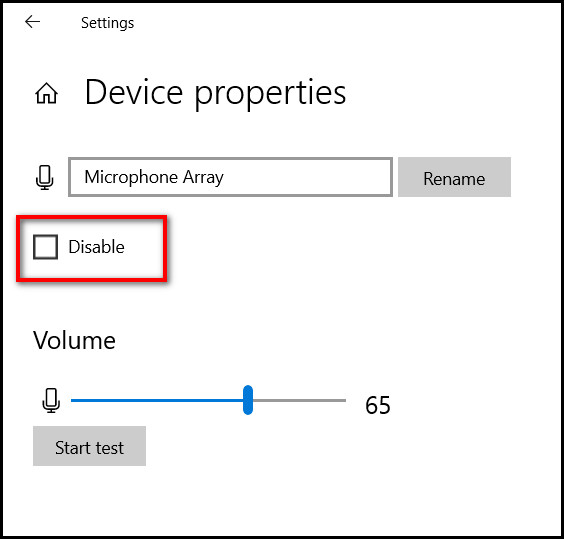
- Click on Device Properties under Input.
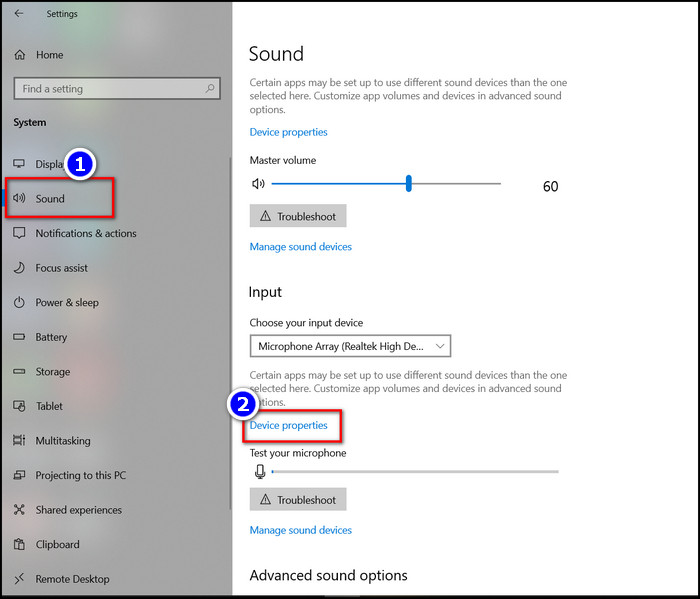
- Unmark the box next to Disabled.
After that, your selected input audio device will be enabled.
Alternatively, you can enable the Windows 10 microphone through the Manage Sound Device option in the Sound settings tab. Just go to Start menu > Settings > System > Sound > Manage Sound Device > Input Devices > Enable. 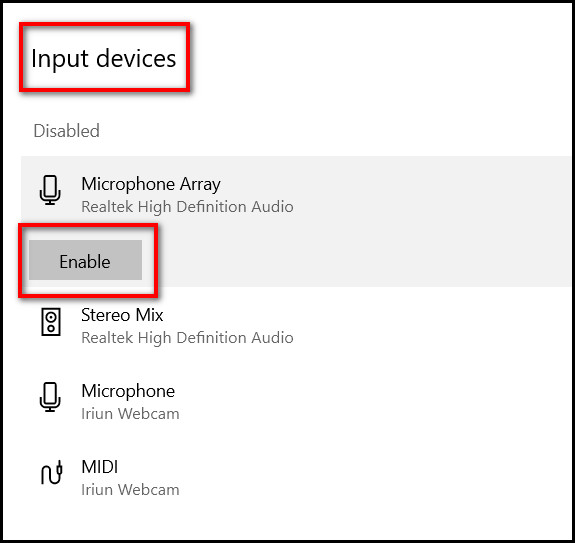
Check out the comparison between Windows 10 Education Vs Pro.
3. Go to Device Manager
Another way to enable your Microphone device is by using the Device Manager tab. This method requires very less time but works effectively.
Follow these steps to enable Windows 10 microphone via the device manager:
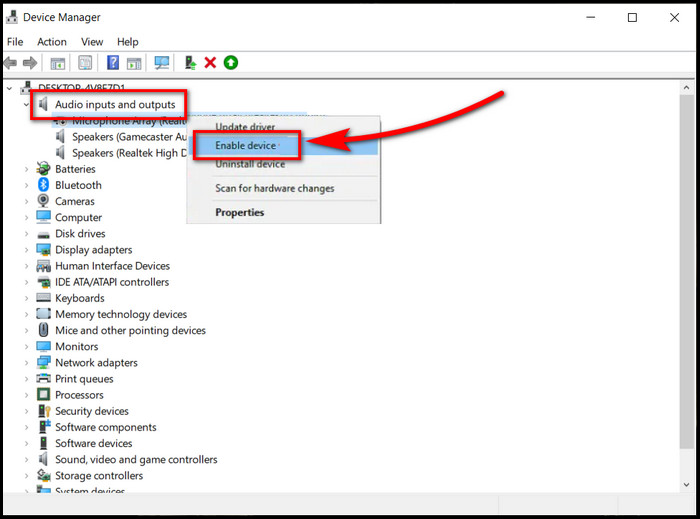
- Press Win+X and select Device Manager.
- Double-click on the Audio inputs and outputs option.
- Right-click on your desired microphone and choose Enable.
That’s it. Your chosen input audio device is ready for work.
After enabling your input microphone device, now it’s time to set it as your default voice recording/input device.
So, Continue reading to know the best methods to set the default microphone in Windows 10.
Follow our easy step-by-step guide to adjust page file in Windows 10.
How to Change Default Microphone in Windows 10
You can quickly set the default microphone in Windows 10 through the Sound Control panel. Plus, you can go to the Sound settings and configure your audio input device from there as well.
Both these methods are very easy to perform and require only a few clicks to change microphone settings. What actually happens, people don’t know the efficient ways to manage audio input devices. So, they either follow a long messy process or ask for others’ help.
Let me share a story. Once, one of my friends wanted to use the built-in microphone for voice call meetings. But he has another device set as the default input device, which he wasn’t aware of. So, I instructed him on the proper techniques that solved his issues in a snap.
If he can do it by himself, you can do it too. Just follow the two methods I provided below carefully. And for your convenience, I have simplified each technique with a step-by-step approach.
Here are the methods to set the default microphone in Windows 10:
Method 1: Go to Sound Control Panel
You can change the default microphone in Windows 10 through the Control Panel.
Here are the steps to set the default microphone via the Sound control panel in Windows 10:
- Open the Start menu and type Control Panel.
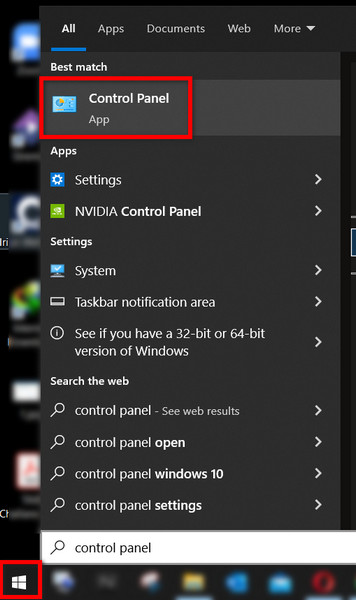
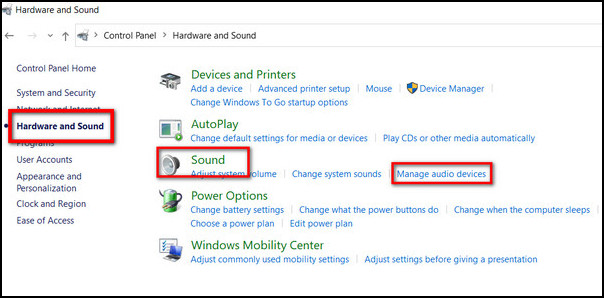
- Open the Control Panel and go to Hardware & Sound.
- Choose Manage Audio Devices under the Sound submenu.
- Switch to the Recording tab.
- Select the mic you want to select as your primary input device.
- Click on the Set Default.
- Hit Apply and then OK to save the changes.
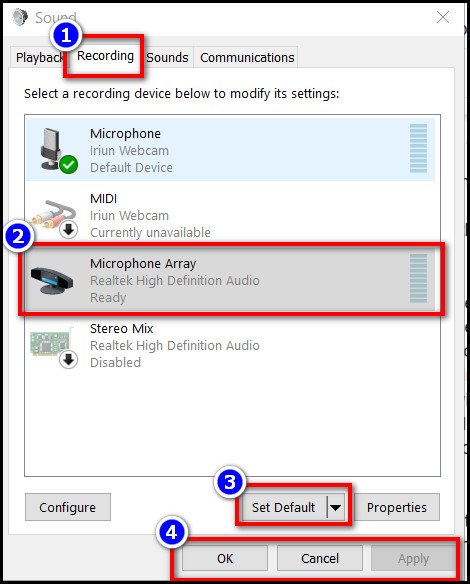
After that, the microphone you’ve selected will have a green checkmark beside it. The information Default Device will also appear right below it.
Alternatively, you can use your System Icon tray to reach the Sounds control panel and configure the default microphone settings. Just right-click on the speaker icon and choose Sounds. Then move to the Recording tab, choose your mic and select Set Default.
Once you apply the changes, your selected mic will be changed as the default input device.
Method 2: Use Sound Settings
You can avoid the control panel option and use your Sound settings tab to set the default input mic in Windows 10.
Here’s how to set the default microphone in Windows 10 using sound settings:
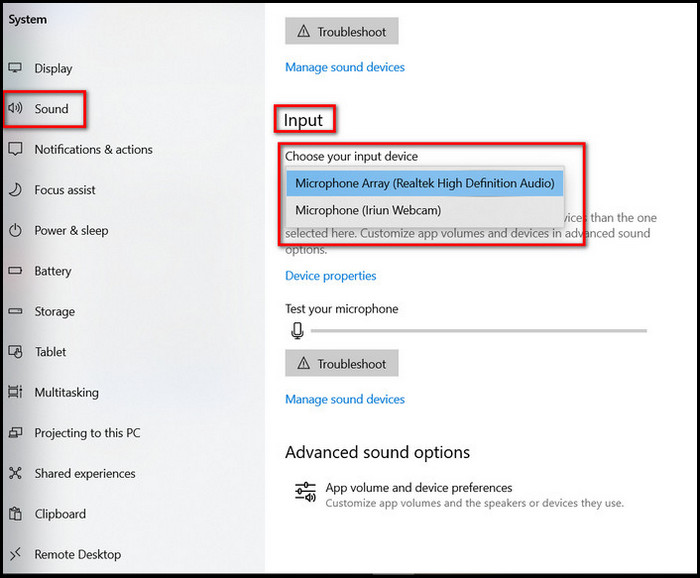
- Open the Start menu and click on Settings.
- Choose System and then move to the Sound tab.
- Open the Input drop-down menu and select the Microphone you want to set as your primary audio input device.
And boom! Windows 10 and its apps will now hear you loud and clear with your newly set default microphone.
Moreover, you can use the Advanced sound options to change the audio input device. Just go to System icon tray > right-click on Speaker icon > Open Sound Settings > Advanced sound options > App volume and device preferences > Input > then select the microphone you’d like to set as default.
Once you set your default microphone, it’s good practice to test the audio device always. To test your default microphone device, go to Start > Settings > System > Sound > Input > Test your microphone.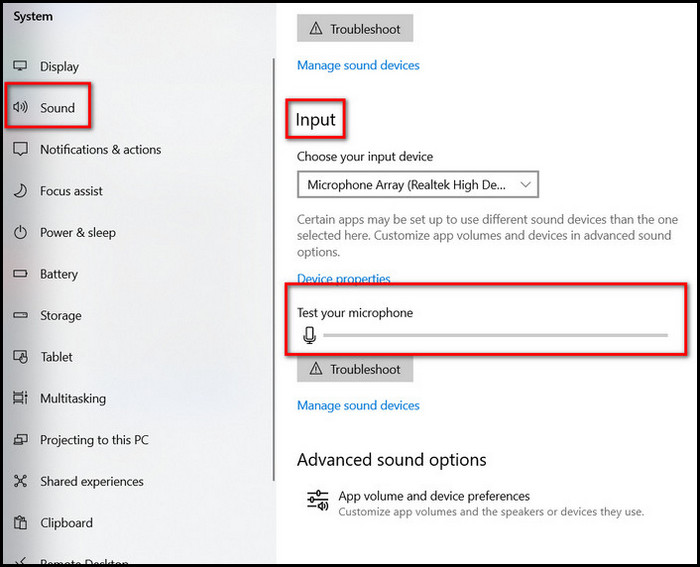
Now speak through your mic and check whether the blue bar rises. If the bar is moving, your microphone is working properly.
FAQs
How do I change my default input device microphone?
To change the default input device microphone in Windows 10/11, go to Start > Settings > System > Sound > Input > choose the Microphone you want to set as your primary audio input device.
How do I get to advanced microphone settings in Windows 10?
To get to the Advanced microphone settings in Windows 10, go to Start > Settings > System > Sound > Advanced sound options > App volume and device preferences.
How do I change the default microphone in Google Chrome?
To change the default microphone in Google chrome, launch the Chrome browser > Settings > Privacy and Security > Site Settings > Permission > Microphone > pick your desired audio input device from the drop-down menu.
Final Words
Windows 10 has built-in options to manage your input and output devices so that you don’t have to use third-party audio applications anymore.
After reading the article carefully, you now know each workaround to turn on and change the default audio input device on your Windows PC all on your own.
Comment down below which method seemed easiest to you. Also, share any problems related to Windows OS. I will gladly help you guys.