Depending on the task, your computer could automatically switch between the integrated graphics card and the dedicated graphics card.
However, your computer’s default display adapter may get changed after performing a factory reset or installing a new operating system. You would have to revert the settings back to the original in that case.
Are you trying to find a reliable means of changing your computer’s default display adapter?
If so, you have come to the right place. Here in this article, I provide you with a detailed guideline on how to switch the default display adapter of your computer. Let’s dive into it!
What is a display adapter?
A graphics card, also known as a video card, display card, graphics adapter, GPU, VGA card/VGA, video adapter, or display adapter, is an expansion card that generates a feed of output images to a display device, such as a computer monitor.
The display adapter is responsible for determining the maximum resolution, refresh rate, and the number of colors displayed.
For the monitor to be able to recreate the graphics from data, the display adapter must be capable of performing enough operations per second.
This was handled by the central processing units (CPU) in earlier personal computers. Display circuits of today are fully functional, highly complex parallel processing computers in and of themselves.
The produced graphic patterns, known as bitmaps, created in the RAM-based frame buffers are continually converted by the second function into signals for the monitor’s screen.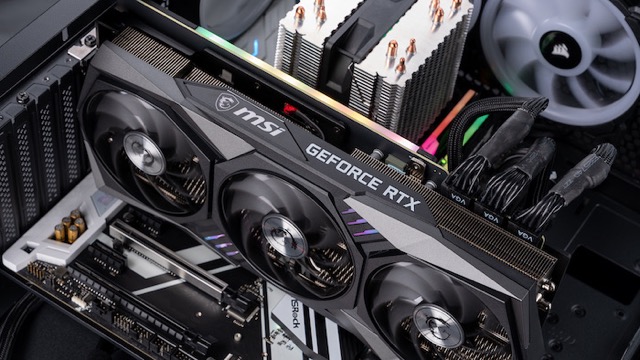
Some graphics circuits are always included in the chipset of personal computers, as all computers now use Graphical User Interfaces (GUI)s.
You need to purchase a separate plug-in card if you want to significantly improve the rendering of video games or other apps that work with fast-motion graphics.
How to change the default display adapter in the BIOS?
In principle, your computer can transition between its integrated graphics card and its dedicated graphics card in response to the requirements of the current activity.
On the other hand, this can sometimes result in performance lags because switching occurs at inconvenient periods.
Setting the external GPU as your primary display adapter is typically the best action to take if you want to ensure that your pricey graphics card is up to the task.
If your computer does not have a dedicated graphics processing unit (GPU), then the integrated graphics will be used as the primary display adapter.
Here are the steps to change the default display adapter in BIOS:
1. Use the BIOS settings
You will need to boot into the BIOS to make changes to the default display adapter. After ensuring that the display adapter is installed correctly and that the BIOS recognizes it, you will be required to locate the primary display adapter in the BIOS.
Ensure that you have correctly installed the required graphics card and that your computer can recognize it before you begin changing your display adapter.
Follow these steps to change the default display adapter from the BIOS:
- Restart your computer > Keep pressing the Esc key (or any other key that arrives on the prompt screen) repeatedly until a drop-down menu displays.
- Navigate to the BIOS setup option or something comparable > Press the key on your keyboard labeled with its corresponding number.
Now things will start to become a little more complicated. Because the BIOS screen appears differently on different computers, it’s not possible to provide you with step-by-step instructions to get to the correct configuration.
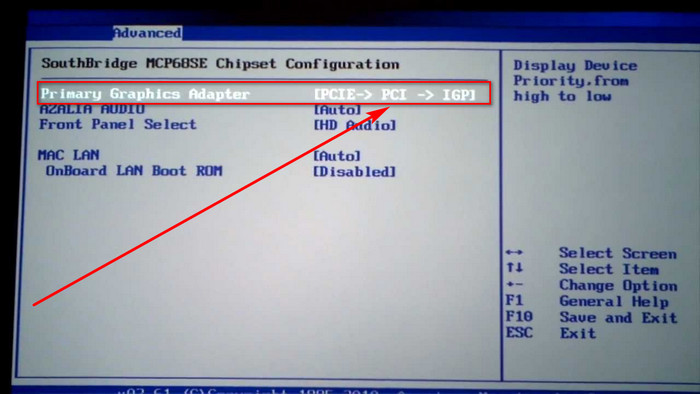
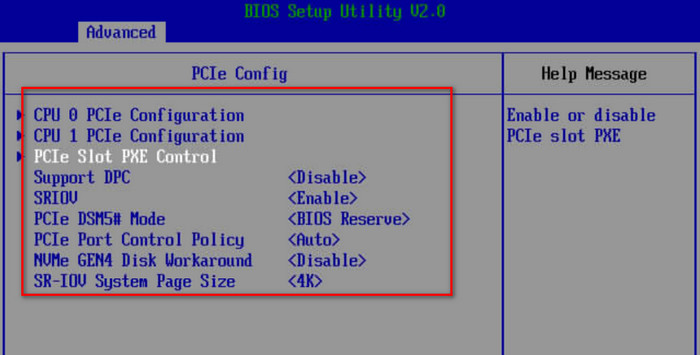
The key information is that you need to locate an option named Primary Display Adapter and make the necessary adjustments. In most cases, this option can be found in the BIOS by navigating to the Advanced or Advanced Configuration menu.
- Locate the Primary Display Adapter in the Advanced tab. It’s also possible that it’s buried deep under the Chipset section.
After you finally locate the Primary Display Adapter setting, you should be presented with the option to choose from PCIe, PCI, IGP, and Internal.
- Select PCIe if you want to use an external graphics card, or select Internal or IGP if you want to use the internal graphics card.
- Set the highest priority for PCIe and the lowest priority for IGP if your BIOS allows you to select different priority levels for other adapter plug-in solutions while using an external GPU.
Restart your computer and check whether it has saved the selected display adapter as default.
You may always try the BIOS technique because it is guaranteed to work each and every time, even if the other methods fail to function properly on occasion.
2. From the Control softwares of the GPU manufacturers
You can skip all of this BIOS bother by using the Control Center app that is given with the graphics card instead of messing around with the BIOS settings.
Several manufacturers produce display adapters, such as NVIDIA, AMD, INTEL, etc. You must choose the appropriate Control app for the adapter you want to set as default.
Here, two methods of switching your default display driver from the Control Center apps are described:
1. Switching from Intel to NVIDIA
The NVIDIA control center app is named NVIDIA Control Panel, which will allow you to change your computer’s preferred display adapter settings. Ensure you have this software installed before going through the following procedures.
The following is a list of the procedures that you should follow to switch your primary display adapter from Intel to Nvidia:
- Right-click an empty place on the desktop screen.
- Select Nvidia Control Panel from the menu that appears.
- Go to the 3D settings option > Select the Manage 3D settings option from the menu that appears.
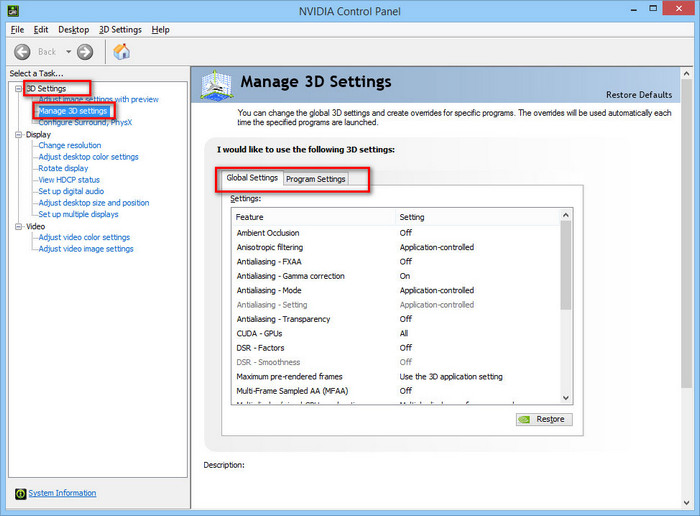
- Navigate to the Program settings tab if you want to make Nvidia the default display adapter for only the programs you have selected, or switch to the Global Settings tab to make Nvidia the primary display adapter for all programs.
In this article, it is presumed that you choose the Global Settings page because most people go for that option.
- Go to the Preferred Graphics Processor menu > Choose the Nvidia Graphics Card from the drop-down menu.
Going through each of these steps will enable the Nvidia Graphics card as your default display adapter.
2. Switching from Intel to AMD
Some of you presumably have an AMD Radeon graphics card, so you might be curious about how to switch from an Intel display adapter to an AMD display adapter for your primary display.
Here is the process of switching from an Intel display adapter to an AMD display adapter:
- Right-click on a blank place on your desktop > Click on the Catalyst Control Center option. If the option is not present, look for it in the Start menu.
- Go to the Gaming tab > Pick 3D Application Settings from the menu.
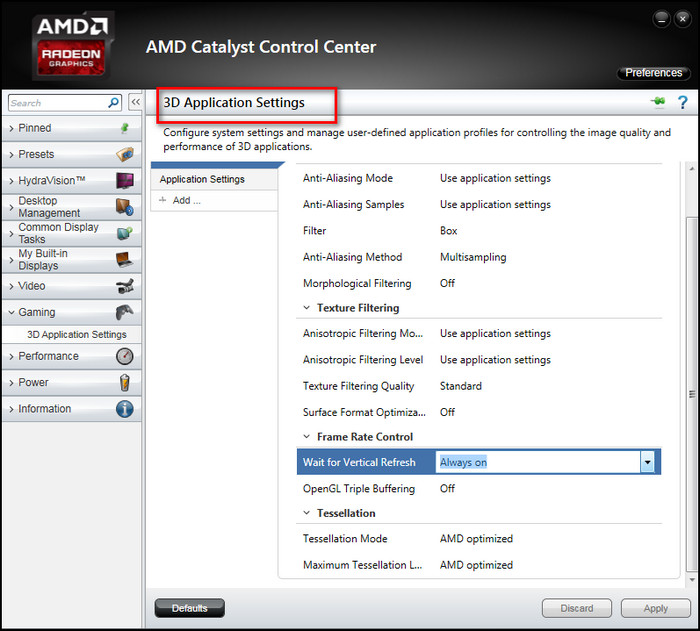
- Select the programs in which you want AMD to function as the primary display adapter > Click the Save button.
You can always go back and change these saved settings profiles in the Gaming area of the Application Profile section.
Why do I need to switch from integrated graphics to dedicated graphics?
The vast majority of laptops, mobile computers, and even some desktop computers come equipped with not just one but two graphics processing units (GPUs): one integrated and a separate GPU.
Even if you don’t have a dedicated graphics processing unit (GPU), your computer will still be able to use a display thanks to the integrated graphics chipset incorporated into the processor.
However, more taxing activities like gaming need a higher powerful GPU, which is almost often seen as an external GPU unit.
If the performance of your game is not what you would expect it to be with your AMD or Nvidia graphics card, the game may be running with the incorrect GPU.
By changing the default display adapter of your computer, you can experience a significant performance boost in graphics-enhanced activities, such as gaming or virtual reality.
Conclusion
To summarize everything, the BIOS is the best way to change the primary display adapter on your computer; however, if you want to change it, you should use the BIOS.
If you want to keep things simple, you should try adjusting the settings described above from the respective Control Center softwares.
I hope this article has helped you guide how to change the default display adapter in various methods. Feel free to try the alternatives if one method does not work for you.